
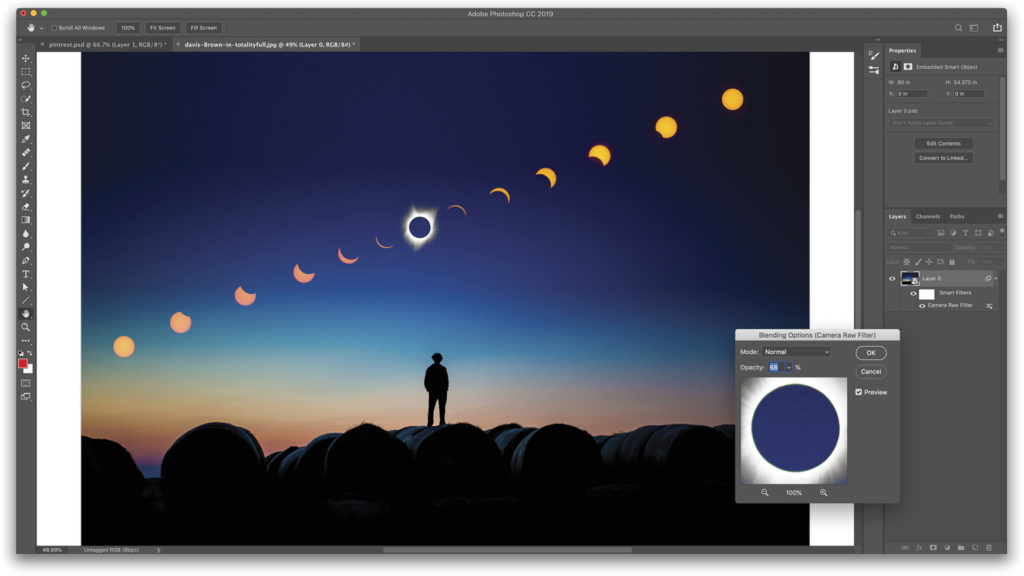
If you’ve used Photoshop plug-ins, you may have noticed that many of them have a master slider that’s called something like Amount or Intensity. This is great because you can fade the overall amount of the effect on your original image. You’d think that something like Camera Raw Filter would have it too, wouldn’t you? Actually, it does; it’s just not obvious. The trick is to convert the layer to a smart object first (Right-click on the layer in the Layers panel and choose Convert to Smart Object). Now go to Filter>Camera Raw Filter, apply all your adjustments, and click OK. When you’re back in Photoshop, look to the right of where it says “Camera Raw Filter” in the Layers panel, and you’ll see an icon that looks like two sliders. Double-click that icon to bring up a dialog that has an Opacity setting (your amount slider) and layer blending modes. This actually works on most smart filters.
This tip previously published in Colin Smith’s Photoshop Tips column, in the March, 2019 issue of Photoshop User magazine.


Hey! Is there any way to do this if you open the image in ACR first? Thanks!