
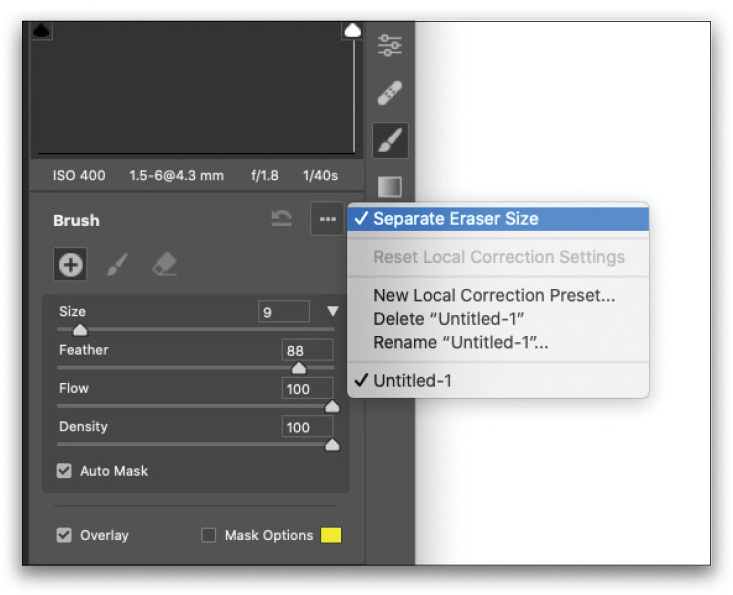
If you’ve ever used the local adjustment tools in Camera Raw (the Radial and Graduated filters or the Adjustment Brush), you probably know they come with an eraser, which allows you to paint away the adjustment. The eraser can be activated by holding down the Option (PC: Alt) key. One way I use the Adjustment Brush is to go a little loose with painting on a difficult area, and then erase the “overspray.” One thing that can be frustrating is that the eraser doesn’t scale with the brush; you can enlarge the brush, but the eraser stays the same. If you find this annoying, here’s how you can lock the eraser so it’s always the same size as the brush. With a local adjustment tool active, click on the three-dot icon at the top right of the panel and turn off Separate Eraser Size.
This tip previously published in Colin Smith’s Photoshop Tips column, in the June, 2020 issue of Photoshop User magazine.


