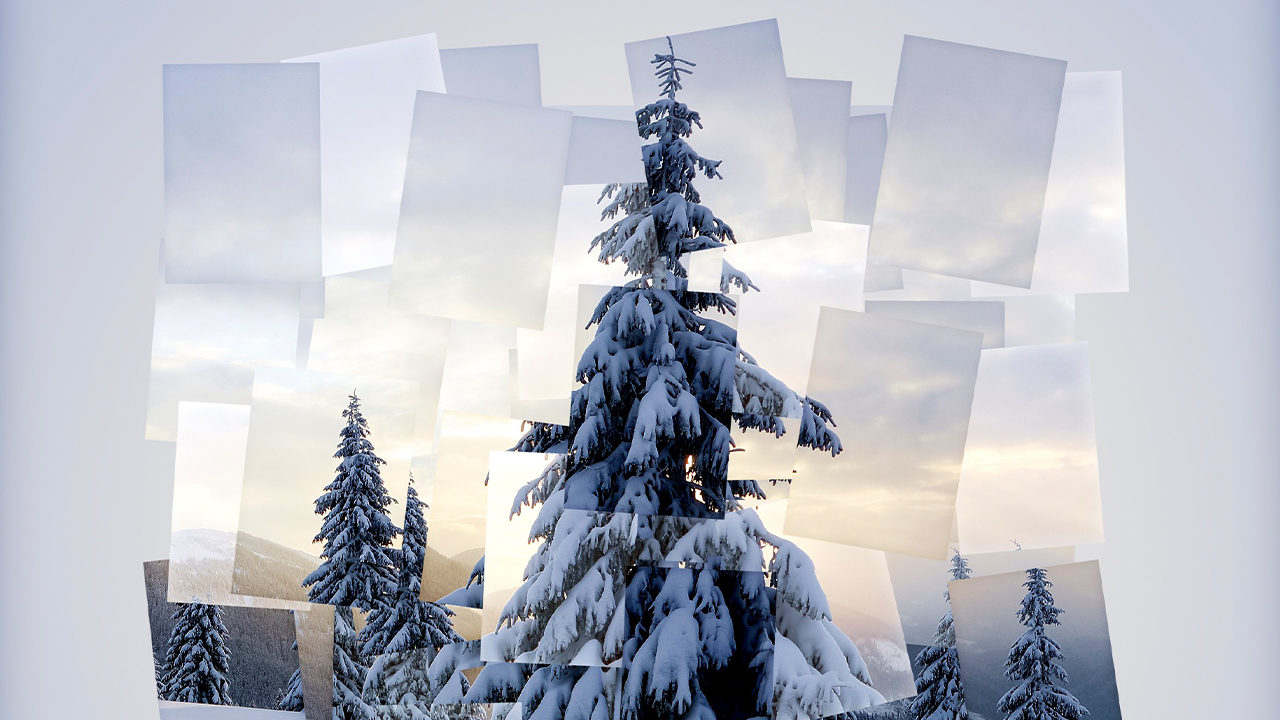
Here’s a fun collage technique that’s reminiscent of David Hockney’s Joiners series of works. Hockney would take dozens to thousands of photos of a scene and assemble the physical prints into single images as an exploration of point-of-view and a nod to cubism. These collage pieces aren’t meant to be perfectly constructed like a puzzle that’s cut from a single image. Instead, the charm and art of Hockney’s work lies in slicing up a real-world scene into individual bits of photographic attention and then building an image that captures many individual moments all at once.
Check out his work by clicking here. Pretty cool, huh? Let’s take a simplified approach using one photograph and some digital sleight of hand to show the basic process. At the end, I’ll talk a little about expanding the process so you can explore your own variations.
Because this method results in lots of lines and texture, it works best with relatively simple subjects. Traditionally, this effect is taught by repeatedly dragging out marquee selections and copying to a new layer; but there’s never only one way to do something in Photoshop!
Step One: Create a Brush
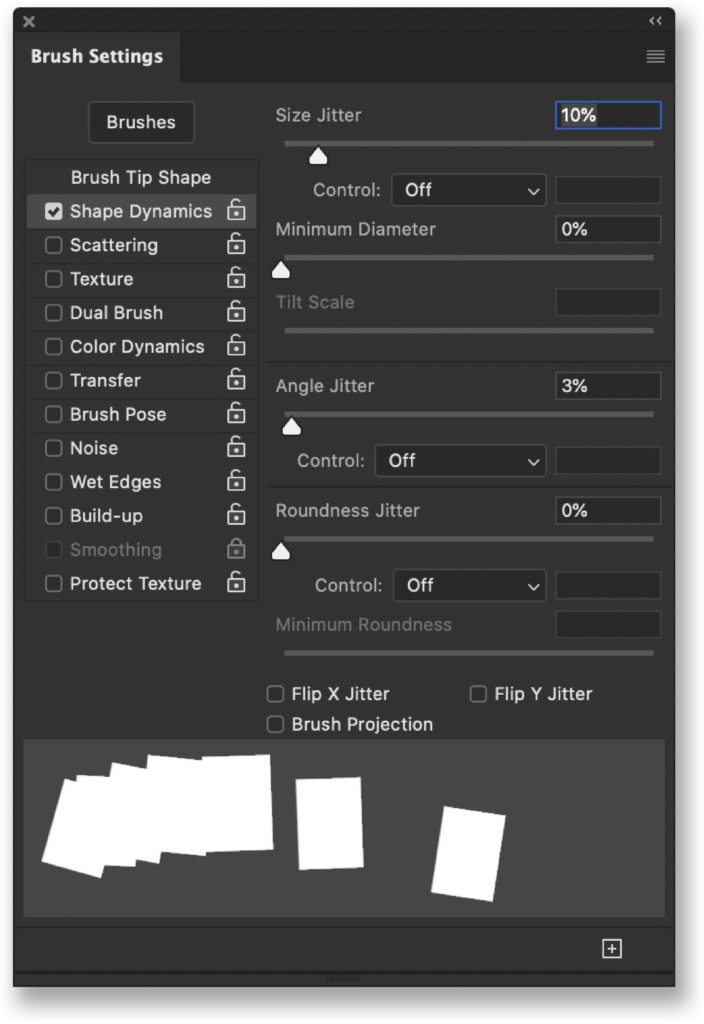
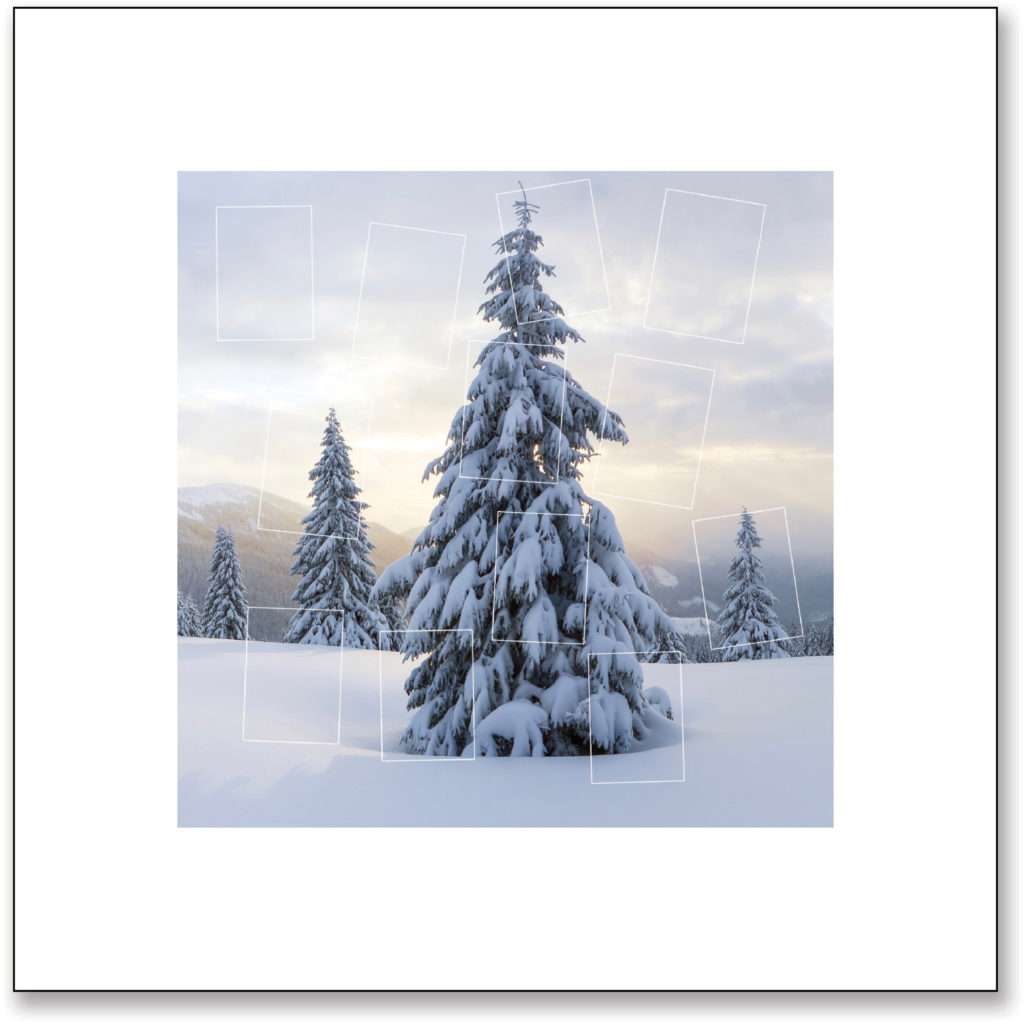
We want to simulate a bunch of snapshots, so let’s create a brush to “stamp” the right dimensions of a 5×7″ printed photo. Create a new document (File>New) around 2000 pixels square with a white background in 8-bit RGB. Select the Rectangular Marquee tool (M) and, in the Options Bar, set its Style to Fixed Ratio, and Width and Height to 5×7.
On a new blank layer, drag out a large rectangle, press D to set the Foreground color to black, and press Option-Delete (PC: Alt-Backspace) to fill the selection with black. My brush is 800×1120 px, but it doesn’t really matter because we’re only using it as a stamp. With the filled selection still active, go to Edit>Define Brush Preset, enter a useful name in the resulting dialog, and click OK. This should automatically switch you to the Brush tool (B). Deselect the marquee (Command-D [PC: Ctrl-D]).

Open up the Brush Settings panel (Window>Brush Settings) and turn off Spacing in the Brush Tip Shape section. Then enable Shape Dynamics on the left, and set Size Jitter to 10% and its Control drop-down menu to Off. Set the Angle Jitter to 3% and its Control drop-down menu to Off, as well. This will introduce some randomness to the cutouts. Tap the Left Bracket key on your keyboard to reduce the size of your brush and try it out making single stamp marks on the layer. When you’re happy with the size, delete the layer.
Step Two: Place Your Image
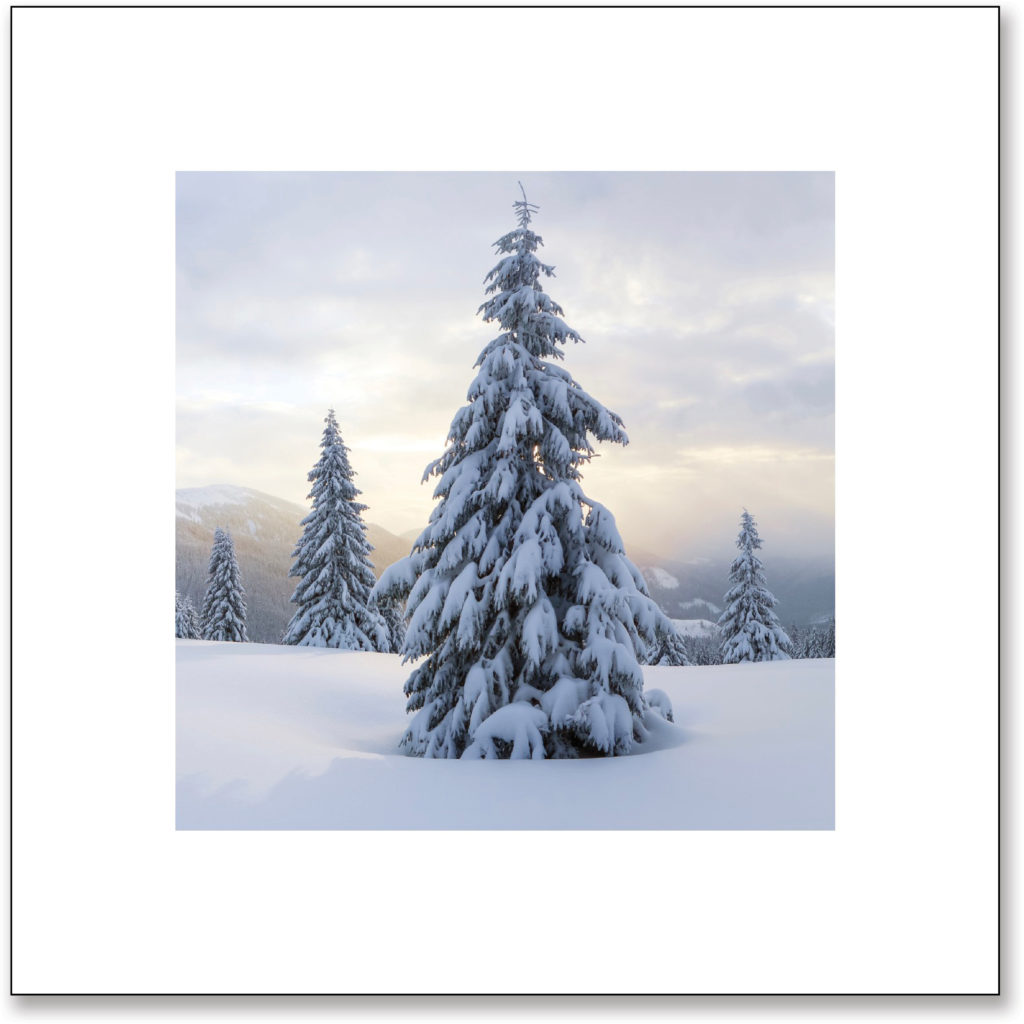
Drag or import your image to your square document, and resize it so there’s some space around it. The goal is to leave some room for ragged edges and randomness!
If you’d like to download the low-res watermarked version of this image to follow along, click this link, log in with your Adobe ID, and click the Save to Library button. Drag the image from your Libraries panel (Window>Libraries) into your working document, resize it, and press Enter to commit the transformation. Right-click on the layer’s name in the Layers panel, and choose Rasterize layer. Switch back to the Rectangle Marquee tool, set its Style back to Normal in the Options Bar, and draw out a selection of the area that you want to keep. Go to Select>Inverse, and then press Delete (PC: Backspace). Press Command-D (PC: Ctrl-D) to deselect.
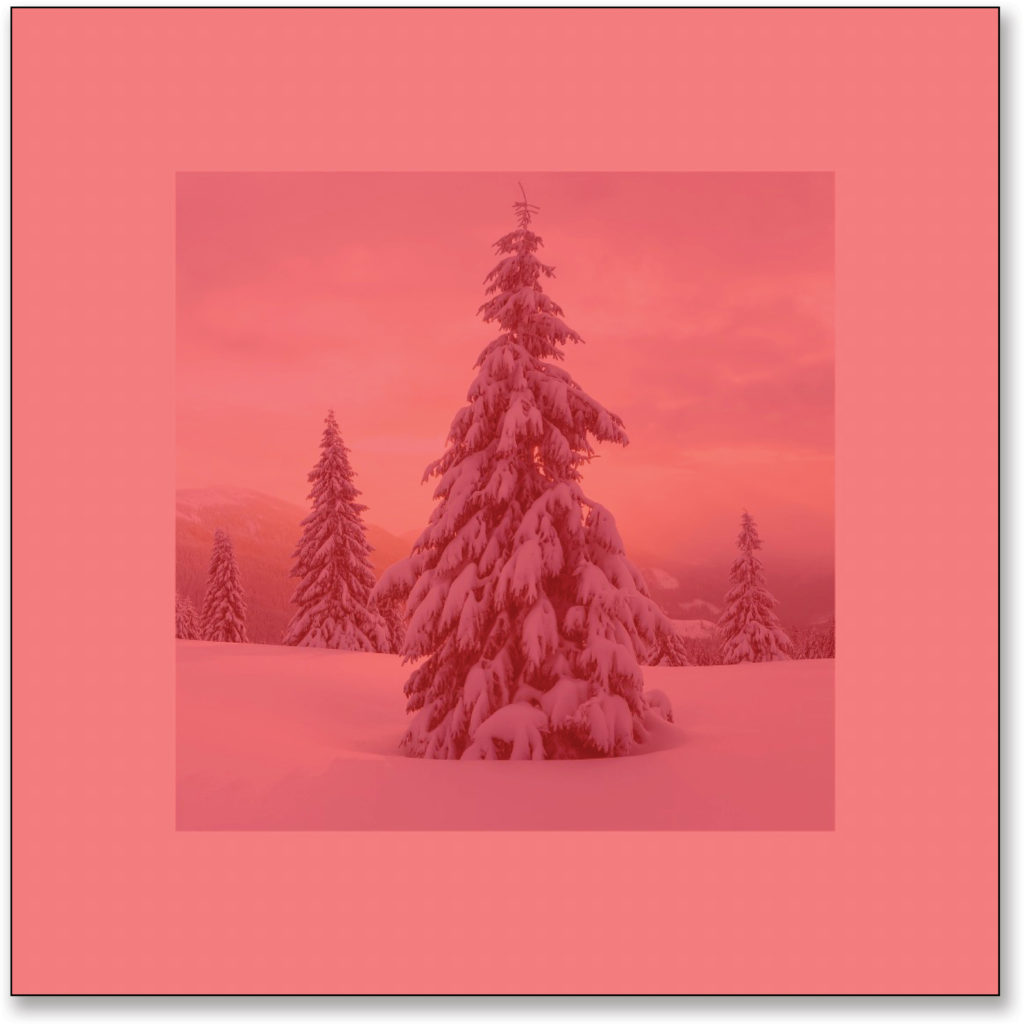
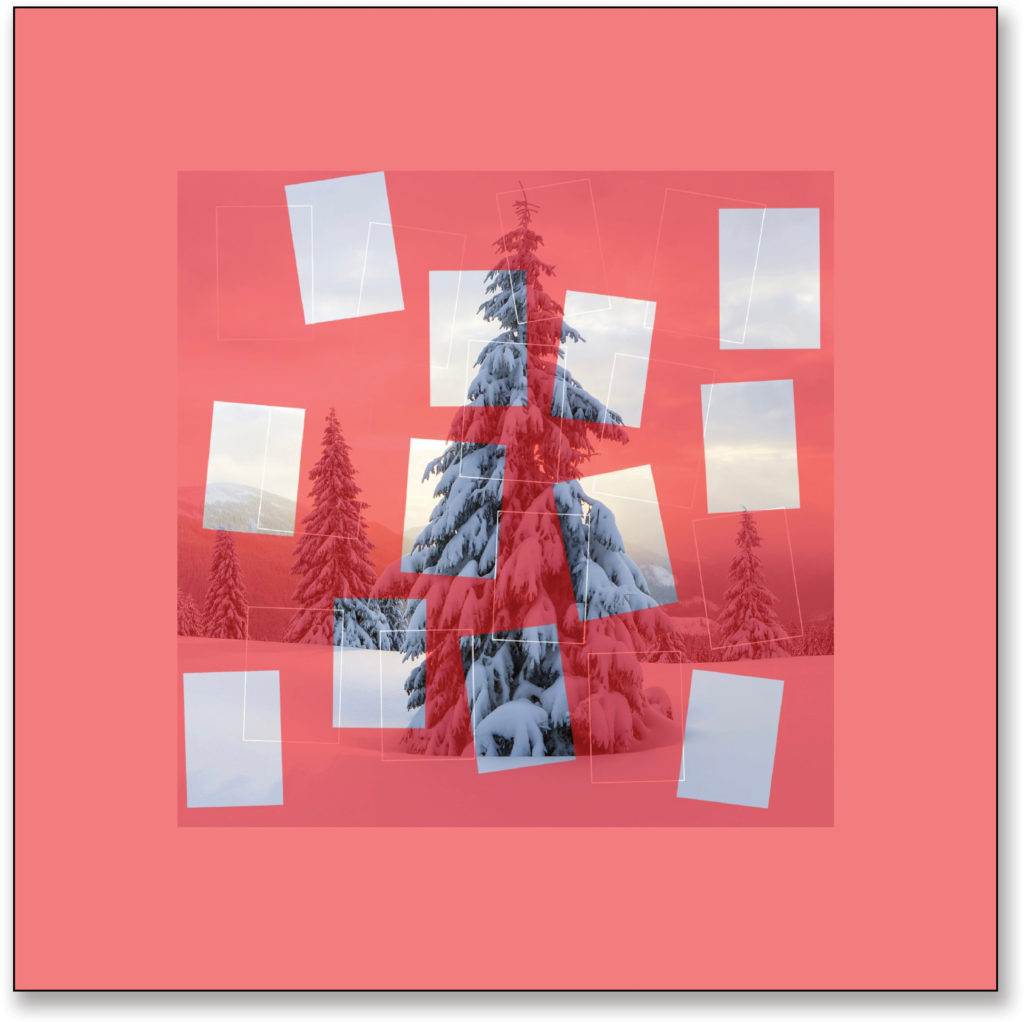
Step Three: Prepare to Make Cutouts
We’ll use Quick Mask mode, which places a selection mask over the image so we can work quickly and easily. Press Q to enter Quick Mask mode, and then with your Foreground color still set to black, press Option-Delete (PC: Alt-Backspace) to fill the quick mask. You should see a red overlay on your image.
Step Four: Start Cutting!
Now switch back to the Brush tool, and press X to set the Foreground color to white. As you work with the Quick Mask, you’ll see cutout areas wherever you stamp your Brush. The size of your brush matters because you’ll end up with multiple layers, and a smaller brush can take a lot more time. This will become clear as you work through the technique.
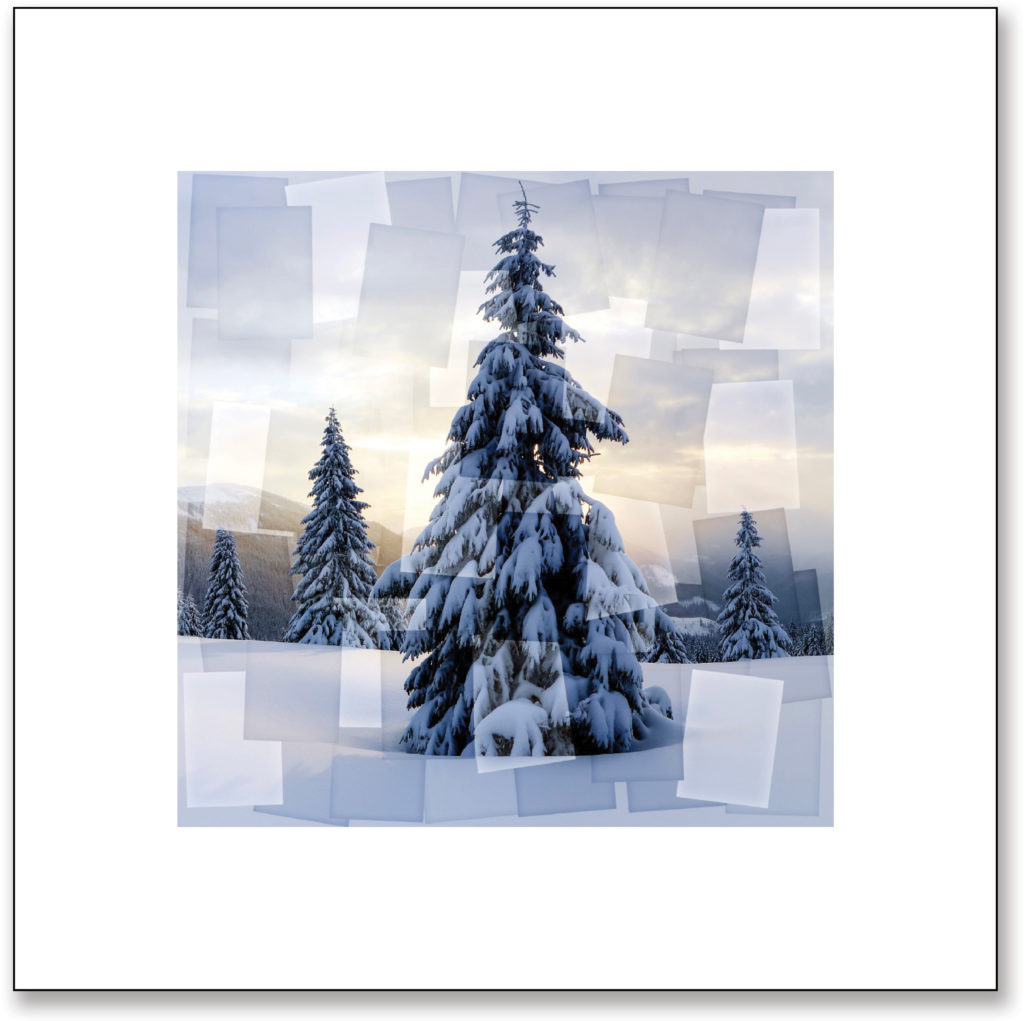
Make a few scattered stamps, being sure they don’t overlap. Eventually the entire image will be cut out, but we don’t want to do that all at once. Just aim for about a third of the image area in this first round.
To end up with a jagged edge in the final effect, be sure to keep your stamp marks inside the boundary of the photo.

Tip: If you have a Wacom tablet or other hardware controller, you can set your brush controls to rotate the brush with the pen. I’m using a Monogram hardware controller, so I can control both rotation and size easily with a physical dial while I’m working.
Step Five: Copy Your Cutouts
Once you have your pattern, press Q again to switch back to Standard Mode, and your cutouts should now be selections. Ensure you’re on the photo layer in the Layers panel, then press Command-J (PC: Ctrl-J). This copies the selected areas to a new layer without harming the original photo.
Double-click the new cutout layer in the Layers panel to open up the Layer Style dialog. Click on Stroke in the list of Styles on the left, set its Blend Mode to Normal, Size to 4 px, and Position to Center. Make sure the Fill Type is set to Color, click on the Color swatch to Open the Color Picker, select white, and click OK to close the Color Picker. Click OK to close the Layer Style dialog. This is a temporary visual cue to help you with later selections so you can see where you’ve already made cutouts.
Step Six: Repeat!
We need most of the original photo cut out and copied, so choose the photo layer again in the Layers panel, and go back and repeat Steps Three and Four, selecting new areas of the photo. After you exit Quick Mask mode, be certain that the photo layer is selected before you copy your selection to a new layer!
The Stroke layer style applied above can be copied to the next new layer by holding Option (PC: Alt), and dragging the word “Stroke” in the Layers panel to the new layer.
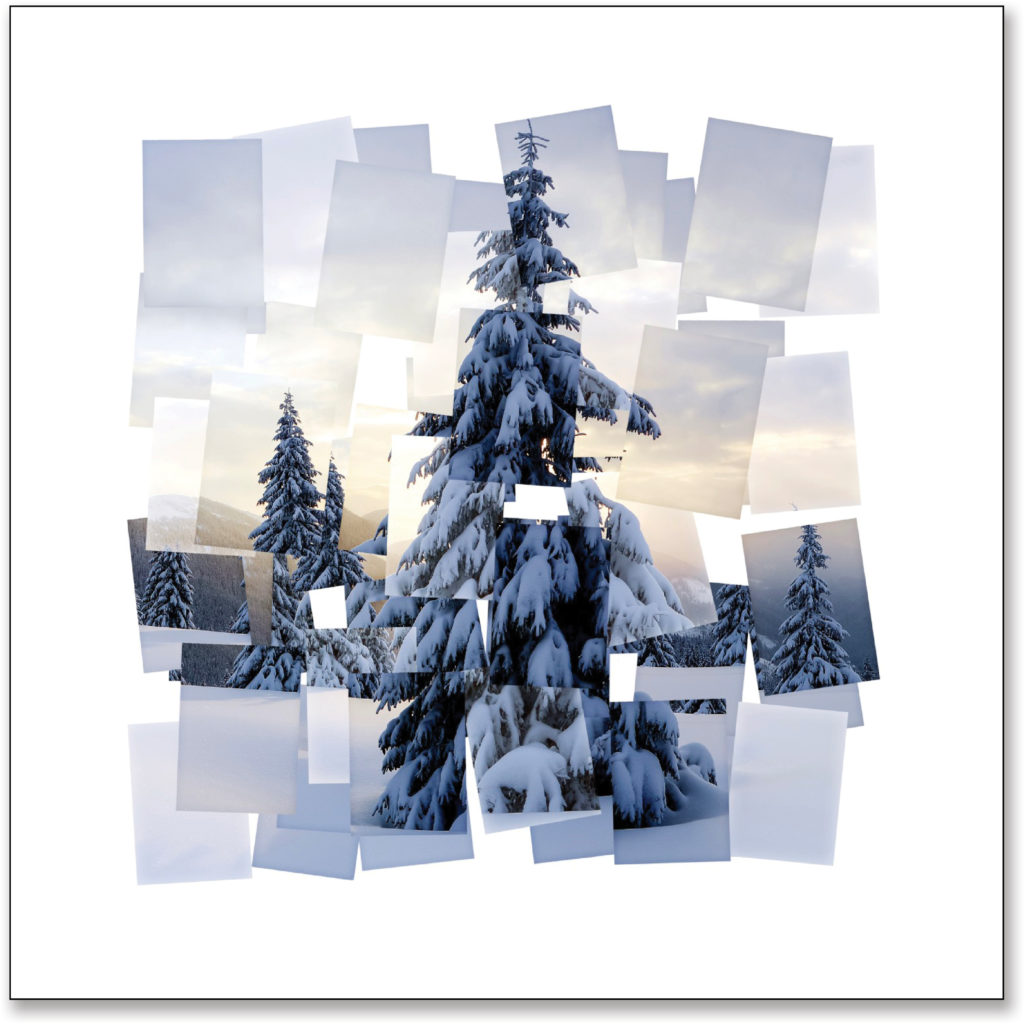
Continue this process of cutting out and copying until you feel you have most of the subject accounted for. You should overlap to varying degrees as you work, to give the feel of a collage. Again, don’t worry about including the edges of the image, because we want to end up with something that looks like a pile of photos.
Step Seven: Resize and Adjust Exposure
Once you have several layers of cutouts and you’re happy that you’ve included as much of the main subject as possible, it’s time to do some tinkering. Start by adjusting the brightness of one of the cutout layers with layer styles. I like to use a combination of Color Overlay and Inner Shadow. For Color Overlay, change the Blend Mode to Color Burn, click on the color swatch to open the Color Picker, and then click in your image to choose a neutral midtone, either lighter or darker than 50% gray. Click OK to close the Color Picker, and then lower the Opacity of the effect. Your goal is to make it look like the exposure is a little different than the base image.
Inner Shadow can look like a slight vignetting effect, so it should complement and enhance the value you selected for Color Overlay. Set the Blend Mode to Overlay so it will accommodate both brighter and darker values.
Be sure to turn off the Stroke effect by removing its checkmark in the Layer Style dialog or clicking its Eye icon in the Layers panel after you apply the layer styles.
Repeat this process for every copied cutout layer, making small variations in each one. Turn the background photo layer off and on to check your results. Finally, transform the background photo layer just a tiny bit (Command-T [PC: Ctrl-T]). Feel free to rotate, increase or decrease size, and even nudge it off center here and there. Maybe get totally wild and apply a little Spherize filter (Filter>Distort>Spherize)!
In the end, it’s okay if you leave some holes where you didn’t quite get the full image covered, and you can certainly go back to make adjustments to each of the layers as you like.
If you’re the adventurous sort, you can also work from multiple views of the same subject. This is especially effective with close-up portraits, as you can see in Hockney’s own collection. In that case, you’ll want to use larger brush marks and take fewer cutouts from each image.
Another great variation is to use extreme wide-angle shots, again with a couple of different points of view. The heavy distortion from “unwrapped” panoramic shots would also make fantastic collages!
This technique is really a lot of fun, and the Quick Mask mode makes things simple enough that you can let your creativity fly. If you don’t like a layer, just toss it and start over. Use Curves instead of layer styles to adjust exposure. Apply new textures to different layers and experiment with blending modes. The whole point of Hockney’s experiment was to investigate perception and human vision in connection with time and motion. Hockney once said of photography, “There is nothing wrong with photography, if you don’t mind the perspective of a paralysed Cyclops.” He then set out to explore how to get that Cyclops to move around!

This article previously published in the November, 2020 issue of Photoshop User magazine.


