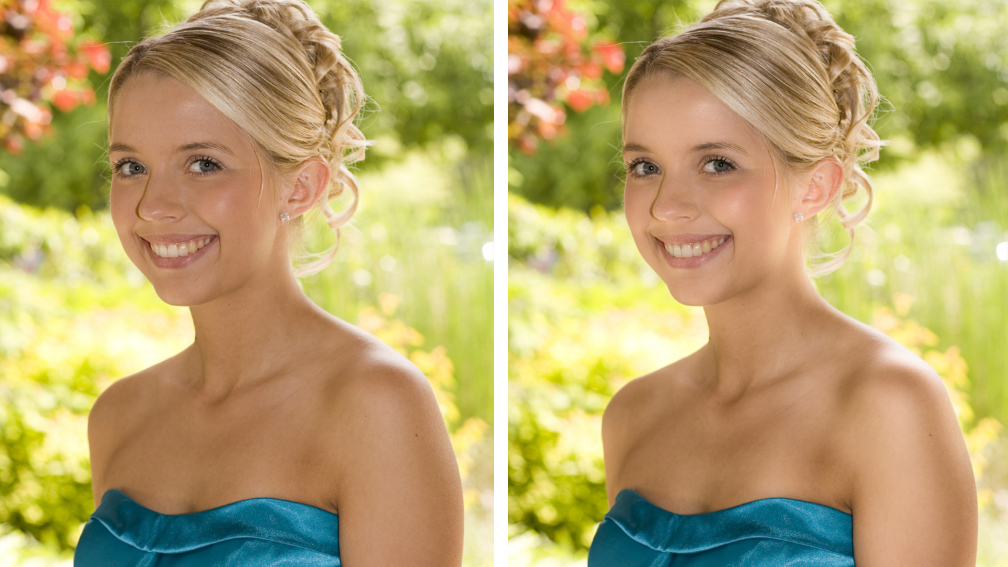
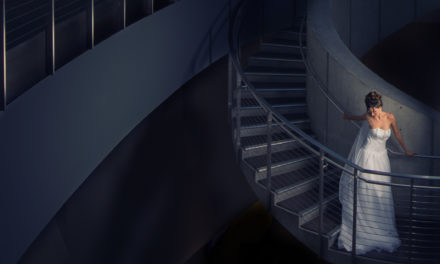
A soft glamour glow effect is incredibly useful when clients want to feel a little old-school Hollywood (think boudoir, wedding, and high school photography). In this column, you’ll learn how to use one of Photoshop’s oldest filters to quickly produce a soft and ethereal portrait effect that’s sure to please brides, prom queens, and princesses of any kind.
Step One:
In Photoshop, choose File>Open as Smart Object to open a photo. If the photo is already open in Photoshop, or if it consists of multiple layers, activate the layer(s) and choose Filter>Convert for Smart Filters. This packages the active layer(s) into a single smart object. If you’re starting in Lightroom, select a photo and then choose Photo>Edit In>Open as Smart Object in Photoshop. [KelbyOne members may download the file used in this tutorial here. All files are for personal use only.]
TIP: If the photo to which you want to apply this effect consists of multiple layers, you can access the original layers later on by double-clicking the layer thumbnail for the smart object. When you do, Photoshop opens a separate, temporary document that contains all of your layers. Once you make your changes in that document, choose File>Save (not Save As) and then close the document, and your changes magically appear in the original document.

Step Two:
Since many Photoshop filters refuse to work with 16-bit imagery, it’s a good idea to ensure you’re working with an 8-bit image to start with. To do that, choose Image>Mode and make sure there’s a checkmark next to 8/Bits Channel. If there isn’t, go ahead and choose that menu item.
Step Three:
The filter you’ll use for this technique uses the Background color swatch at the bottom of the Toolbar for the glow color. Set it to white by pressing D on your keyboard to reset your Foreground and Background colors to their default settings of black and white, respectively.
Step Four:
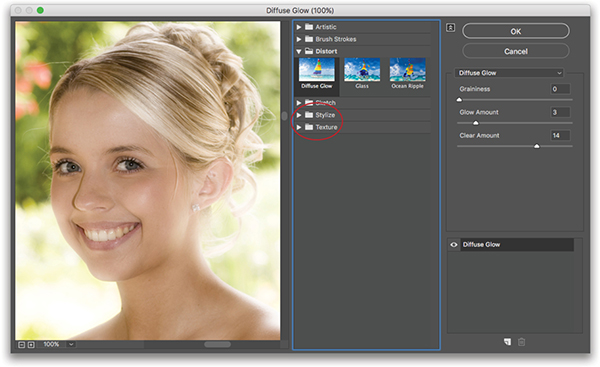
Choose Filter>Distort>Diffuse Glow. If you don’t see the Distort option in the menu, choose Filter>Filter Gallery instead (Adobe shortened the Filter menu a few versions back, so you may be viewing an abbreviated filter list). In the resulting dialog, use the zoom buttons, beneath the lower left of the portrait preview, to adjust the zoom level so you can see the model. To the right of the portrait preview, click to expand the Distort section, and then click Diffuse Glow. On the right side of the dialog, drag the Graininess slider all the way to the left, set the Glow Amount to around 3, and set the Clear Amount to around 14. You’ll need to experiment with the Glow Amount and Clear Amount sliders on your own photos, but these settings are a good starting point. Click OK.
TIP: You can repopulate the Filter menu by going under the Photoshop (PC: Edit) menu and choosing Preferences>Plug-Ins and turning on the Show All Filter Gallery Groups and Names checkbox.
Step Five:
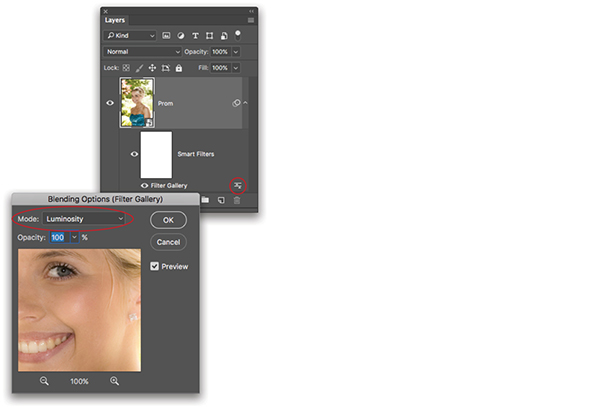
In the Layers panel, double-click the tiny icon to the right of the filter’s name (which will be Filter Gallery or Diffuse Glow, depending on the menu item you picked to open the filter in the first place). In the Blending Options dialog that opens, set the Mode pop-up menu to Luminosity to keep the photo’s colors from shifting. If you’d like, you can reduce the Opacity setting in this dialog to tone down the strength of the filter. Click OK.
TIP: You can also reopen the filter and experiment with different Diffuse Glow settings by double-clicking on the filter’s name in the Layers panel.
Step Six:
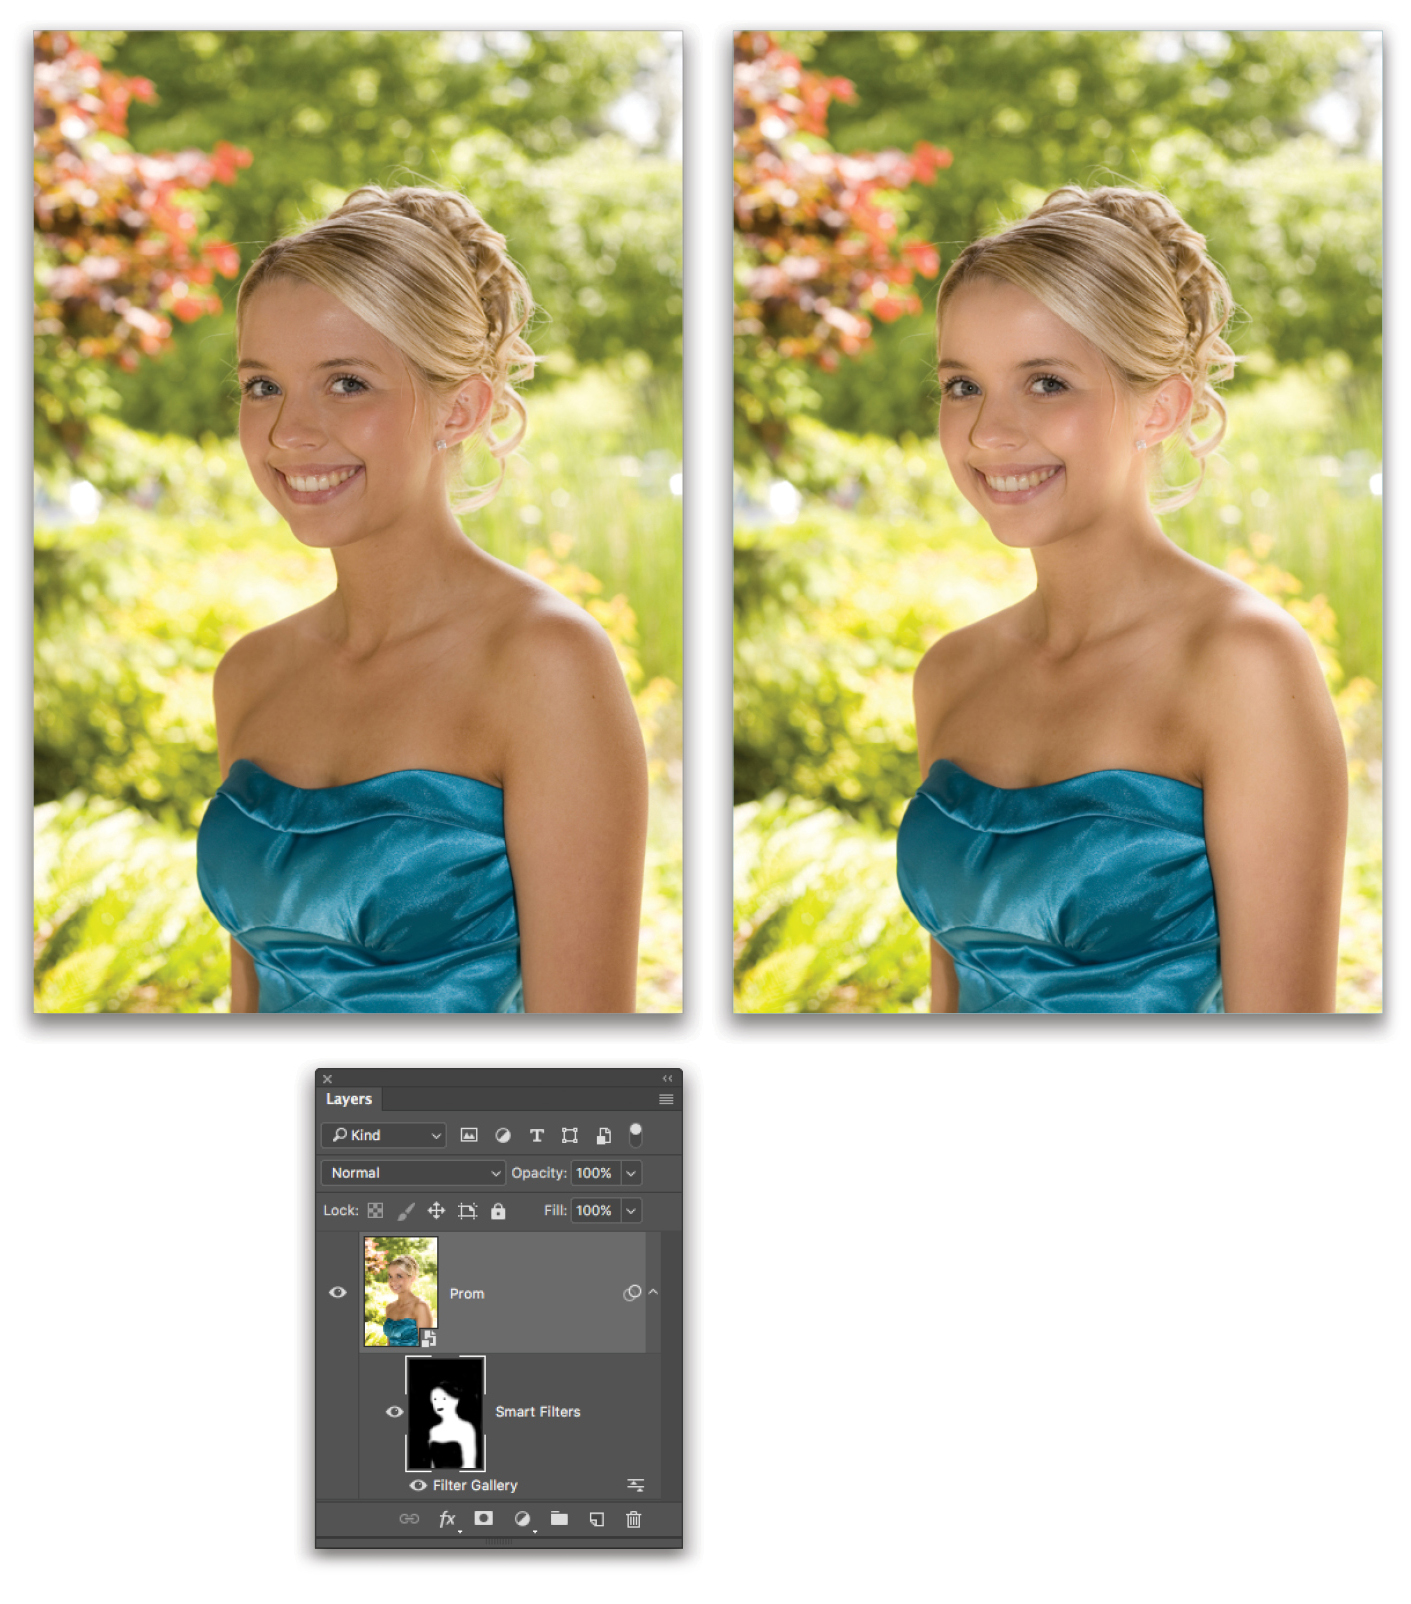
Now let’s hide the glow from certain parts of the photo. Click on the Smart Filters mask beneath the image layer in the Layers panel to activate it (white brackets appear around its thumbnail). Press B to activate the Brush tool and pick a soft-edged brush from the Brush Picker toward the left end of the Options Bar. Set the Size to around 100 pixels, and ensure the Mode pop-up menu is set to Normal and that Opacity and Flow are set to 100%. Whenever you’re working with a mask, painting with black conceals and white reveals, so to hide the filter effect, you need to paint with black. Press X on your keyboard until your Foreground color to black.

Step Seven:
With that large, soft brush, paint across the background, the model’s dress, hair, teeth, and the iris of each eye. You can change your brush size as you paint by pressing the Left Bracket key ([) to decrease it or the Right Bracket key (]) to increase it. If you hide too much of the glow, press X on your keyboard to switch your Foreground color to white, and then paint that area again.

Step Eight:
Choose File>Save to save the file. If you started in Lightroom, and you left it running while you worked in Photoshop, the new and glowing image shows up in your catalog as soon as you save it in Photoshop. To see before and after versions, click the visibility Eye icon to the left of the filter’s name in the Layers panel, and then turn it back on.
As you can see, this technique not only produces a soft, romantic image but also smooths your subject’s complexion nicely. Until next time, may the creative force be with you all!
This article was originally published in the March 2017 issue of Photoshop User magazine.


The use of the filter was excellent. It’s a good idea to know a new method. It was a bit solid to distinguish between the previous picture and the next picture. It is so soft touch. However thanks.
Steps are very clear to understand, this type of images effects are works for basically for magazine cover or for inside images. This article can be very useful for for learning photo retouching. Excellent presentation.
This was a great work but following another way it can be solve more easily
Thanks for this great tutorial. By the way, which photoshop version you have used?
More informative tutorial for me…..thanks a lot..
What a wonderful lesson. It was amazing. Thank you so much for the great help.
Great post with a lot of information. Many many thanks for sharing with us.
Thanks for the tutorial. Lots of information gathered.
nice info thanks for the help
Seriously a lot of awesome information
It is very good tutorial! Why don’t you make a video for youtube?
You are awesome, Lesa! This is great tutorial, thank you for sharing!
Thank you! I learn photoshop now and it helped me
Nice Photoshop Article.
it really feels great. Thanks for sharing such a valuable information which is very hard to find normally. I have subscribed to your website and will be promoting it to my friends and other people as well.
Thank you for very usefull information.
Nice Article.
Wow! It looks so natural. Thank you for sharing these tips. Keep it up!
I think you did a great job on this one.
This is really helpful for photoshop beginners.
Skin retouch techniques were things to master first. But now that is a sort of thing neural network does in a snap with no effort. Such tutorials were really helpful on the very first steps at Photoshop but times are changing.
This is really great and wonderful! I am amazed to read your articles! Thanks!
Thanks for sharing it with us!
You have a good data posted. Thanks for sharing!
You have a very nice data. Thanks
Awesome work! The edit you’ve made looks natural.
This is really wonderful! Thanks!
Really amazing article. It’s really helpful. Thanks for sharing.