There are times when we can deal with cluttered shots packed full of tourists by simply arriving at a location early, before the rest of the world wakes up. But, sometimes, there are reasons why this isn’t possible and we end up unable to avoid tourists. Luckily for us, there’s a seriously smart solution offered in Adobe Photoshop that lets us remove tourists and, with only a little prep on location, we end up with a clutter-free shot. Here’s how it works:
As a result of countless tests and research surveys, there are many smart algorithms at work inside Photoshop, trying to determine what we want our shots to look like. One such algorithm is entitled Statistics, and it’s the one we’re going to use. This algorithm takes a look at a series of photos and analyzes all the pixels, determining what the images have in common and what their differences are. We’re going to take advantage of this Statistics feature to remove the tourists from our shot; but we first need to put the best images into Adobe Photoshop to make sure this works.
As we’re shooting, we need to compose our scene giving consideration to helping the algorithm do its thing. We’re going to take a series of images (perhaps around a dozen) and we need to keep our composition unchanged throughout, so, if we’re going to get the best results and retain our original framing, it’s very important that we use a tripod. (If you shoot handheld, you’ll end up composing a slightly different shot each time, no matter how hard you try, and then you’ll lose the edges and suffer some changes in perspective when the algorithm gets to work.) We also need to ensure that each shot in our series is the same as the last, which means leaving camera settings and focus locked in. The only difference in all the shots should be the position of the tourists.
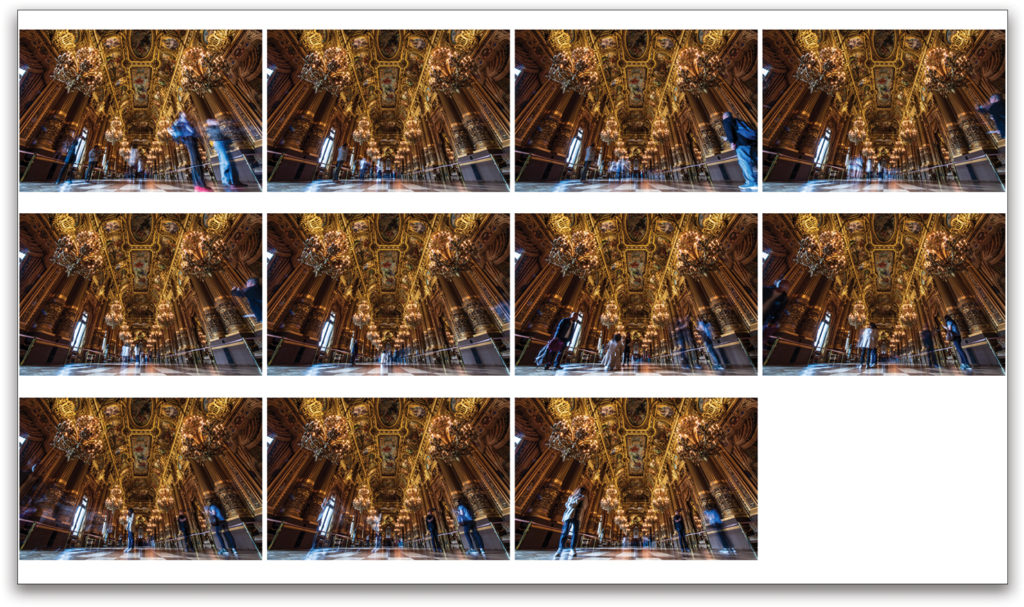
When we shoot the series of images, we need to pay attention to what’s happening and where everybody is. If there are particular spots where people congregate, shoot frames when these areas have no people in them. What we’re aiming for is a series of shots where the entire scene is visible without the tourists in as many of the shots as possible. When we’ve finished shooting our series of images, we’ll move into Adobe Photoshop for postprocessing.
Step One:
First, download the series of images from the camera and save each of them. To keep everything in order, make a new Folder, and save all the images there together. Once they’re saved, we can move on, but they must be saved so Photoshop can do its thing.
Step Two:
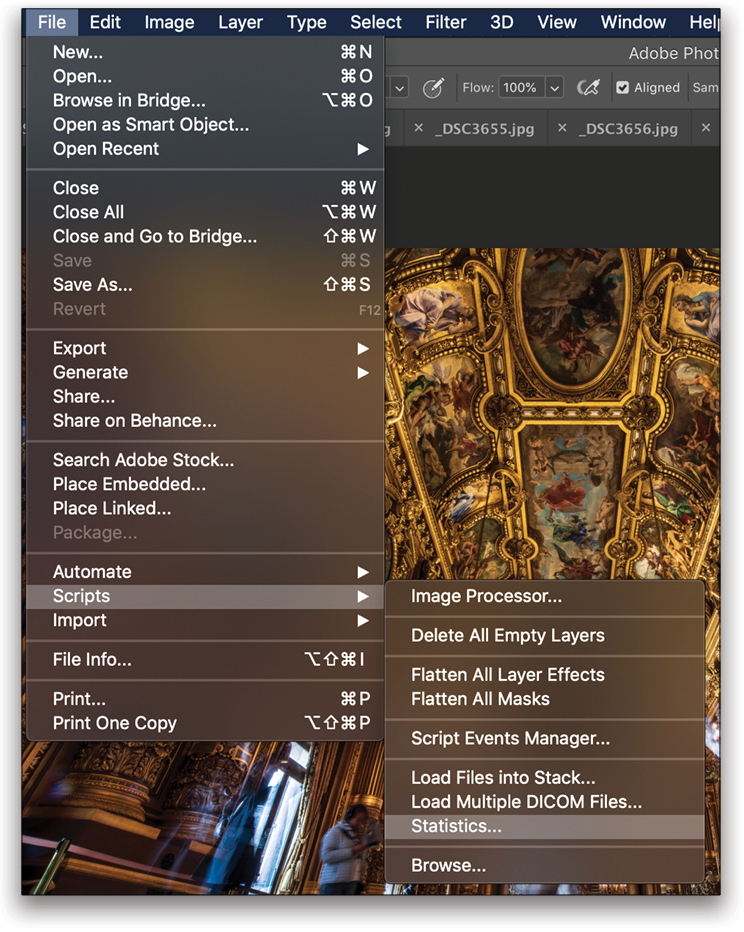
With all the images open (and saved), let’s get to work on losing the tourists from our scene. We’ll start by going to File>Scripts>Statistics.
Step Three:
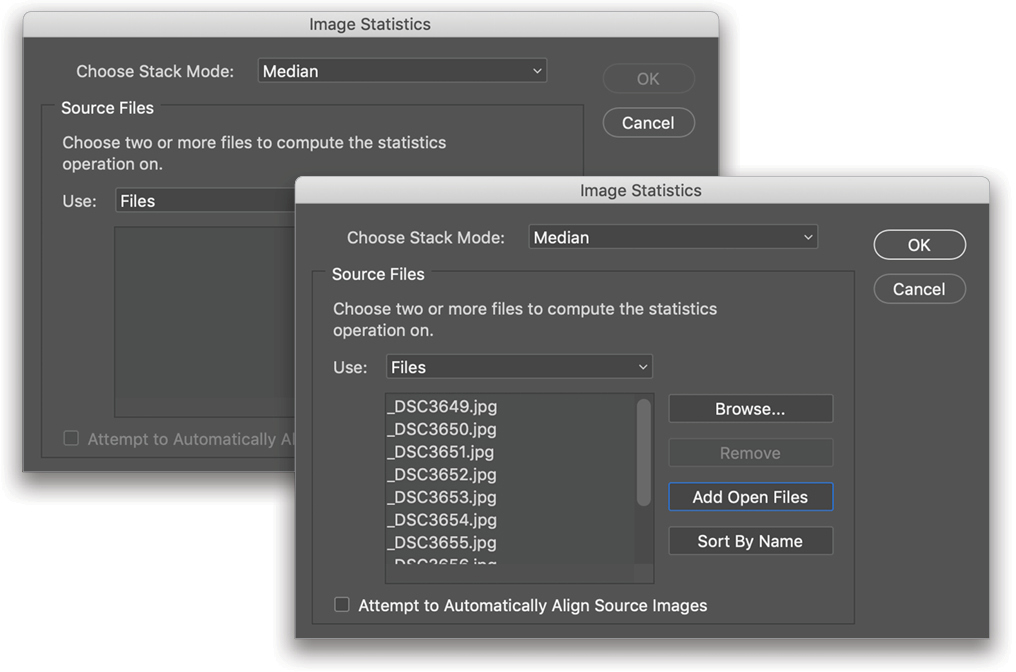
This opens a dialog with some options we need to work through. First, click the Add Open Files button, which does exactly what it says. At this point, double-check that the only files loaded in the center of the dialog are those with which we want to work. If there are any others open, simply highlight them in that center area and click Remove.
Step Four:
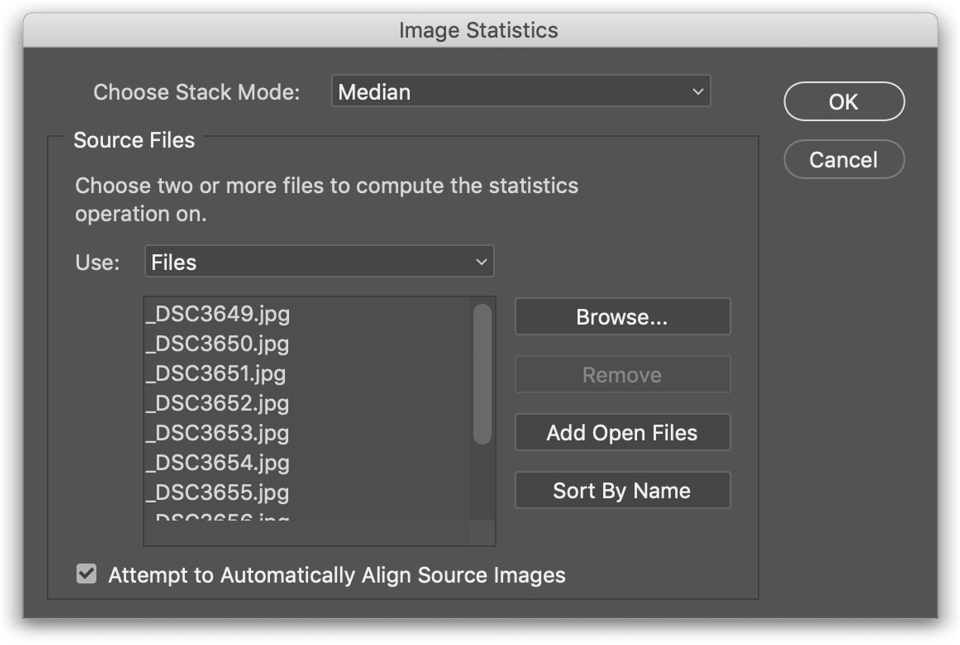
Next, turn on the Attempt to Automatically Align Source Images checkbox so that Photoshop assesses them and ensures they line up just right in the stack. Although we shot our images using a tripod, if there’s any slight discrepancy, this will line everything up and overcome the differences.
Step Five:
Also, at the top of this dialog, select Median from the Choose Stack Mode menu. The reason for choosing Median is that this mode analyzes the image for nontransparent pixels: It looks for pixels that are the most consistent throughout the series of images and uses those for the final result. Median mode actively looks at the things that differ between all of the images and removes those differences; it’s the mode that’s designed to remove unwanted content.

Step Six:
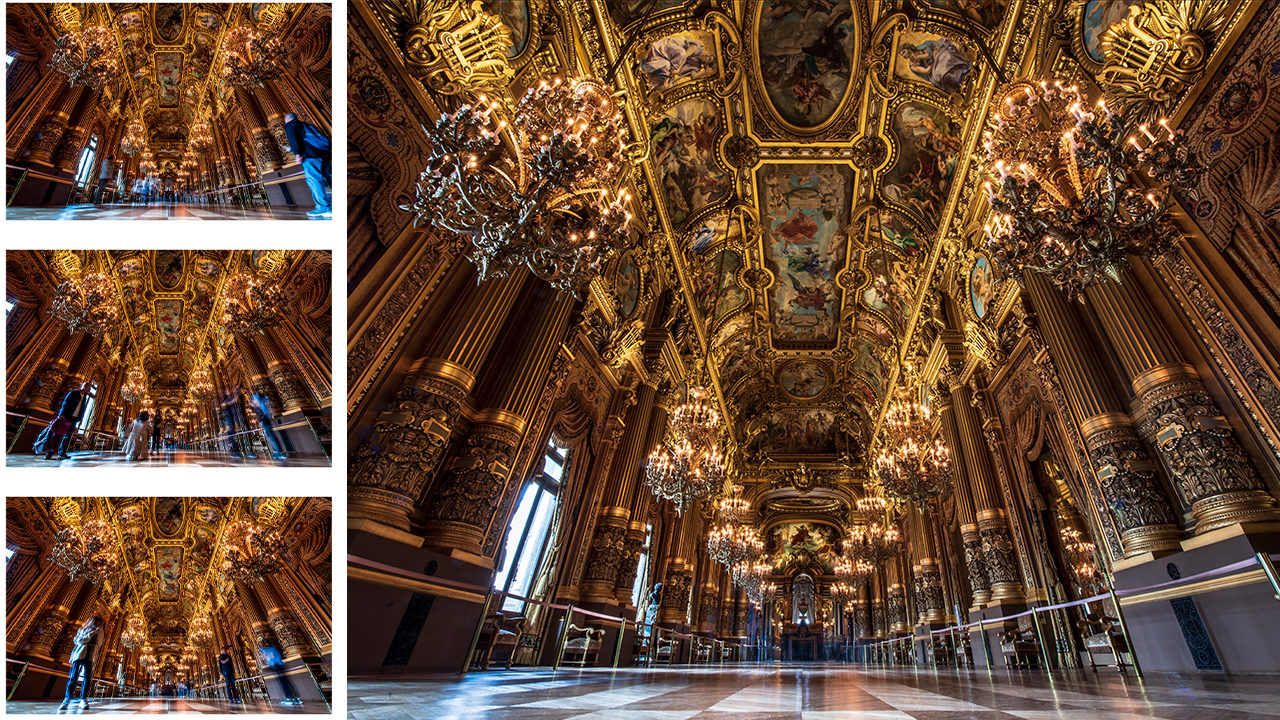
Once everything is set in the dialog, click OK, and Photoshop will perform its magic. What’s happening behind the scenes is that the algorithm is stacking up all the images we selected and analyzing their similarities and differences, so when the process is completed, we’ll be presented with an image without any tourists!
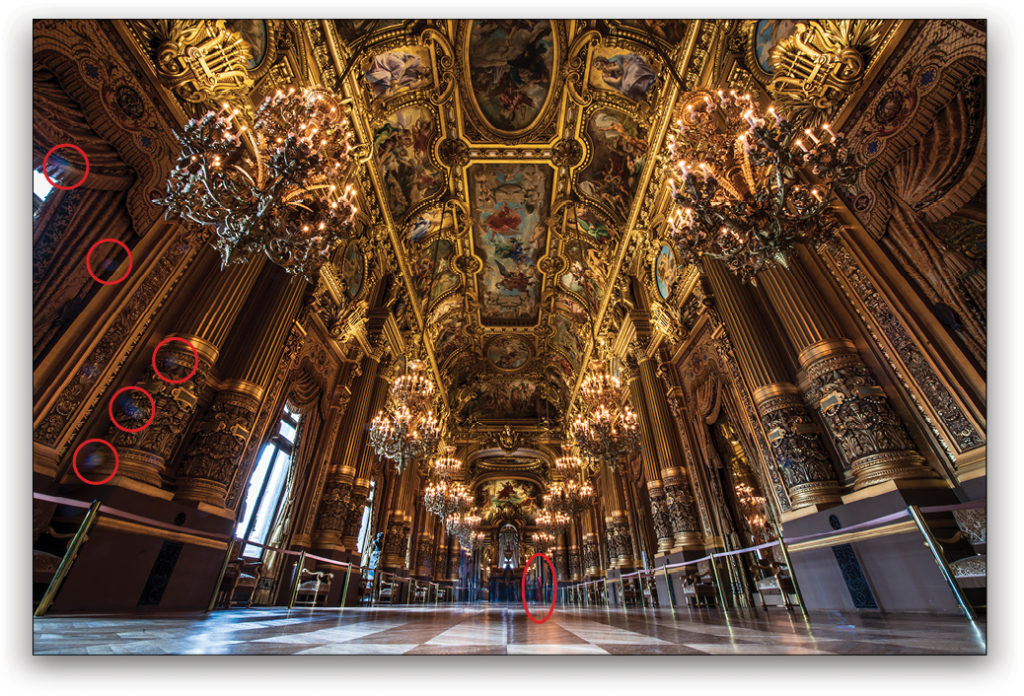
There may be some tidying up to do at this point (see the red circles), depending on whether we managed to get a good range of images with enough of the static background revealed.
This is my favorite way to remove tourists from travel photos in postprocessing. I hope you give it a go, and find some other uses for it, as well.
This article originally published in the August, 2019 issue of Photoshop User magazine.