
Trendy graphic treatments on websites and in newsletters are both visually interesting and fun to deconstruct. In this column, you’ll learn core Photoshop skills as you re-create a technique Fast Company regularly employs to isolate a black-and-white subject, give it a colorful new background, and then add a brightly colored shadow that you can offset in any direction.
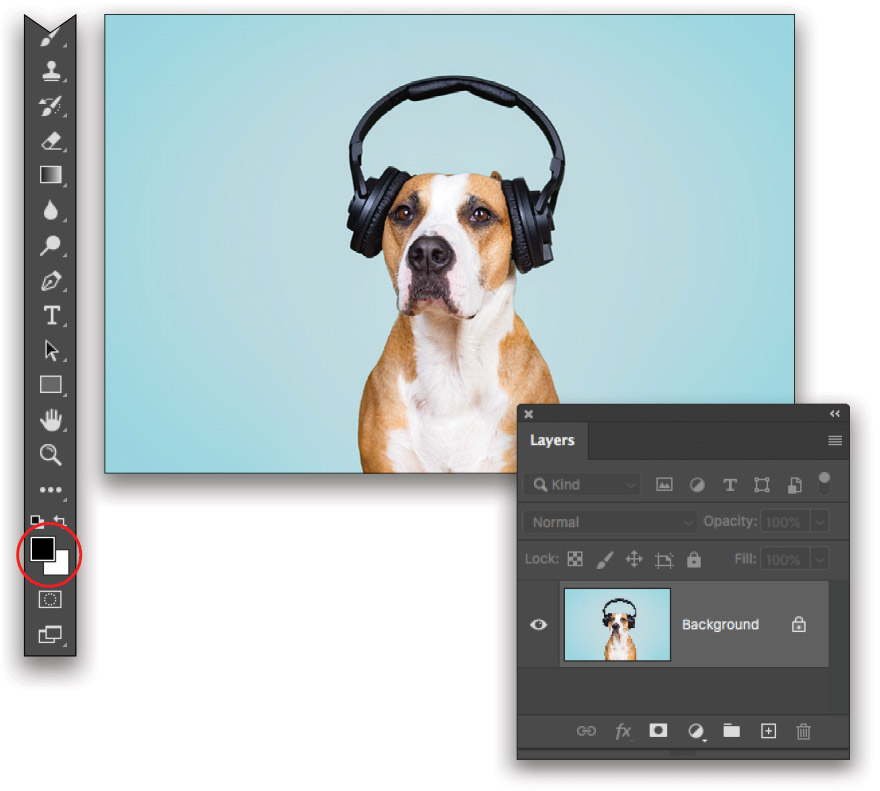
Step One: Start by opening a photo in Photoshop. If you’d like to download the low-res watermarked version of this image to follow along, click this link, log in with your Adobe ID, and click the Save to Library button. Double-click the image in the Libraries panel (Window>Libraries) to open it in Photoshop. To make it easier to work with the image, increase the resolution of the practice file. (We normally don’t recommend enlarging images, but this is only for practice purposes.) Go to Image>Image Size, turn on the Resample checkbox, select Preserve Details 2.0 from the Resample drop-down menu, set the Width to 2,400 pixels, and click OK.
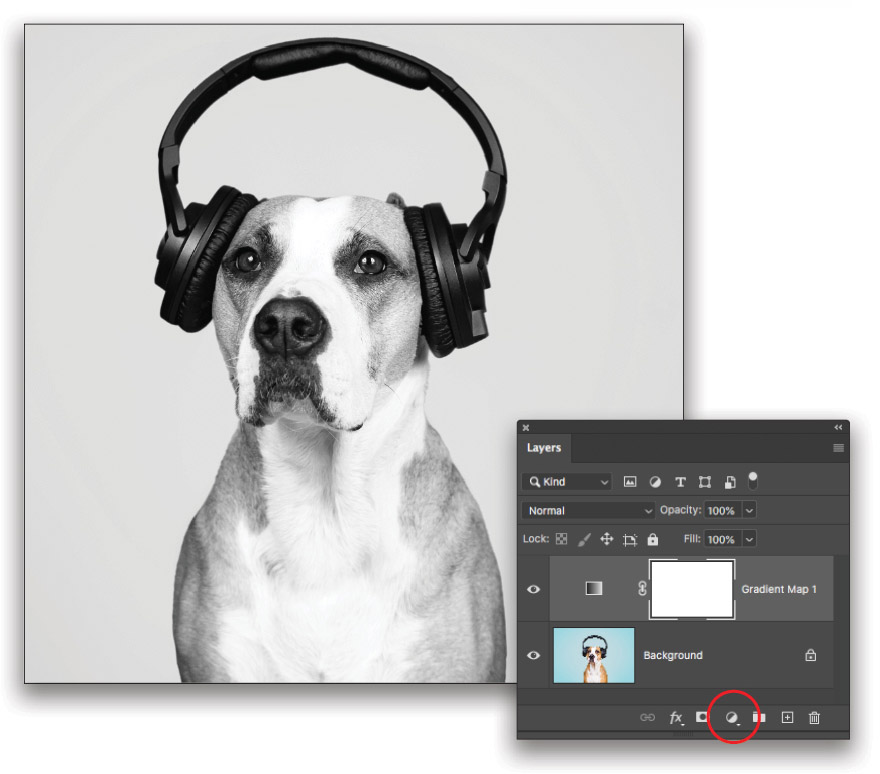
Turn the photo into a black-and-white image using the method of your choice. If you’re starting in Lightroom, use the HSL/Grayscale panel to create a nice, contrasty black-and-white image. In Photoshop, we’ll use a Gradient Map adjustment layer, which produces a high-contrast black-and-white right out of the gate.
Because a Gradient Map adjustment layer uses the color chips at the bottom of your Toolbar (circled), start by setting them to the default of black and white by pressing the D key on your keyboard.
Step Two: In Photoshop, choose Layer>New Adjustment Layer>Gradient Map, or click the half-black/half-white circle at the bottom of your Layers panel (circled) and choose Gradient Map. Either way, Photoshop adds the adjustment layer and remaps the shadows in your image to your Foreground color chip (black) and the highlights to the Background color chip (white).
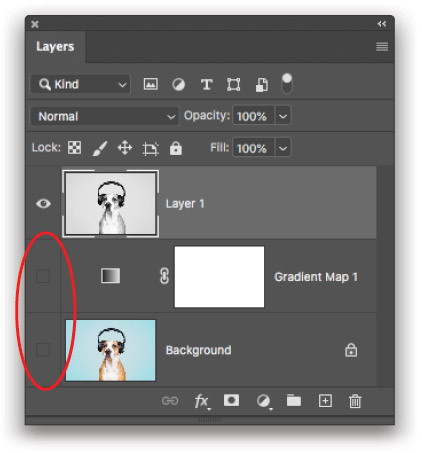
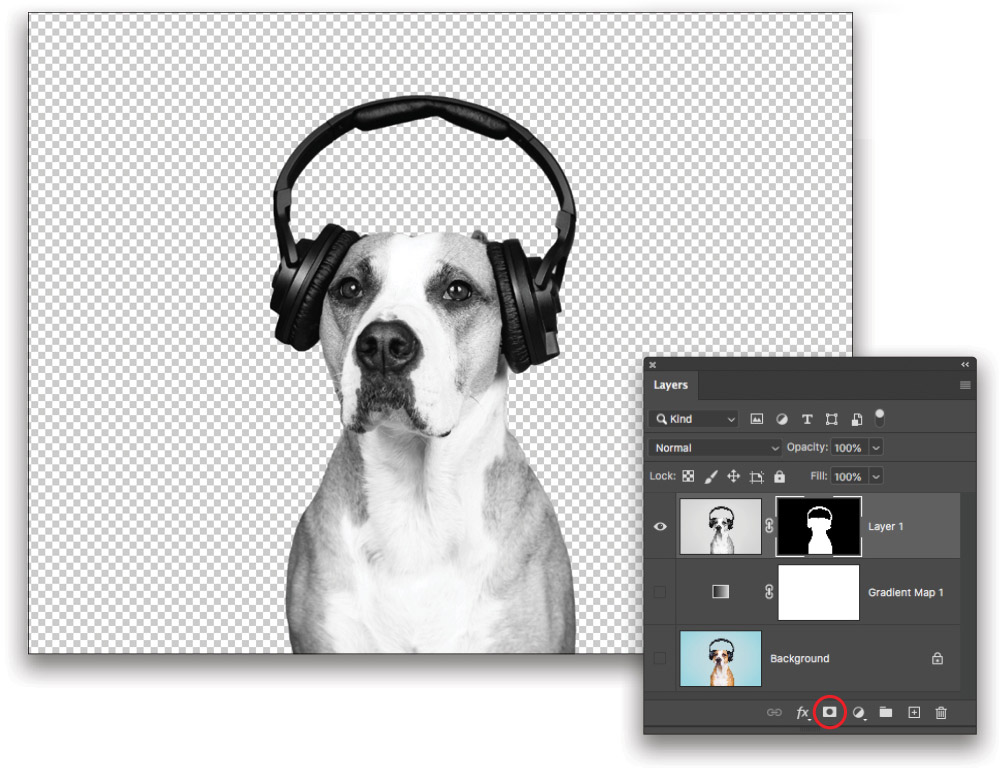
Step Three: Now let’s combine all visible layers into a brand-new layer, leaving the original layers intact. First, activate the topmost layer (the Gradient Map adjustment layer), and then press Shift-Option-Command-E (PC: Shift-Alt-Ctrl-E). You can also press-and-hold Option (PC: Alt) as you choose Merge Visible from the Layers panel’s flyout menu. Turn off the layer visibility for the two original layers by clicking the Eye icon to the left of their layer thumbnails (the area is circled here with the icons turned off).
Note: If you used Lightroom to go black-and-white, it’s time to open the photo in Photoshop. Select its thumbnail and choose Photo>Edit In>Edit In Adobe Photoshop CC 2020.
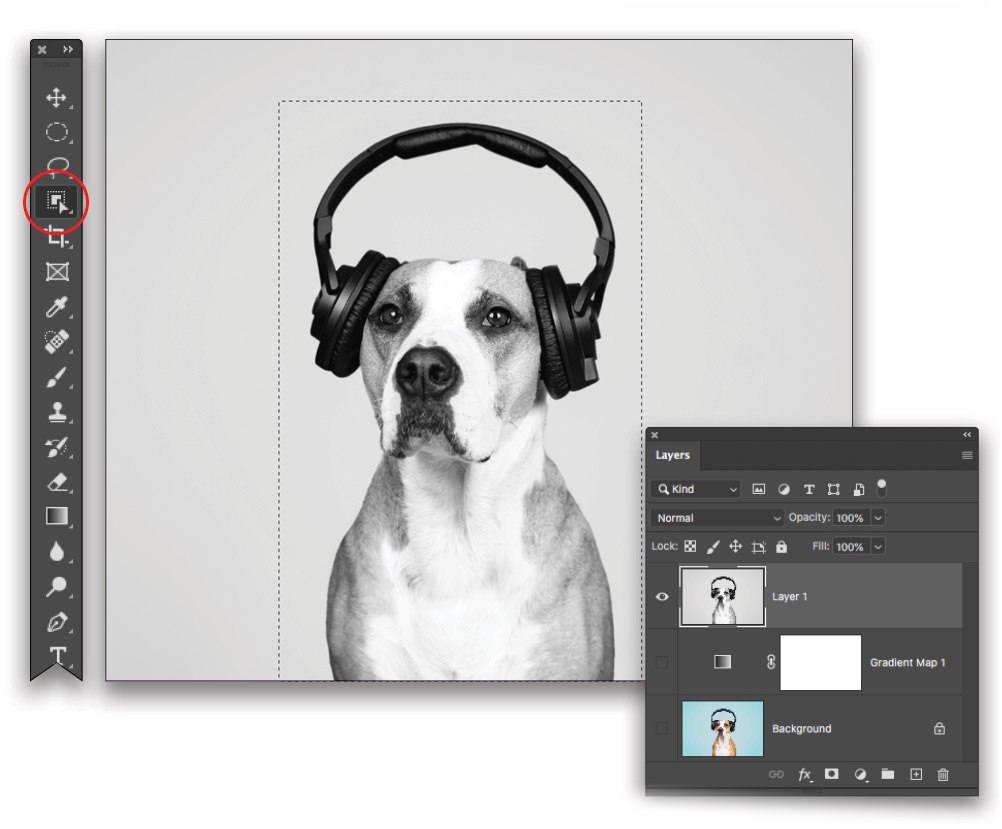
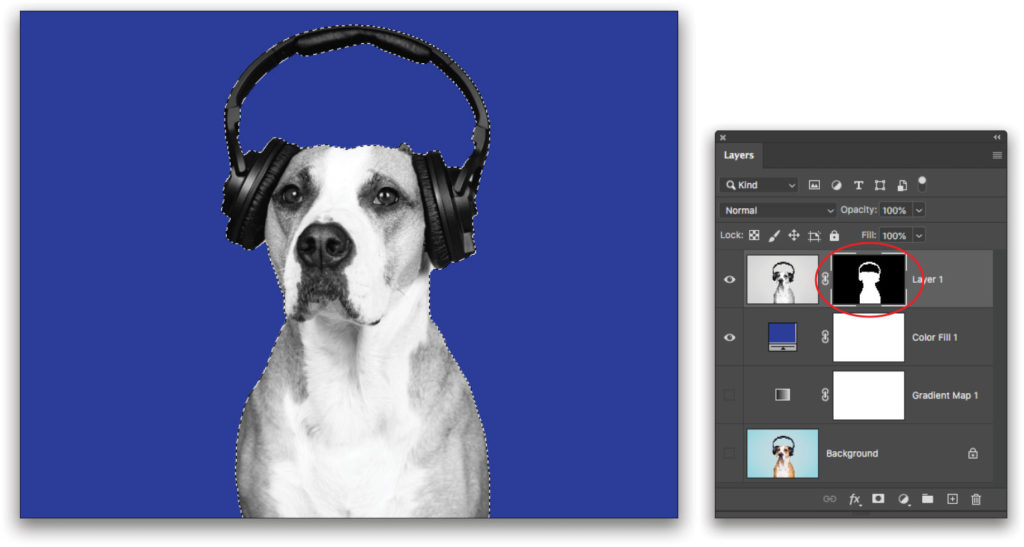
Step Four: Select your subject. There are many ways to do this, but if you have good contrast between the subject and the background, as we do here, try Photoshop’s new Object Selection tool (circled), which lives within the Magic Wand and Quick Selection toolset. Mouse over to your document and click-and-drag to draw a box around the subject. Release your mouse button and Photoshop creates a selection.
Step Five: Next, hide the original background using a layer mask. Here’s how: Click the circle-within-a-square icon at the bottom of the Layers panel (circled), and Photoshop will create a layer mask based on your selection. In the realm of the layer mask, black conceals and white reveals; take a peek at the layer mask thumbnail and you’ll see that the background area is black and the subject is white.
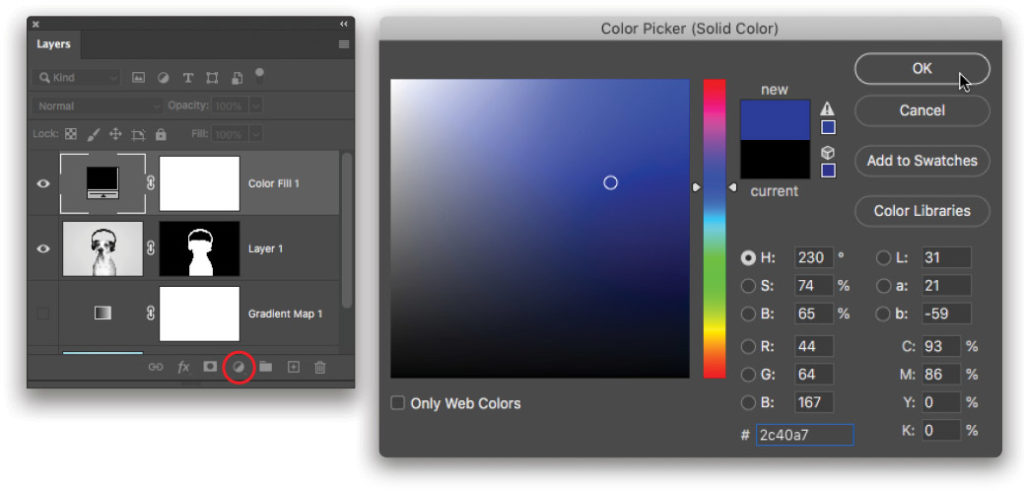
Step Six: Now, we’ll add a new background. Start by clicking the half-black/half-white circle at the bottom of the Layers panel and choosing Solid Color. From the Color Picker that opens, click within the blue range on the vertical bar and then in the large square, choose a fairly bright blue (we used #2c40a7 here). Click OK.
Tip: To experiment with a different color background later, simply double-click the thumbnail of the Solid Color fill layer to reopen the Color Picker.
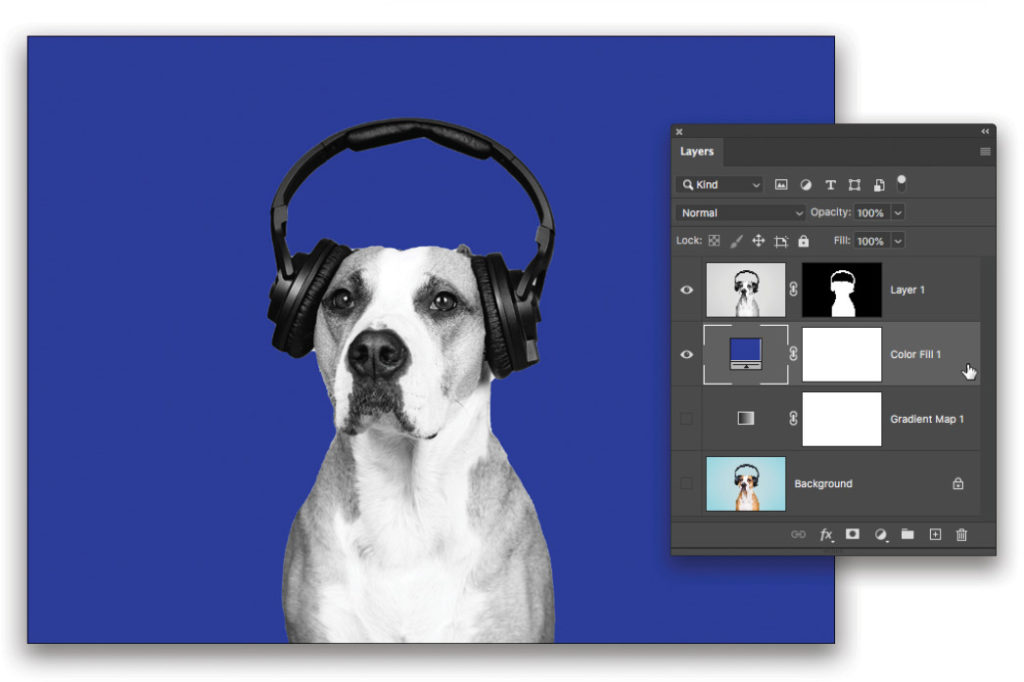
Step Seven: Drag the resulting Color Fill layer beneath the masked subject layer in the Layers panel.
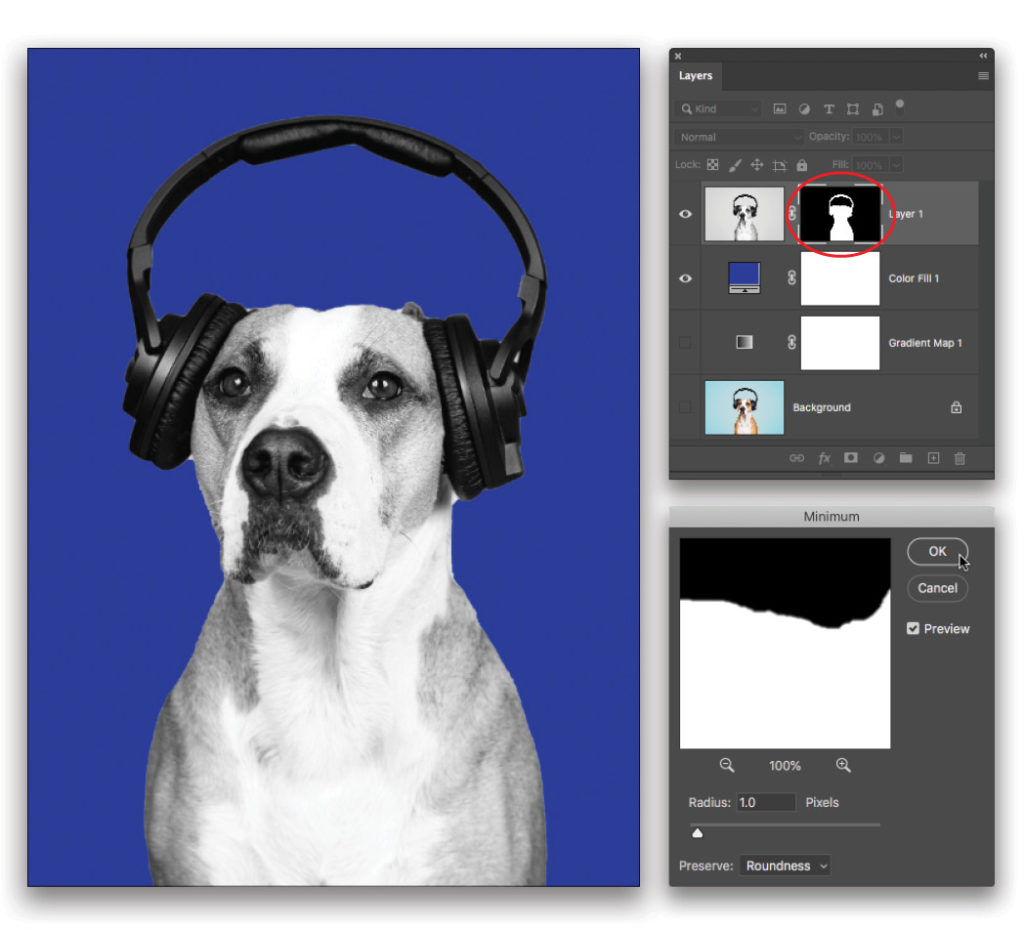
Step Eight: If you see a little of the original background peeking out from around the edges of the subject on its new background, click on the layer mask thumbnail (circled) in the Layers panel to make it active, and choose Filter>Other>Minimum. In the resulting dialog, enter 1 pixel and click OK to tighten the edges of the layer mask.
Tip: To use decimals in this dialog, choose Roundness from the Preserve menu.
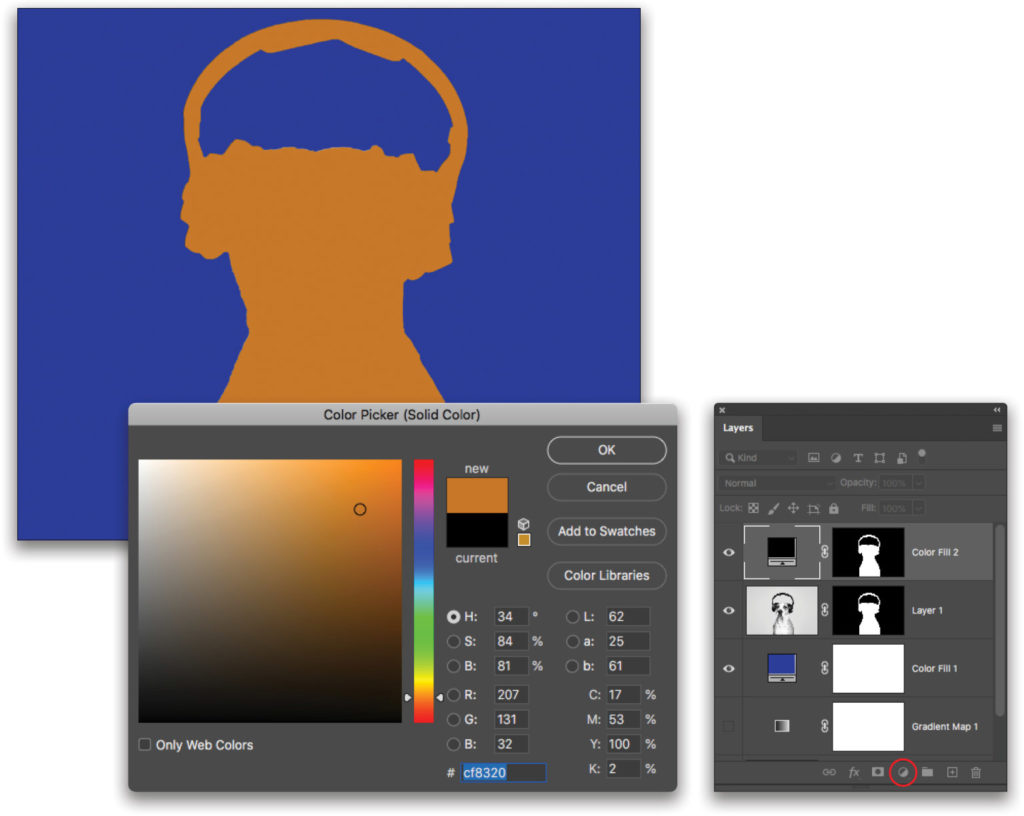
Step Nine: Load the layer mask as a selection by Command-clicking (PC: Ctrl-clicking) the layer mask thumbnail (circled).
Step 10: With the selection active (it looks like marching ants), add another Solid Color fill layer. This time choose a fairly bright orange (#cf8320 was used here) and Photoshop fills the inside of the selection with that color. Click OK.
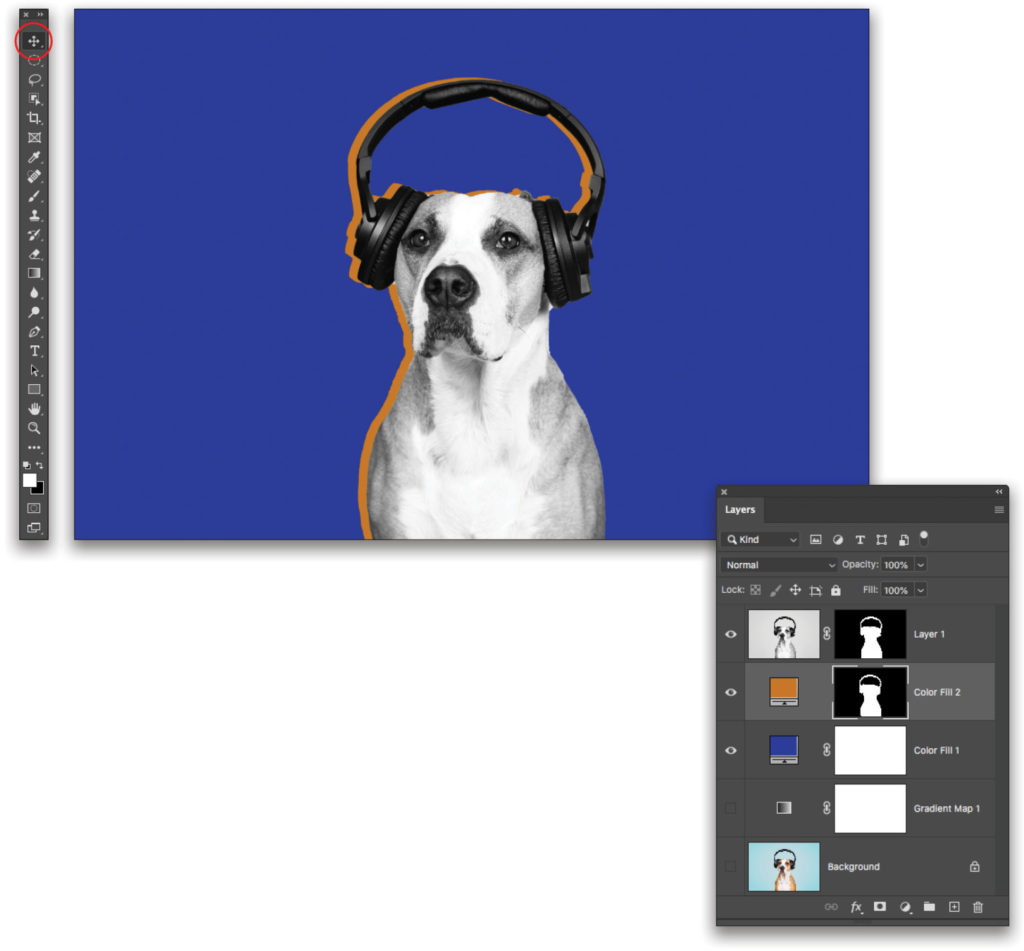
Step 11: Drag the resulting Solid Color fill layer beneath the masked subject layer. To move (offset) the color fill, unlink it from its layer mask by clicking the tiny chain-link icon (circled at left) between the Color Fill layer thumbnail and the mask. Click the layer mask (circled at right) to make it active; you should see little brackets around the mask corners.

Step 12: Press V to grab the Move tool and then tap the Arrow keys on your keyboard to scoot the colored shadow away from its original position, so it’s offset from your subject. Be sure to save the document with your layers intact by choosing File>Save As and picking Photoshop as the document format.
As you can see, this technique is effective for drawing the viewer’s eye to a subject, while incorporating a nice punch of color. Remember, you can easily experiment with the background and shadow colors by double-clicking the Color Fill layer thumbnails (here that’s the blue and orange thumbnails). For extra credit, try this technique on more than one photo in the same Photoshop document to produce multiple subjects with the same treatment. The subjects don’t have to be animal or human; this technique works equally well on inanimate objects. Until next time, may the creative force be with you all.
This article originally published in the March, 2020 issue of Photoshop User magazine.


