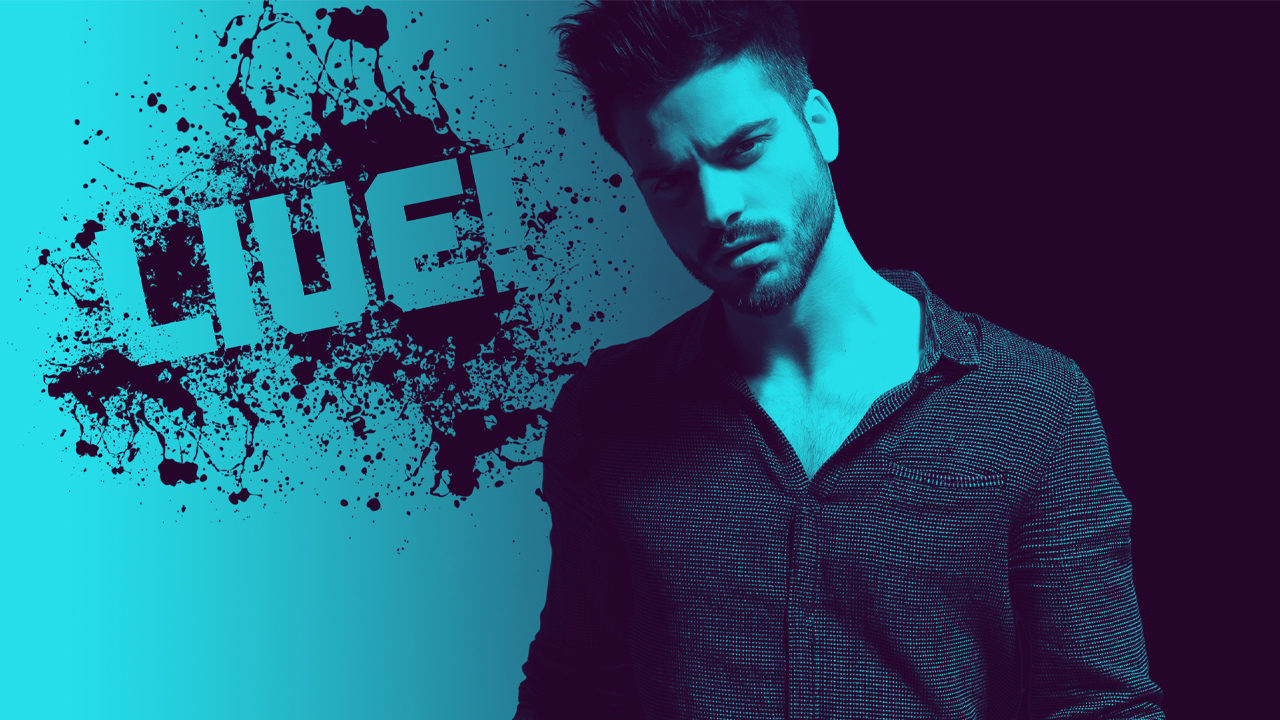
As you know, there are many ways to achieve the same effect in Photoshop, and duotone effects are no exception. One of the most common duotone techniques I’ve seen uses a gradient map, which does produce impressive results, but is somewhat limited as it requires the interaction of colors within the same layer. In this tutorial, I’m going to show you a cool method of breaking out the light and dark tones into separate layers for greater flexibility.
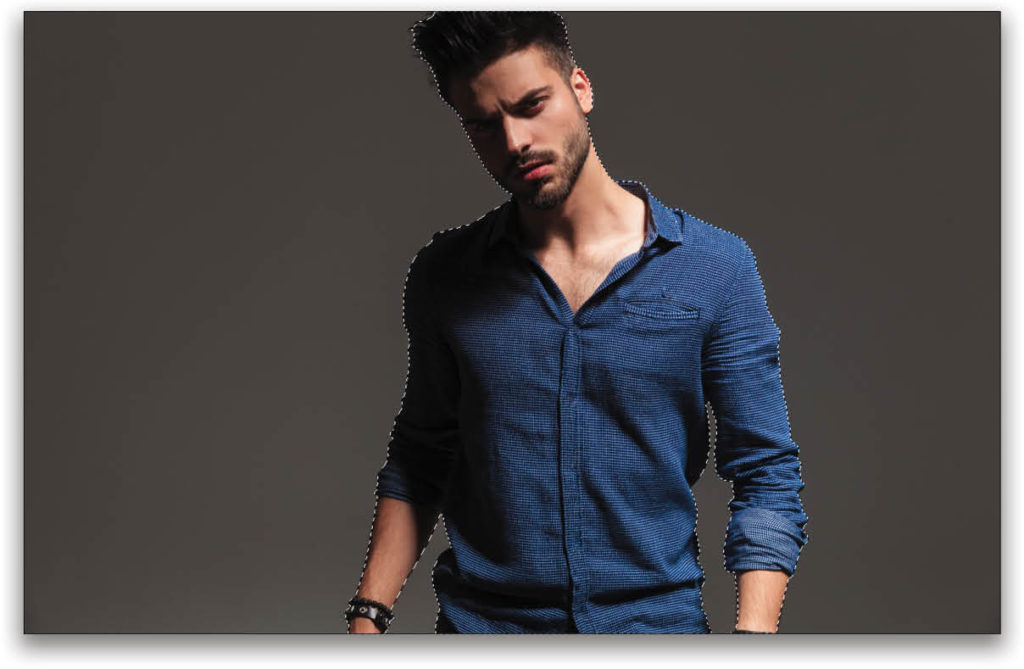
Step One: As usual, we’ll start with a photo. I chose this image because it has a strong light that’s producing harsh shadows on the subject’s left side. Since the effect is going to be created based on the overall brightness of the image, the more contrast the better. Also, this subject is shot on a simple background, and his side that’s in shadows still has a visible edge, making it a little easier to create a selection. If you’d like to download the low-res watermarked version of this image to follow along, click this link, log in with your Adobe ID, and click the Save to Library button. Double-click the image in the Libraries panel (Window>Libraries) to open it in Photoshop. To make it easier to work with the image, increase the resolution of the practice file. (We normally don’t recommend enlarging images, but this is only for practice purposes.) Go to Image>Image Size, turn on the Resample checkbox, select Preserve Details 2.0 from the Resample drop-down menu, set the Width to 2,000 pixels, and click OK.
Once the image is open, go under the Select menu and choose Subject. This will do a really good job of making the initial selection. The simpler the background, the easier it is to define the selection.
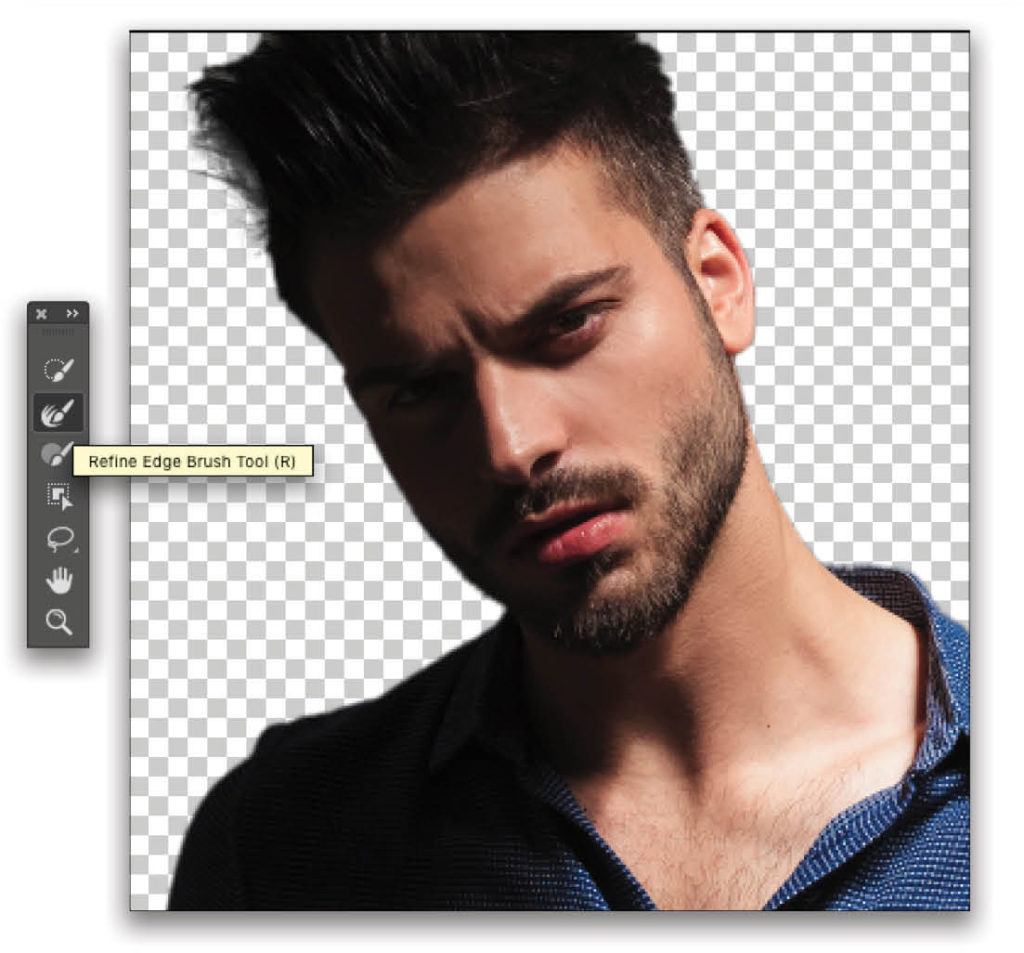
Step Two: Grab any of the selection tools in the Toolbar, go to the Options Bar, and click the Select and Mask button so you can adjust the selection around the subject’s hair.

Step Three: Once the Select and Mask workspace appears, go to the Toolbar on the left and choose the Refine Edge Brush tool (R). We’ll use this to adjust the selection around the soft edges of the subject’s hair. Tap the Right Bracket key (]) on your keyboard to increase the size of the brush to around 60 px. Paint just along the edge of the subject’s hair on both sides, keeping the crosshair in the middle of the brush cursor just outside the edge of the hair. You’ll see the selection adjust as you paint. Look around to see if you have more areas like this in your image, and adjust those areas as needed.
Step Four: Go to the Properties panel and set the Edge Detection Radius to 1 or 2 px. This usually cleans up any minute fringing around the rest of the selection. Then, go down to the Output Settings section and set the Output To drop-down menu to New Layer. Click OK when done.
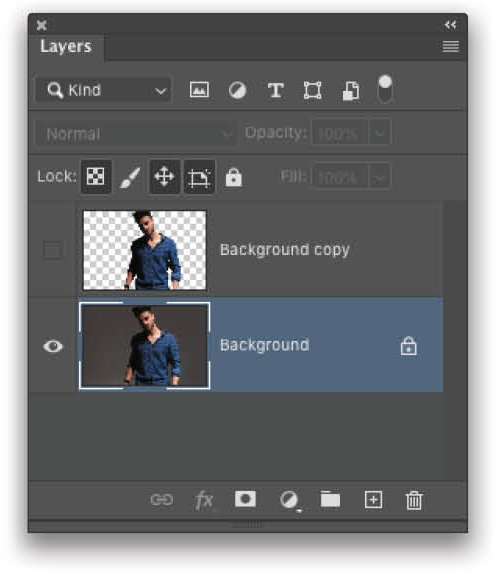
Step Five: In the Layers panel, you’ll see the subject has been extracted and copied to a new layer. Click on the Eye icon to the left of the extracted layer to turn it off. Click on the Background layer to make it the active layer, and click where its Eye icon used to be to make it visible.
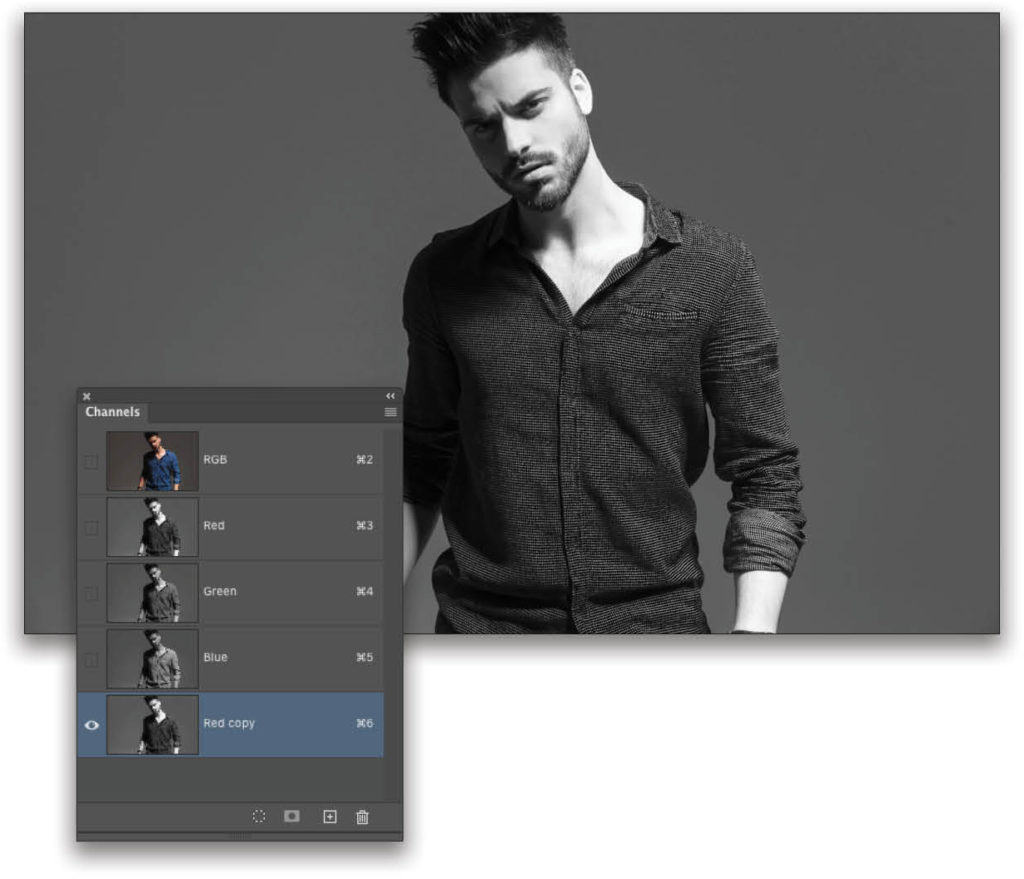
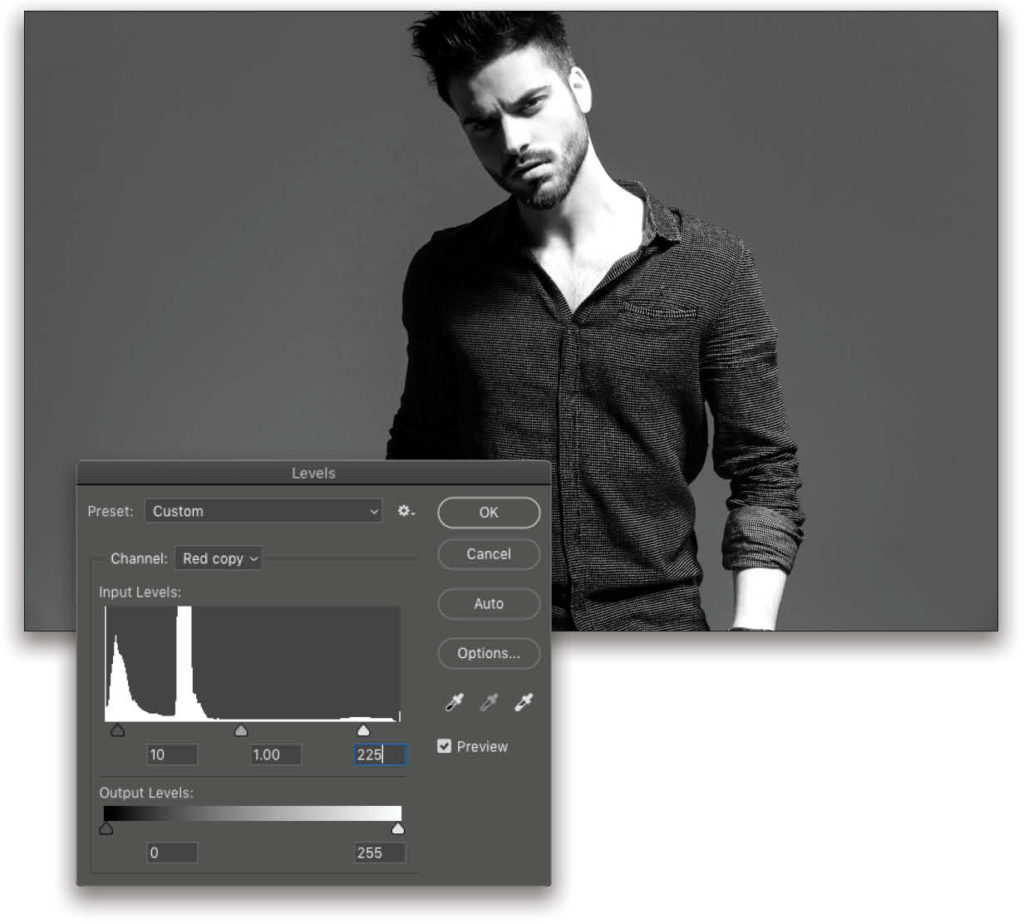
Step Six: Now open the Channels panel (Window>Channels). Although the original image had a good amount of contrast, if you click on the individual color channels, you may find one that has even more contrast and detail. In this case, the Red channel looks perfect as it has very strong highlights and shadows. Make a copy of the Red channel by dragging it to the Create New Channel icon (plus inside a square) at the bottom of the Channels panel.
Step Seven: Let’s do a Levels adjustment to crush the shadows even more. Press Command-L (PC: Ctrl-L) to open the Levels dialog. Here we set the Shadows at 10 and the Highlights to 225 to force the darkest areas to solid black and the brightest areas to solid white.
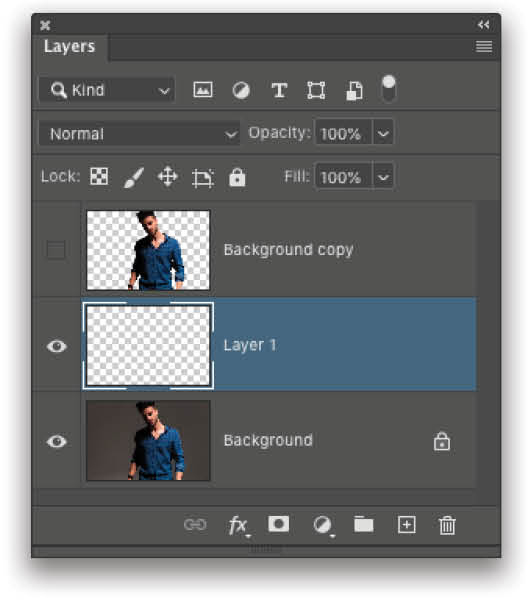
Step Eight: Activate the channel as an active selection by holding down the Command (PC: Ctrl) key and clicking on the Red copy channel thumbnail in the Channels panel. This loads the brightness, or luminosity, of the image as the active selection; however, we need to have the darker areas of the image selected, so go under the Select menu and choose Inverse.
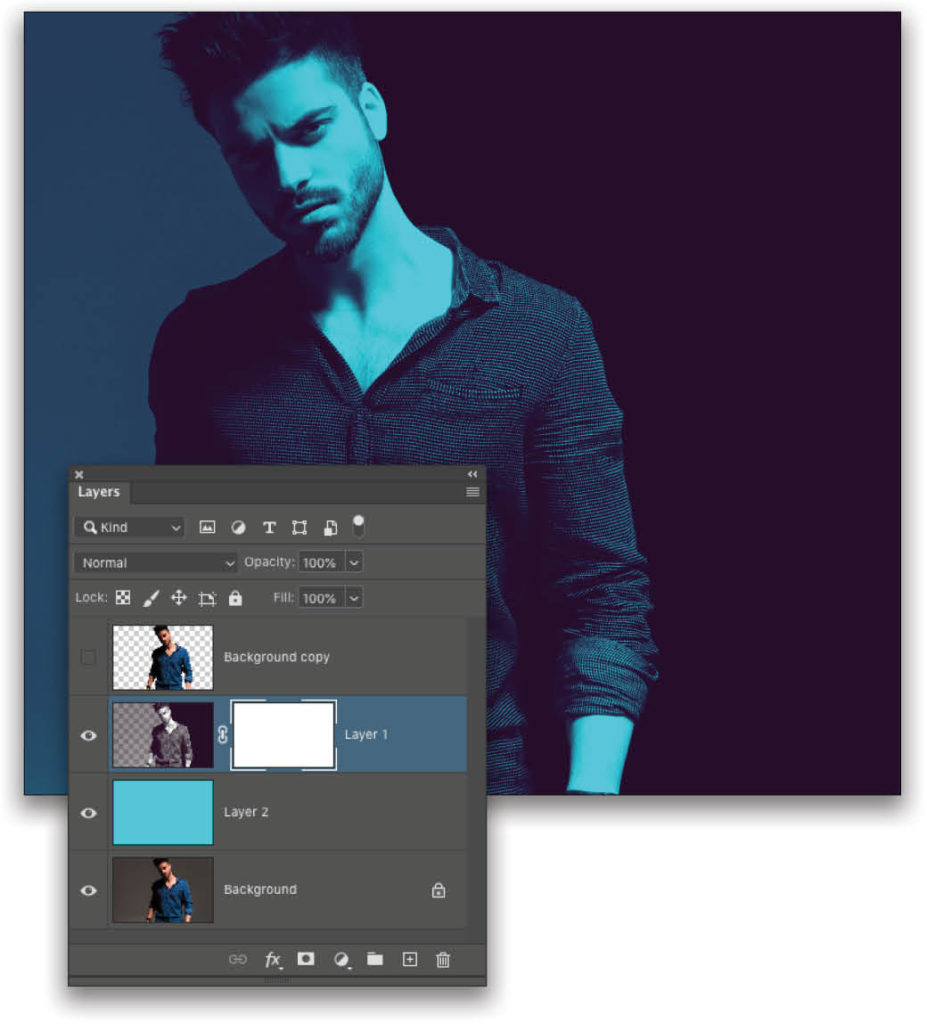
Step Nine: Go back to the Layers panel and create a new blank layer just above the Background layer. (I haven’t forgotten about that layer with the extracted subject; that will come into play in a little bit.) Moving on!
Step 10: Click on the Foreground color swatch near the bottom of the Toolbar, and select a color in the Color Picker. Here we’ve chosen a dark purple, which we’ll use to fill the shadow areas of the image. Click OK to close the Color Picker.
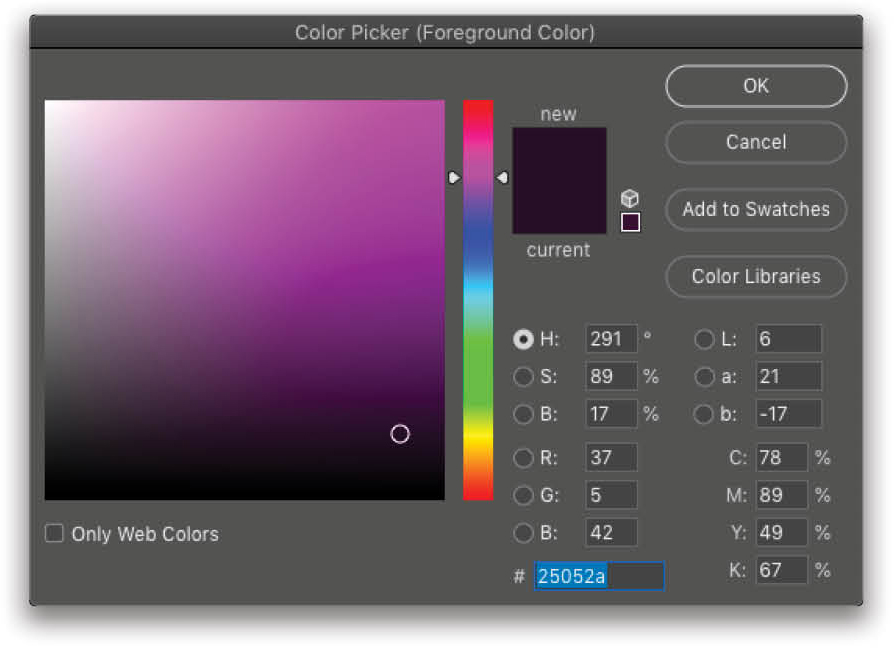
Step 11: Is your selection still active? If not, activate it again in the Channels panel, and then press Option-Delete (PC: Alt-Backspace) to fill the selection with the dark purple. This color effect over the original image already has an interesting result. (Trying different colors is something worth experimenting with.) Press Command-D (PC: Ctrl-D) to deselect.
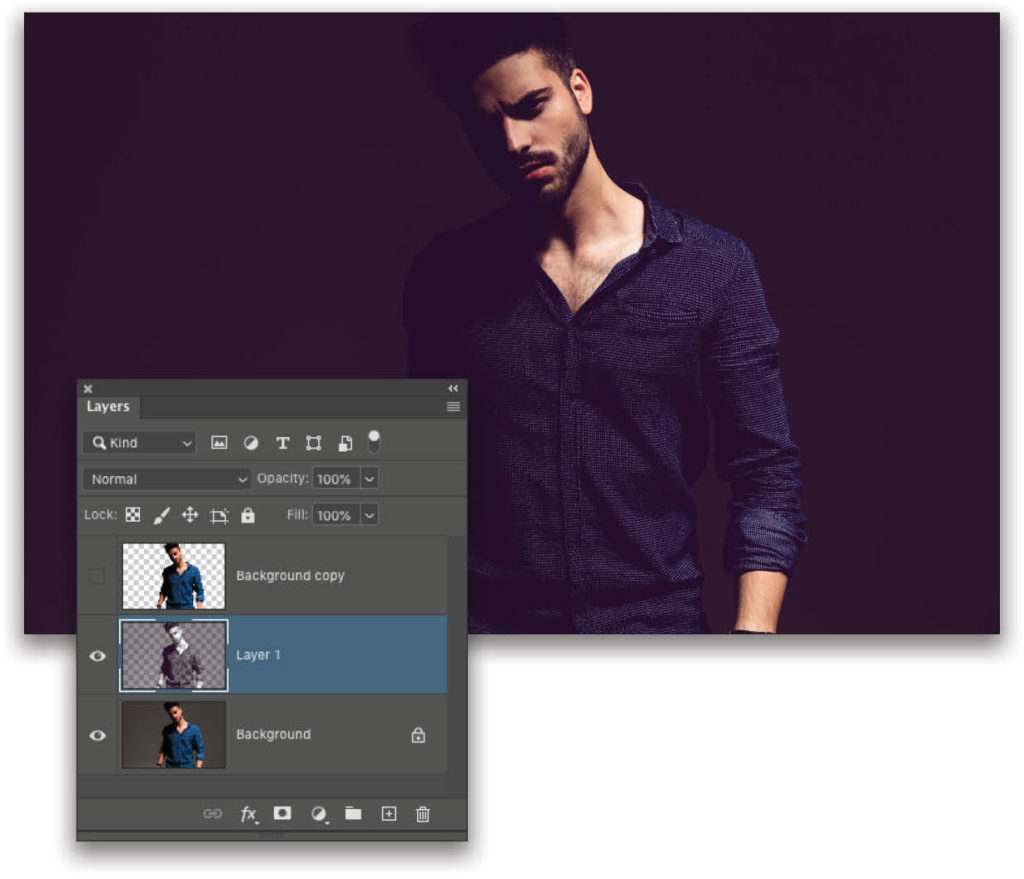
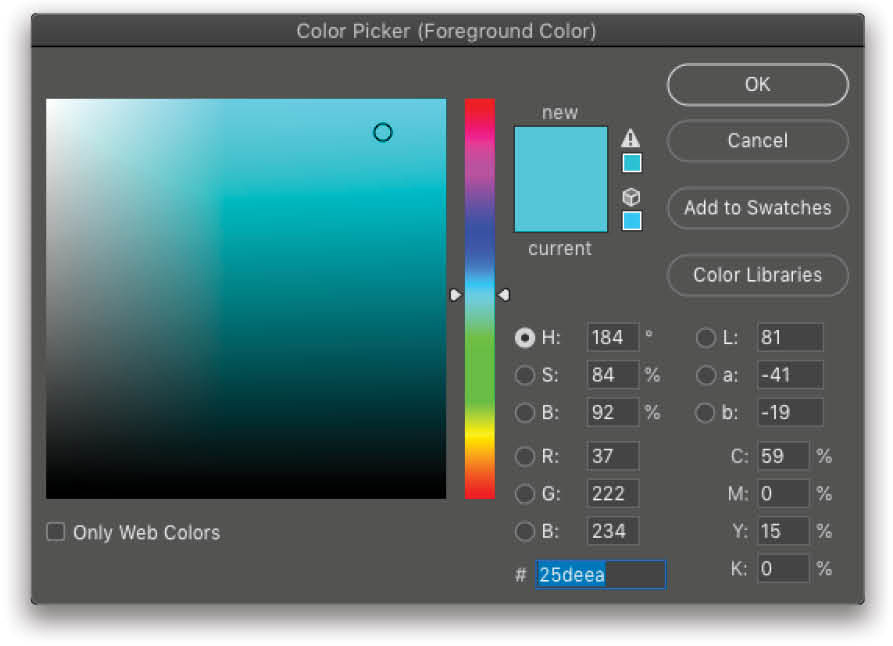
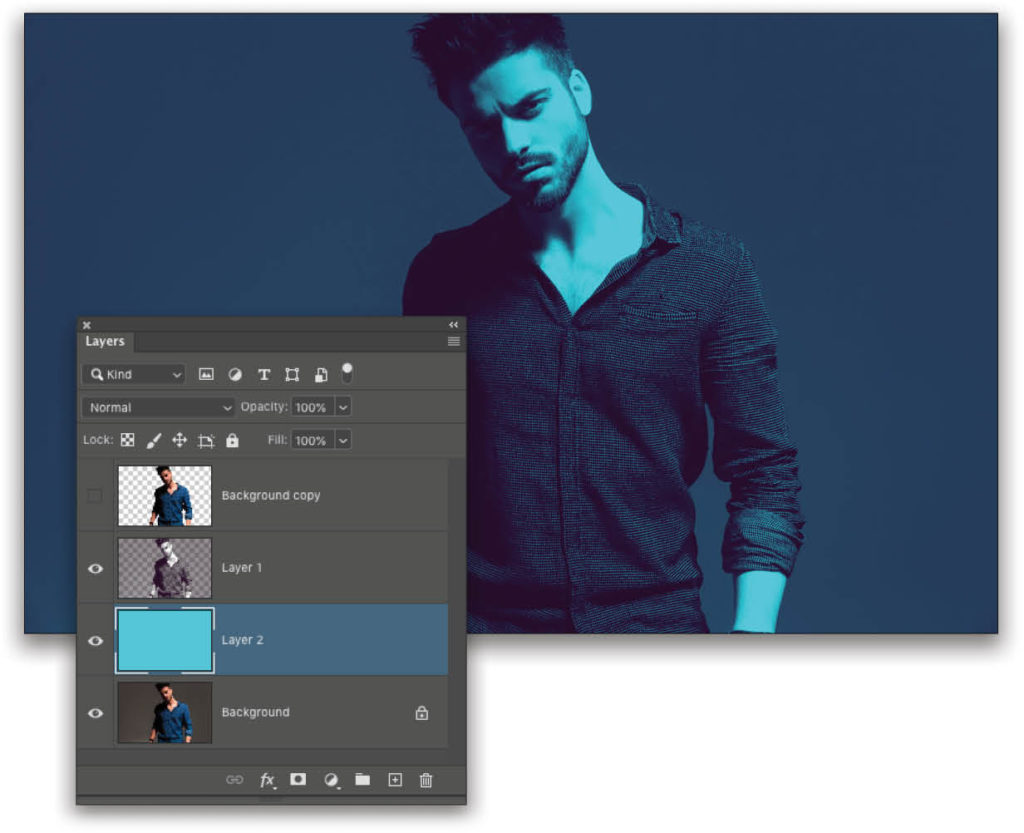
Step 12: Create another new blank layer in the Layers panel and place it under the dark-purple filled layer. Again click on the Foreground color swatch in the Toolbar, but this time choose a lighter color for the highlights. We’re using the cyan mixture you see here. Click OK.
Step 13: Fill the new layer with this color by pressing Option-Delete (PC: Alt-Backspace). Now you have a duotone effect but with the light and dark tones separated into different layers, allowing you to change each color easily for a myriad of combinations. So again, experiment with various colors.
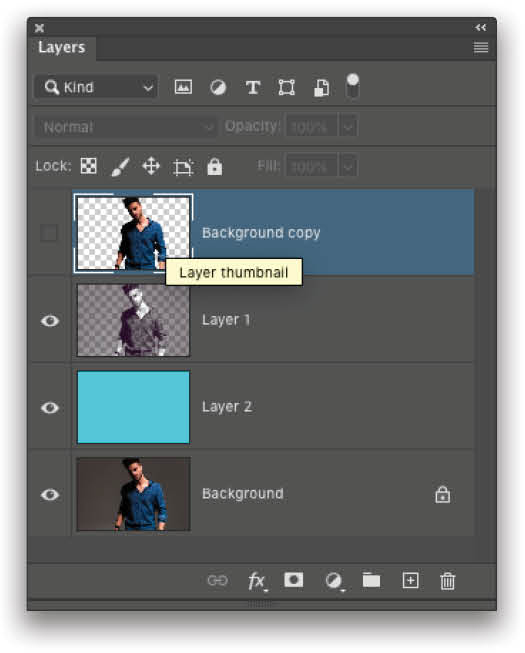
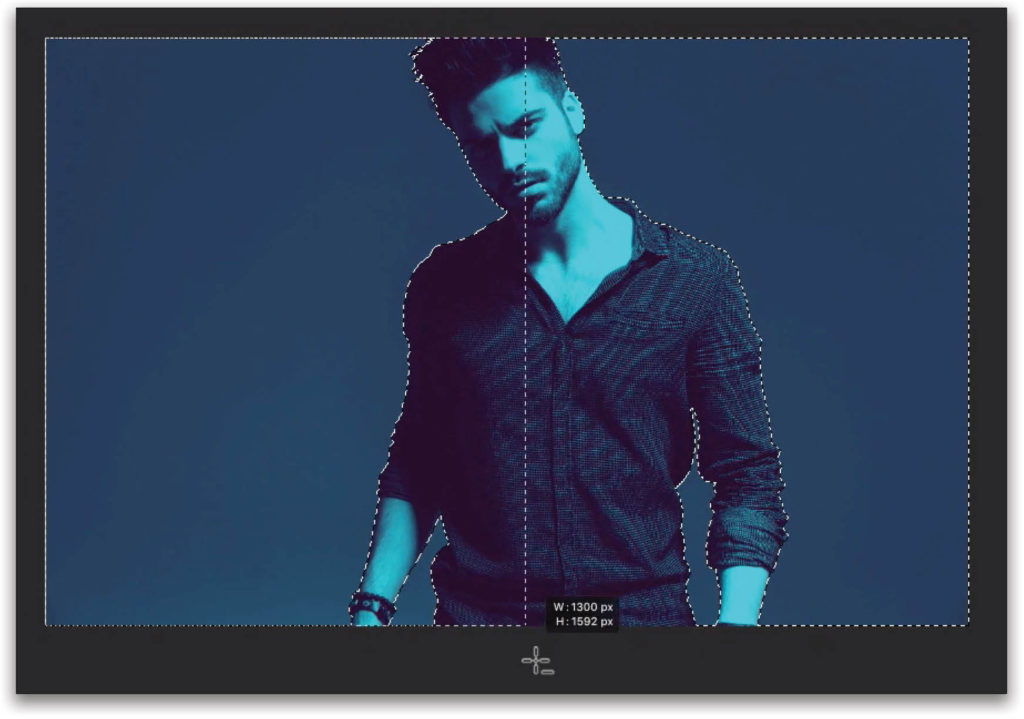
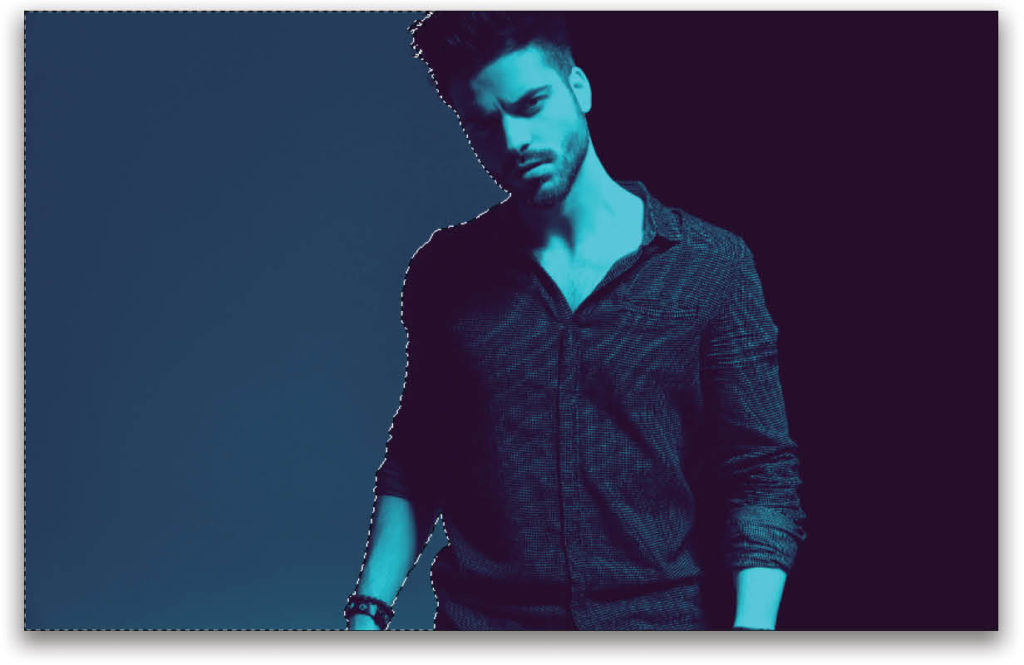
Step 14: At this stage, you could call this a finished effect, but let’s take it a bit further. Remember how we started by extracting the main subject? In the Layers panel, hold down the Command (PC: Ctrl) key and click on the extracted layer’s thumbnail to load the shape of the subject as an active selection. You don’t need to turn the layer back on to do this.
Step 15: Go under the Select menu and again choose Inverse to flip the selection to the background around the subject. We want to remove the selection to the left of the subject, so switch to the Rectangular Marquee tool (M), hold down the Option (PC: Alt) key, and click-and-drag around the area on the left as shown here. When you release the mouse button, the selection should only appear around the background area to the right of the subject.
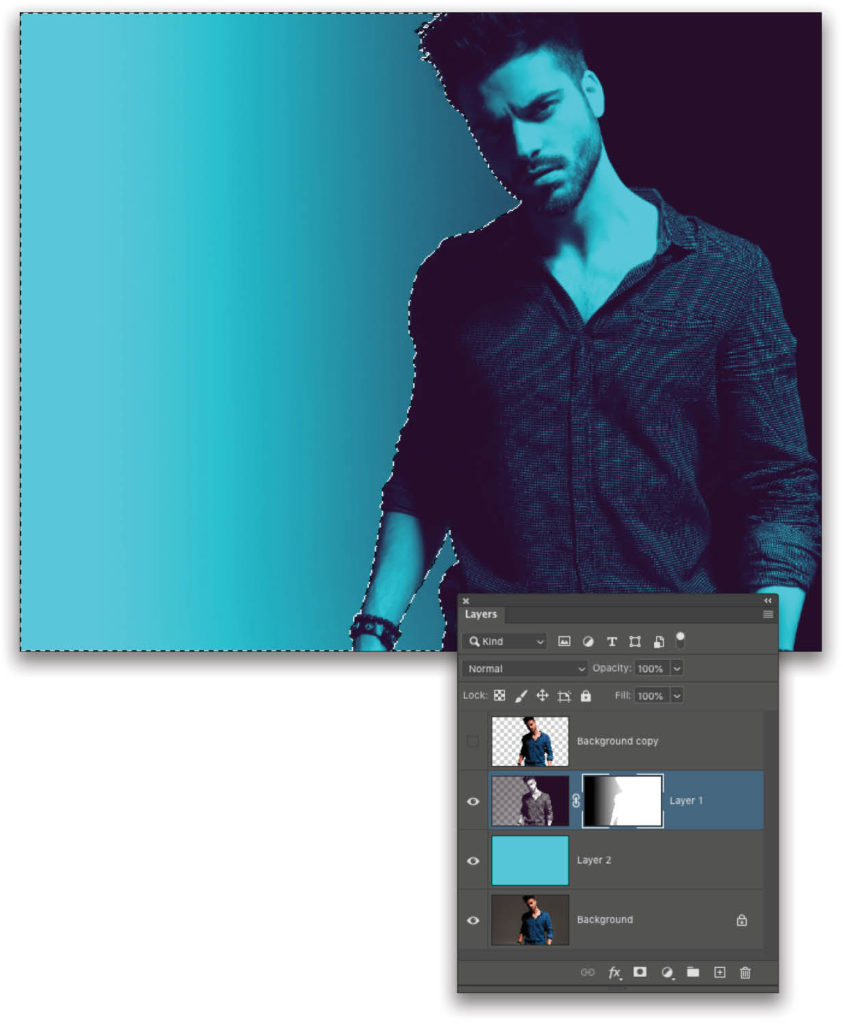
Step 16: Back in the Layers panel, click on the shadow layer that we filled with the dark purple (Layer 1) to make it active. Set the Foreground color to the same dark purple we used earlier, then press Option-Delete (PC: Alt-Backspace) to fill the selection with it. Since we applied this to the lighter side of the subject, it adds more contrast and dimension even though it’s a solid color. Press Command-D (PC: Ctrl-D) to deselect. Before we go to the next step, click the Add Layer Mask icon (circle in a square) at the bottom of the Layers panel to add a layer mask to this layer.
Step 17: Now repeat Steps 14 and 15 but this time remove the selection on the right side of the image. Before you use the Rectangular Marquee tool to deselect the right side, remember to inverse the selection to the background after you select the subject.
Step 18: Select the Gradient tool (G); click on the gradient thumbnail preview in the Options Bar to open the Gradient Editor; select the Black, White preset (the third one in the top row); and click OK. Starting between the left side of the image and the subject, hold the Shift key as you drag to the right to near the center of the subject. This will fade the background on this side, revealing more of the lighter, cyan background. Press Command-D (PC: Ctrl-D) to deselect.
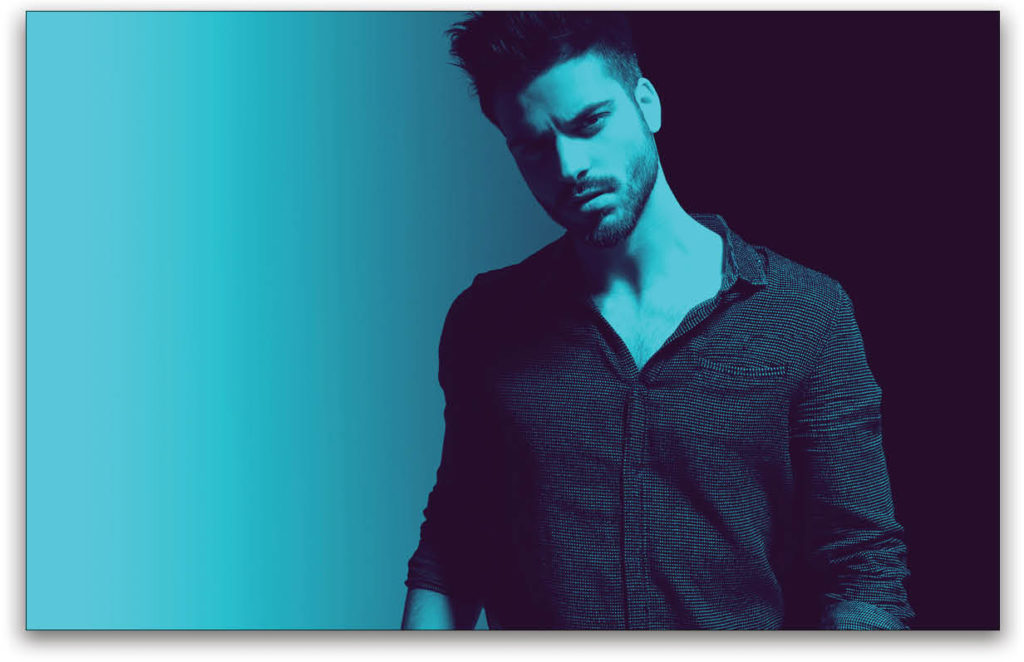
Step 19: To finish the composition, we scaled this layer up to make the subject a bit bigger. Just press Command-T (PC: Ctrl-T) for Free Transform, hold the Option (PC: Alt) key, and click-and-drag one of the corner points outward. Press Enter to commit the transformation.
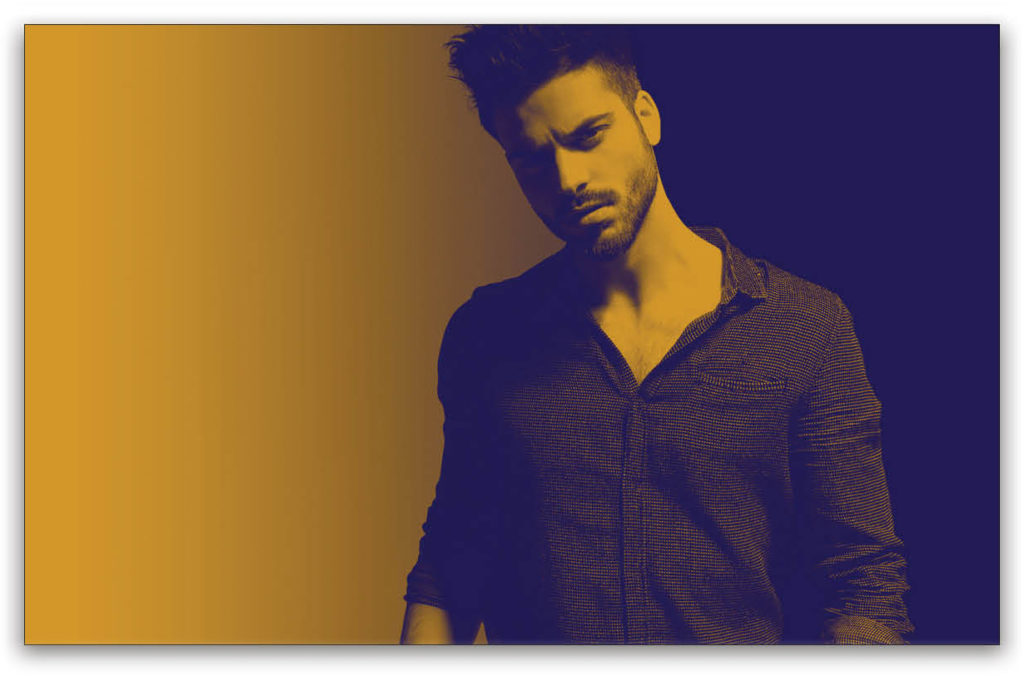
Step 20: Here’s another color variation. Just click on the first icon to the right of the word “Lock” in the Layers panel to lock the transparency of the shadow layer, and then click on its layer thumbnail to make it active and not the layer mask. Fill the layer with a new, dark color, and then apply a new color to the light base color layer below. You can play with any combination of colors to suit your needs.
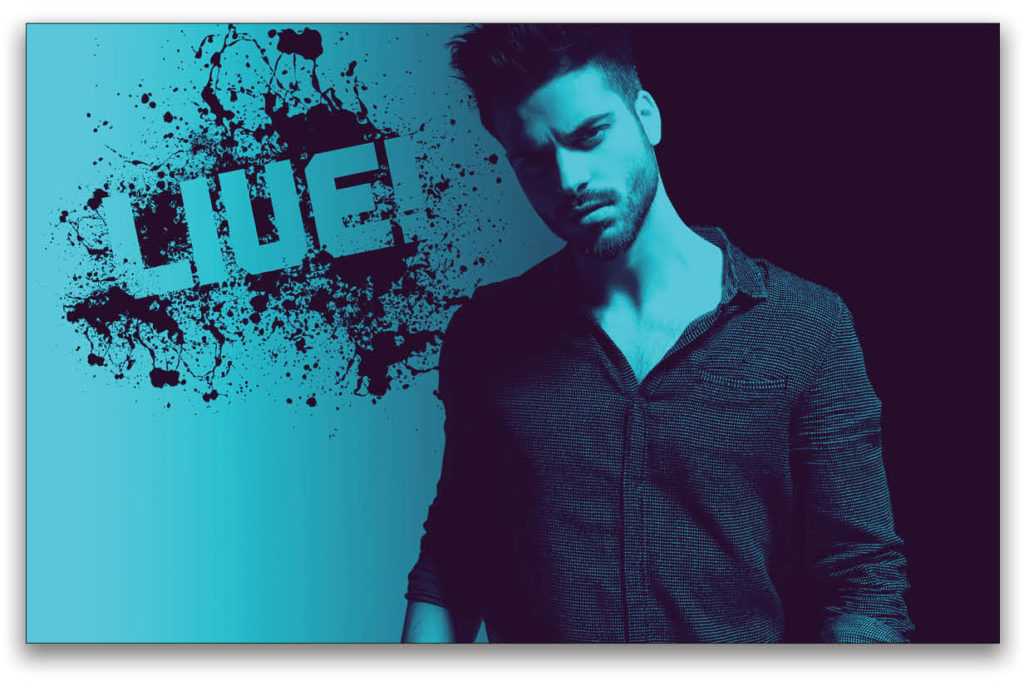
At this point, you can say that it’s done—or can you? Well, if you’re just going for a cool photo effect then yes, we’re pretty much done, but for you designers out there, I know you’re aching to add some text, right? Check out this short video for adding a simple splatter text effect! (Click here if you want to download the custom splatter brush that I use in the video.)
This article originally published in the June/July, 2020 issue of Photoshop User magazine.
![Creating Reflections in Photoshop [Flashback Friday!]](https://insider.kelbyone.com/wp-content/uploads/2017/05/FeaturedIMage-1-440x264.png)