By Serge Ramelli
Originally published in Lightroom Magazine, Issue 26
When you travel all the way from Los Angeles to Paris, followed by a five-hour train ride to Geneva, and then a three-hour drive to Lauterbrunnen, Switzerland, with the sole purpose of taking photos of the Valley of the 72 Waterfalls, but the weather turns out really bad with lots of clouds and rain, you don’t feel very happy! That’s when you need Lightroom to come to the rescue. I discovered a while ago that bad weather photos could make stunning black-and-white or special-look type images with just a little work in Lightroom.
Step One:
The first thing to do after you come back from shooting is to go through all your photos in Lightroom and give a one-star rating to the ones that have the most potential, making sure they have nice composition, decent light, good exposure, etc. To rate an image, click on it in Grid view (G) in the Library module, and press the 1 key on your keyboard to give it a one-star rating. Then, go through the one-star images and decide which one you want to retouch first. Press D to take that image into the Develop module.
Step Two:
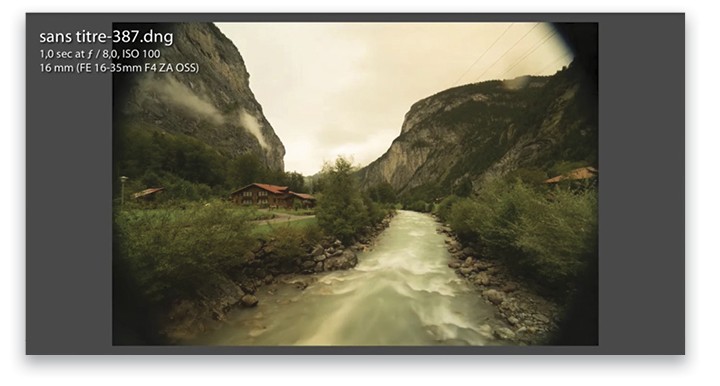
When I was shooting these images, the sky was really white, which can make a photo very boring. So for this shoot, I used an ND (neutral-density) variable filter and added a polarizer filter on top of it to give the sky a warmer feeling. This works great for white skies. In this case, I picked an underexposed photo in Lightroom to make sure there were some details in the sky.

Step Three:
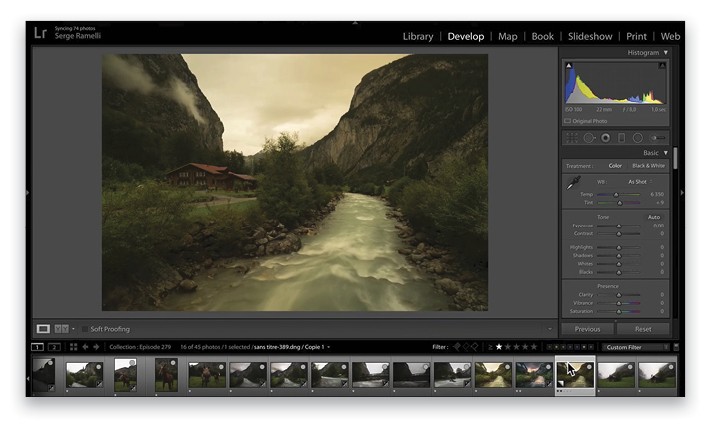
Once you choose the photo you want to work with, start with a basic workflow. Here’s mine:
In the Basic panel, I opened up the Shadows to +100 and brought down the Highlights to –100. I then set Blacks to –45, Whites to +36, and Clarity to –18 to decrease the midtone contrast.
Step Four:
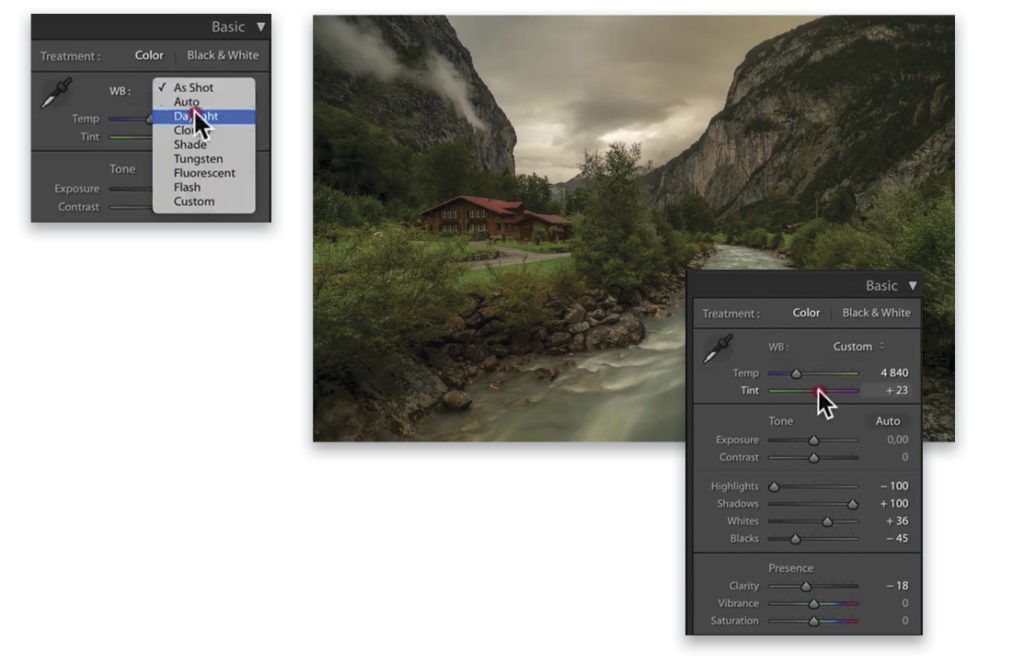
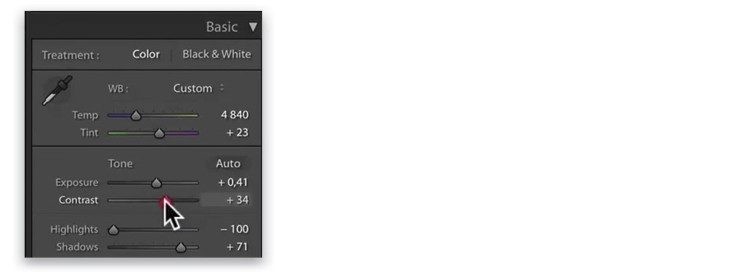
Next, select the appropriate white balance for your situation. For this photo, I chose Daylight from the WB drop-down menu in the Basic panel, then dragged the Temp slider left to 4840 to make the image bluer, which goes well with the water. I also added a bit of magenta by sliding the Tint to +23 because I’m addicted to magenta!
Step Five:
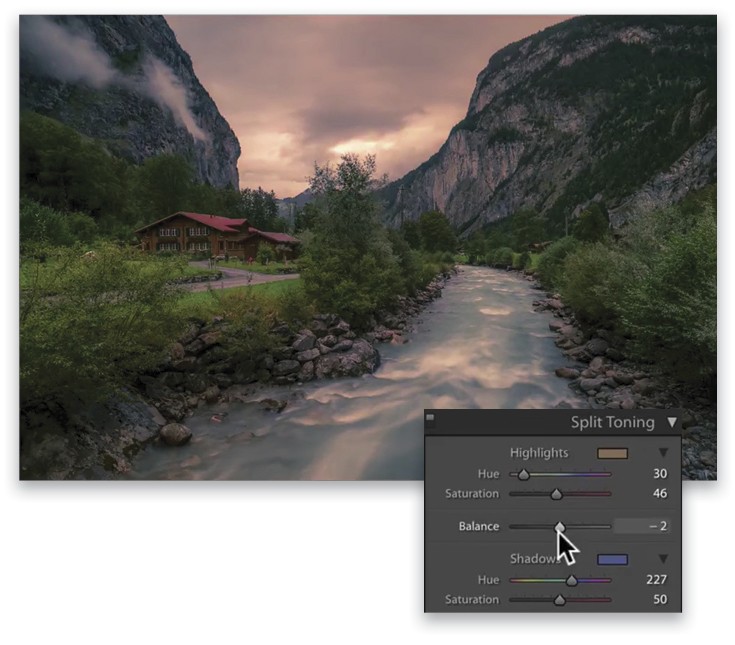
To give a stylistic look to a photo, go into the Split Toning panel. I selected a warm color for the Highlights by setting the Hue to 30. You won’t see a change in your image until you raise the Saturation. In this example, I set the Saturation to 46. For the Shadows, I selected a blue color by setting the Hue to 227 and the Saturation to 50. (I like this contrast; it’s the “Hollywood look”!) Now you can use the Balance slider to fine-tune the split-toning effect. If you move the Balance slider to the left, it will favor the shadow tones, and if you drag it to the right, it will influence the highlights.
Step Six:
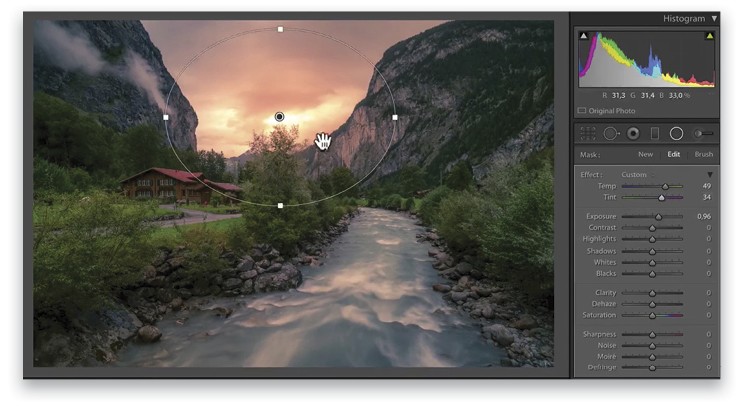
This is a good base for this photo, so now I’m ready to personalize it. You can play with different tools in Lightroom for your own photos. For this image, I want to re-create the sun behind the clouds, so I’ll use the Radial Filter (Shift-M) for this. After clicking-and-dragging where I want the Radial Filter to appear, I checked on Invert Mask, set the Feather to 100, and added some yellow by setting the Temp to 49 and some magenta by setting the Tint to 34. [For more on the Radial Filter, see page 10.—Ed.]

Step Seven:
You can use the Graduated Filter (M) to darken skies in your images. Just start dragging where you want the effect to be at 100%, and stop dragging where you want it to be 0%. Double-click the word “Effect” at the top left of the Graduated Filter panel so all the settings are at 0, and then lower the Exposure to –1.21. (Graduated Filter tips: Drag the outer lines to expand the effect, drag the middle line to rotate it, and drag the dot in the center to reposition it.)
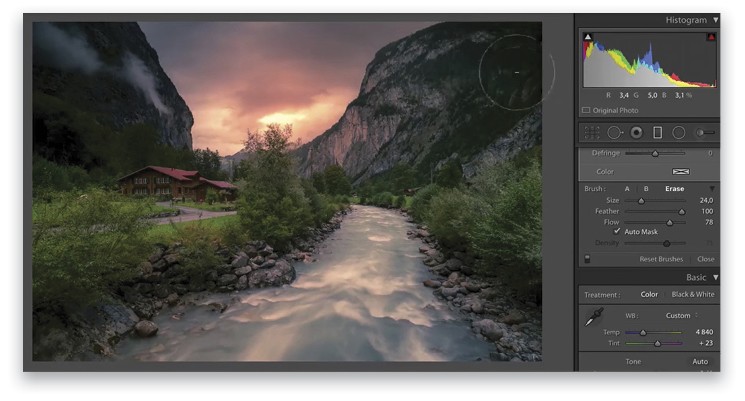
Now the sky is darker but it also affects other parts of the photo, such as the mountain on the right, which isn’t nice. While using the Graduated Filter, you’ll see the word “Brush” at the top-right corner of the panel. Click on it to reveal the Brush options below the Graduated Filter panel. Turn on Auto Mask and set both the Flow and Density of your brush to around 80. Press-and-hold the Option (PC: Alt) key, and the brush will now erase the effect of the Graduated Filter wherever you paint.

Step Eight:
You can add another Graduated Filter by clicking on the word “New” at the top of the panel. This time, I dragged from the bottom of the photo and lowered the Exposure to –1.02.
Step Nine:
At this point, take a step back to see how you like the result. I often go back and change a few of the previous settings as I’m processing my images. For this image, I added some Contrast (+34) in the Basic panel. You can go back to the Split Toning panel if you think it’s too unnatural, and you can lower the Saturation of the blue and magenta. You can also play around with the Radial Filter and make it to your taste.

Step 10:
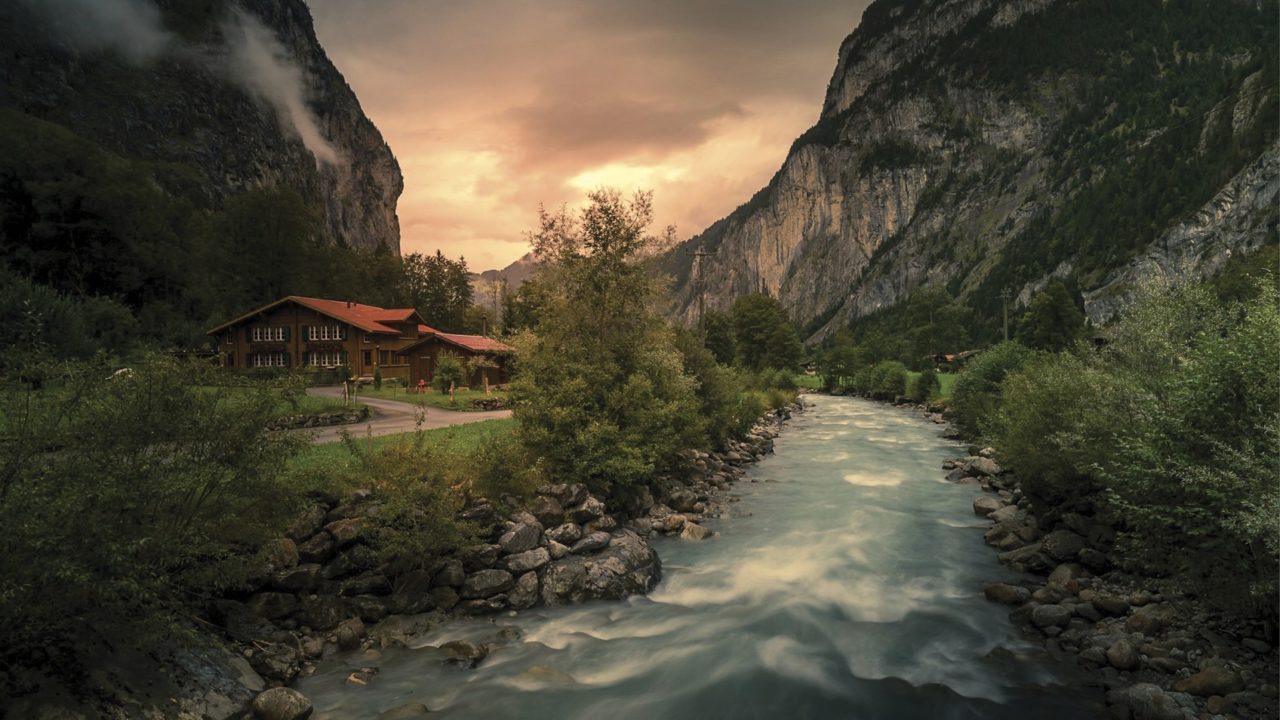
If you’re happy with the final retouch, you can make it into a preset to use on other photos taken in bad weather. Just click on the plus (+) icon at the top right of the Preset panel to create a new Develop preset. Presets are always great to give you a base, and it can bring you places you’d never have been without this look! Here’s the final image.


