![Creating Reflections in Photoshop [Flashback Friday!]](https://insider.kelbyone.com/wp-content/uploads/2017/05/FeaturedIMage-1-1021x640.png)
Here’s an Old School technique that is still extremely useful today, inspired by Scott Kelby’s 2004 book, Photoshop Classic Effects: The Essential Effects Every User Needs to Know, and updated for Photoshop CC 2017.
Step One:
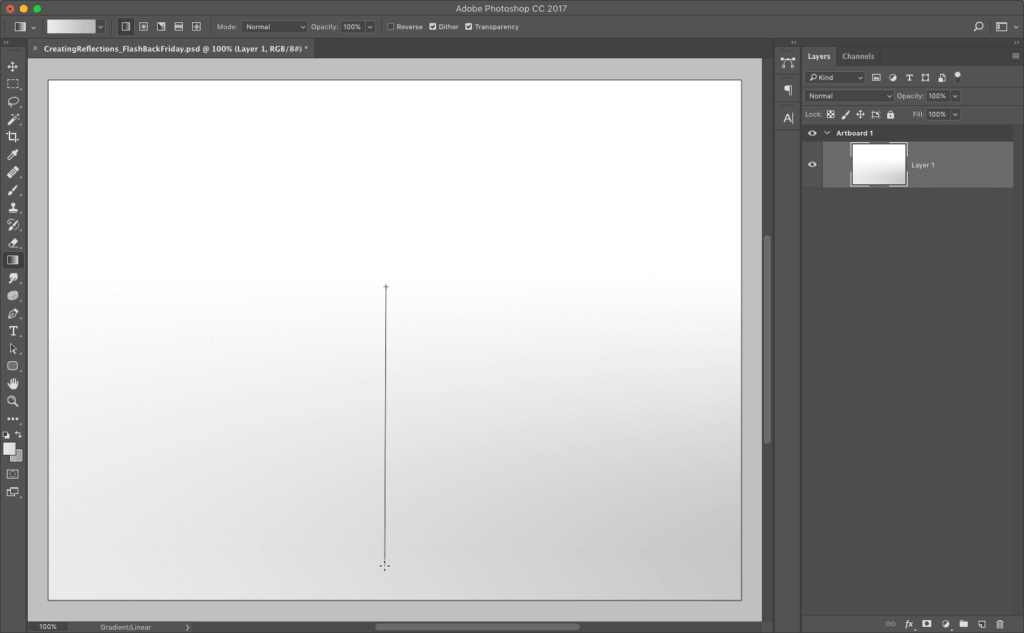
Open a new document (File>New) using the “Web Minimum” preset of 1024×768 pixels at 72 ppi.

Click on the Foreground color swatch in the Toolbox and choose a very light, almost white, gray color. Then click on the background color swatch and choose a light to middle grey. Choose the very first gradient (the Foreground to Background gradient) in the Picker. Click the linear Gradient icon in the Options Bar. Click about one-third from the top in the center of your document and drag straight down to the bottom of the document to add a slight gradient to Layer 1.
Step Two:
Open and place the image you want to add a reflection to. Make sue your object is on its own layer (silhouetted on a transparent background). Here, you’ll see the nail polish bottles have been left as a Smart Object, which is good practice when sizing images down.
Step Three:
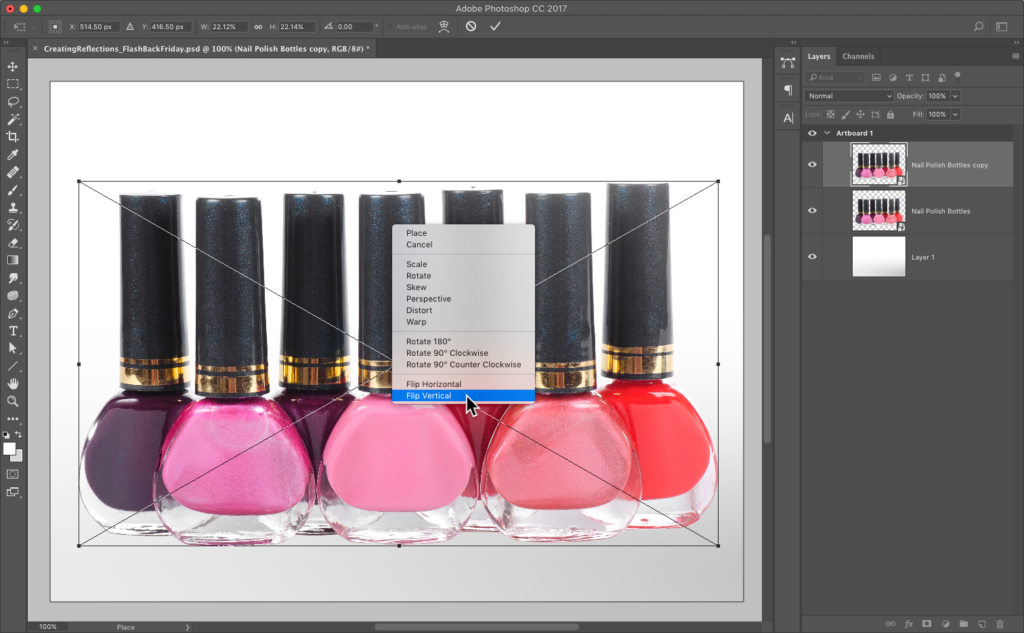
To create the reflection, start by pressing Command-J (PC: Control-J) to duplicate the image layer. Then, press Command-T (PC: Control-T) to bring up the Free Transform command. When the Free Transform bounding box appears, Control-click within the bounding box and a contextual menu will appear. Choose Flip Vertical (as shown here), then press Return (PC: Enter) to lock in your transformation.
Step Four:
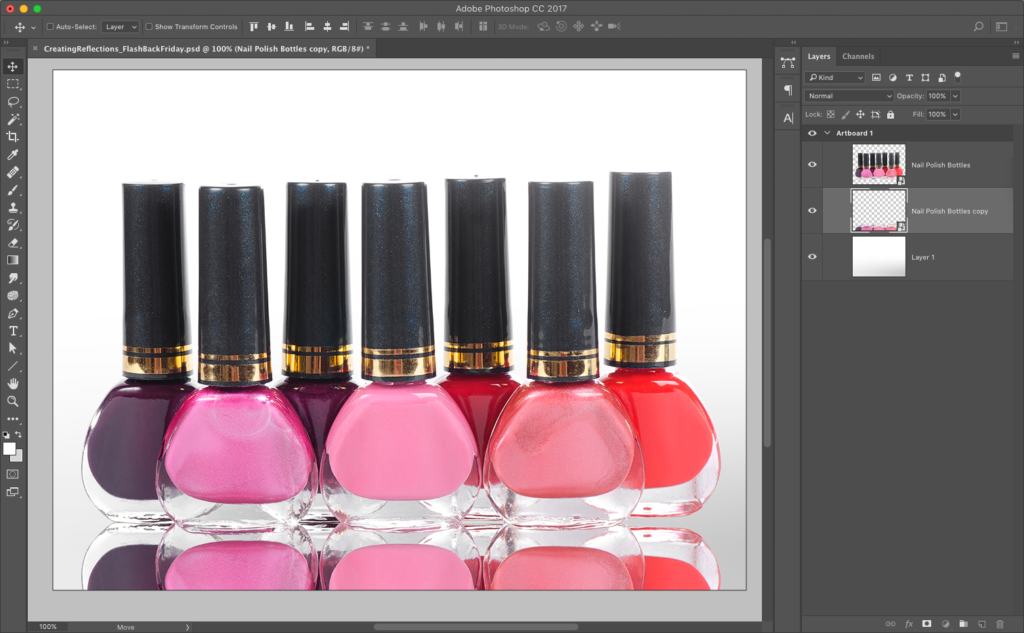
Now, using the Move tool, hold the Shift key and click on the flipped image, and drag straight down (the Shift key will keep the flipped bottles in the same horizontal position as you drag). Keep dragging straight down until the bottoms of the nail polish bottles meet. In the Layers panel, drag your flipped reflection layer below your original image layer.
Note:
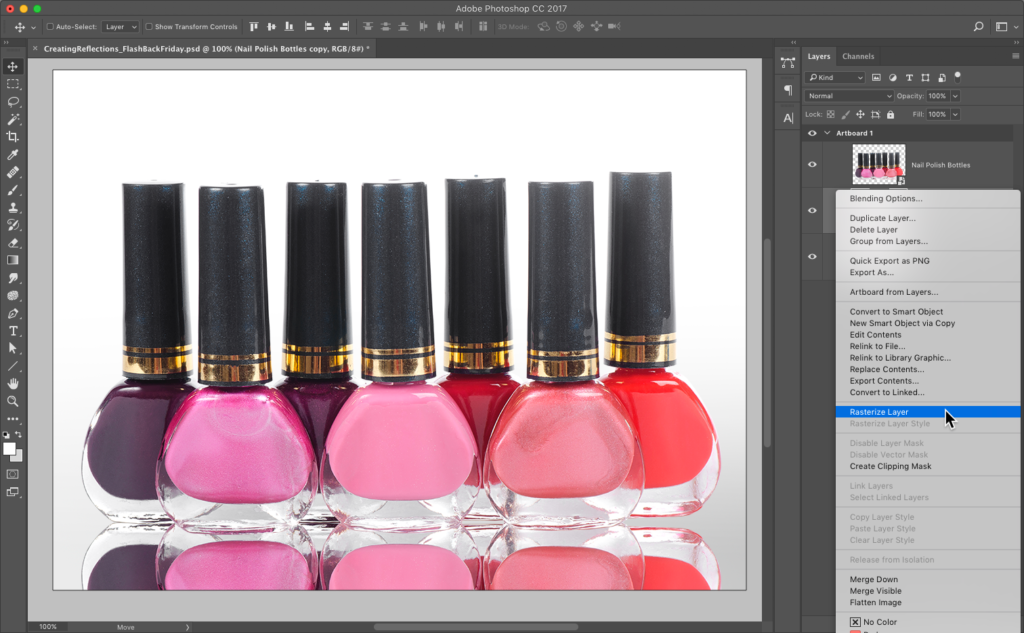
In this particular image, the bottles don’t align completely, so we’ll have to make a couple of adjustments that are not usually required for this technique. Since our image and reflection layers were placed as Smart Objects, the first thing we need to do to fix the little gap on the right is to rasterize the Smart Object. To do that, simply right-click (or Control-click) directly on the reflection layer (“Nail Polish Bottles copy”) in the Layers panel, bringing up a contextual menu, and select Rasterize Layer, as shown below.
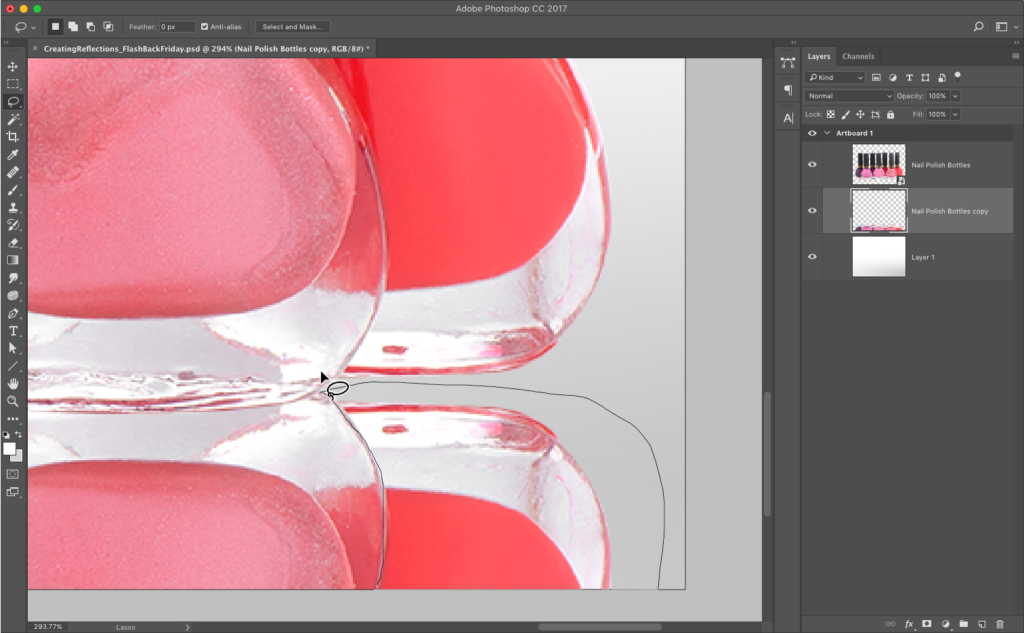
Zoom in and make a selection around the part of the reflection that needs to be nudged up. The reflection won’t really show detail, so it doesn’t need to be a super-perfect selection.
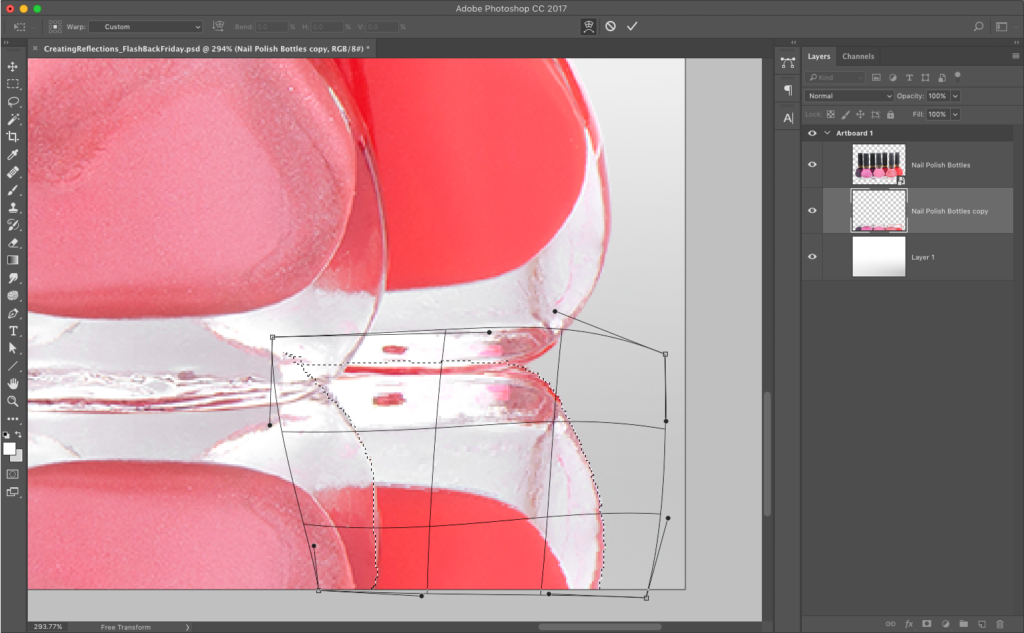
Next, go to the Edit menu and choose Transform>Warp, and noodle (that’s a technical term) with the area using small tugs and pushes until the gap is eliminated, taking care to keep the shape similar to the original shape. Hit Enter (PC: Return) to lock in this transformation.
Step Five:
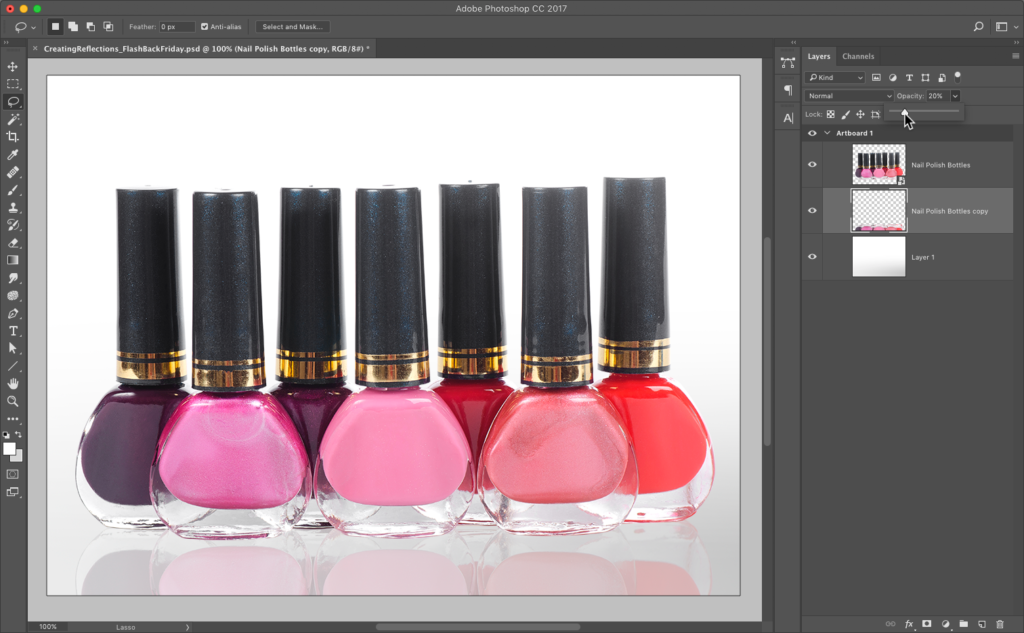
Ok, back to business. To make this mirror-like reflection look more realistic, go to the Layers panel and lower the Opacity of the flipped layer to 20%, as shown here.
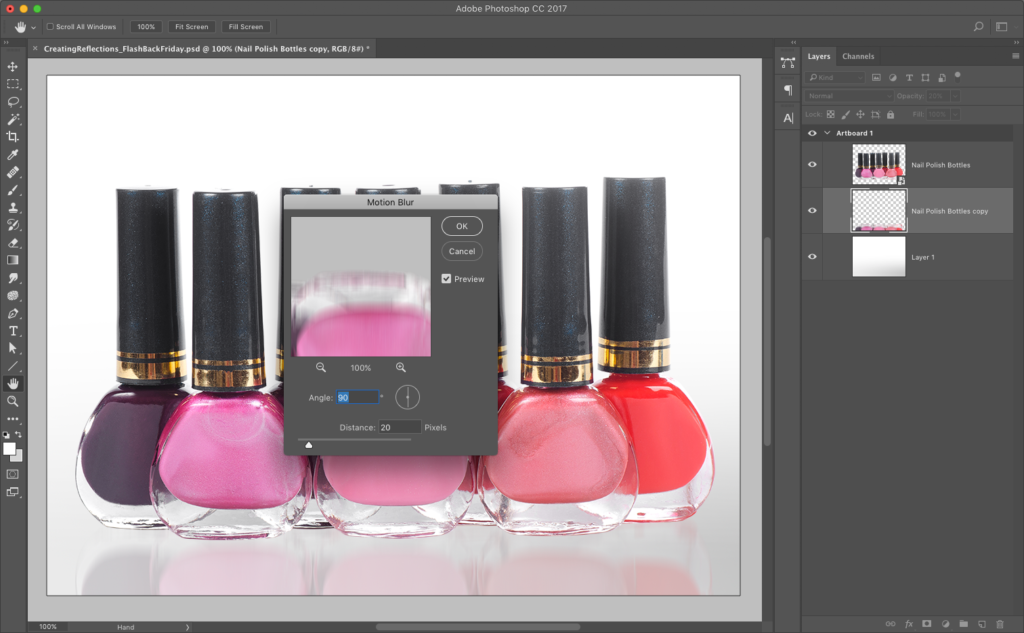
Step Six:
Go under the Filter menu and, under Blur, choose Motion Blur. When the dialog appears, enter 90º for Angle and 20 pixels for Distance, and click OK to apply a bit of motion bur to the reflection. This helps put the focus on the real bottles and not on the reflection.
Step Seven:
Now we’re going to create a shadow for the nail polish bottles. In the Layers panel, click on the original bottle layer to make it active, then hold the Command key (PC: Control key) and click on the Create a New Layer icon to create a new blank layer under the Nail Polish Bottles layer. Press the letter “d” to set your Foreground color to black, then press the letter “b” to switch to the brush tool. Click on the Brush Picker in the Options Bar and choose a small, soft-edged brush. Trace along the bottom edge of the bottles to paint in a drop shadow (as shown). Then, lower the Opacity of this layer to 40% in the Layers panel to soften the intensity of the shadow.

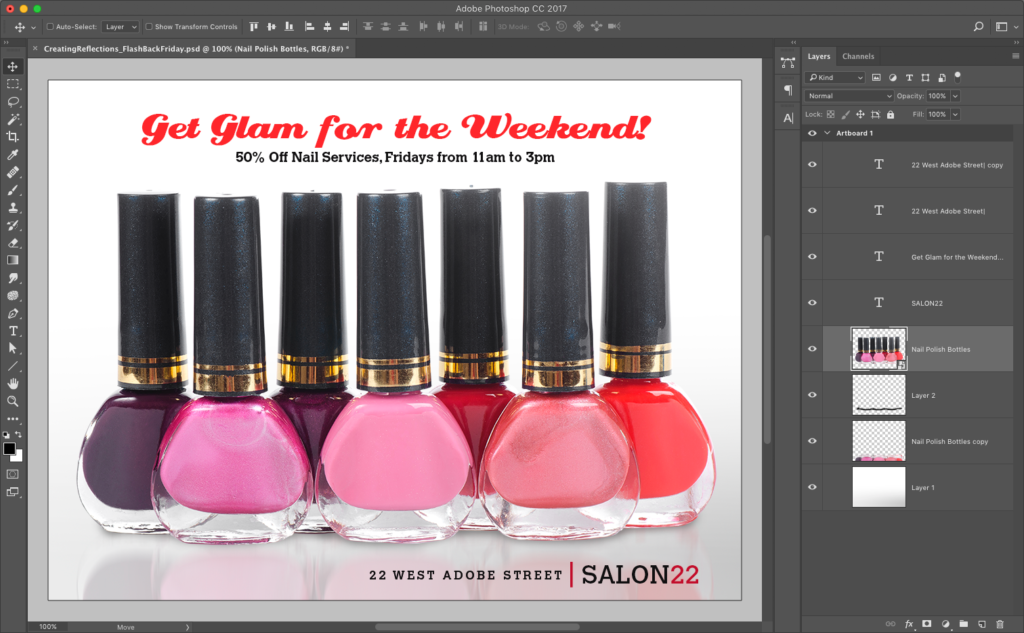
Step Eight:
Now that the reflection effect is complete, you can use the Type tool to add some text, and place logos or other items required to finish your project.
And now you know the quickest, easiest way to make it look like your object was photographed on a reflective background. Plus, this is a reminder to pull out your old books when you need to know classic effects like this one!


