Photoshop is one of those apps in which there are multiple ways to accomplish the same task; however, some methods are slow and destructive, while others are fast and flexible. In this column, you’ll learn 10 ways to ensure your Photoshop life is as productive and painless as it can possibly be.
Tip One:
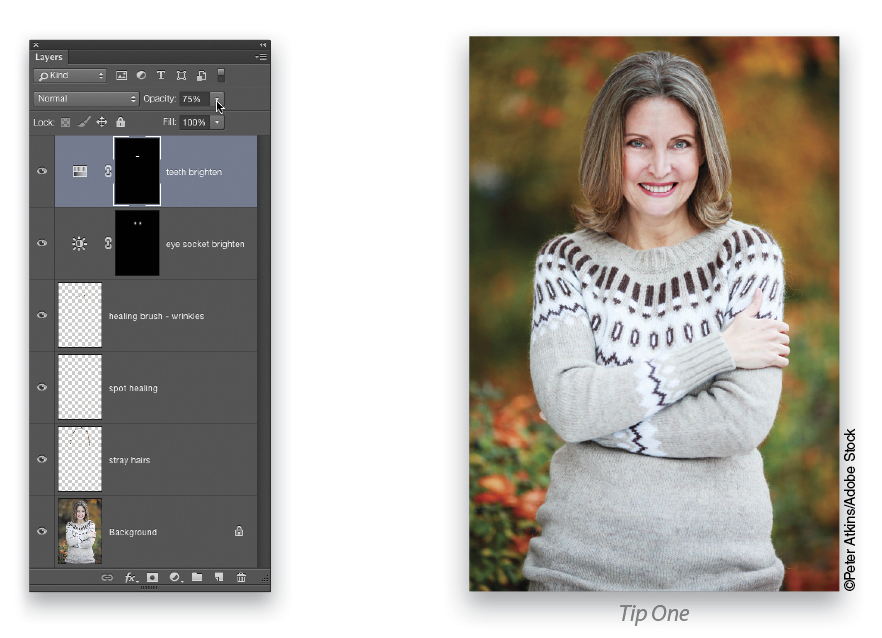
Develop the habit of performing edits on separate layers. For example, you may adjust color and lighting using a Curves or Levels adjustment layer (or the Camera Raw Filter as explained momentarily), zap blemishes with the Spot Healing Brush on another layer, remove stray hairs or a power line on yet another one, sharpen on another layer, add an edge vignette on yet another layer, and so on. This gives you the ability to back out of any edit (by deleting the layer) and use layer Opacity to control the strength of each edit individually.
Tip Two:
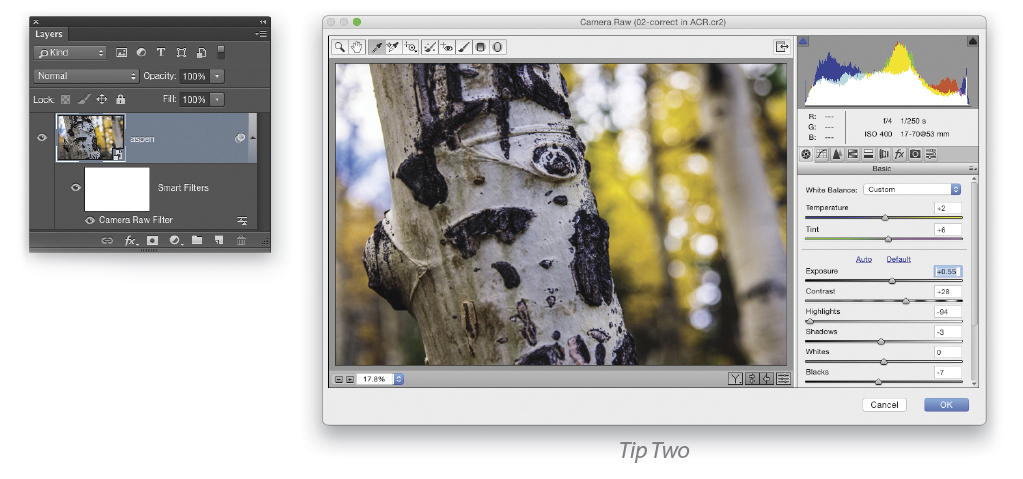
While Photoshop includes some incredible tools for fixing color and lighting, it’s easier to use the sliders in the Basic panel of the Camera Raw plug-in or the Camera Raw Filter. If you’re shooting in RAW format, the Camera Raw plug-in opens automati-cally when you double-click a file to open it, as shown here. You can, however, open the plug-in as a filter in Photoshop. To do this, activate the image layer and choose Filter>Convert for Smart Filters, then select Filter once more, and pick Camera Raw Filter. To reopen the Camera Raw Filter for more editing later, just double-click the filter’s name that appears beneath the layer in the Layers panel.
Tip Three:
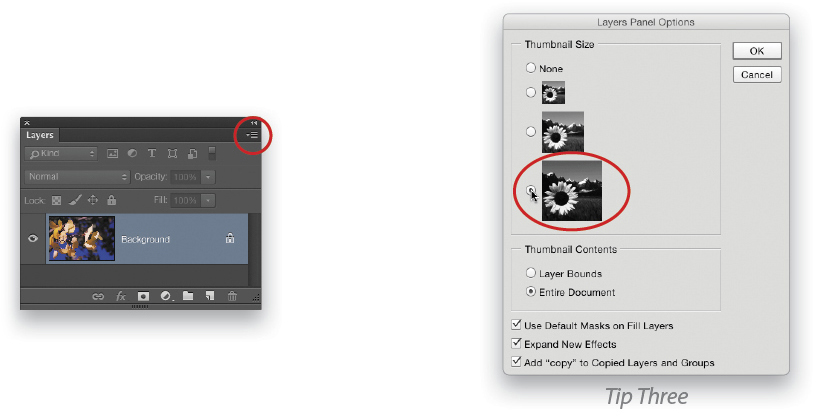
Once you start using layers, it’s handy to increase the layer thumbnail size in the Layers panel so you can see them better. Just choose Panel Options from the Layers panel flyout menu (circled) and then click the largest Thumbnail Size option. (You can also do this in the Channels and Paths panels.)
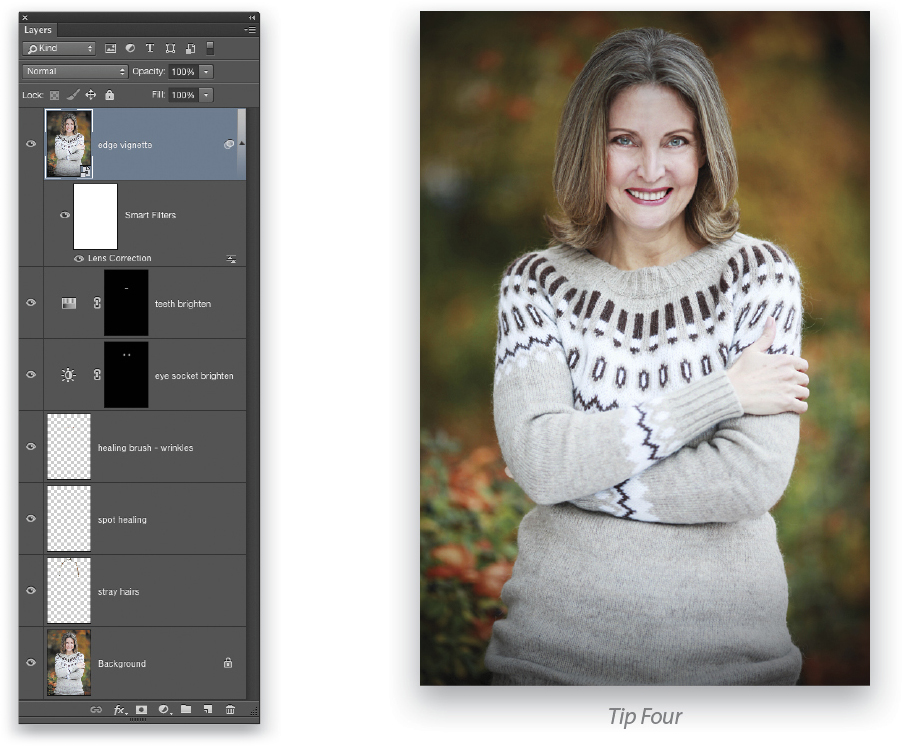
Tip Four:
Never flatten the layers in your document: If you need to use a tool or filter that only works on one layer, create a new layer that contains the content of all visible layers by pressing Shift-Option-Command-E (PC: Shift-Alt-Ctrl-E). The end result is called a “stamped copy.” To run a filter nondestructively on the stamped layer, activate the layer and choose Filter>Convert for Smart Filters. Return to the Filter menu again and choose the one you want to run (the Lens Correction filter was used here to add a dark edge vignette). To reopen that filter later to edit it, double-click its name in the Layers panel.
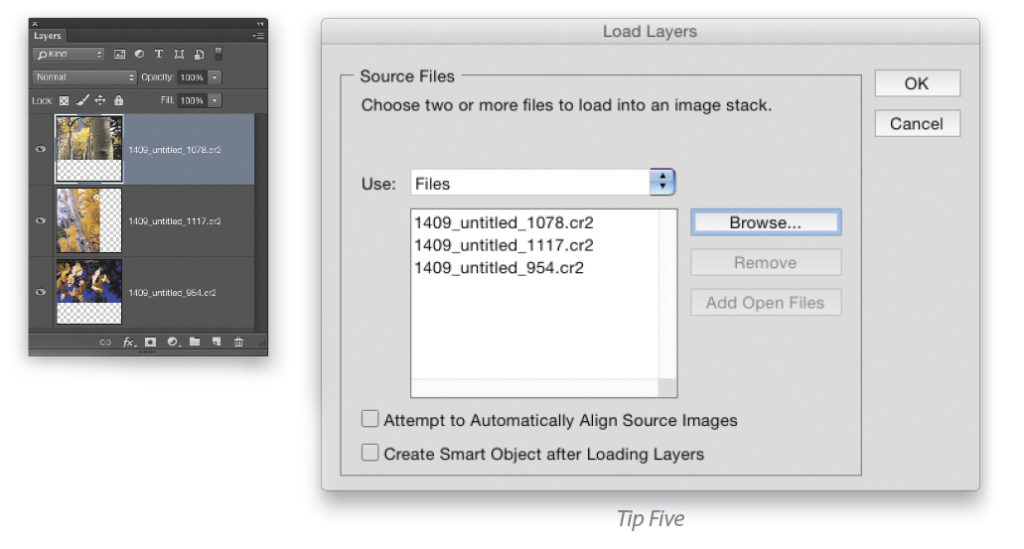
Tip Five:
To quickly load several files into a new Photoshop document (say, for compositing or collaging), choose File>Scripts>Load Files Into Stack. As you can see here, each image lands on its very own layer.
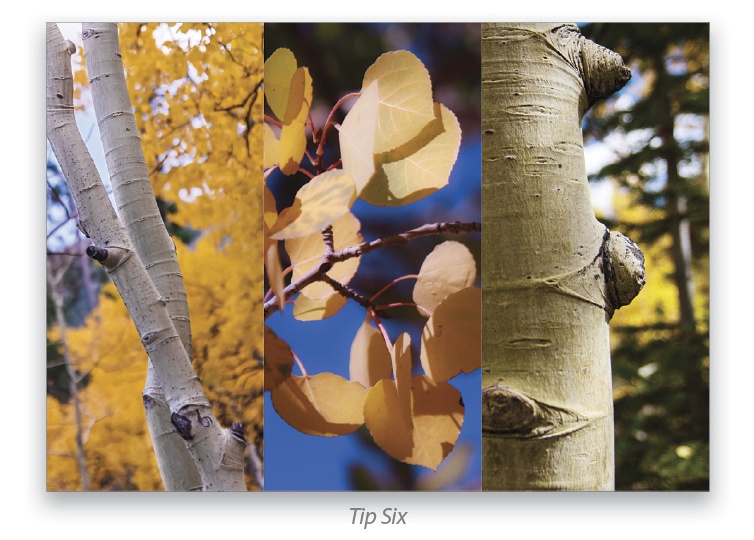
Tip Six:
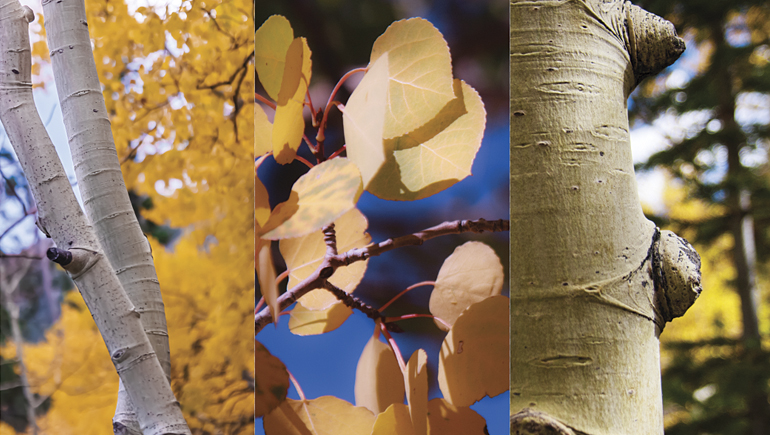
Don’t use the Eraser tool to delete pixels; instead, use a layer mask to hide them. By doing so, you can always retrieve hidden pixels. Adjustment layers automatically come with a layer mask; but you can add a layer mask to other layer types by clicking the circle-within-a-square icon at the bottom of your Layers panel. The resulting layer mask thumbnail (circled) is a mini-representation of your image. Adding black to the mask—either by using the Brush tool (B) set to paint with black or, as in this triptych example, by creating a selection and then filling it with black—conceals that layer’s content, while white reveals it. To quickly change a white mask to black, invert it by pressing Command-I (PC: Ctrl-I). If you’re using the Brush tool to paint inside a mask, you’ll do a lot of switching between painting with black and white. To speed up the process, use the keyboard shortcut of X to flip-flop your color chips near the bottom of the Toolbox.
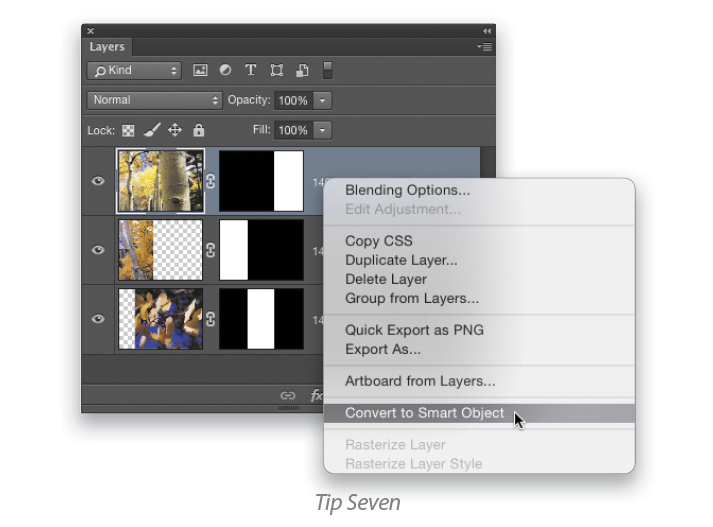
Tip Seven:
When using Free Transform (Command-T [PC: Ctrl-T]), Shift-drag any corner handle inward or outward to preserve the image’s aspect ratio so it doesn’t appear squished or stretched. Add the Option (PC: Alt) key to resize the content from the center outward. Also, if you need to use Free Transform to resize layer content more than once, first convert the layer(s) into a smart object, and then resize it. Here’s how: Activate the layer and choose Layer>Smart Objects>Convert to Smart Object. Alternatively, Right-click to the right of a layer’s thumbnail in the Layers panel and choose Convert to Smart Object from the resulting shortcut menu. Now you can use Free Transform as many times as you want without creating pixel pudding.
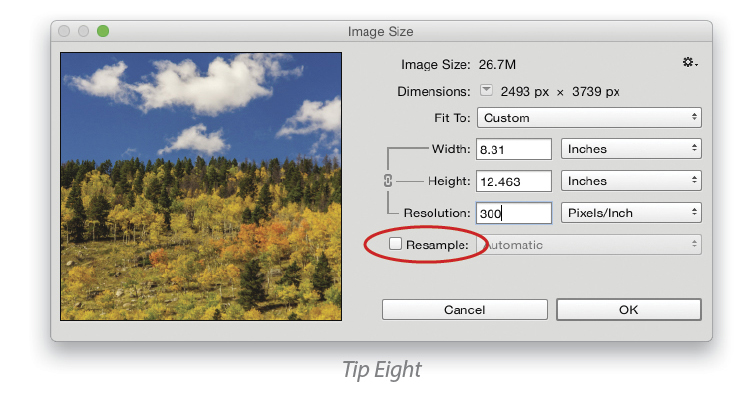
Tip Eight:
In order to produce a high-quality print, you need a resolution (pixel size) of 240 ppi or higher. To change resolution without deleting pixels and losing image quality, choose Image>Image Size and turn off the Resample checkbox (circled). Now you can enter whatever resolution you need and the pixel dimensions of your image won’t change—though the print measurement will.
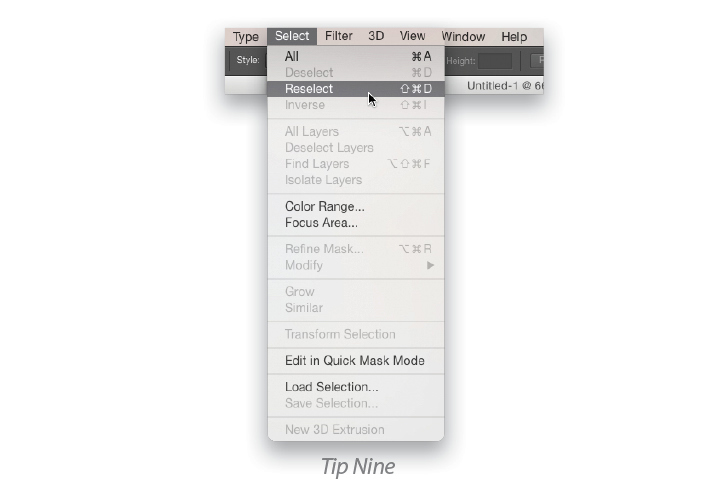
Tip Nine:
If you make a selection and then click elsewhere in your document while you still have a selection tool active, the selection vanishes. Happily, you can always get back the last selection you made by choosing Select>Reselect or by pressing Shift-Command-D (PC: Shift-Ctrl-D).
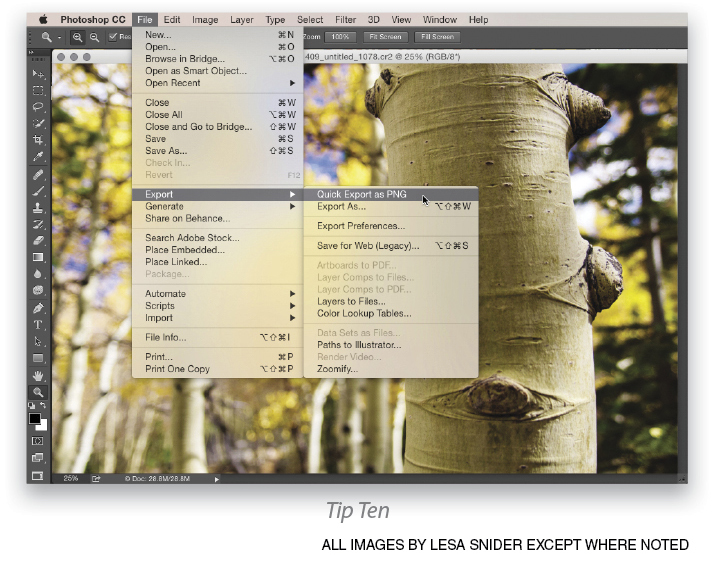
Tip Ten:
To preserve image quality and any layers you’ve made (so you can edit them later), always save your documents in Photoshop format (PSD). If more editing is required, reopen the PSD file and make your changes there. When you’re finished, choose File>Save As or File>Save for Web to create another copy in JPEG, PNG, or whatever format you need. In Photoshop CC 2015, choose File>Save As or File>Export>Save for Web (Legacy). Alternatively, you can quickly create a PNG in CC 2015 by choosing File>Export>Quick Export as PNG. You can also export a single layer as a PNG by Right-clicking on that layer in the Layers panel and choosing Quick Export as PNG. The PNG format is handy for keeping text sharp when posting online, plus Facebook’s upload compression voodoo doesn’t destroy PNGs as much as JPEGs. (Note: If you go to File>Export>Export Preferences, you can change the file format of the Quick Export feature to JPG, PNG-8, GIF, or SVG.)
By employing these tips, you’ll edit smarter instead of harder. Until next time, may the creative force be with you all!
This article originally published in the October, 2015 issue of Photoshop User magazine.


