
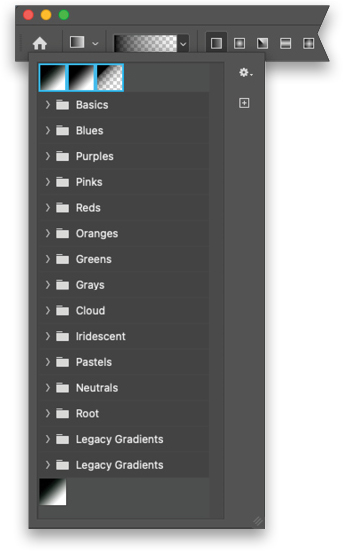
Cast your mind back a couple of years. Do you remember when you used gradients and the ones you needed most often were always right there? Foreground to Background; Black, White; Foreground to Transparent; etc. When you opened the Gradient Picker in any tool that used them, those swatches were right on top. Now you have to dig into folders for them, every time. Here’s a little trick: Choose the Gradient tool (G) and click on the down-facing arrow next to the gradient preview thumbnail in the Options Bar to open the Gradient Picker. Expand the Basics folder, and drag the swatches out of the folder to the top of the picker. Now those gradient presets will appear at the top just like they used to. Add any other ones you use frequently.
Bonus Tip: Command-click (PC: Ctrl-click) to select multiple swatches so you can move them all at once.
This tip originally published in Colin Smith’s “Photoshop Tips” column in the November, 2022 issue of Photoshop User magazine.


