
Sometimes when you’re retouching, Content-Aware Fill and the Healing Brush can’t give you the results you need. This is time to resort to the Clone Stamp (S). Many people don’t realize you can’t produce something out of thin air; you first need to find part of a photo to clone (or illustrate it from scratch, but that’s another story), and then Option-click (PC: Alt-click) to sample that area. Now when you paint, it will clone the area you sampled.
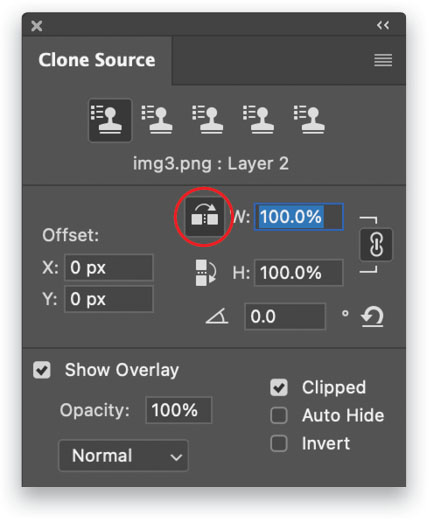
When you’re looking for something from which to clone, don’t forget you can also clone in reverse. Go to Window>Clone Source to open the Clone Source options. It’s not super obvious, but if you click the icon to the left of W it will cause the Clone Stamp to work in mirror mode. This can often be useful when retouching a face; you can grab stuff from one side and clone it to the other.
This tip previously appeared in Colin Smith’s Photoshop Tips column in the August, 2022 issue of Photoshop User magazine.
About Photoshop User and KelbyOne
Photoshop User magazine comes out digitally 12 times a year and is part of KelbyOne, the leading educational resource for Photoshop, Lightroom, and photography. Pro members have access to more than 900 video courses and 100 back issues of Photoshop User. To learn more about KelbyOne, click here.


