
With all the new masking tools and greatly improved “healing brush” in Lightroom, I wanted to kick off a new column on using Lightroom for portrait retouching. I think there’s a lot that can be done, retouching-wise, than most users realize, so I want to use this column to open that door and show what can be done, which today is more than ever.
Let’s start with one of the most common portrait retouches, which is removing blemishes and reducing things such as hot spots or moles.
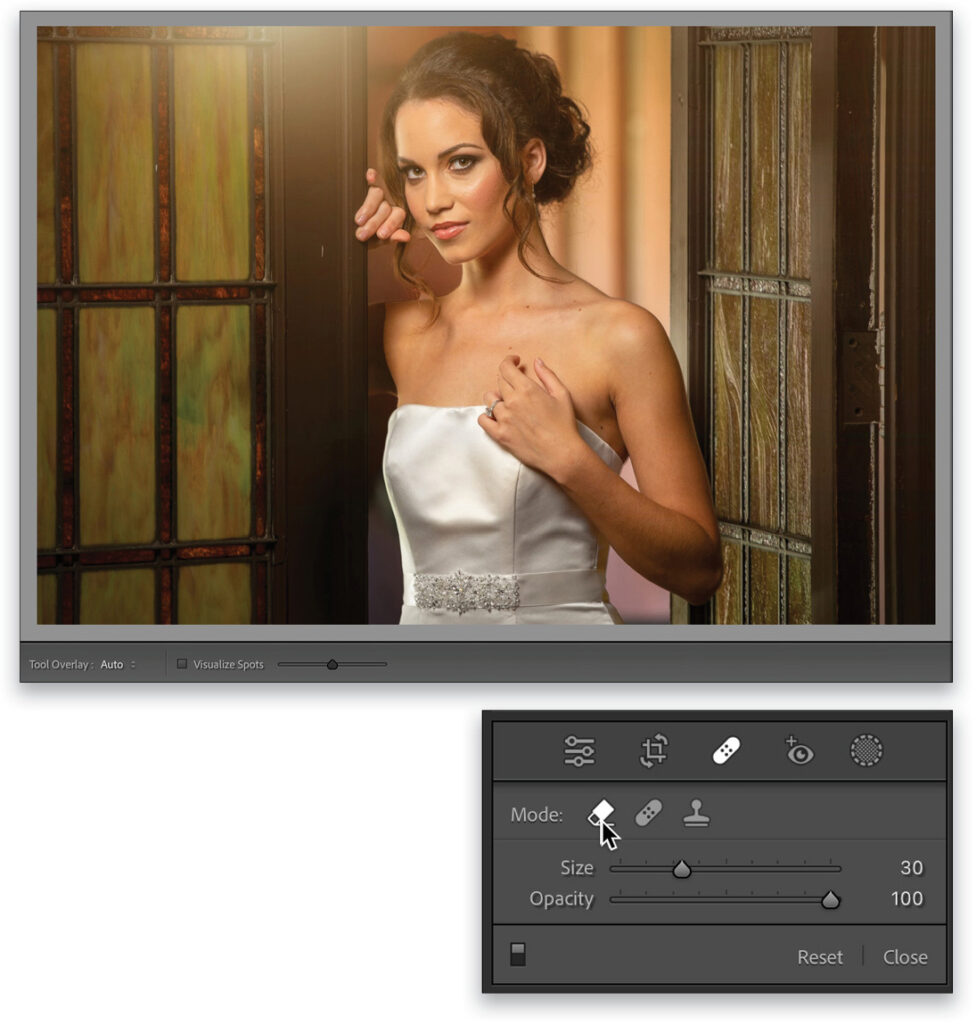
STEP ONE: Here’s our original image (KelbyOne members can click here to download this image for practice purposes only). The tool we’re going to use for removing blemishes is the new Content-Aware Remove brush, and you get to it by clicking on the icon that looks like a bandage up in the toolbar near the top of the right side panels (this bandage used to be the Spot Removal tool, but in the latest version of Lightroom, it’s now called the Healing tool). When that panel appears, where it says “Mode,” click on the first icon (that’s the Content-Aware Remove brush) and, from here on out, it’s the only one we’ll use, because the other brush, the Heal brush is, well, I don’t want to say it’s trash, but…it’s trash (and that’s being kind).
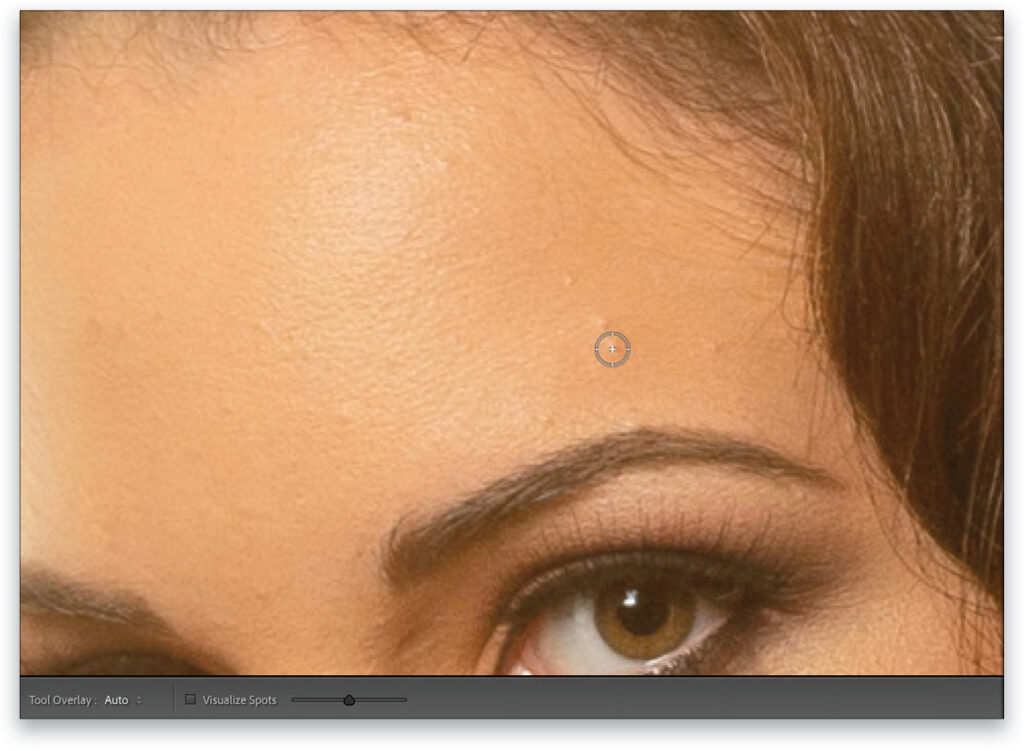
STEP TWO: Press Command-+ (PC: Ctrl-+) a few times to zoom in tight on your subject’s forehead (after you zoom in, you can hold the Spacebar and click-drag to move around the image). Note that there are a few minor blemishes up here we can remove.

STEP THREE: Size your brush so it’s just a little larger than the blemish you want to remove. You can do this in the Healing tool’s options panel in the right side panels, but it’s easier to use the Left and Right Bracket keys on your keyboard: the Left Bracket ([) makes the brush smaller, and the Right Bracket (]) makes it larger. Move your cursor over the blemish you want to remove (as shown here).
STEP FOUR: Now just click once. That’s it. You don’t have to “paint” with it; just a single click should do it and, as you can see here, the blemish is gone.

STEP FIVE: That’s the basic process, so for now, go ahead and remove the rest of the blemishes in this area by moving your cursor over them and just clicking once. Okay, you can see there’s a problem here: Your blemishes are replaced by little icons showing where you used the brush.

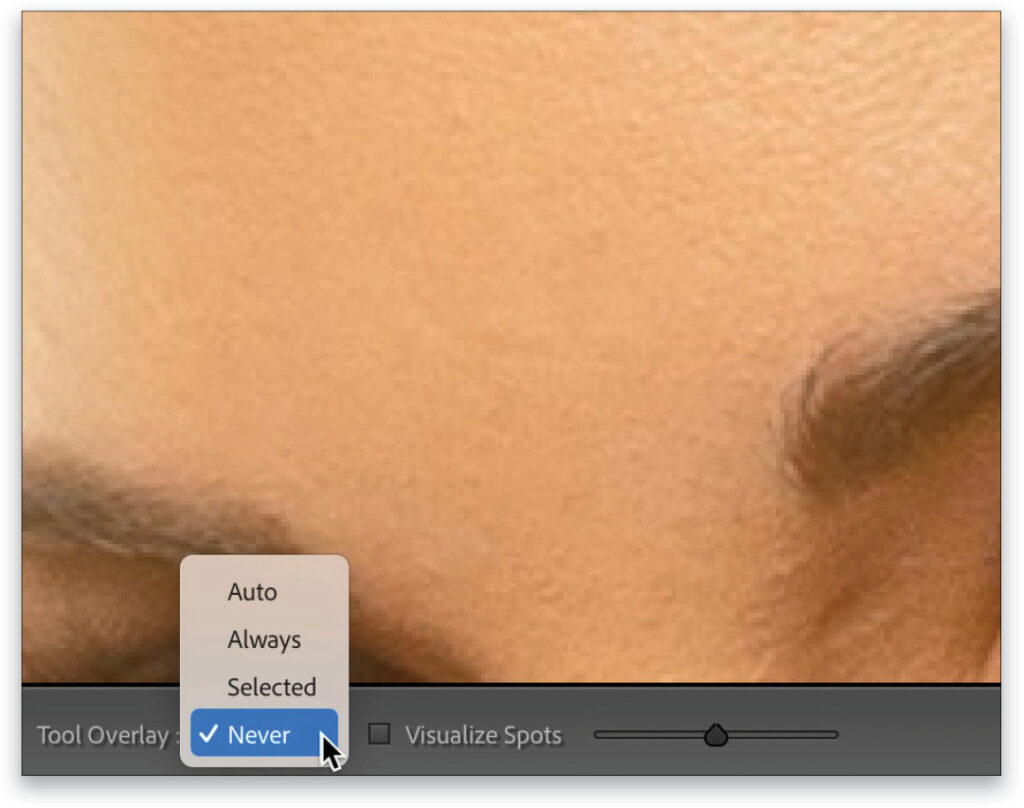
STEP SIX: If you move your cursor outside the image area, say, over onto the panels along the right side, as I did here, those icons will temporarily disappear so you can see how your retouch looks. I kind of hate this. Here’s why: I have to keep moving my cursor over to the right side panels to see if the retouch I did on the previous blemish looks good. But we can fix that.
STEP SEVEN: In the gray Tool-bar along the bottom of your image, you’ll see the words “Tool Overlay” on the far left side (if you don’t see the Toolbar, press the letter T on your keyboard). Click-and-hold and change the option to Never (as shown here). Now when you click over a blemish, you’ll see the repair, not the icon, which is the way the Healing Brush works in Photoshop. I only switch this option to Never when I’m using this brush; I switch it back to Auto show/hide, the default setting, when I’m done.
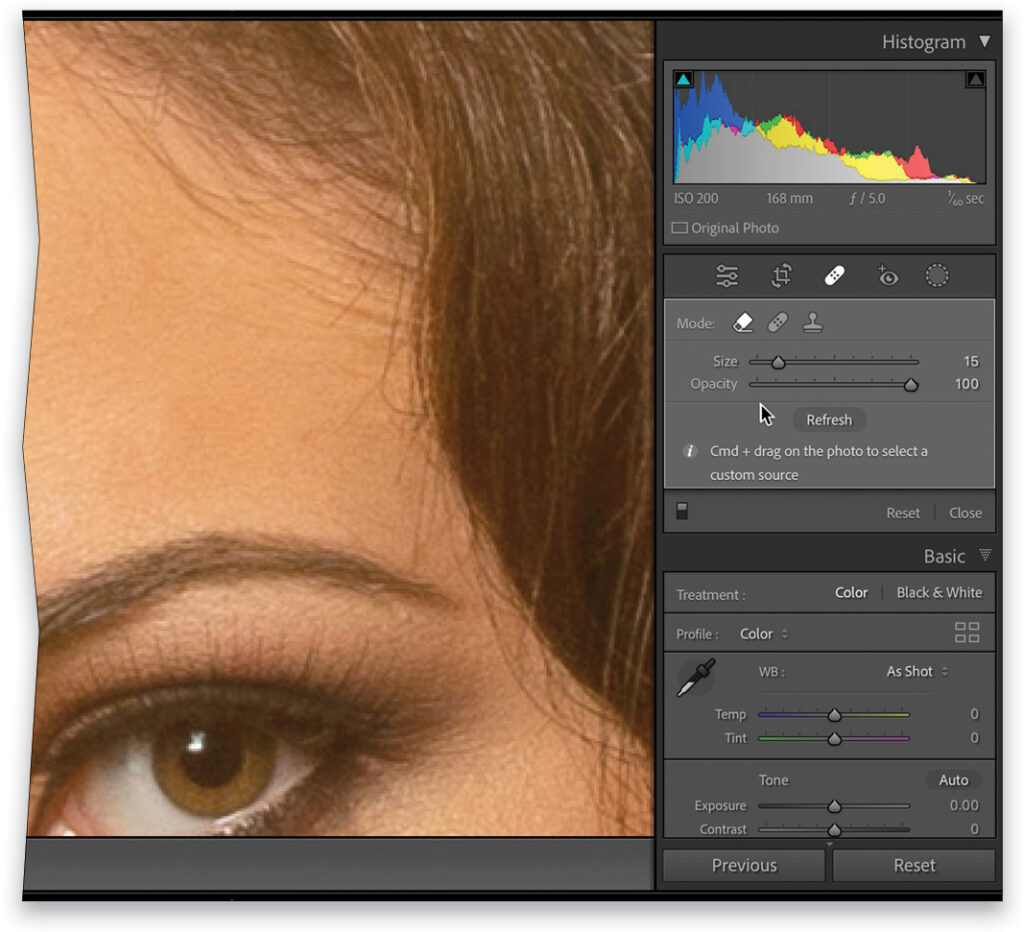
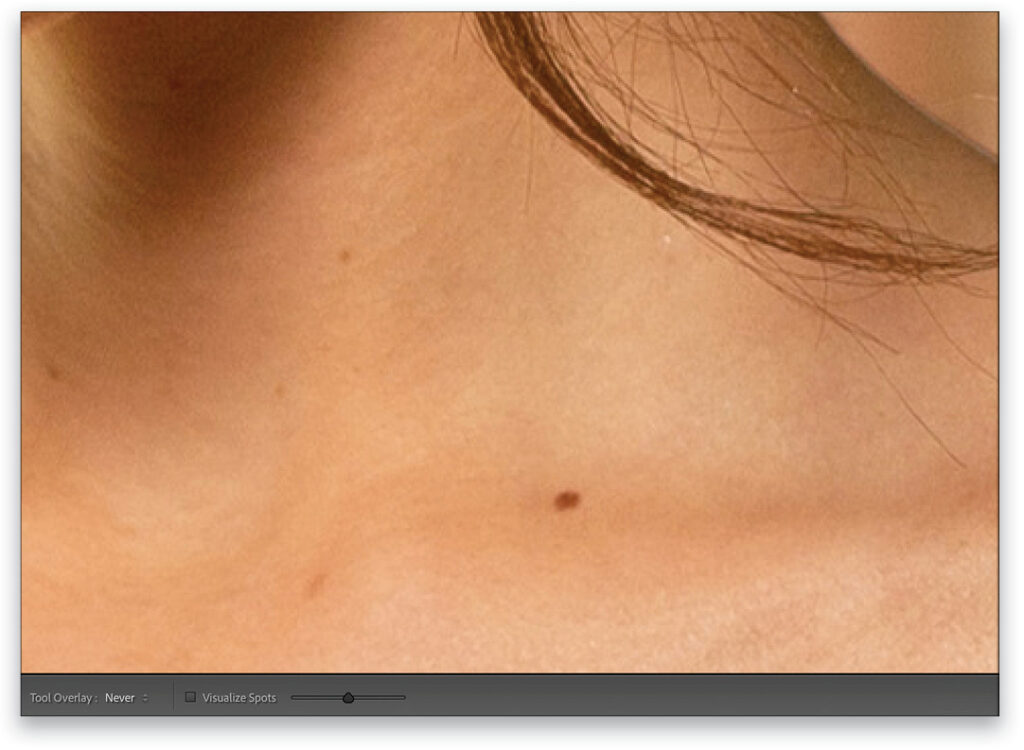
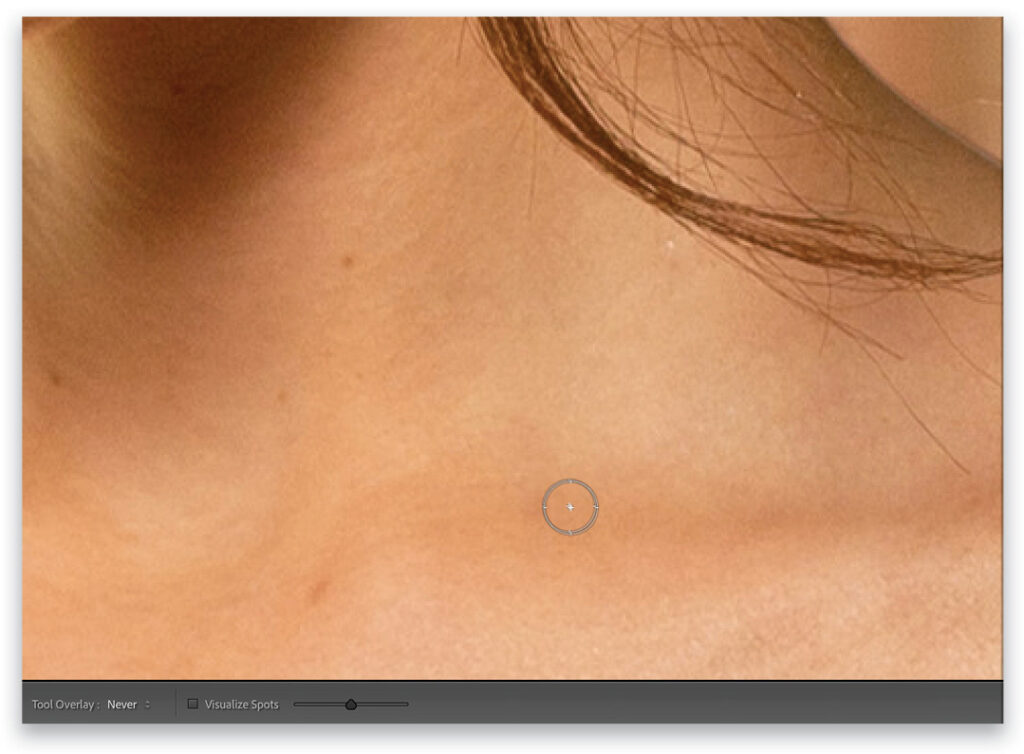
STEP EIGHT: Now scroll down farther on your image (again, hold the Spacebar and then click-and-drag downward inside your image) until you see some moles just below her neck on the right (as shown here). I generally don’t remove moles as they’re part of the subject’s character, but they appear much more apparent in photographs than they do in real life, so instead of removing them, most retouchers reduce their intensity.
STEP NINE: We’re going to use a similar technique as we did with removing the blemishes, same tool and all. Resize the brush so it’s just a little larger than the mole, move your cursor over the mole, and click once to remove it completely (I know, I said we weren’t going to remove it, and we’re not; we still have another step to go). By the way, did you notice we don’t have the annoying icon here? We can see the area retouched inside the brush cursor. That’s because I have my Tool Overlay still set to Never.
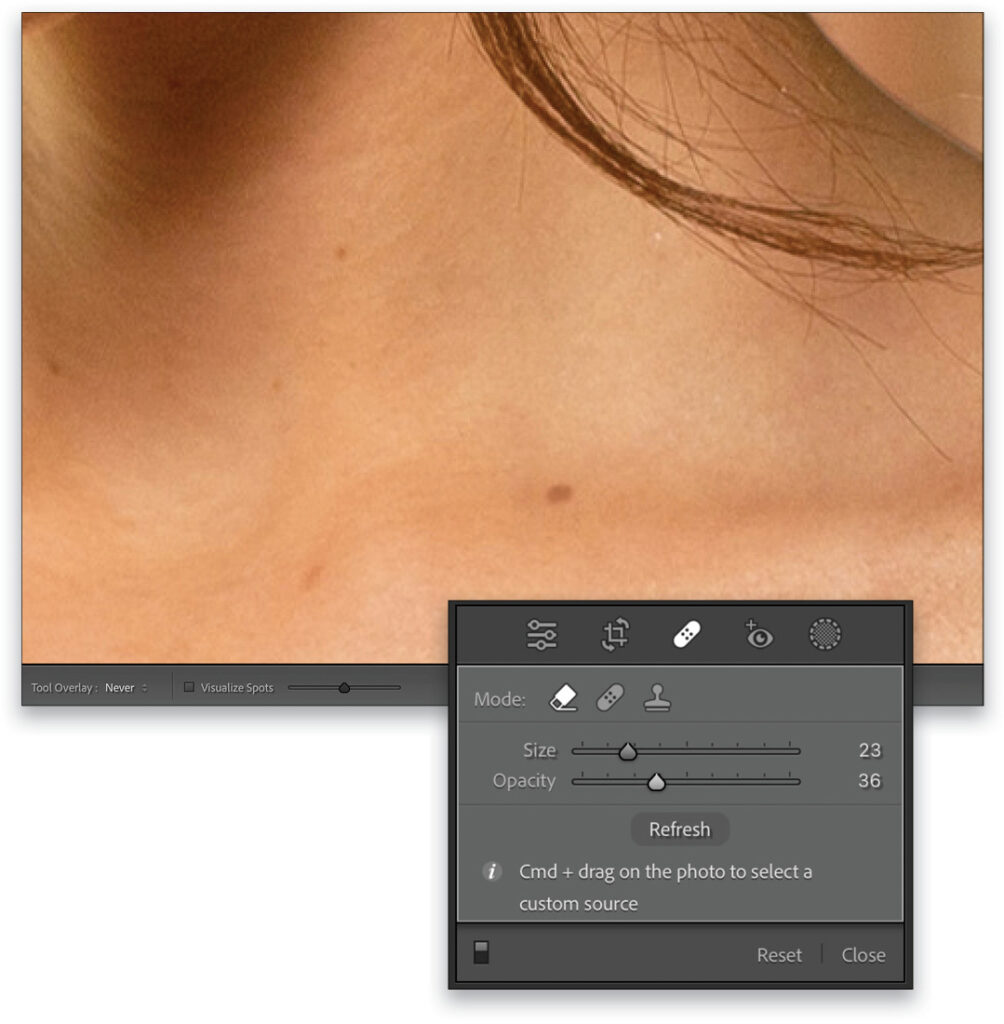
STEP 10: Now, we’re going to head over to the Healing tool’s panel, and lower the Opacity. I want you to think of this move as “Undo on a Brush,” and we’re going to use it to “undo” some of that complete removal. If you drag the Opacity to 0%, the mole would be back (we’d have undone our removal). If you leave it at 100% Opacity, it’s fully gone. As you drag the slider to lower the Opacity, the mole starts coming back, so you want to lower it to where it’s still there, but not nearly as intense or noticeable. Here, I lowered the Opacity to 36%, so I brought quite a bit of it back, but not nearly all of it. So the mole is still there, just reduced.
We’ve only just dipped our toe into what portrait retouching can be done in Lightroom, but it’s a start, and I’m glad you’re here with me for this retouching journey. See you next time.
This article originally published in the November, 2022 issue of Photoshop User magazine.
About Photoshop User and KelbyOne
Photoshop User magazine comes out digitally 12 times a year and is part of KelbyOne, the leading educational resource for Photoshop, Lightroom, and photography. Pro members have access to more than 900 video courses and 100 back issues of Photoshop User. To learn more about KelbyOne, click here.