
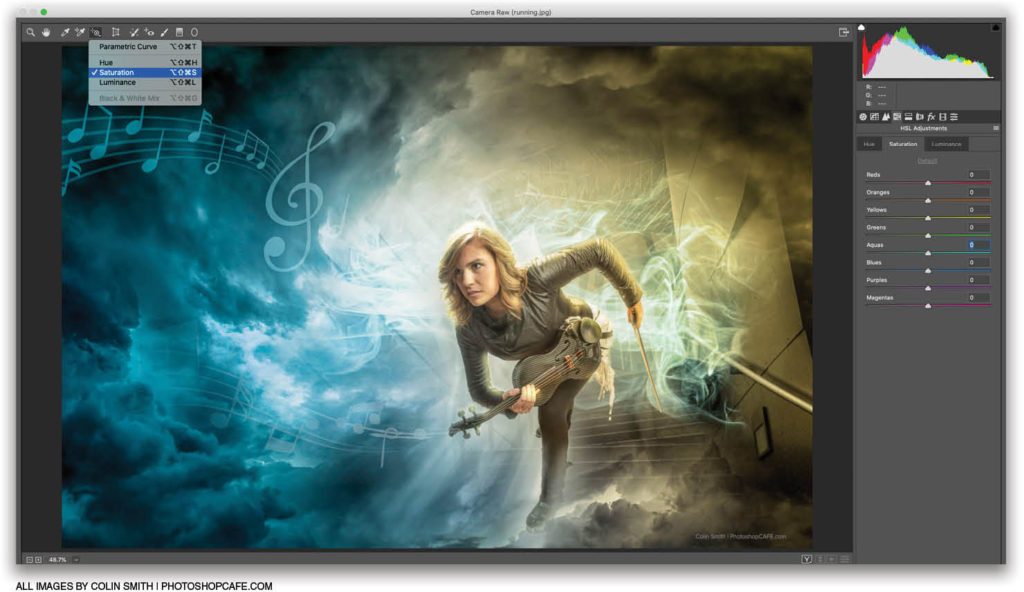
Camera Raw as a filter is the best thing to happen to Photoshop since Photoshop CC (except maybe the Libraries panel or the Object Selection tool; Content-Aware is pretty good too). The Camera Raw Filter adjustments are better than using Photoshop’s adjustment controls in many ways. One of the nice ways to work in the Camera Raw Filter is with the onscreen controls. You can click-and-drag on your image and adjust the color, brightness, and saturation. Click-and-hold on the Target Adjustment tool (T) in the toolbar at the top left. It looks like a crosshair with a target. You’ll see options for Parametric Curve, Hue, Saturation, and Luminance. Choose any of these and drag up or down directly on the image to change the tones across the entire image, based on the area where you first clicked. Hue changes the color, and saturation changes the amount of color. The main difference between Luminance and Parametric Curve is that Luminance darkens or lightens based on the color, whereas Parametric Curve uses the luminance (light or dark tones).
This tip previously published in Colin Smith’s Photoshop Tips column, in the April, 2020 issue of Photoshop User magazine.


