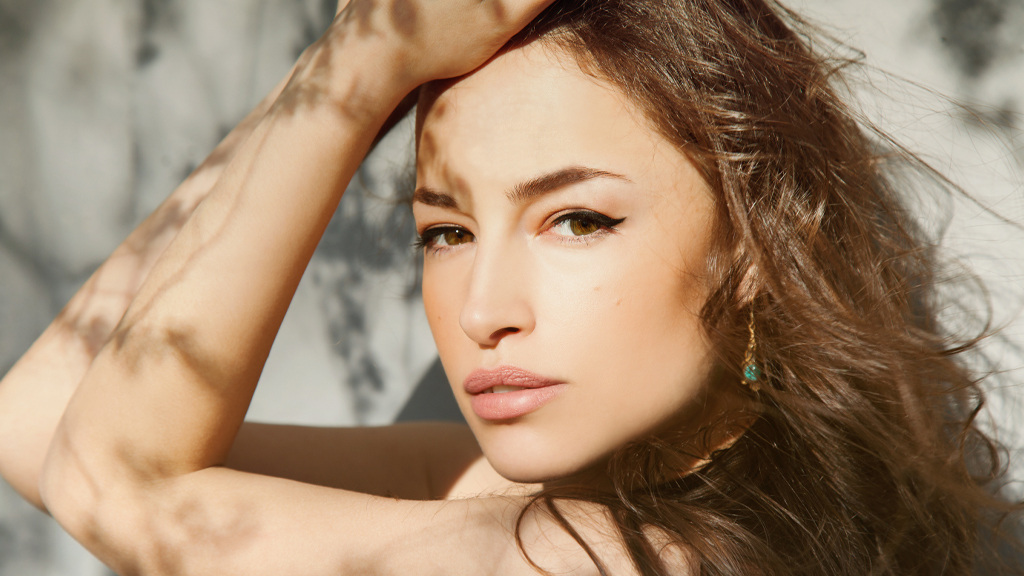
A rogue shadow can ruin an otherwise great portrait. Happily, if you have a good-sized patch of non-shadowy skin next to the shadowy part, you can often remove the shadow completely. And if not, you can always lighten the shadows so they’re not as noticeable. In this column, you’ll learn a nondestructive technique for both. Let’s get started!
STEP ONE: Choose File>Open and navigate to a portrait with shadows on the skin. If you’re starting in Lightroom, select the thumbnail in the Library module and choose Photo>Edit In>Adobe Photoshop 2022.
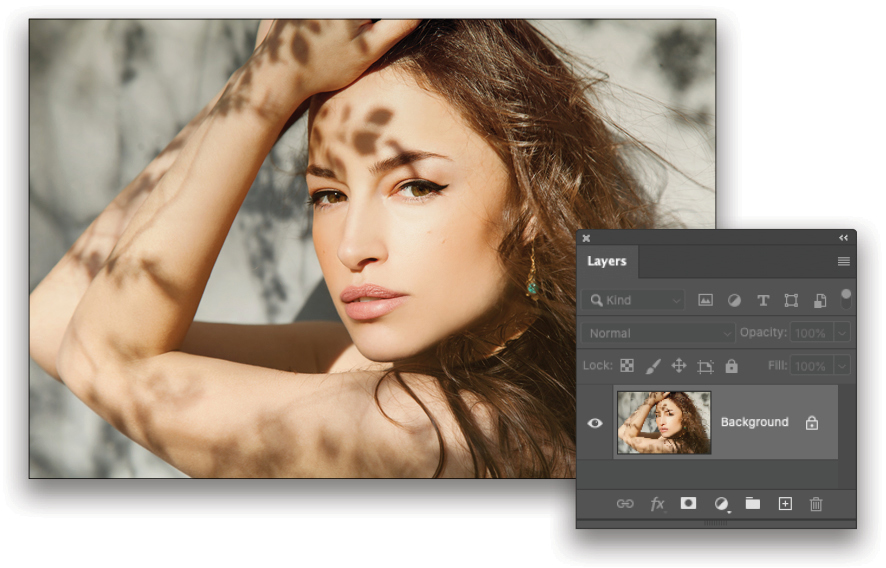
If you’d like to download the low-res watermarked version of this image to follow along, click this link, log in with your Adobe ID, and click the Save to Library button. Double-click the image in the Libraries panel (Window>Libraries) to open it in Photoshop.
To make it easier to work with the image, increase the resolution of the practice file. (We normally don’t recommend enlarging images, but this is only for practice purposes.) Go to Image>Image Size, turn on the Resample checkbox, select Preserve Details 2.0 from the Resample drop-down menu, set the Width to 5,000 pixels, and click OK.
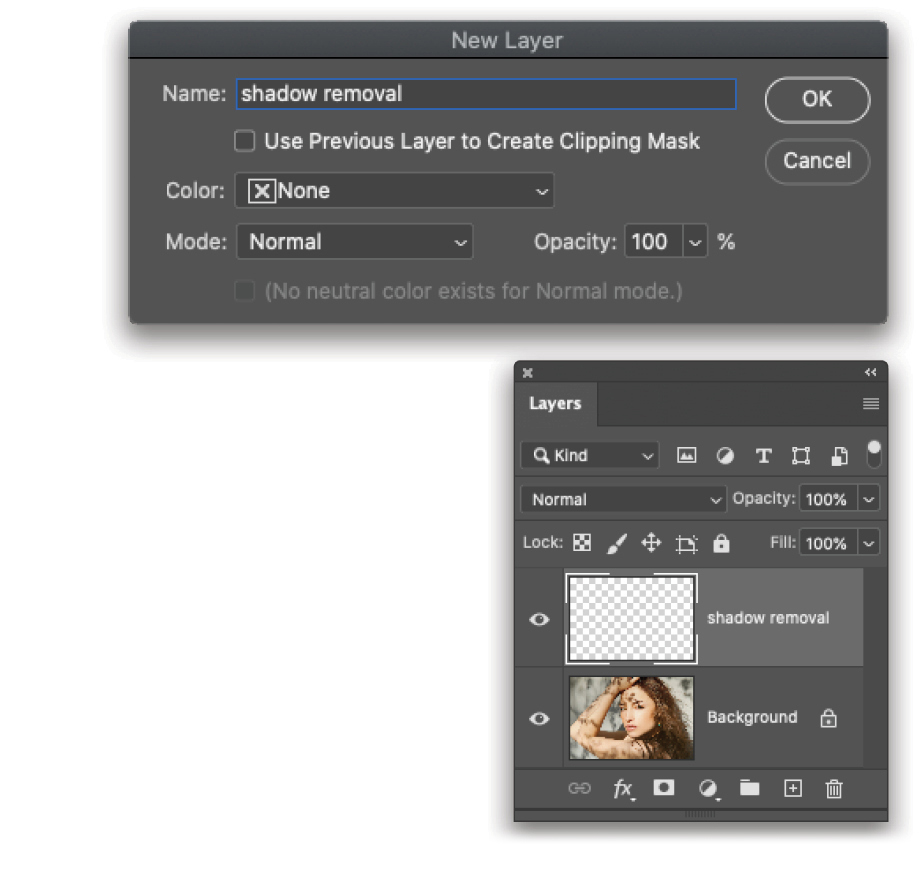
STEP TWO: To remove the dark shadows above and across the model’s left eye, we’ll use the Clone Stamp tool. To prevent harming the original image, we’ll use it on a new, empty layer. To do that, choose Layer>New>Layer and in the New Layer dialog, name it “shadow removal.” Click OK.
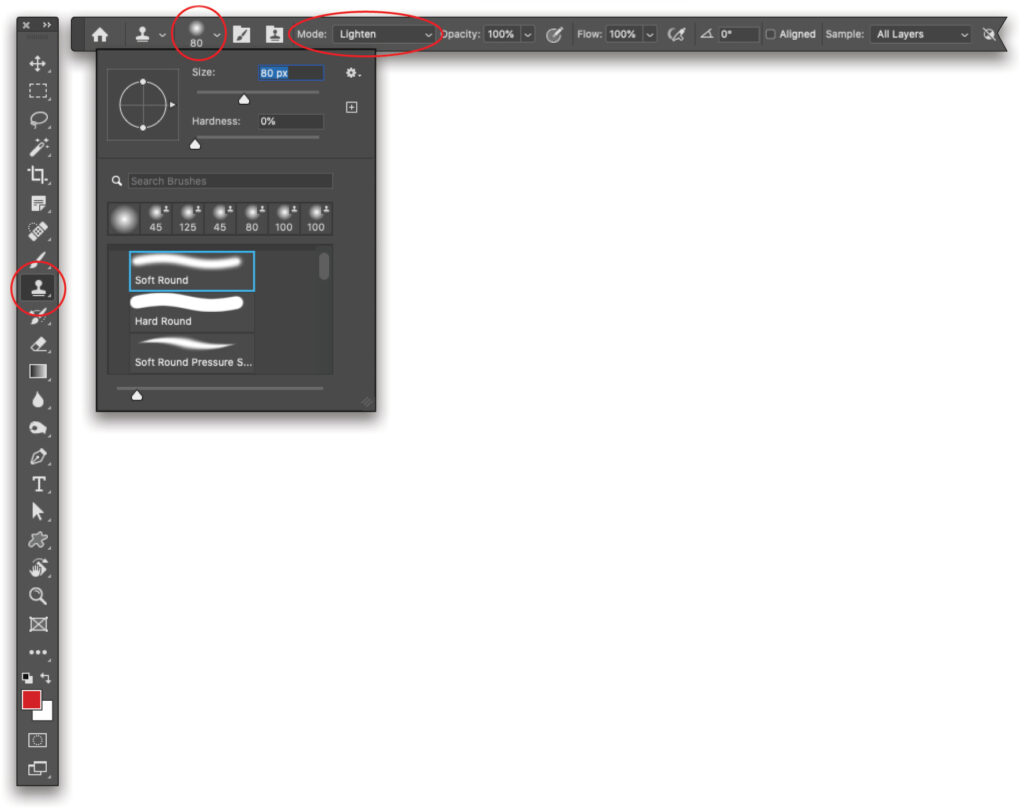
STEP THREE: Press S on your keyboard to grab the Clone Stamp tool (circled). In the Options Bar, open the Brush Preset picker (also circled) and choose a Soft Round brush around 80 pixels in size. Next, set the Mode menu to Lighten, Opacity to 100%, turn off the Aligned checkbox, and set the Sample menu to All Layers.
For the curious, Lighten mode tells the Clone Stamp tool to change only pixels that are darker than the lighter, non-shadowy skin from which you’ll copy the pixels. Using a 100% Opacity gives you full-on pixel-copy operation (like a skin graft). Turning off Aligned lets you continuously copy (sample) pixels from the same area (when it’s turned on, the sample area moves with the cursor). And changing the Sample menu to All Layers tells the Clone Stamp tool to copy (sample) the pixels on the layer(s) below the currently active layer, enabling it to work on an empty layer.
STEP FOUR: Press Command-+ (PC: Ctrl-+) to zoom into the image, hold the Spacebar, and click-and-drag to reposition the image so you can see her eye on the right and forehead. Mouse over to the image and Option-click (PC: Alt-click) a non-shadowy area just above the topmost dark shadow on her forehead (your cursor turns into a target). Release the modifier key (Option or Alt) and then click-and-drag all the way across the top part of the shadow to remove it. As you drag, a little crosshair (circled) represents the sample point. Release your mouse button, move your mouse down and then click-and-drag to remove another section of the shadow. Notice how the sample point resets itself to the original area each time you release your mouse button.
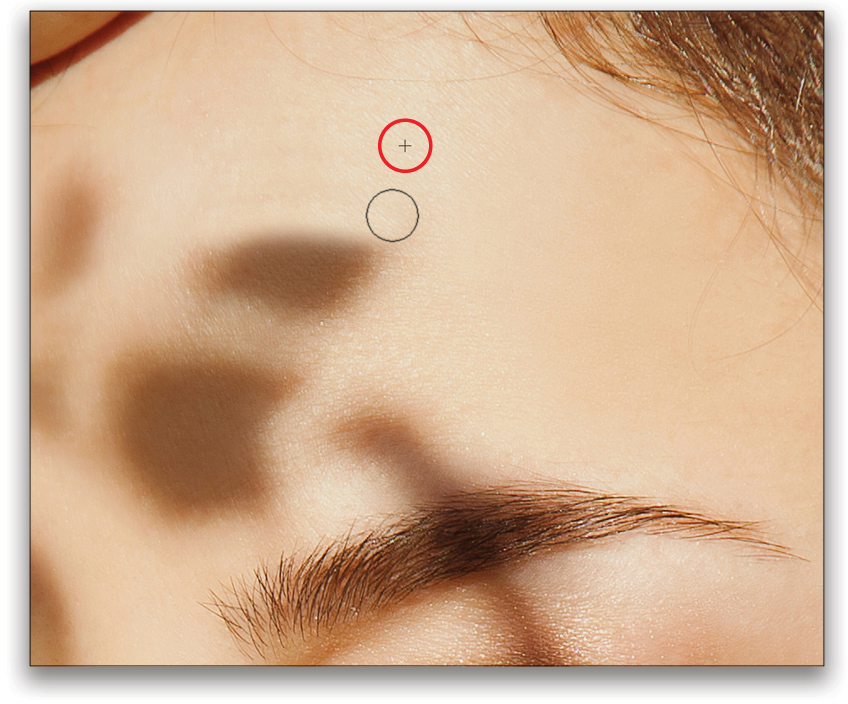
STEP FIVE: Option-click (PC: Alt-click) to reset the sample point near the side of the shadow and then remove another portion of the shadow. Keep resetting your sample point and removing shadows until most of the shadows on the left side are gone. When you can, keep the sample point close to the area you’re fixing so the skin tone matches, but that may not always be possible (note the sample point circled in the third example).
Tip: To make the shadow removal look realistic, you may need to experiment with turning the Aligned checkbox in the Options Bar on and off to see what works best. The undo keyboard shortcut is your best friend in this technique; if you don’t like the way a brushstroke looks, press Command-Z (PC: Alt-Z) to undo it then adjust your sample point, or fiddle with the Aligned checkbox, then have another go.
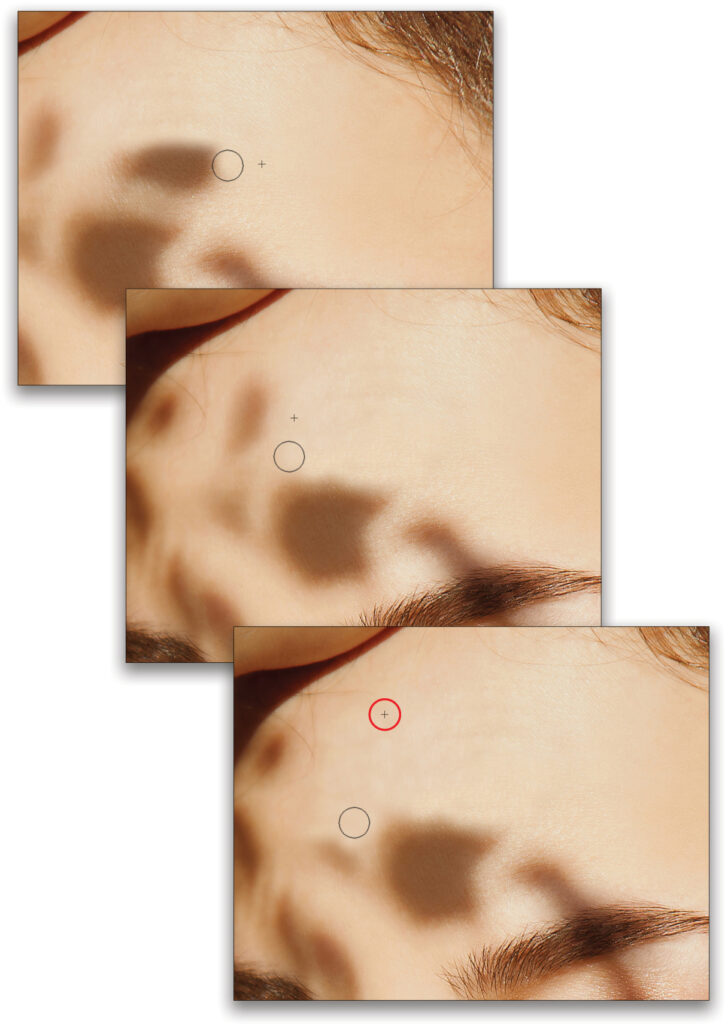
STEP SIX: When you’re finished with the forehead shadows, start on the eyebrow and eyelid, using the same technique of resetting your sample point (circled) and then dragging to remove the shadow. If necessary, reduce brush size to more closely match that of the area you’re fixing. And if you end up with a light area that needs darkening, as shown here in the third example, change the Option Bar’s Mode menu to Darken (circled, as are the sample point and cursor).

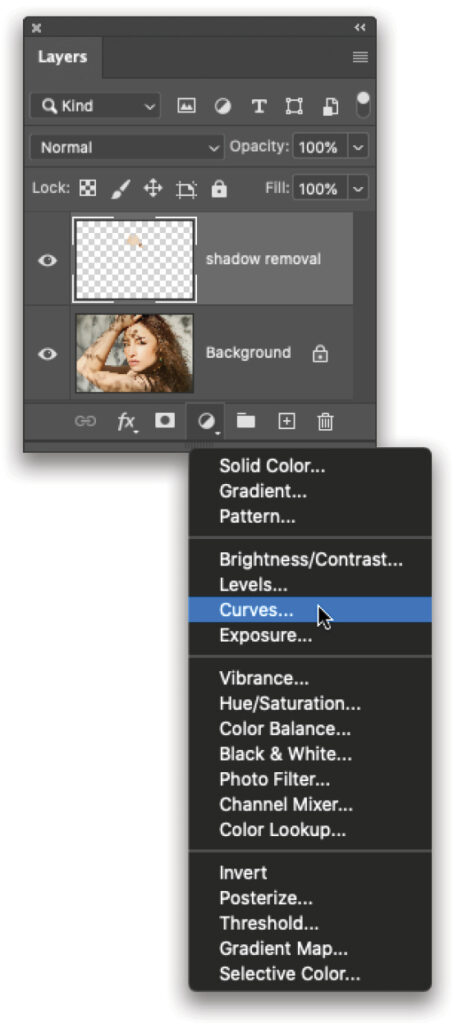
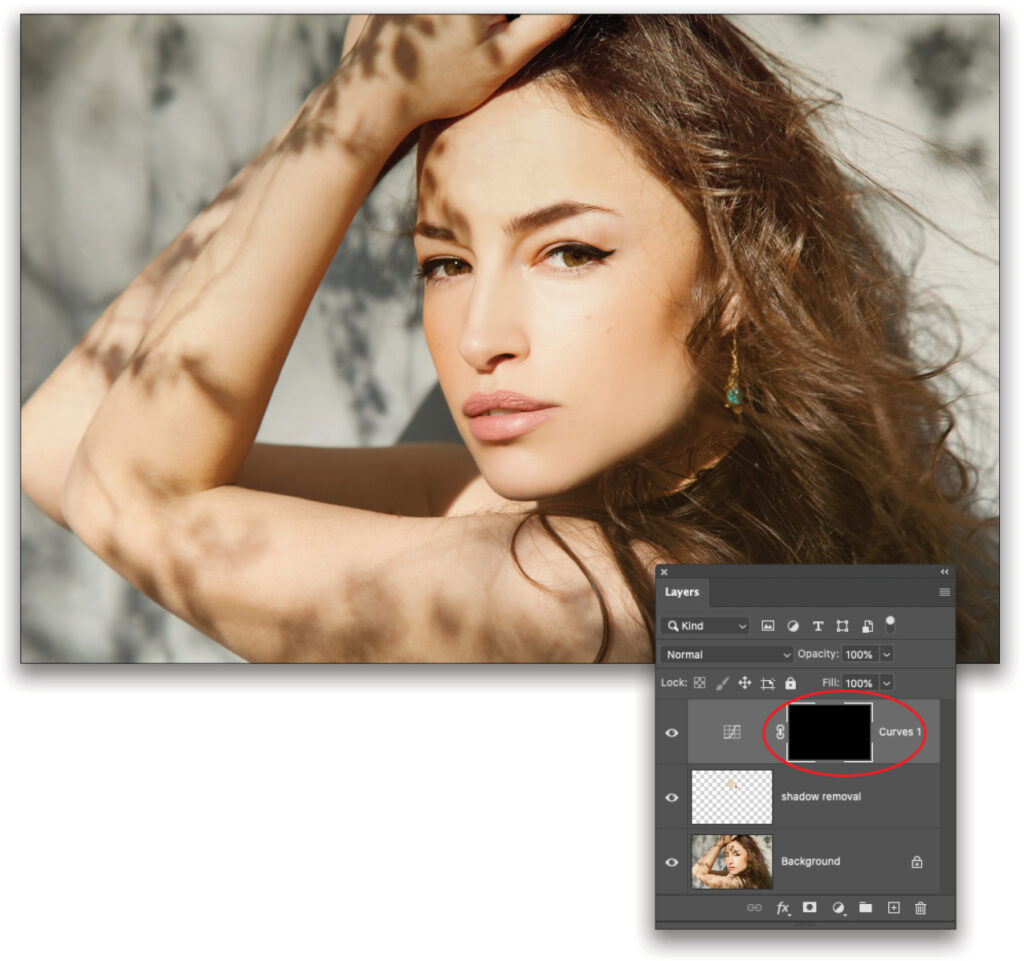
STEP SEVEN: Now let’s lighten the other shadows that aren’t easily removed (because there isn’t quite enough non-shadowy skin nearby to copy). To do that, click the half-black/half-white circle at the bottom of the Layers panel and choose Curves.
STEP EIGHT: In the Properties panel that opens, locate the center point of the graph, then click slightly to the left of it to set a point on the diagonal line, and then drag the point upward to lighten the whole image. Don’t worry, you’ll hide the lightening and reveal it only atop the shadows over the next few steps.
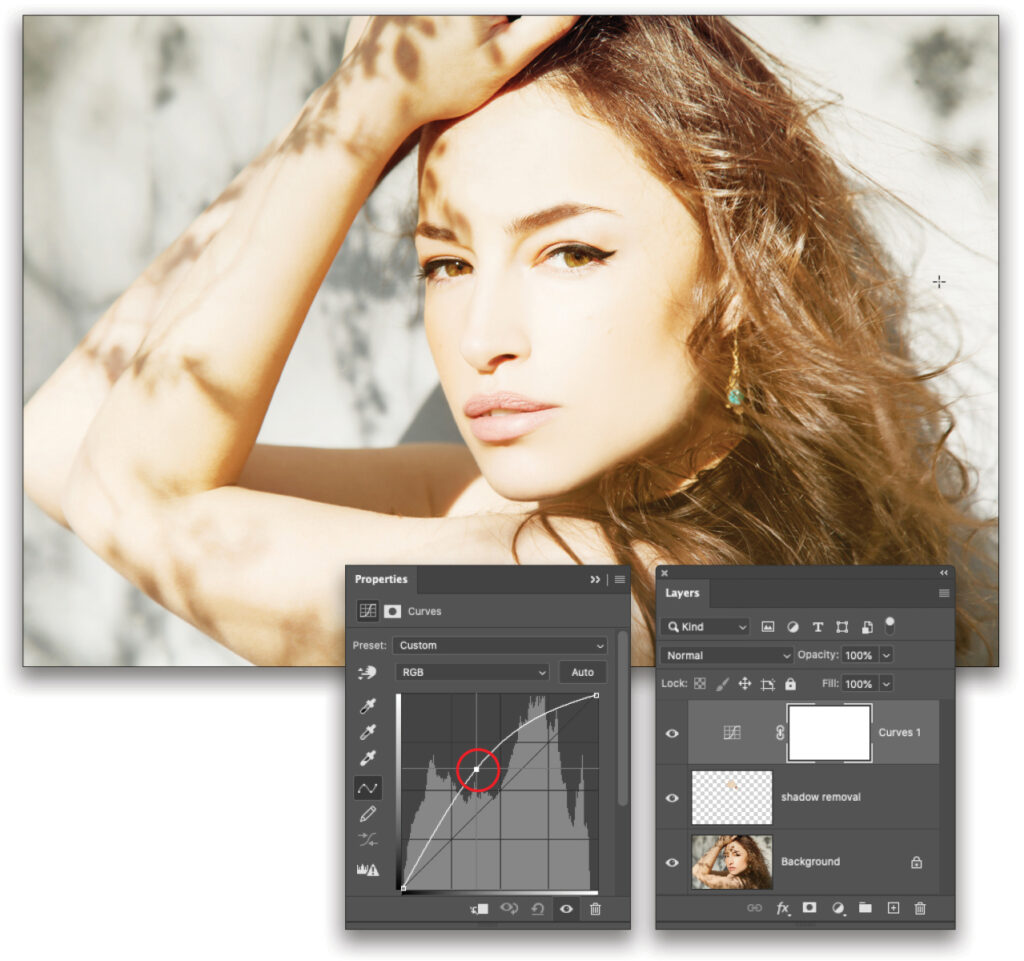
STEP NINE: With the Curves adjustment layer’s mask active (circled), invert the mask by pressing Command-I (PC: Ctrl-I). The fills the mask with black, which hides the lightening you just did.
STEP 10: Press B on your keyboard to grab the Brush tool (circled). In the realm of masks, painting with black conceals and painting with white reveals. So press D to set the color chips at the bottom of the Toolbar (also circled) to the default colors of white and black, and make sure white is on top. In the Options Bar, use the Brush Preset picker to choose a Soft Brush and lower the Opacity (circled) to around 50%.
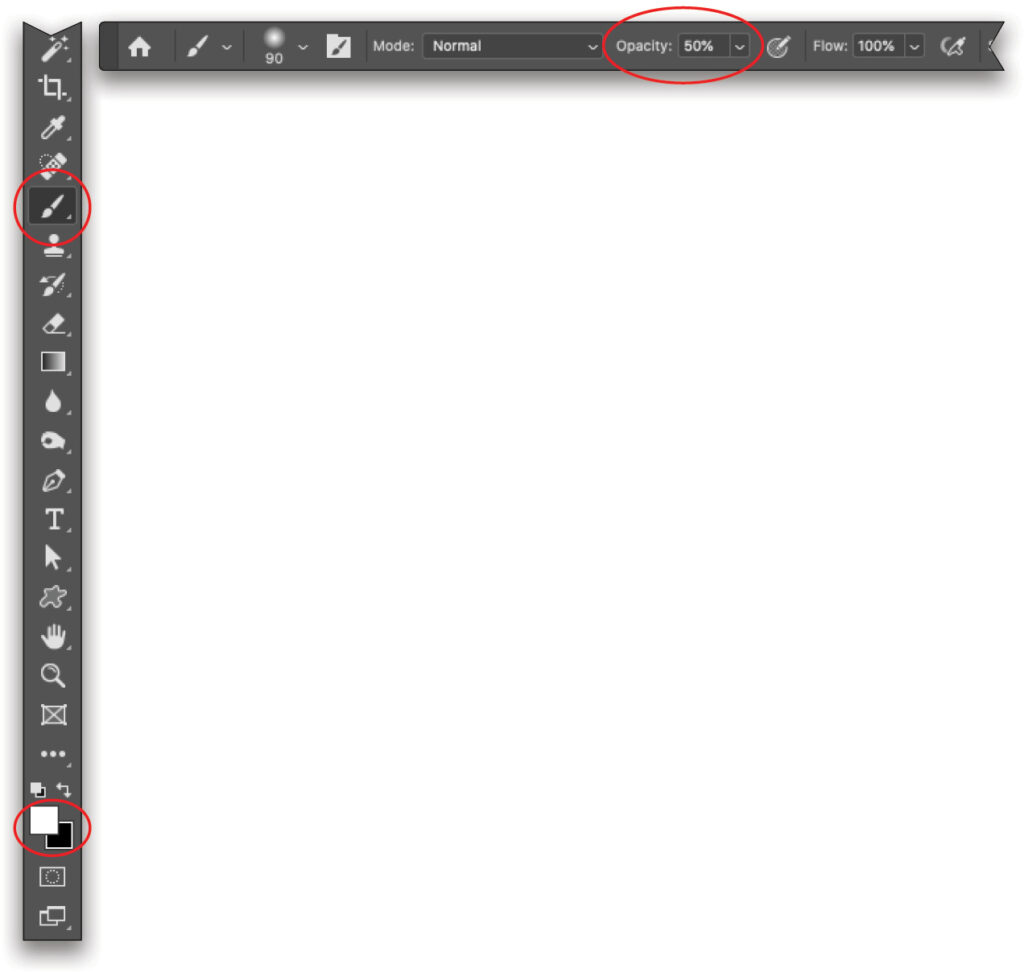
Tip: The size of the brush should not exceed the size of the shadow you’re lightening, so you’ll need to change brush size as you go, using the Left and Right Bracket keys ([ ]) on your keyboard.
STEP 11: Mouse over to the remaining shadows on the model’s skin and paint repeatedly within a shadow to lighten it—take care not to paint outside a shadow’s edge. Don’t worry if the shadows look discolored as you’re doing this; you’ll lower the Curves adjustment layer’s Opacity in the next step.
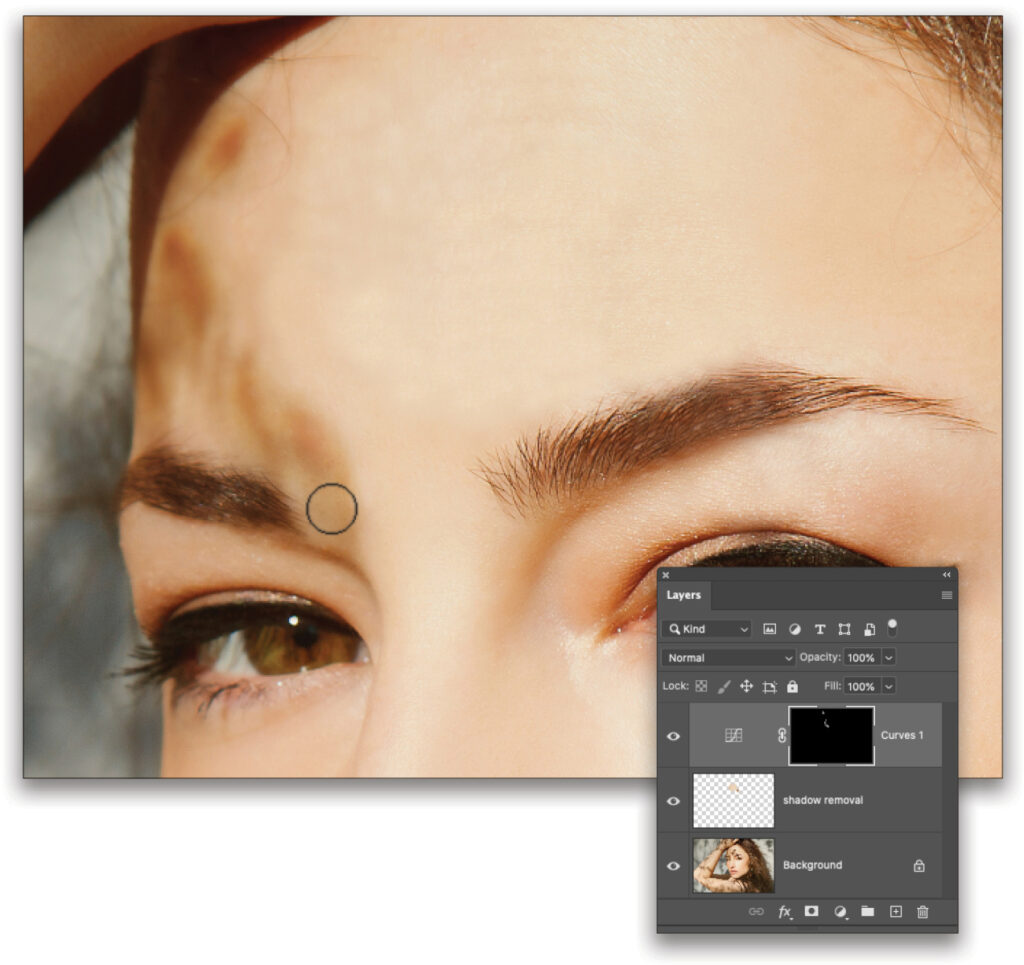
Tip: If you mess up and paint outside a shadow, or if you lighten a shadow too much, press X to flip-flop the color chips so black is on top, and then paint repeatedly back across that area.
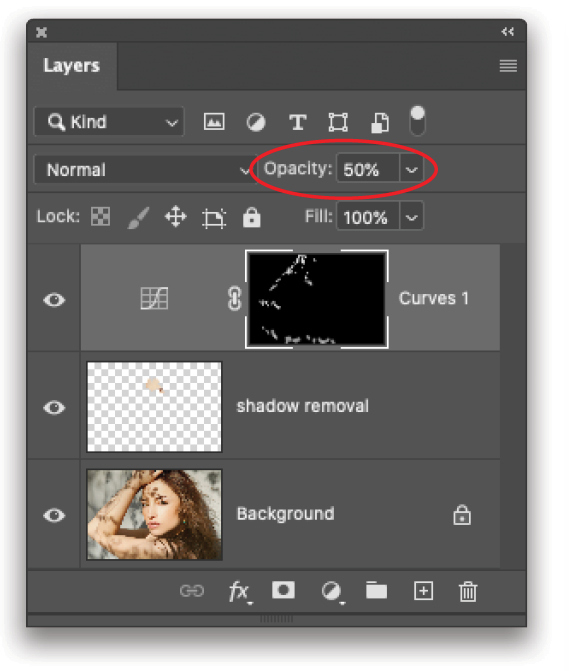
STEP 12: In the Layers panel, lower the Opacity (circled) of the Curves layer to around 50%.
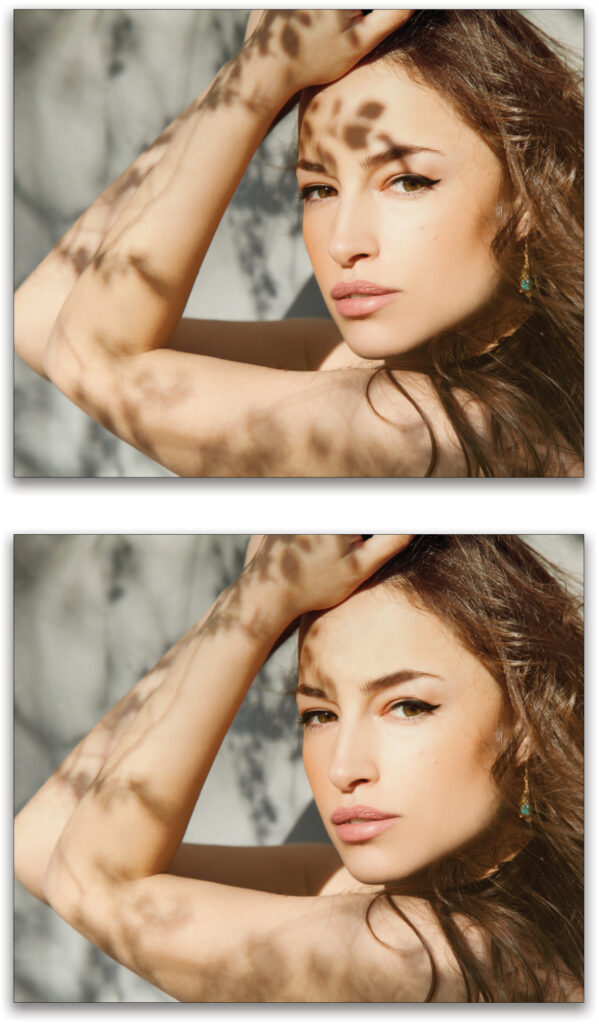
Here’s a before and after version.
The beauty of this technique is that you haven’t harmed a single pixel of the original image! Plus you can double-click the Curves adjustment layer to reopen its properties and adjust the point you added to the graph to fine-tune the shadow lightening. Until next time, may the creative force be with you all!
This article originally published in the November, 2022 issue of Photoshop User magazine.
About Photoshop User and KelbyOne
Photoshop User magazine comes out digitally 12 times a year and is part of KelbyOne, the leading educational resource for Photoshop, Lightroom, and photography. Pro members have access to more than 900 video courses and 100 back issues of Photoshop User. To learn more about KelbyOne, click here.


