There are a ton of filters in Photoshop that do all sorts of things but, in reality, there are only a handful that we use on any kind of regular basis. We’re going to focus one of the most useful sets of filters in all of Photoshop, and that’s the Sharpen filters. They do just what they sound like they’d do: they sharpen your photo. These filters have a big advantage over the sharpening in Lightroom, which is that you can clearly see the effects of the sharpening onscreen at different magnifications, like 25%, 50%, 67%, and so on. Seeing your sharpening at these different magnifications is incredibly helpful because, in Lightroom, you can really only see the effects of sharpening when you view the image at 100%. At that size, it’s hard to see what it’s going to look like when you take that 6,000 pixel-wide image and resize it down to 1,080 pixels for posting on Instagram (or sharing anywhere online).
Plus, Lightroom’s Output Sharpening is kind of a blind situation: There’s no preview whatsoever. It does its sharpening behind the scenes, so you have no idea if the amount you’re choosing is right until the file is generated and the sharpening is already applied. You sidestep all of that when you do your sharpening in Photoshop; you can see everything right onscreen every step of the way, which is why, even though Lightroom has good-quality sharpening, I still prefer to do my sharpening in Photoshop.
By the way, in case you’re wondering how often I apply sharpening to my images, that’s easy: every image of mine gets sharpened. Every one.
Now, there are a number of different methods for sharpening in Photoshop, but we’ll start with the most popular method, which has been in Photoshop since the very start in version 1.0 (nearly 32 years ago), and that’s the:
THE UNSHARP MASK FILTER
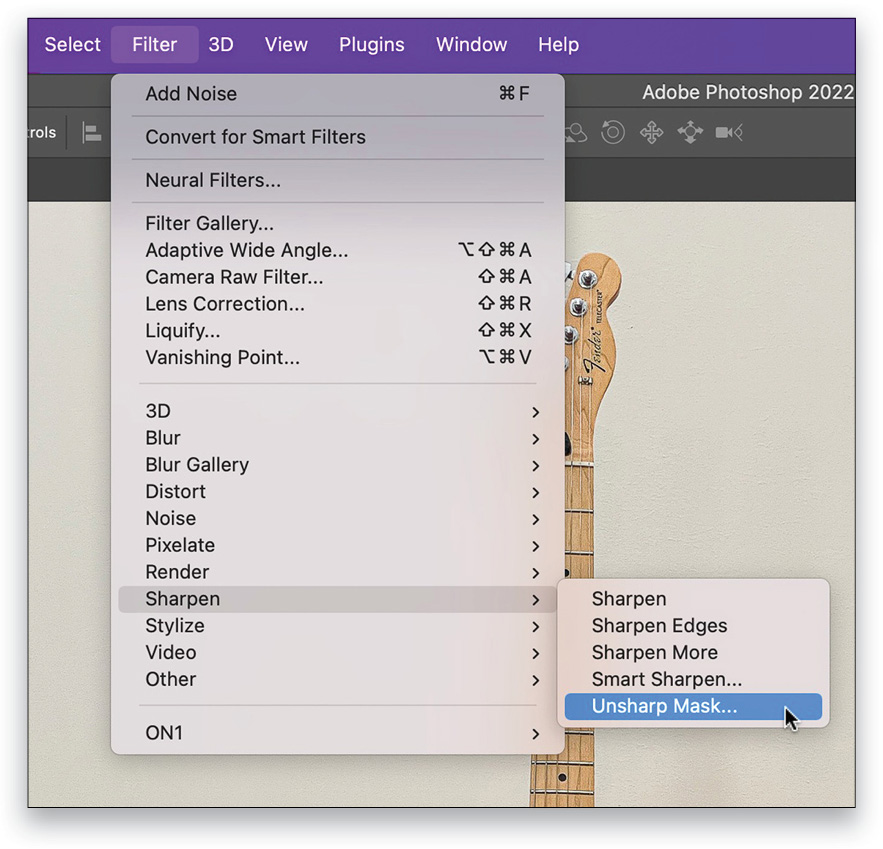
Don’t let the name throw you; it doesn’t make your images blurry (the name is a holdover from a traditional darkroom technique). It’s the go-to sharpening filter, even though it’s not the best sharpening method in Photoshop but, for whatever reason, people still use it as their primary sharpening filter, so we’ll start with it. To get to the filter, go up top under the Filter menu, then go down to Sharpening, and there you’ll find the Unsharp Mask (as shown here).
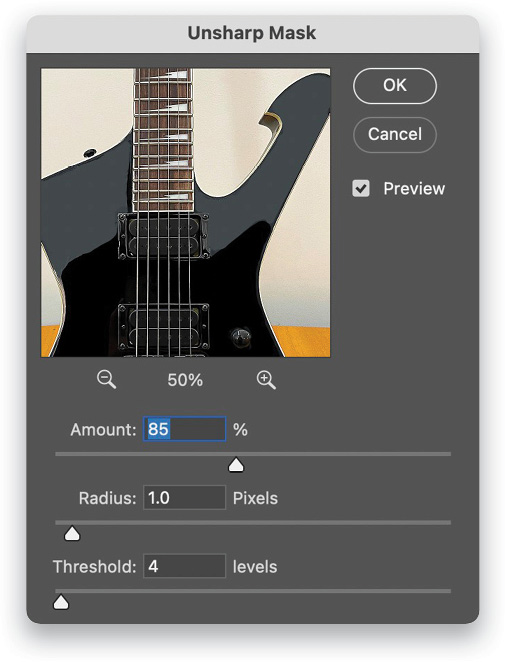
When the Unsharp Mask filter dialog appears, you’ll see it has three sliders: Amount, Radius, and Threshold. At this point in your Photoshop journey, you don’t have to learn what all three do (especially because they probably wouldn’t make a lot of sense now anyway), so all you have to concern yourself with for now is simply the Amount slider. The farther you drag it to the right, the more it sharpens your photo. You can leave the other two sliders alone for now and just work with that Amount slider. You’ll see a preview of your sharpening right within the Unsharp Mask filter dialog, but that preview is pretty small. Luckily, as long as you have the Preview checkbox turned on, you’ll see the sharpening applied to the full-size image right in Photoshop, even while the filter window is still open, so you can see the effects on the full image (shown here).
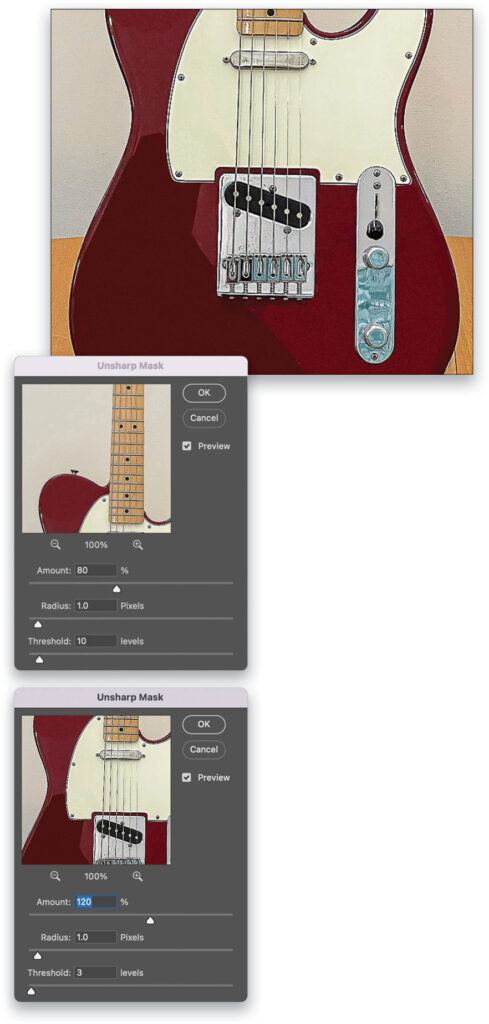
Question: But Scott, don’t you have a set of go-to settings you use when you’re applying the Unsharp Mask filter? Answer: Okay, well, I do actually. If I’m applying Unsharp Mask to images taken with camera bodies that are anywhere from 20–30 megapixels, the settings I’m showing below left will work well between those ranges. If you have a higher-megapixel camera, you’ll need to increase the Radius to 1.2 or 1.3, or if you’re using a camera that’s below 20 megapixels, lower the Radius to 1.0, and leave the rest the same.
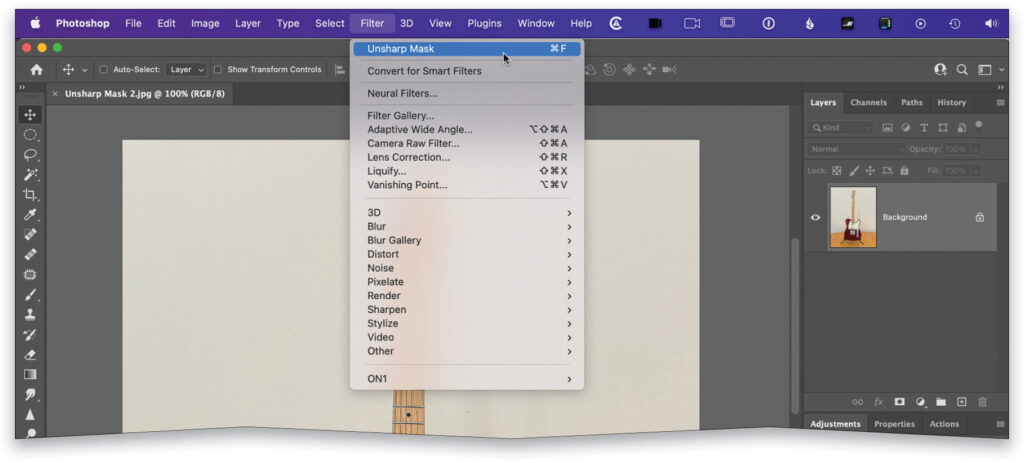
But what if that’s not enough sharpening? Well, you can use a lower Amount, like setting the Amount down to 100%, and run the filter twice (so click OK to apply the filter, and then bring it up again and click OK a second time). This actually works better than just raising all the settings, so give it a try. By the way, the last filter you’ve applied automatically appears at the top of Photoshop’s Filter menu just to make it easy to apply the filter again (Photoshop figures if you used it once, you’ll probably want to use that same filter again, so it puts it right at the top of the list for your convenience, as shown above).
SHARPENING RESIZED IMAGES
There’s another Unsharp Mask technique you should know about. I generally do my sharpening at the image’s full size or after some cropping, but essentially it’s about the size (in megapixels) that it came out of my camera. Unless I’m going to print the image, however, I rarely leave it at that large size. So, for example, if I’m going to share my image on Instagram, Twitter, Facebook, etc., then I first go to Photoshop’s Image menu, choose Image Size, and type in a much smaller size with the Width and Height linked and Resample turned on (for example, we’ll use that 1,080 pixel-width for Instagram).
Well, if I apply my sharpening after I resize the image, those figures I gave you will be way too much sharpening on such a smaller image. The settings I gave you previously (Amount: 120, Radius: 1.0, and Threshold: 3) are for using before you shrink the image’s size for posting on social. So, if you’d prefer to resize first, and then apply your sharpening, use the settings shown here instead (Amount: 85, Radius: 1.0, and Threshold: 4). That should do the trick. By the way, I changed to a different guitar photo just so we don’t keep looking at the same ol’ guitar.
Once you resize an image down to post on social, you’ll usually see a bit of loss of overall sharpness that happens during the resizing process. Think of it this way, if you had a 4,600-pixel-wide image out of your camera, and you size it down to a 1,080-pixel-wide image, you tossed out 3,520 pixels during the resize. Now, you can apply those lower Unsharp Mask settings after the resize if you’d like (so, you apply the large Unsharp Mask amount to the large image, and then after you resized it down, you apply the subtler amount to bring back that sharpness). So you’re sharpening twice: once at full size, once with a smaller amount on the smaller image.
THE SHARPEN FILTER
Another method I use (just for convenience sake) is after I’ve sharpened with Unsharp Mask on the larger image and then resized it, I just go under the Filter menu up top, under Sharpen, and simply choose Sharpen (as shown here). That doesn’t bring up a window at all. It just applies a low preset amount that the Photoshop team chose, and it usually works pretty well.
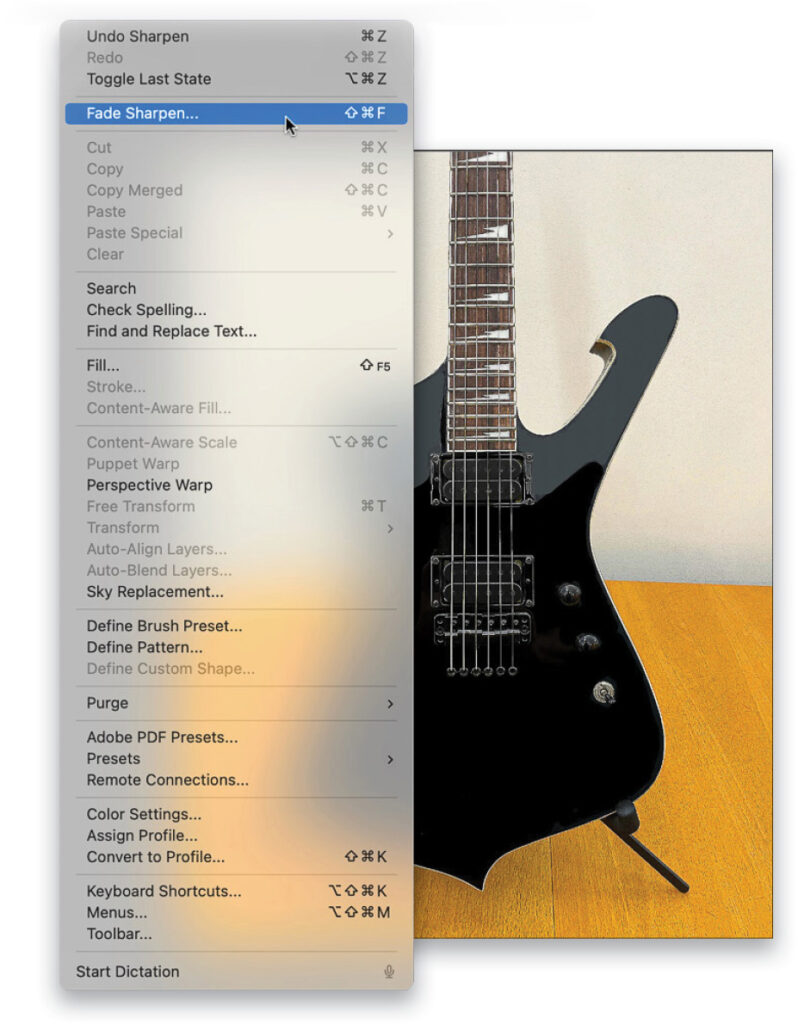
The only problem with the Sharpen filter (and its cousin in the same menu called Sharpen More, which just runs that same filter again but with a higher amount of sharpening), is that you have no control over the amount. It’s great if it looks good (and when I size down an image for Instagram, the Sharpen filter actually usually looks pretty good) but, if it’s too much sharpening, you’ll either have to Undo the filter or use this cool trick: Apply the Sharpen filter and, if you think it’s too much, go under the Edit menu (up top) and choose Fade Sharpen.
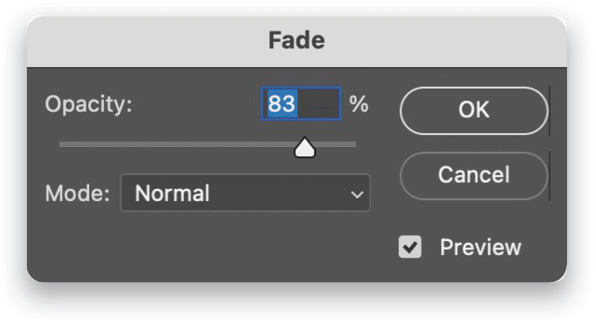
This brings up a simple dialog with an Opacity slider. Think of that slider as “Undo on a slider.” At 100% (all the way to the right, which is the default setting), you’re getting the full effect of the Sharpen filter. If you drag it to the left, you’re reducing the amount of the filter, so you’re undoing some of its strength. In short, you’d apply the Sharpen filter, go under the Edit menu, choose Fade Sharpen, and then drag the Opacity slider to the left to reduce its intensity, stopping when the amount of sharpening looks about right to you. I have to do this on a fairly regular basis, but luckily, it’s fast and easy. Note: Be sure to go to Fade Sharpen immediately after you apply the Sharpen filter; otherwise, if you do anything else in Photoshop first, the Fade Sharpen menu option will go away.
There’s more sharpening filter stuff still to cover, but we’ll tackle that next issue. Getting the Unsharp Mask filter under our belt is a big one. See you next time when our filter adventure continues.
This article originally published in the January, 2022 issue of Photoshop User magazine.
About Photoshop User and KelbyOne
Photoshop User magazine comes out digitally 12 times a year and is part of KelbyOne, the leading educational resource for Photoshop, Lightroom, and photography. Pro members have access to more than 900 video courses and 100 back issues of Photoshop User. To learn more about KelbyOne, click here.


In my LrC, I have many collections. Is there a way to copy a colection or move it to another location so I could save it outside LrC?