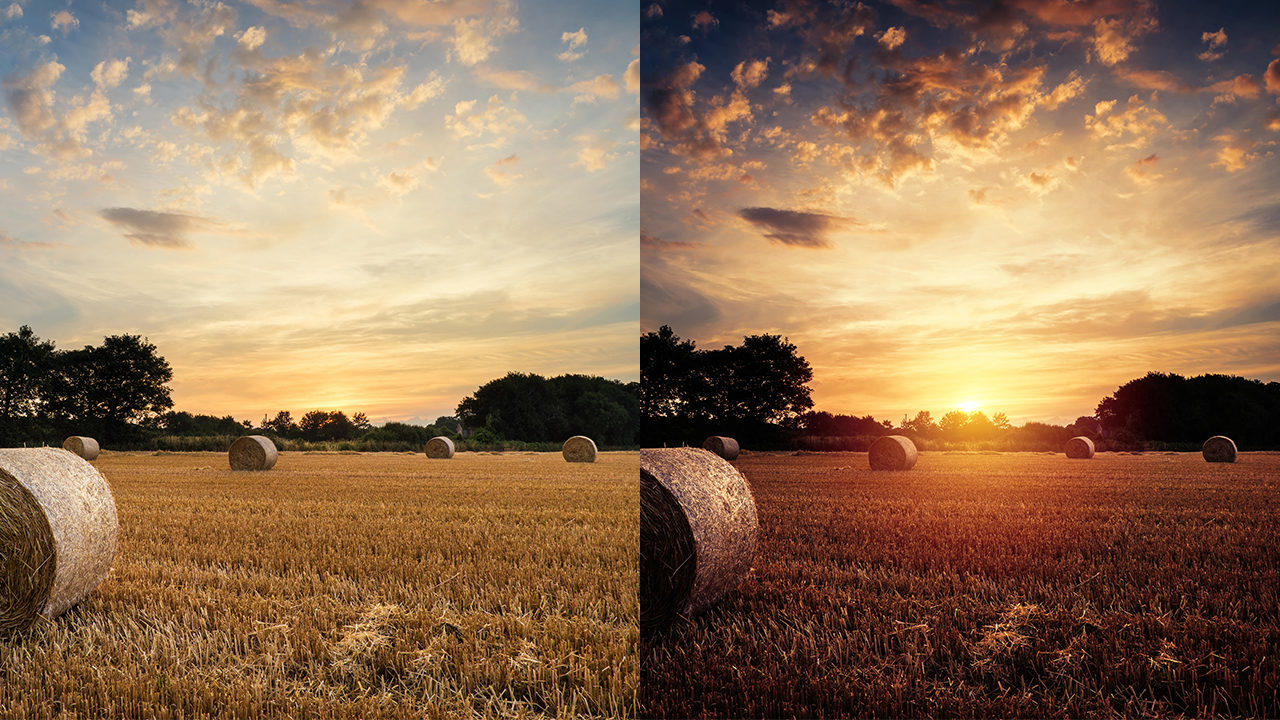
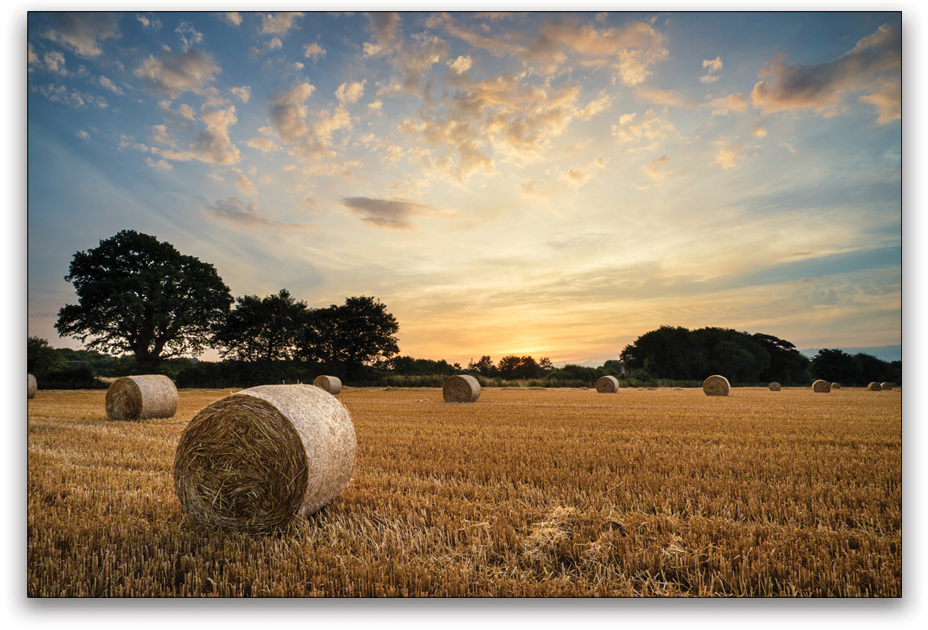
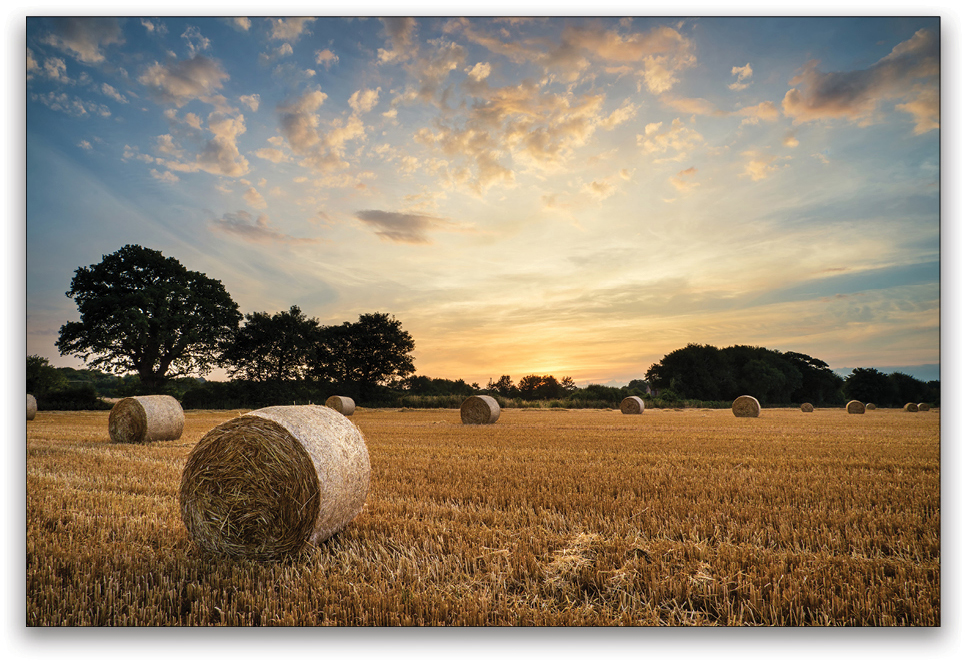
Whether you wish to turn the clock back and catch the brilliant sunset you missed or you want to add a sunset effect, this article is for you. We’ll learn how to create a sun and the atmosphere around it just by using the power of blending modes and adjustment layers in Photoshop. In the process, we’ll learn techniques to add drama and warmth to simulate the dramatic nature of a sunset. So without any further ado, let’s get started!
STEP ONE: OPEN THE IMAGE
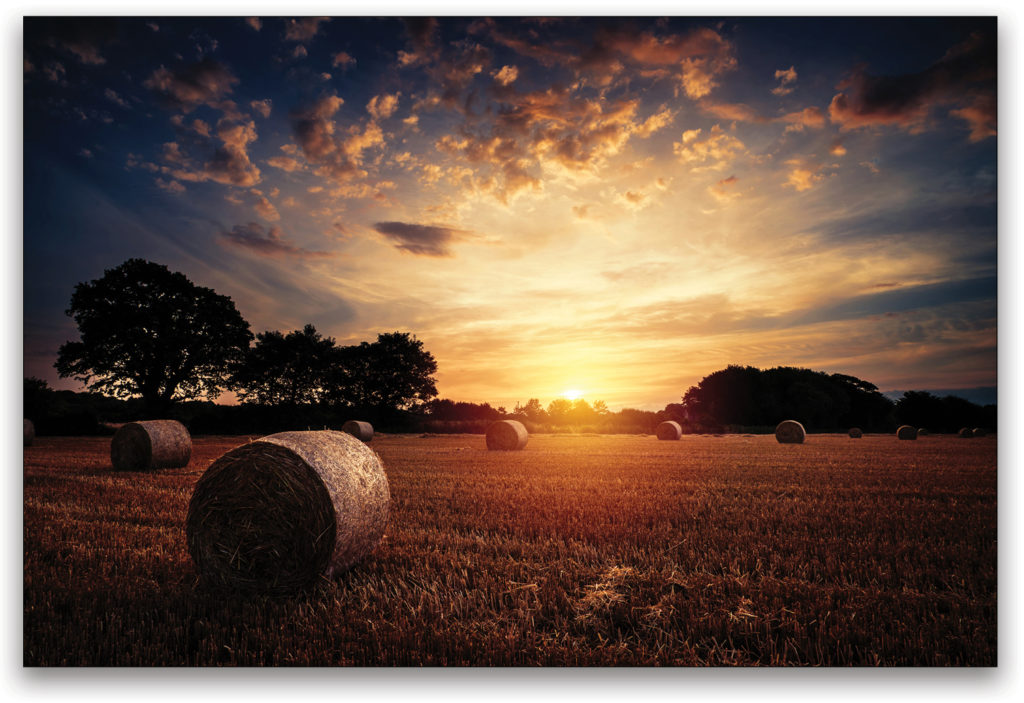
First, let’s open an image into Photoshop. You can add this effect to any landscape you wish. If you’d like to follow along with the photo used here, you may download the JPEG preview for free, or license the full-resolution version from Adobe Stock by clicking here. To download the preview image, log in with your Adobe ID, and click the Save to Library button. After you download your image from Adobe Stock, you can double-click the image in the Libraries panel (Window>Libraries) to open it.
If you’re using your own image, go to File>Open, locate your image, and then click Open. Or, while Photoshop is open in Application Frame, go to Finder (PC: Explorer), locate your image, and drag-and-drop it into Photoshop.
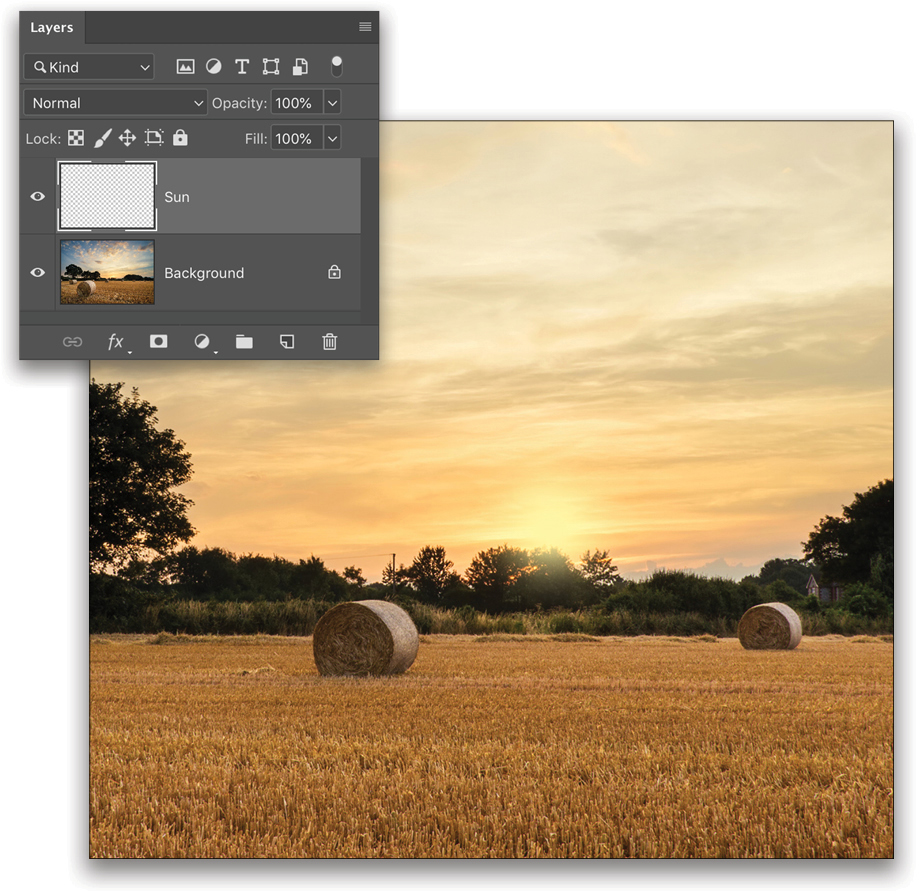
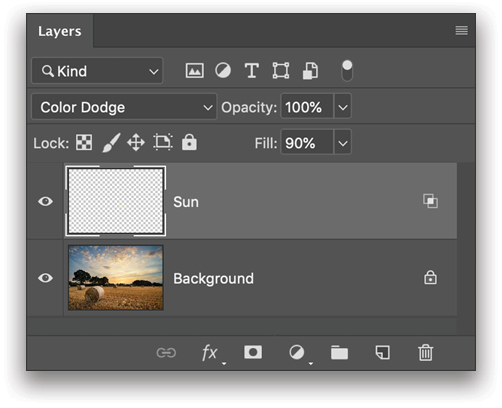
STEP TWO: CREATE A NEW LAYER
Click on the Create a New Layer icon at the bottom of the Layers panel or press Command-Option-Shift-N (PC: Ctrl-Alt-Shift-N) to create a new layer. Double-click on the layer’s name and rename it “Sun.”
STEP THREE: PAINT THE SUN
Get the Brush tool (B), select a soft round brush, and set the Foreground color to a bright yellow. For this example, choose H=55, S=36, B=100.
Just click once near the horizon to create a ball of sun, as shown here.
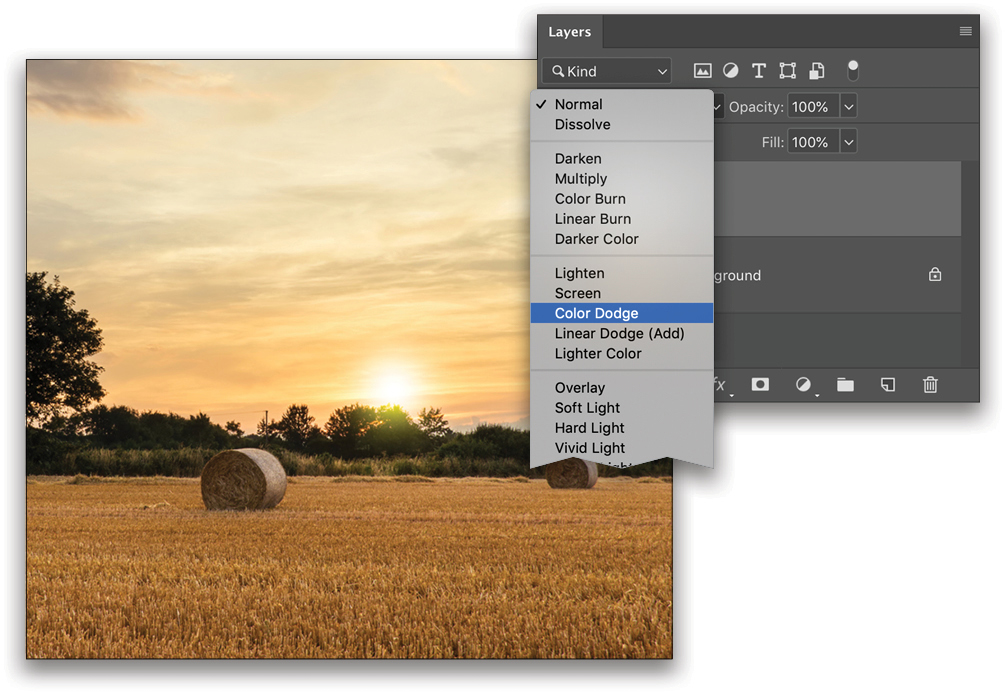
STEP FOUR: CHANGE THE BLEND MODE TO COLOR DODGE
Change the blending mode of the Sun layer to Color Dodge.
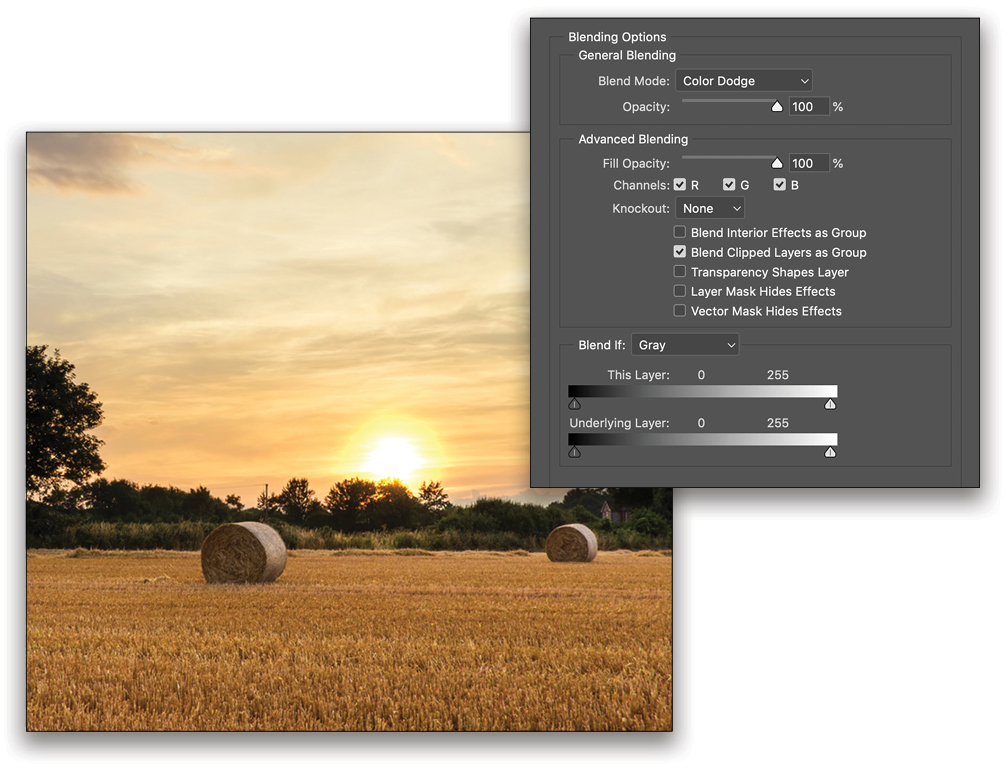
STEP FIVE: UNCHECK TRANSPARENCY SHAPES LAYER
To make the sun look more realistic, Right-click on the Sun layer and choose Blending Options. In the Advanced Blending section, turn off the Transparency Shapes Layer checkbox, and click OK.
STEP SIX: ADJUST THE POSITION & INTENSITY OF THE SUN
Select the Move tool (V) and click-and-drag the sun to the position you wish. If you think it’s too big or too small, use Free Transform (Command-T [PC: Ctrl-T]) to resize it; press Enter to lock in your change.
In my opinion, the sun looks too powerful. Since Color Dodge is a special blend mode, Opacity and Fill act differently. In this case, Fill controls the intensity and projection of the layer. Let’s decrease the Fill to about 90%.
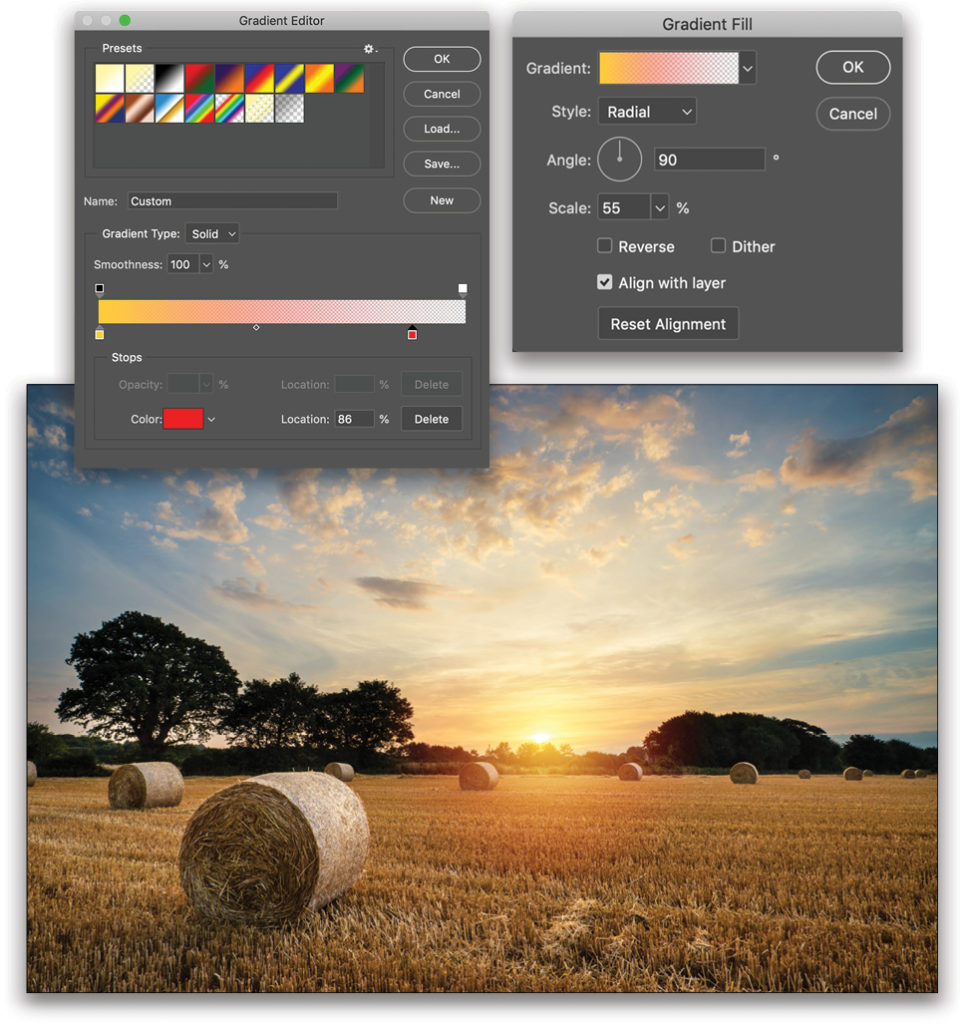
STEP SEVEN: CREATE THE GLARE AROUND THE SUN
Click on the Create New Adjustment Layer icon (half-black/half-white circle) at the bottom of the Layers panel and choose Gradient. In the Gradient Fill dialog, click on the Gradient thumbnail to open the Gradient Editor. Choose the Foreground to Transparent gradient (second from the left in the top row). On the gradient ramp, the top-left opacity stop should be set to an Opacity of 100% and the top-right opacity stop to an Opacity of 0%. Double-click on the bottom-left color stop and change the color to H=45, S=79, B=100. Slide the bottom-right color stop a little to the left, and set its color to H=0, S=100, B=100. Click OK to close the Gradient Editor.
Back in the Gradient Fill dialog, change the Style of the Gradient to Radial and change the Scale to 55%. You can now click-and-drag the gradient over the sun. Once done, click OK. Let’s rename the Gradient Fill layer to “Glare” and change its blending mode to Screen.
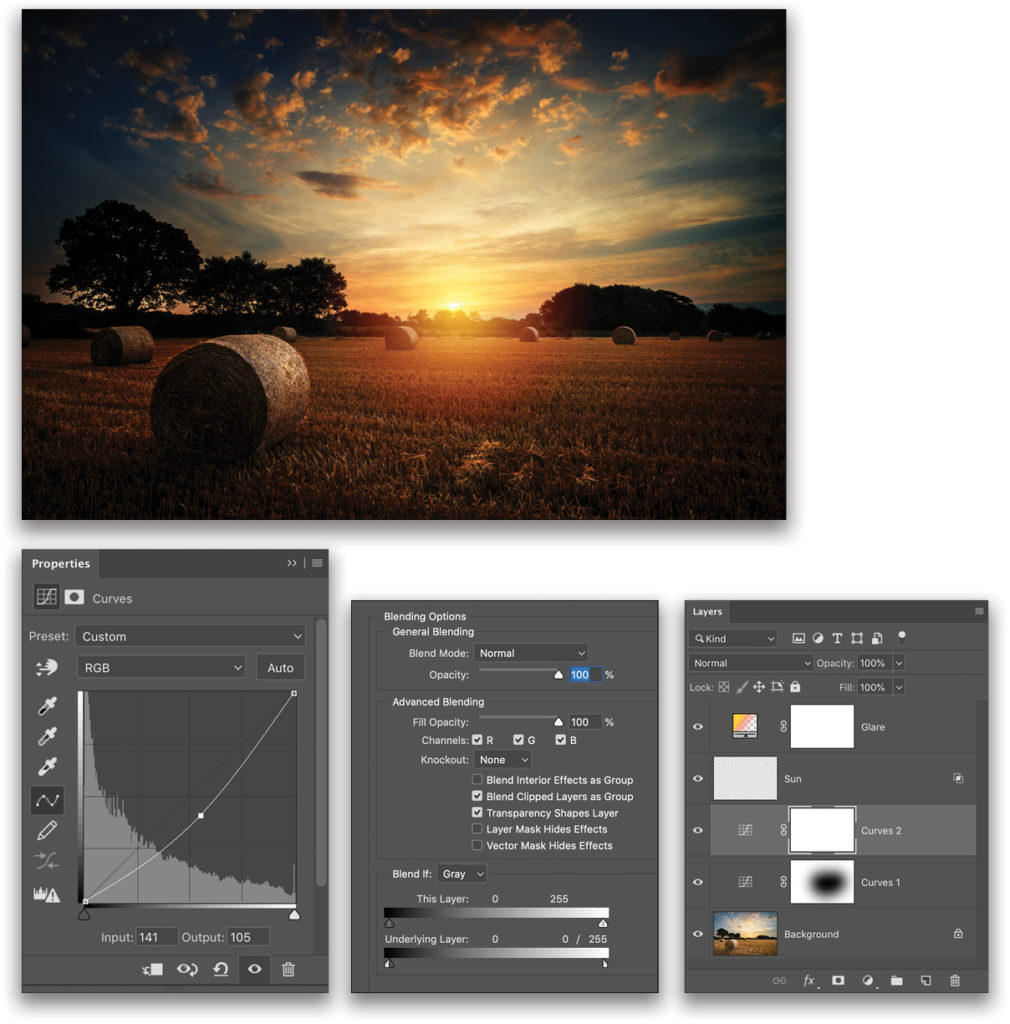
STEP EIGHT: DARKEN THE IMAGE WITH CURVES
Select the Background layer so that the Curves layer we’re about to add will be created above it. Click on the Create New Adjustment Layer icon again, but this time, choose Curves. Click to create a point in the middle of the curve in the Properties panel (Window>Properties) and drag it down to darken the image, as shown.
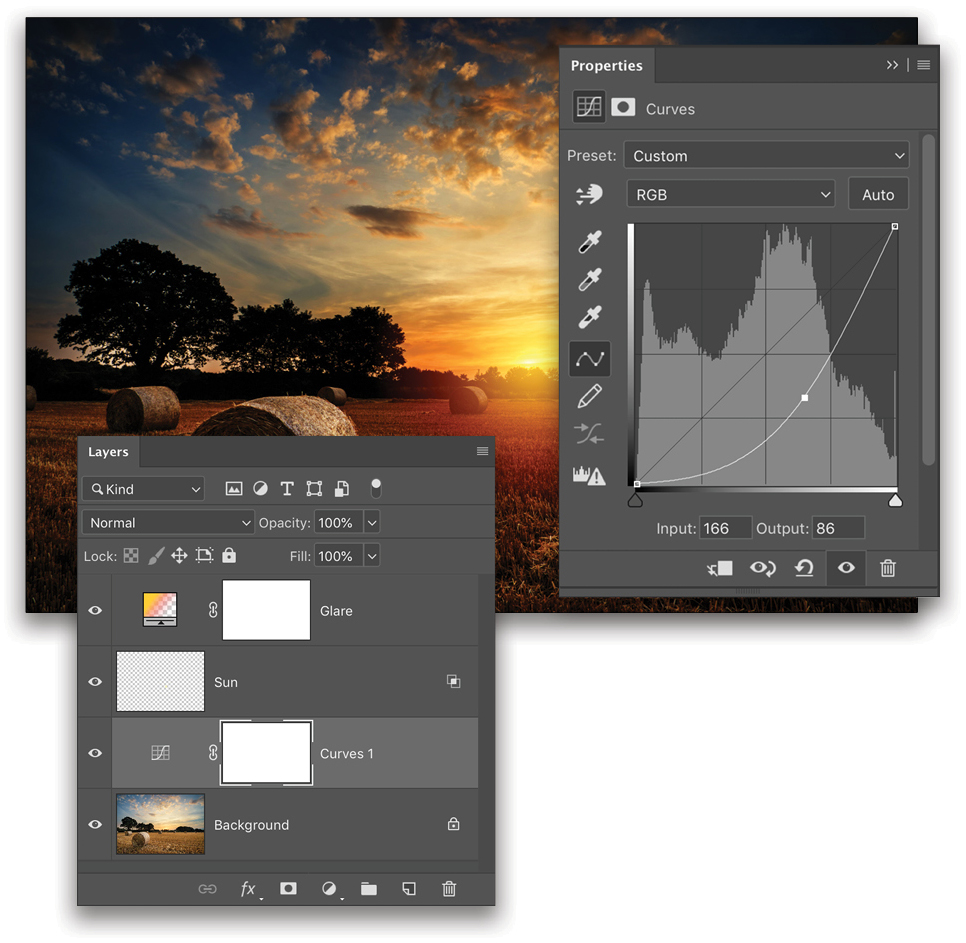
STEP NINE: MASK OUT THE SUN & THE AREAS AROUND IT
Click on the mask for the Curves adjustment layer to select it. Get the Brush tool again and choose a really large, soft round brush. Press D, then X to set your Foreground color to black, and then paint over the sun and the areas around it to remove the Curves effect.
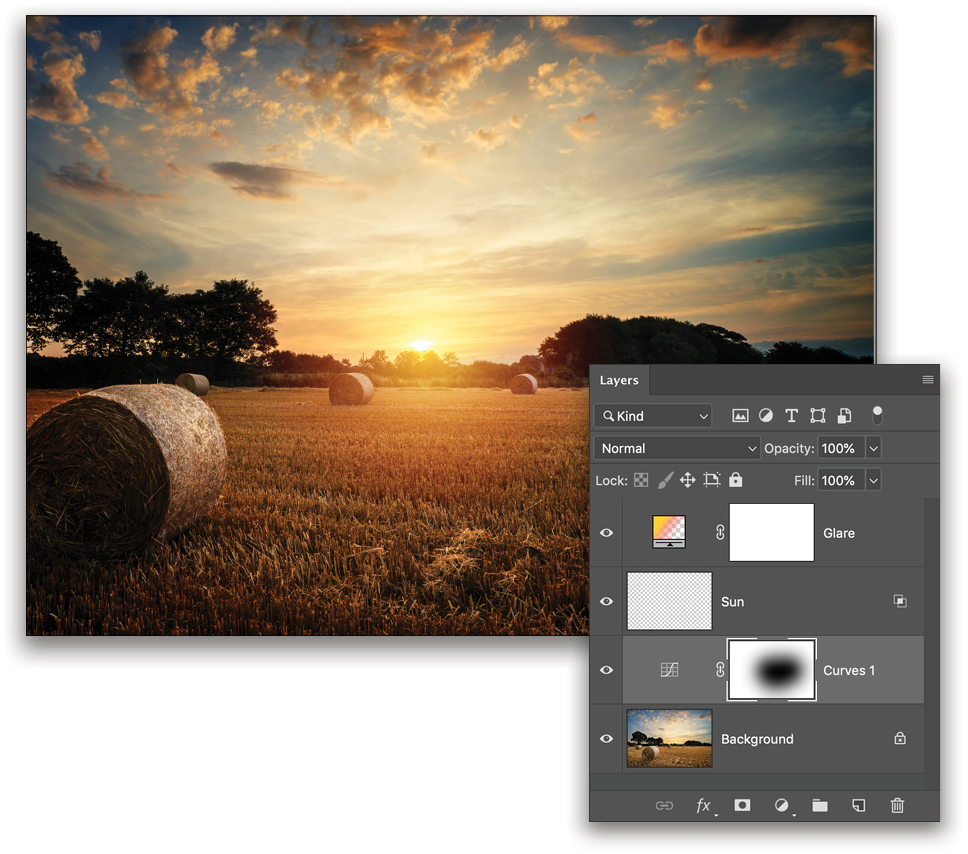
STEP 10: ADD AN OVERALL DARKENING
Similarly, let’s create one more Curves adjustment layer above Curves 1, click to create a point in the middle of the curve, and drag it down.
Right-click on the Curves 2 layer and choose Blending Options. In the Blend If section, Option-click (PC: Alt-click) on the right Underlying Layer slider, splitting it, and then drag the left half all the way to the left. Click OK. (To learn more about using the Blend If sliders, click here.)
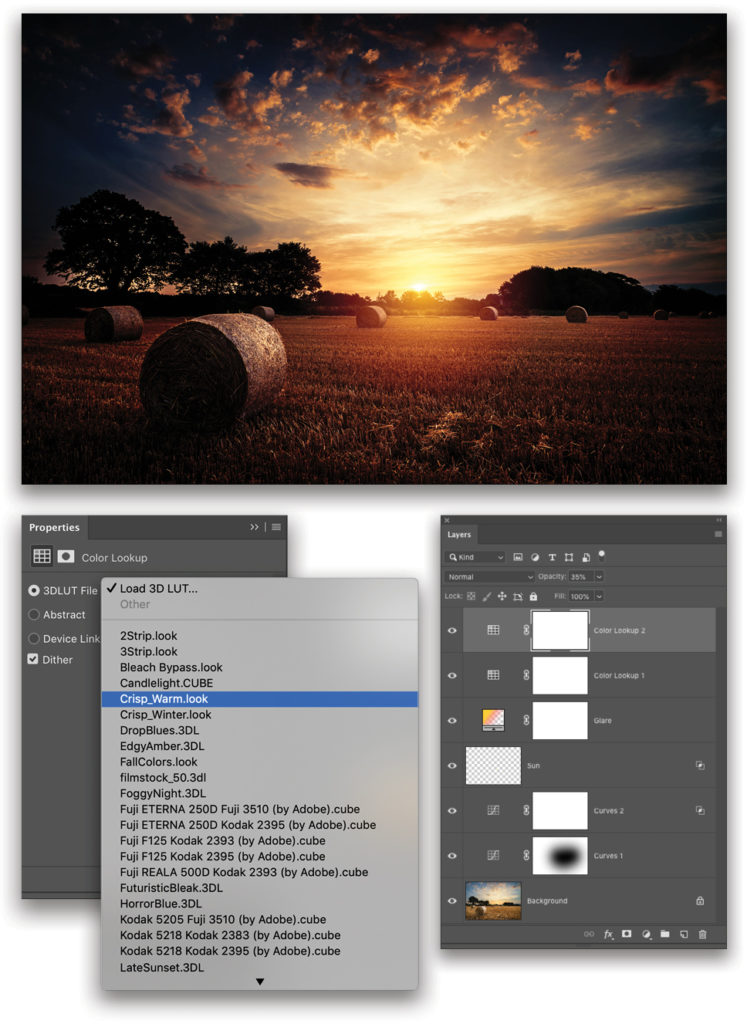
STEP 11: ADD COLOR LOOKUP TABLES TO ENHANCE THE DRAMA
Select the Glare layer at the top of the layer stack. Then, click on the Create New Adjustment Layer icon at the bottom of the panel, and choose Color Lookup. In the 3D LUT File drop-down menu, choose Crisp_Warm. Decrease this layer’s Opacity to 30%.
Create one more Color Lookup adjustment layer, and this time choose LateSunset from the 3D LUT File drop-down menu. Decrease this layer’s Opacity to 35%.
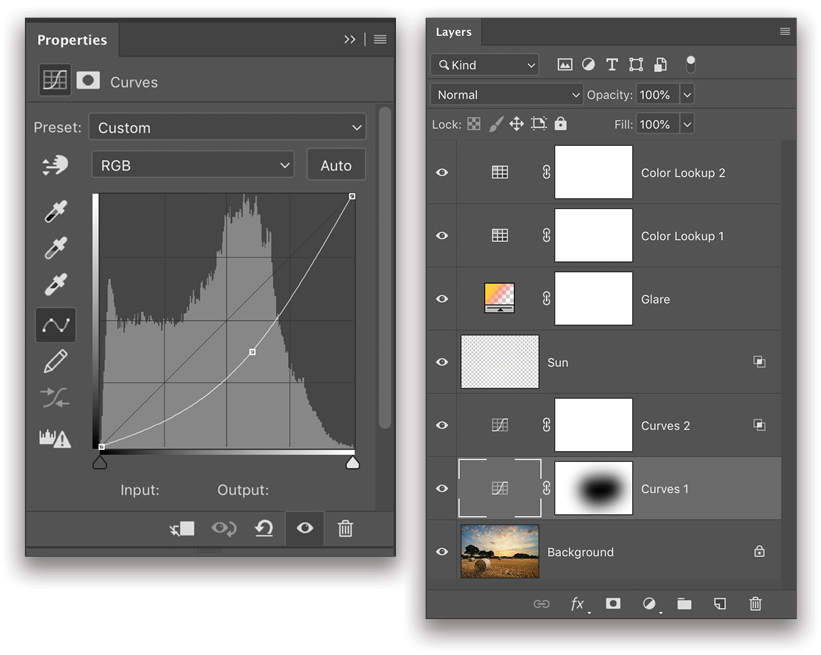
STEP 12: ADJUST THE DARKNESS
Now the image has become too dark, so let’s revisit the Curves 1 adjustment layer just above the Background layer and drag the point up a little.
This technique isn’t limited to creating a sunset effect; you can modify it to simulate any source of light. The key to creating exceptional results is understanding the concept of tools in Photoshop and also observing how the light source looks in real life. To learn more about using color grading to create drama, click here.
This article originally published in the August, 2019 issue of Photoshop User magazine.