
Welcome back, you beautiful Photoshop-loving folks! In a previous post, we tweaked a fun, quick snapshot that my mom took of my daughter and me, and we started the process of turning it into something that really stands out, looks beautiful, and would be suitable for a holiday card. But in this month’s article, we’re going to take the image even further and make it more epic by adding some fun foreground elements completely in Photoshop! This is going to make the image look much more like a professional portrait that was artistically shot.
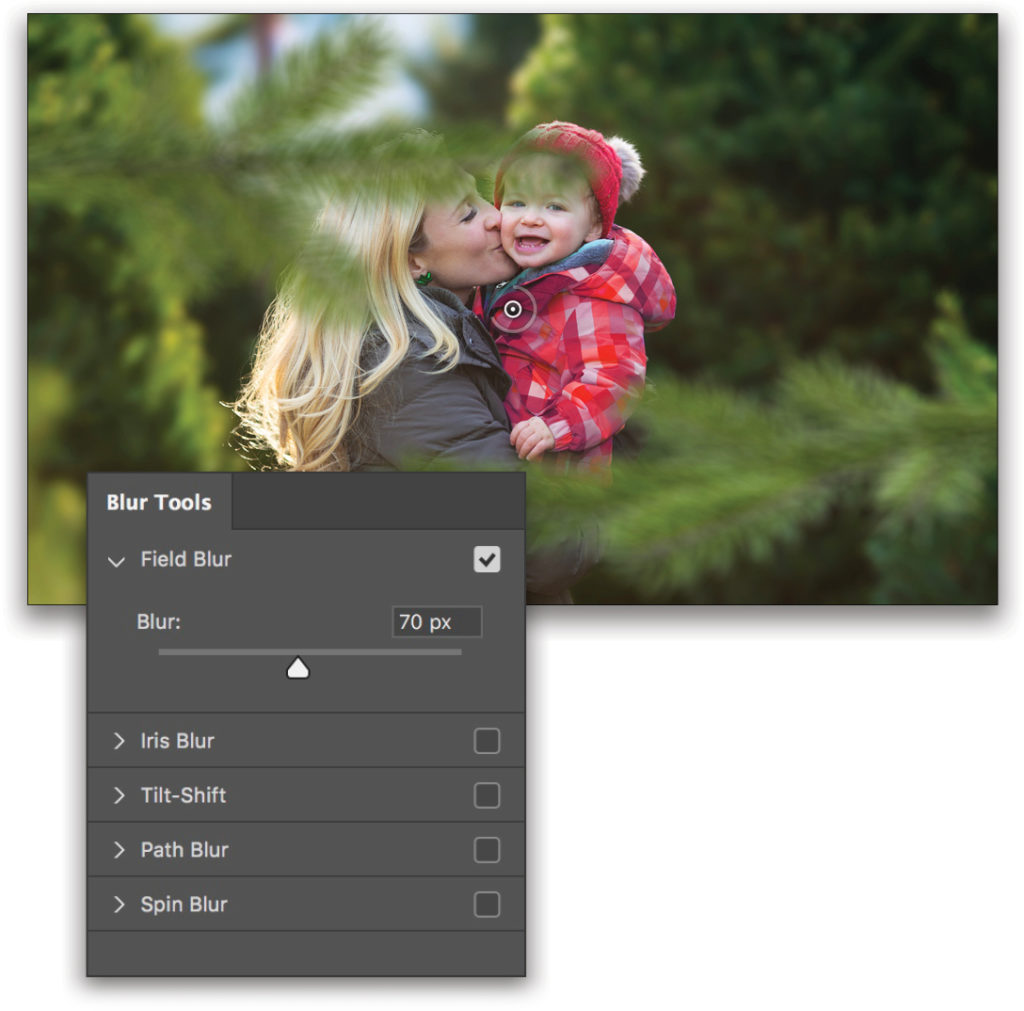
As a reminder, here’s our original image and where we left off at the end of last issue’s article. We cleaned up the image by removing distracting elements; blurred the background using Field Blur, which gave it a really blurry, buttery look; and finally, we changed the color of my baby’s jacket for a more festive look. If you’ve already completed the first part of the tutorial, open the practice file so you can pick up where we left off. If you haven’t completed Part 1, click this link to jump to Part 1, and then come back here when you’re done.

Step One: At this point, we want an image that has isolated Christmas tree branches. Where better to find a specific image like that than on Adobe Stock? Searching for the term “Christmas tree branch” got me some great results. When choosing elements to add to a project such as this, it’s easier to use an image with as plain a background as possible to alleviate any complex issues that may come up when selecting the elements to extract them from the background. In this case, we were lucky to find this image with branches on a white background. Yahoo! This will make masking a breeze.
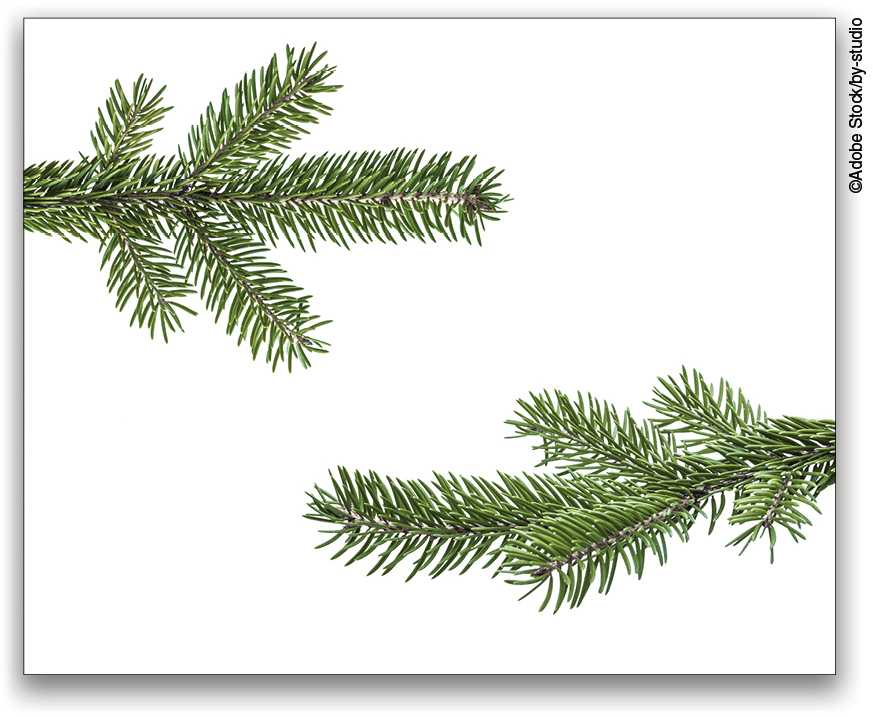
If you’d like to download the low-res watermarked version of this image to follow along, click this link, log in with your Adobe ID, and click the cloud-with-an-arrow icon next to Save Preview to My Library to download the file to your Libraries panel (Window>Libraries).
Step Two: Let’s get started by opening the stock image in Photoshop and adding it to our working file. If you downloaded the Adobe Stock file, simply double-click the image in the Libraries panel to open it.
We can add the branches image to our working file in one of two ways. I generally work in tabs, so here’s my go-to method: Activate the Move tool by pressing the V key, hold the Shift key, click-and-drag the image to the tab of the file to which you want to add the image, and hover the cursor over the tab for a few seconds until that image pops to the foreground. Now you can drop the layer into the new document. Holding the Shift key will drop the image in the center of the document.
The previous method is easier to show in person, so if it doesn’t quite make sense, you can always do the simple copy-and-paste method: Click on the stock image of the branches to make it the active image, press Command-A (PC: Ctrl-A) to Select All, press Command-C (PC: Ctrl-C) to copy, navigate to your working document, and press Command-V (PC: Ctrl-V) to paste the image.
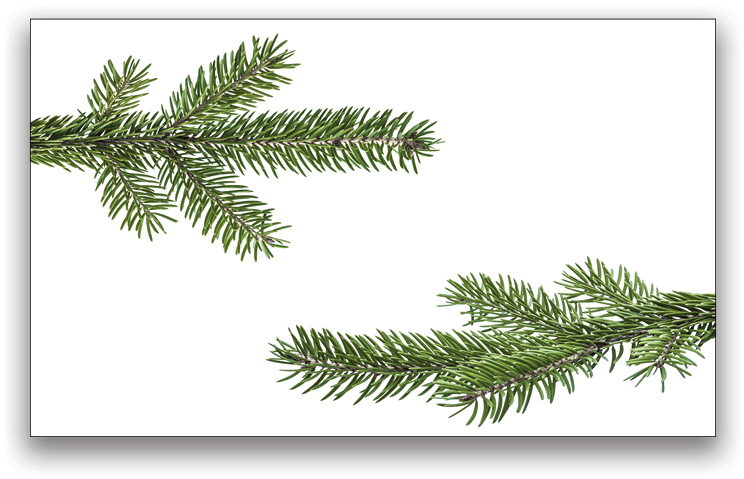
The Adobe Stock image of the branches is pretty small for the working file, so press Command-T (PC: Ctrl-T) to enter Free Transform and scale and position the branches so they go all the way to the left and right edges of the document, but make sure you can see the top and bottom of the layer in its entirety. You can hold Shift while reshaping the layer, as we’re not concerned with maintaining the proportions of the original branches. Press Enter to commit the transformation. Don’t worry about the resolution of the branches, as we’ll be blurring them.
There’s one more thing you need to do if you’re using the Adobe Stock image: Press Command-A (PC: Ctrl-A) to Select All, and then go to Image>Crop. This will cut away any of the excess branch layer that’s sticking out beyond the document bounds (this is important for the upcoming Field Blur step).
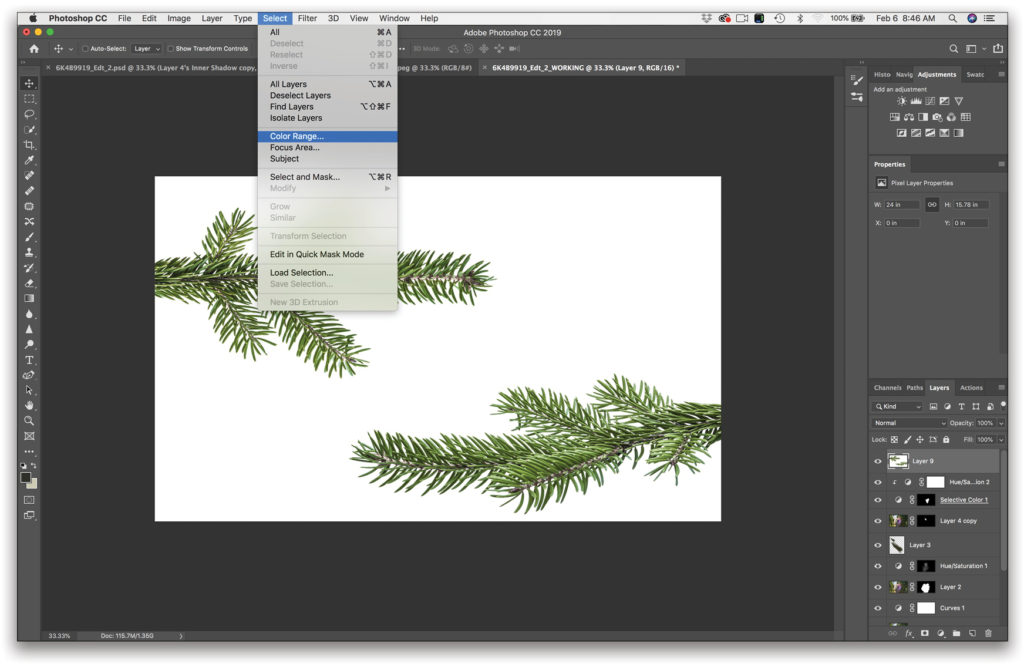
Step Three: It’s time to get rid of that pesky white background! Because the background is plain white, this can be done in a snap. My favorite method of removing a background is Select>Color Range.
Note: Color Range is my favorite tool in Photoshop. You can make extremely intricate and detailed selections using the colors, brightness/darkness values, and even skin tones (in CS6 or later) in your image. If you haven’t played around with this method of creating selections, you should be extremely excited because you have a serious treat waiting for you to unwrap! Okay, back to business.
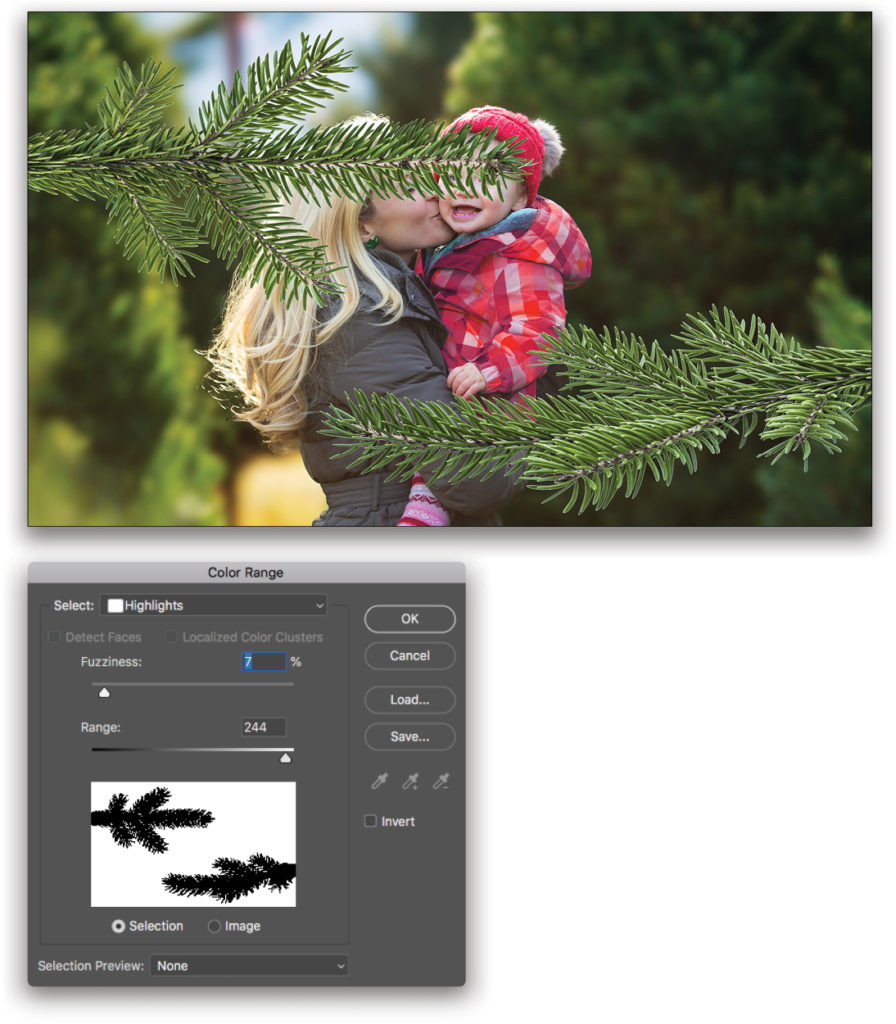
Step Four: Our next step is to tell Color Range which tone we’d like to isolate, so choose Highlights from the Select drop-down menu. This is going to immediately select all the highlights in the image, which is mainly the white background. Set the Fuzziness slider to 7% and Range to 244. Click OK, and then press Command-X (PC: Ctrl-X) to trash (or cut) the pixels we don’t want. Now wasn’t that easy? This tool will revolutionize the way you mask and make selections from now on!
Step Five: Our last step for prepping our branches is to separate them into their own layers. Make a loose selection around the bottom branch using the Lasso tool (L), press Command-X (PC: Ctrl-X) to cut it from the layer, and then press Shift-Command-V (PC: Shift-Ctrl-V) to paste it in the exact same place. This will divide the two branches onto their own layers so we can modify and place them independently.
I’ve taken the liberty of renaming these two layers “Left Branch Original” and “Right Branch Original.” Simply double-click a layer’s name to rename it. Our last bookkeeping item is to turn both branch layers into smart objects. Since we’re going to blur these branches, I want the original content to be protected inside a smart object. So click on one of the branch layers in the Layers panel to make it active, and choose Layer>Smart Objects>Convert to Smart Object. Do the same for the other branch layer.
Step Six: Now let’s move on to the fun part! Make the Left Branch Original layer active, and choose Filter>Blur Gallery>Field Blur. Then use the Blur slider in the Blur Tools panel to blur the branch 70 px. Click OK in the top Options Bar. Now our branch looks like it was originally in the foreground of the photo. Repeat this step for the Right Branch Original layer as well.
Step Seven: Both of our branches have been blurred! The only thing that strikes me now is that they’re a little too bright; let’s make them darker so they blend in with the rest of the image. Create a Curves adjustment layer by clicking the Create New Adjustment Layer icon (half-black, half-white circle) at the bottom of the Layers panel. As it stands now, the adjustment layer will affect the entire photo; we only want the darkening effect to be visible on the underlying branch layer. So with the Curves layer active, go to Layer>Create Clipping Mask, and that will make the effect only show through the pixels in the underlying layer!
Pull down the midtones of the curve in the Properties panel to darken the branch until the brightness of it looks right in the image. Name your Curves adjustment layer “Darken Branch.” That was an easy way to darken one branch, but the other one is still too bright. So let’s do the same thing to the other branch.

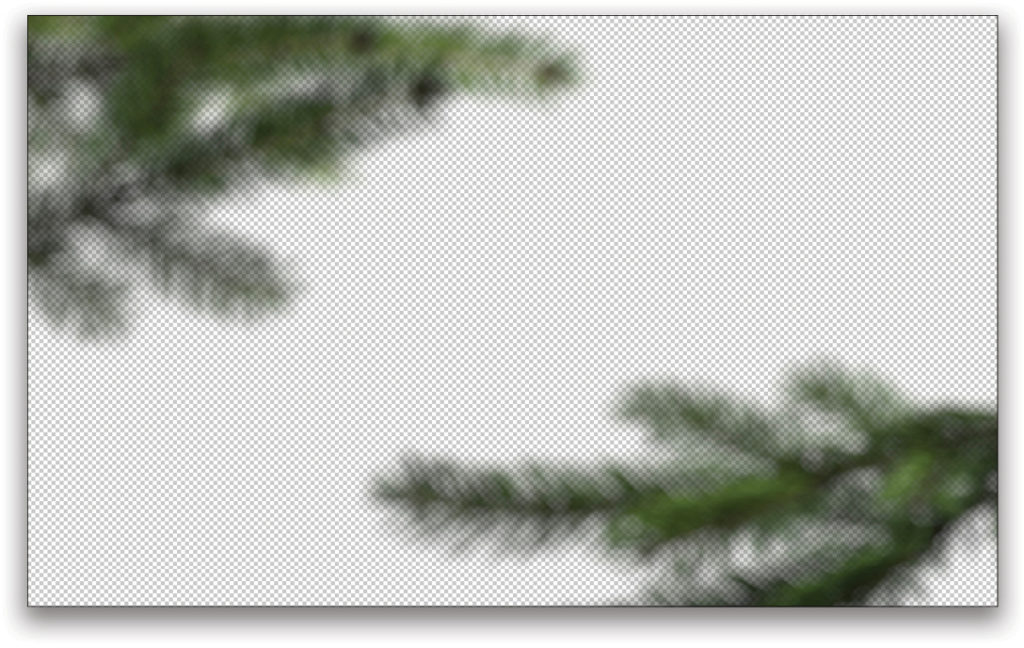
Step Eight: This is where you get to add your own creative juices to this project! At this point, you can copy-and-paste each branch and reposition it to create the illusion that the camera was peeking through the trees to capture this shot. You can even transform each branch using Command-T (PC: Ctrl-T) to create variation and make sure the subjects are visible. Place each branch in the perfect location to make an amazing shot. To show what my final foreground branches look like I’ve turned off all other layers in the image here.
Note: As you duplicate each branch, you’ll need to remember that the darkening treatment we applied (through the Curves adjustment layer) is on a different layer that won’t be copied. So the adjustment layer will now be clipped to the copy and not the original branch layer. You’ll have to create new darkening Curves adjustment layers for the original branch layers and re-clip them.
Power User Tip: If you anticipate wanting to add these branches to other images in the future, you could save a PSD file with only the blurry branch layers to add to any image you create in the future! That way, you’ve saved yourself 30, maybe 40 minutes of work for each time you utilize this file. Now all of your images can have that epic feel quickly and easily and with little-to-no-work from you!
Here’s the original image (top), the after from Part 1 (center), and the final with the branches added (below). In closing, just because an image is a fun snapshot doesn’t mean it can’t become something epic with a little TLC and Photoshop! So take these tips, find a good image, and make it epic!


This article originally published in the February, 2019 issue of Photoshop User magazine.


