In the 20 plus years I’ve been using Photoshop, I’ve seen many features come and go, but few have had the staying power of layer styles. Their popularity stems from their versatility and the wide range of design and photographic effects that they offer. I remember life before layer styles, and if you know what went into just getting a simple bevel effect back then, you definitely appreciate the power and convenience of them. In fact, my top three favorite features in Photoshop are brushes, 3D, and layer styles.
Whether you’re a veteran designer or an eager novice, the pages that follow will help you get a better understanding of the core functionality of layer styles, which will be the basis for creatively exploring the myriad possibilities contained in this one dialog. Let’s start with how to apply a layer style; this may sound simple, but as with most things in Photoshop, there are several ways to arrive at the same place.
THE BASICS OF APPLYING A LAYER STYLE
Layer styles are so varied and multifaceted that millions of combinations can be created. To apply a layer style, you first need a layer. I know that may seem obvious but what I mean is you need an unlocked layer. So, for example, if you want to apply a layer style to the Background layer, you’ll need to unlock it first.
As I mentioned in the introduction, there are usually several ways to accomplish the same thing in Photoshop, and layer styles are no exception. Accessing and applying the settings when you need them is quite simple, and you’ll ultimately use whatever feels comfortable in your workflow.
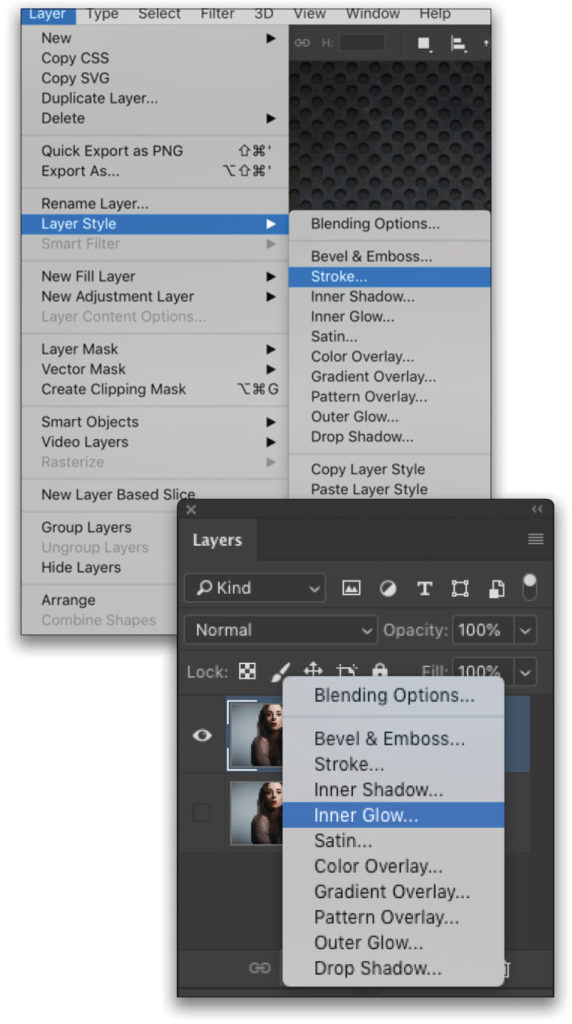
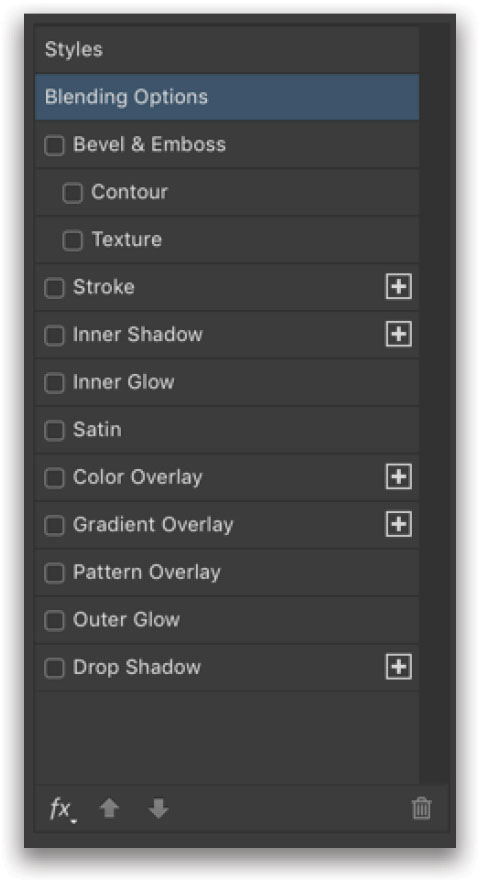
There are three ways to launch layer styles: You can go into the Layer menu, to Layer Style, and then choose the desired style with which you want to start. Or, you can also access the same list of effects by clicking the fx icon at the bottom of the Layers panel and choosing the desired style there. Lastly, you can double-click the blank area to the right of the layer’s name in the Layers panel, or double-click the layer thumbnail if it’s a regular layer (i.e., not a smart object, adjustment layer, etc.). It’s interesting to note that there are no default keyboard shortcuts for applying a layer style.
All of the methods mentioned above will open the Layer Style dialog to the settings of the selected style, except when you double-click the layer itself. That will open the dialog to the Blending Options (we’ll get to that in a moment). Anyway, this is where all the magic of layer styles happens. Looking at the dialog, though, it doesn’t look like much, does it? Well, apart from a few enhancements over the past couple of versions, layer styles in Photoshop have largely remained unchanged since they first appeared because they offer such a vast world of possibilities.

Layer styles have turned out to be quite the powerhouse of special effects beyond what’s obvious. The key is to understand how they work and how they can achieve the effects for which you’re looking. Through my experimentations, I’ve come up with a variety of design and text effects, but I’ve also come up with some rather interesting photo effects. A lot of photographers might be quick to dismiss layer styles, thinking they’re a design feature and have no use in photo retouching. I beg to
differ! (Just check out Kristina Sherk’s article on page 64.)
WHAT ABOUT THOSE BLENDING OPTIONS?
Once you have an understanding of how the Blending Options work, they’ll become an essential part of your workflow. They’re conveniently separated into three sections: General Blending, Advanced Blending, and Blend If. Each section offers options that can further enhance how your layer styles blend with the original layer. I remember using layer styles for quite some time before I realized what these features actually did. So let’s cover each section briefly.
The General Blending settings are merely a repeat of the Opacity and Blend Mode settings found in the Layers panel. These are the same settings, so it doesn’t matter whether you change it here or in the Layers panel.
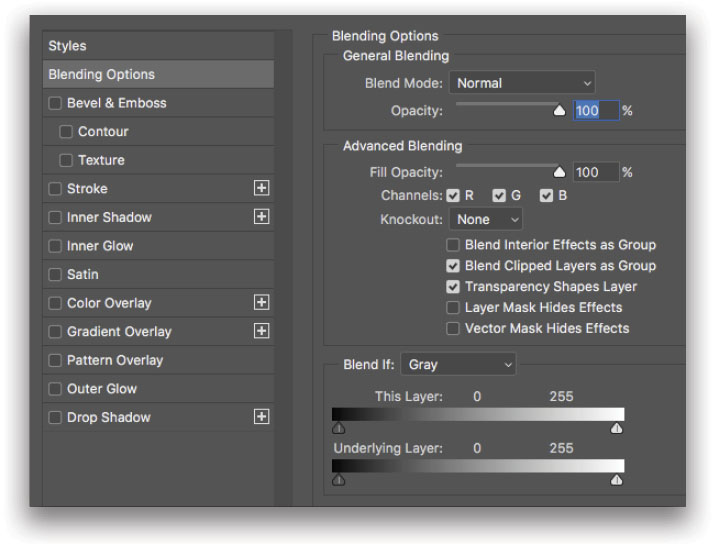
The Advanced Blending section starts with the Fill Opacity setting, which also appears in the Layers panel just below the Opacity setting, but it’s not the same as Opacity. The difference is that Opacity affects every visible thing on the layer, including the original image and any styles applied. The Fill setting allows you to lower the opacity of just the original image, leaving layer styles at full visibility. So if you wanted a simple stroke in the shape of text, you could apply the stroke as a layer style to a text layer, and then set the Fill to 0% to get outlined text that’s still fully editable. I’ve also found the Fill feature to be useful in photo retouching for creating light and atmospheric effects.
There are a few features here for which I’ve had little use, but for printing you may find them useful. For example, you can turn off the individual color Channels of a layer by simply clicking the R, G, or B checkboxes. This allows you to create channel effects, such as making multiple copies of a layer, turning off individual color channels for each layer, and then offsetting them to create a color overlay effect.
The Knockout setting allows you to mask any areas under the current layer to ensure no overprinting occurs. Modern print processes have become more advanced, so there’s been very little need for this feature, but it’s still relevant in some print industries.
Blend Interior Effects as Groupis unchecked by default. Checking it will assign whatever blend mode you’ve set for the current layer to all styles you apply, effectively overriding the individual style’s Blend Mode setting. So if you have the layer set to Overlay, and then apply a Gradient Overlay layer style, the effect will appear in Overlay mode even though the style’s Blend Mode menu is set to Normal.
Blend Clipped Layers as Groupassigns the blend mode of the base layer of a clipping group to all clipped layers above. If you have an active clipping group, which is a layer with one or more layers clipped to it, you’ll see they’re all still individual layers in the Layers panel. If you want to blend the base layer with a blend mode, you just change the base layer of the group, and all clipped layers will assume the blend mode of the base layer. This is the most common use, which is why this option is checked on by default.
The last two settings in the Advanced Blending section are a big help, and knowing what they do can potentially alleviate a lot of frustration. When the Layer Mask Hides Effects option is unchecked, if you apply a layer mask to a layer that has, say, a Stroke layer style applied, the style will redraw itself along the edge of the mask. Checking this box disables that redraw, and the layer style will be masked the same as the rest of the layer. The other option is for vector-based mask shapes. So if you’ve ever been hung up on styles not looking right when painting on a mask, this may be the reason why.
I wanted to point out these blending features because, while they’re not technically a “style,” they do have some functionality that will be useful, and in some ways critical, in achieving certain effects.
LET’S TALK ABOUT BLEND IF
When I first discovered the Blend If feature, I was blown away, not only because of what it could do but also because, at the time, it seemed so very few people knew about it. I liked it because it became one of those “secret-weapon” effects.
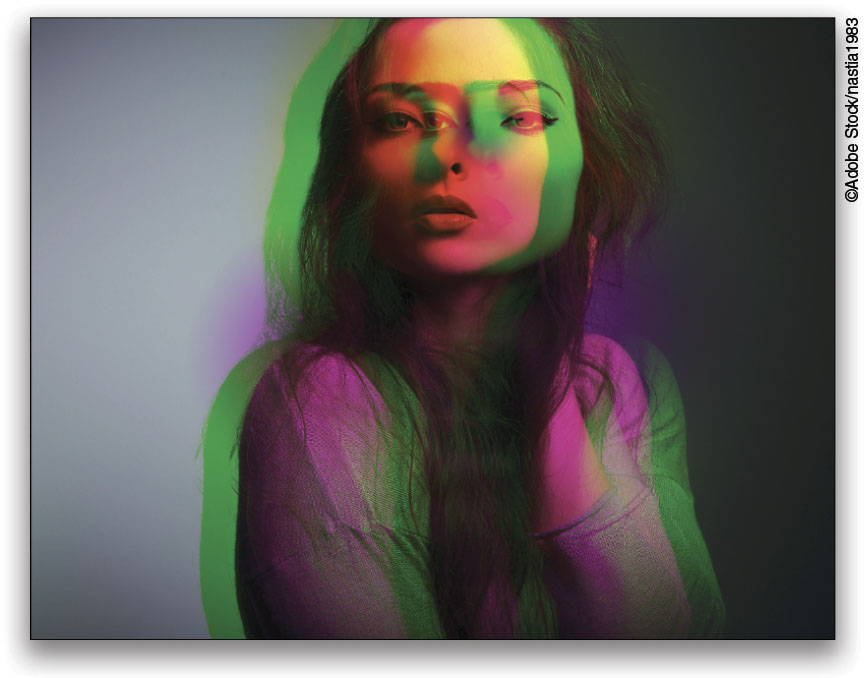
You may have seen people demonstrate this feature but you didn’t fully understood what it was doing. It’s essentially a away to blend two layers beyond what the blend modes can produce, as it allows you to blend layers based on the light and dark areas of each image.
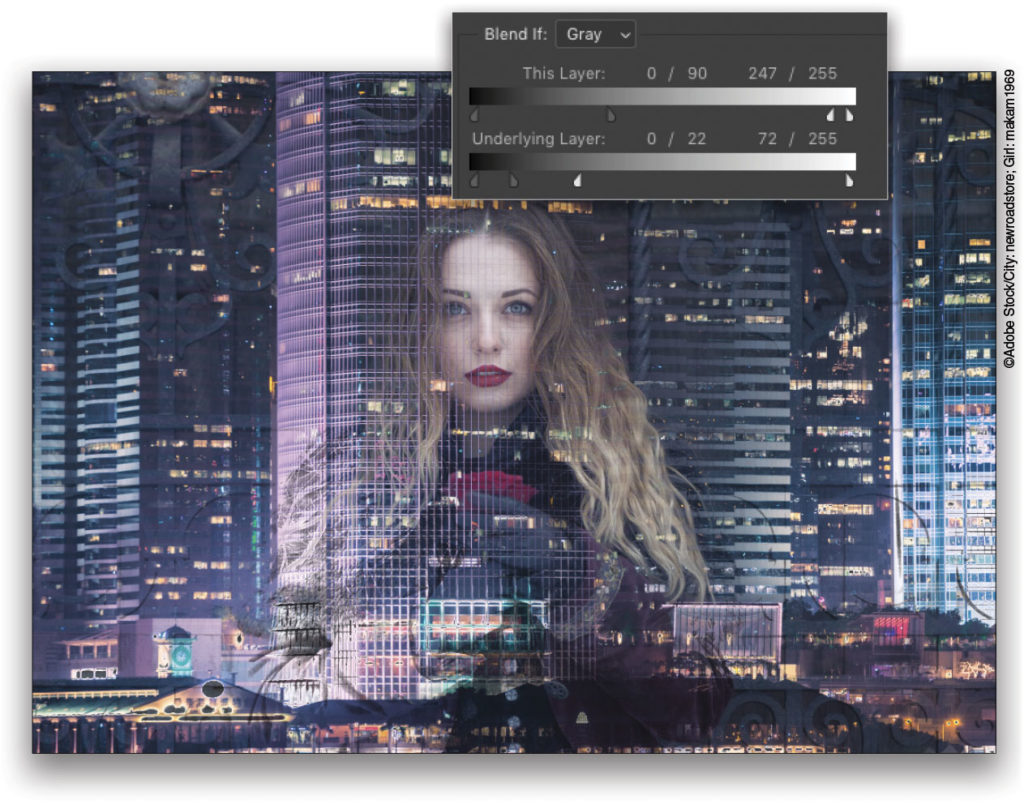
To briefly show how this works, here’s an image containing two layers. With the top layer active, I double-clicked the layer to access the Blending Options. In the Blend If section at the bottom of the Layer Styles dialog, there are two sliders labeled This Layer and Underlying Layer.

Starting with This Layer, if you click on the dark slider and drag it toward the center, you’ll start to see the darkest areas of the top layer disappear, revealing the layer below. Continue to move the slider and as you get into the lighter areas of the strip, you’ll see even more of the underlying image revealed. Conversely, the white slider will make the lightest areas transparent and will progress to darker areas. You’re essentially turning on or off the light or dark areas of the image on a slider. It doesn’t delete the pixels. It just hides them, and only reveals those in the designated range.
The only problem is that the transition is rather abrupt and jagged. You can soften this by splitting the sliders. Notice each slider has a line down the middle. If you hold down the Option (PC: Alt) key and click the slider, it will split; then you can drag each half independently, creating a smoother transition, depending on how far apart you set them.
The Underlying Layer slider works in a similar way, except instead of revealing the layer below, it pulls forward the light or dark areas of the bottom image.
These sliders give you two different ways to create luminance-based blends. You’ll also notice in the Layers panel a blending icon, which indicates that you have custom blending options applied to the layer. Furthermore, the effect isn’t permanent. You can return to the current settings at any time just by double-clicking that blending icon. (For a deep dive into Blend If, check out Scott Valentine’s article on page 60.)
THE NAME OF THE GAME
As I mentioned earlier, the list of available layer styles hasn’t really changed over the years, and while some of the names seem rather self-explanatory, in some ways it limits their potential. What I mean is don’t be quick to dismiss a style based on its name. Think more about what it can do. By simply going in and messing around with various settings and mixing and matching layer styles, you can achieve all kinds of effects. To this day, I’m still discovering new effects. Think of it as a toolkit of sorts.
While I don’t have the pages here to go into detail for each layer style, I will say that if you’re new to layer styles, just create a simple object (or even text on a new layer), launch the Layer Style dialog, click on each style one at a time, and just go nuts with all the settings. Don’t worry; you won’t break it! Just go crazy and experiment with the various settings. Two things will happen when you do this: First, you’ll have a better understanding of what each style does rather than being steered by what it’s called. If you only use Drop Shadow to create drop shadows, you’re missing out on a world of discoveries.
The second thing that will happen is you’ll no doubt stumble onto something that looks really cool: a happy accident if you will. When that happens, go ahead and save the style as a preset. Just click New Style on the right side of the panel and name it.
Continue clicking on more styles and experiment with blending them in interesting ways. I’ll share a couple of my discoveries in a little bit, but there’s one more aspect of layer styles that’s quite useful. It’s a recent addition to the toolkit: the ability to create multiple instances of the same layer style.
EFFECTS PLUS
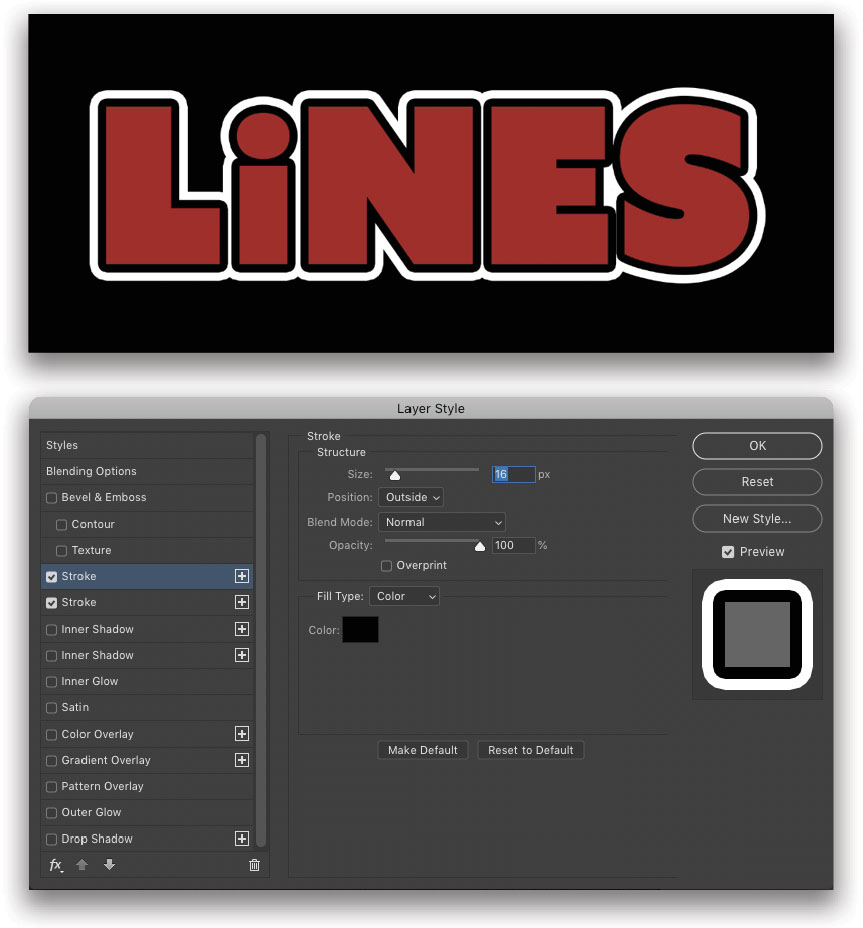
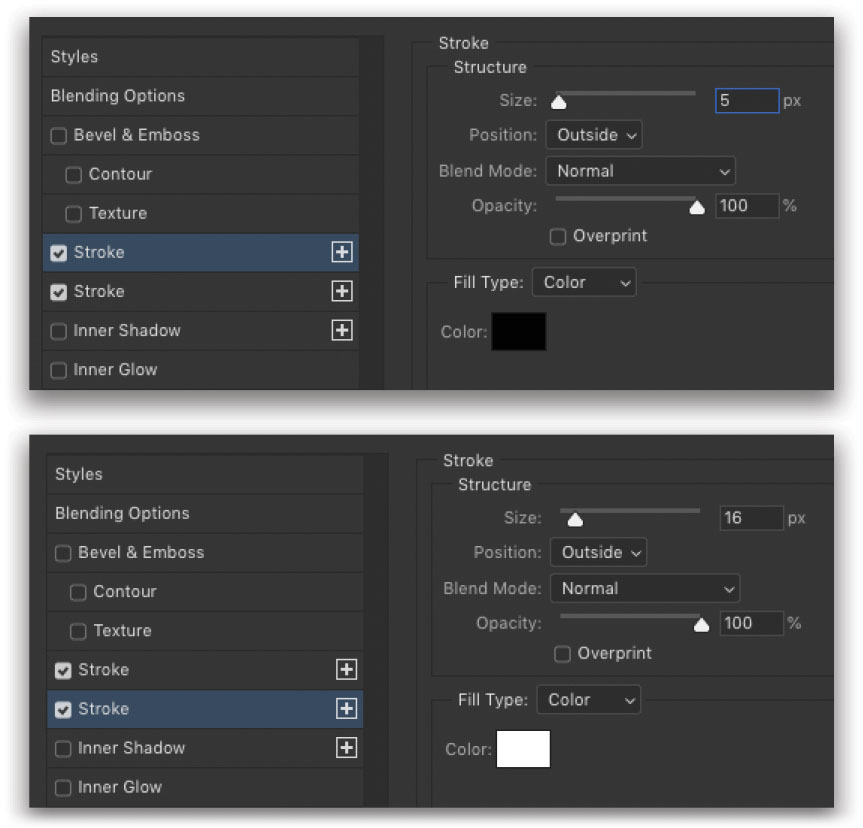
While little has changed with layer styles over the years, one enhancement was recently added that up until then, we had to achieve with a workaround. It involves creating multiple instances of the same layer style. For example, let’s assume you have some text and you want to apply a multiple stroke effect around the edge. In previous versions of Photoshop, if you used a layer style to add the stroke, you could only apply the stroke once. So if you wanted a second stroke, you’d have to make a duplicate of the layer, set the Fill to 0%, change the stroke thickness and color on the duplicate layer, and then place the layer under the original in the Layers panel—a lot of extra steps but it worked.
But now all you need to do is apply the initial stroke like normal, then click the plus icon to the right of the Stroke style in the list of Styles on the left side of the dialog. This duplicates the current style. You’ll see the instance appear under the original. The stacking works like layers, so if the lower instance is set thinner than the one above it, the bottom stroke will be hidden by the top stroke. With the bottom instance selected, you can move it up or down the hierarchy by clicking the arrows at the bottom of the dialog. To delete an instance, just select it and click the trash can icon. This is much better than hacking the effect with multiple layers. Note: You can only create multiple instances of styles that have the + icon.
A FEW PRODUCTIVITY TIPS
So now that you have a good handle on how styles work, here are a few little tricks you can use when working with them to speed up your productivity. These are some best-practice techniques that have served me well over the years.
Deleting a layer style: If you’re not happy with the way a style is working, just toss it and start again. Go to the layer with the style applied, then click-and-drag its fx icon to the Delete Layer icon (trash can) at the bottom of the Layers panel. This deletes the layer style only and not the layer. You can Right-click the fx icon and choose Clear Layer Style to do the same thing. That same option is also located under the Layer>Layer Style menu.
Copy or move a style to another layer: I use this one all the time. If you have a layer style applied to one layer and want to apply the same style to another layer, just hold down the Option (PC: Alt) key, click on the fx icon, drag it to the target layer to which you want to add it, and release the mouse button. Done! That’s the quick-and-easy way. You can also Right-click the fx icon, choose Copy Layer Style, Right-click on the target layer, and choose Paste Layer Style. This second method is handy when you’re pasting styles to a layer in a different document all together. If you want to just move a style from one layer to another, click-and-drag the icon without holding down the Option (PC: Alt) key.
Scale Effects: As I mentioned in the previous tip, you can copy-and-paste a layer style to a different document; however, the target document may be at a higher or lower resolution than the original, thus altering the appearance of the style. Instead of going in and adjusting each style that’s been applied, you can Right-click the fx icon once again and choose Scale Effects at the bottom. You can input a specific amount, or use the slider to adjust the effect, based on the new image.
Create a separate layer: There may be occasions when you want to liberate the style from its layer. That is, you want to extract the style to its own layer so you can manipulate it just like a regular layer. You can do this by Right-clicking the fx icon and choosing Create Layer. Note: This rasterizes the effect, so make sure it looks the way you want before you choose this option.
Loading and saving presets: While there are a couple of ways to go about loading layer style presets, I want to show you the method that I use most often that gives me the most control, no matter whether I’m saving or loading layer styles. Go to the Edit menu, to Presets, and choose Preset Manager. Choose Styles in the Preset Type drop-down menu. To load presets, just click the Load Button at the right, locate the file, and click Open. You’ll see the new layer styles added to the list. If you want to save a layer style set, you have to click on at least one layer style. To choose multiple layer styles, hold down the Shift key and click to select contiguous styles, or hold down the Command (PC: Ctrl) key to choose non-contiguous styles. Once the layer styles are selected, click the Save Set button, give the set a name, and click Save.
THE MANY LAYERS OF LAYER STYLES
Before I finish things up with a quick example, I wanted also to mention something about layers themselves. We’ve been talking about the many varieties of layer styles but there are also several types of layers in Photoshop; for example, pixel-based layers, adjustment layers, smart objects, group layers, and even 3D layers. You may be thinking, “Can you apply layer styles to all of these?” The answer is, “Yes!” You can apply a layer style to all of them, including 3D and video layers. I’ve enhanced many a 3D object by applying a layer style directly to the 3D layer itself. A handy tip is to use a layer group if you want to apply the layer style to a design, but don’t want to merge the layers. Let me show you how.
Here’s a simple shape layer and a text layer that make up a logo. I want to apply a layer style to the entire logo but it’s made up of two layers. If you apply the style to each layer, there will be overlap, and the effect won’t look right. You don’t want to merge the layers because neither the text nor original shape will be editable.

So here’s the solution: Select both layers in the Layers panel and press Command-G (PC: Ctrl-G). This will create a group folder and place the selected layers inside.
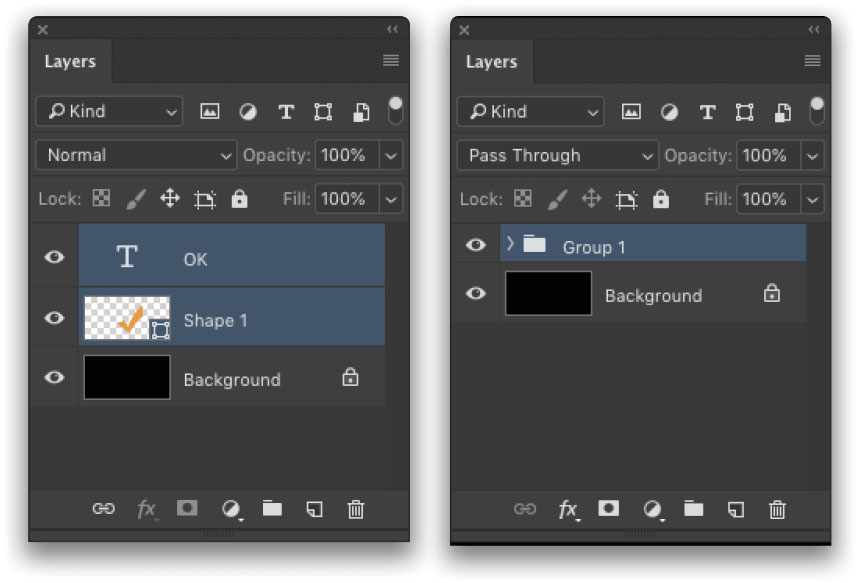
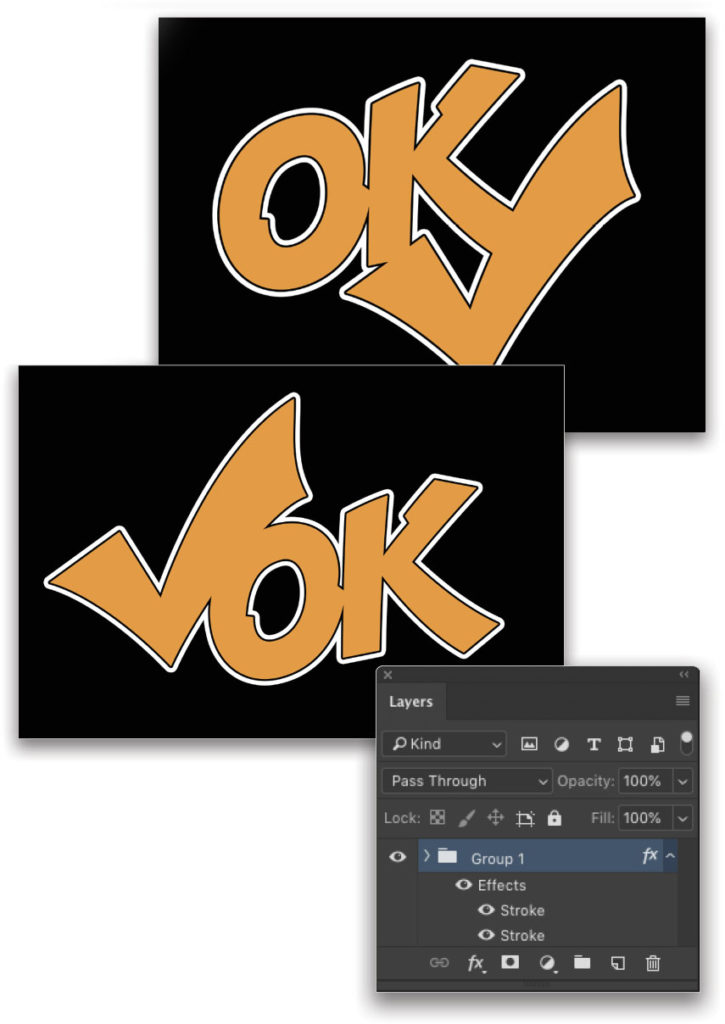
Now, apply the layer style to the layer group and it will be applied to the full graphic. You can still edit or reposition each layer and the style will redraw in real time. Just reveal the contents of the layer group, then move each layer to a new position, and as you can see, the effect redraws as each change is made.
This and everything else we’ve covered here sums up the real power of layer styles: flexibility; the flexibility to experiment with endless combinations and achieve new effects that you can save and use over and over again, and even expand on later. This is why layer styles have endured all these years with very little change. It’s a creative toolset that gives you the power to create endless possibilities. Now that you know how they work, what will you create?
BONUS: A FLARE FOR STYLE
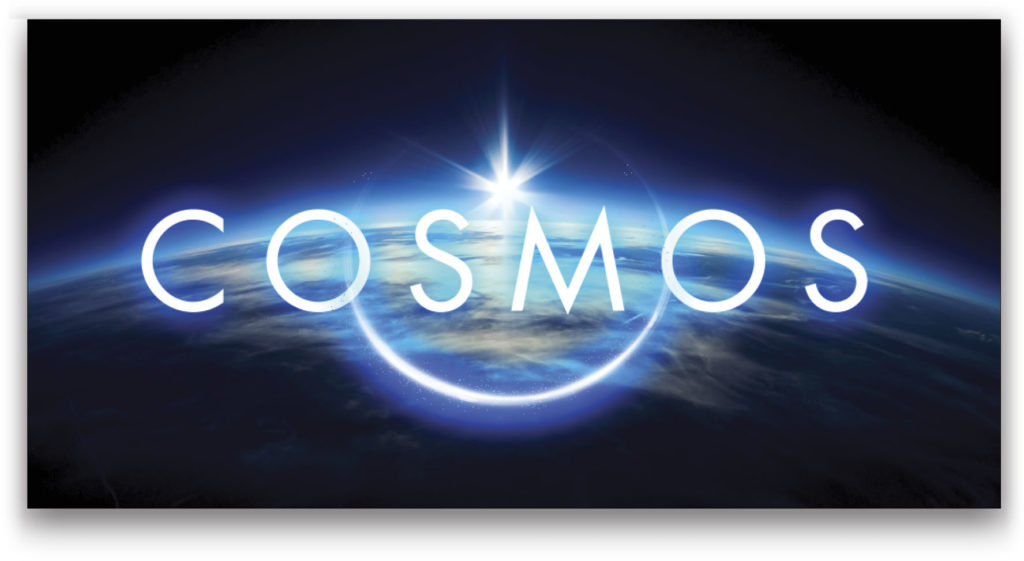
Here’s an effect I discovered while experimenting with light effects. It makes use of a blend mode that’s seldom used. There’s a simple ring flare image around some text, and I want to enhance the glow. So I started by applying an Outer Glow layer style using the settings shown below, which added a nice color glow.
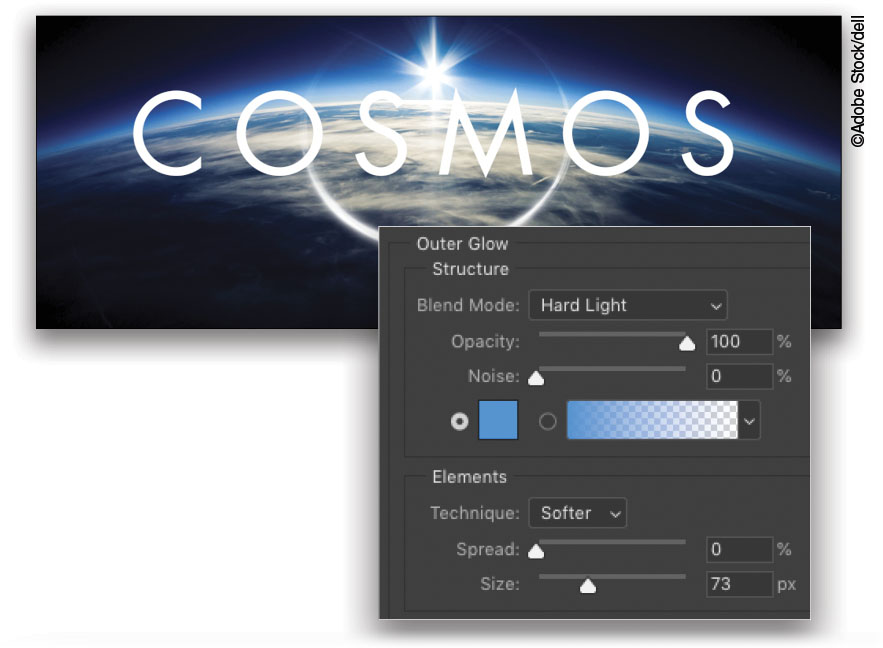
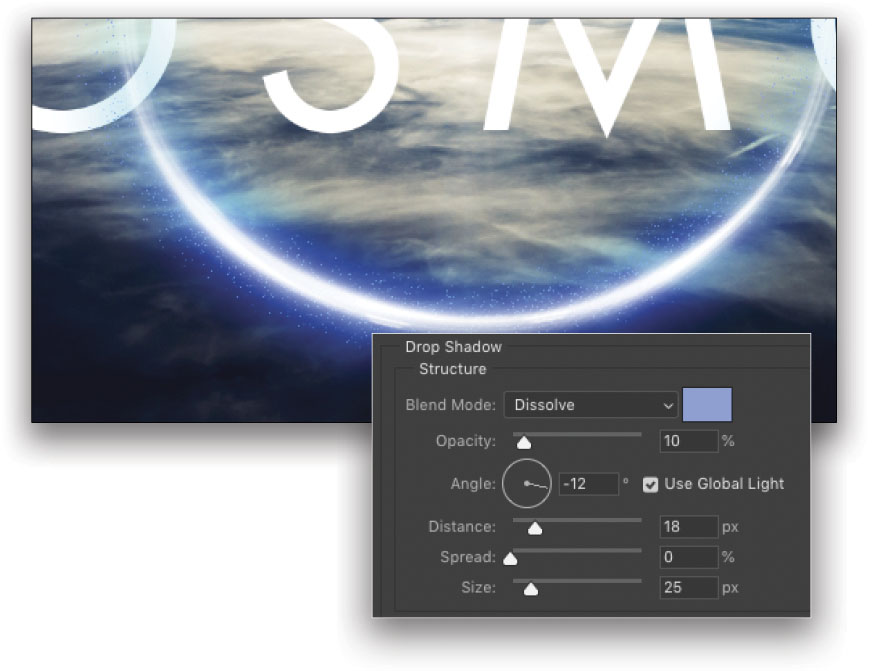
Now we can’t create multiple instances of the Outer Glow layer style (because it doesn’t have the + icon) but we can use Drop Shadow for this next part. Yes, Drop Shadow can be used for more than just its name! Remember what it can do. Activate Drop Shadow and set the color to a lighter color than the Outer Glow. Then set the Blend Mode to Dissolve and drop the Opacity to around 10%. Also increase the Size to around 25 to start. This will create a cool particle effect around the glow. And, because it’s a drop shadow, you can click in the canvas and move it around manually. Just click OK when you’re done.
As a final touch, I placed the text and flare layers in a group folder, and then applied just the Outer Glow, as before. This not only adds the glow around the text but it also doubles down on the glow on the flare, making it more vibrant! I often use this technique as a finishing effect for my compositing work. It demonstrates how a little outside-the-box thinking can yield something that otherwise you’d never have known was possible.
This article originally published in the May, 2018 issue of Photoshop User magazine.


