As you’re learning in this issue, increasing contrast globally along high-contrast edges makes a photo look crisp and sharp; however, increasing local contrast in smaller regions—referred to as a local contrast enhancement or LCE—can accentuate larger details (shapes), giving your image a three-dimensional look. This column demonstrates three super-quick ways to get it done.
Step One:
In Photoshop, choose File>Open as Smart Object. If your photo consists of multiple layers, Shift-click to activate all the layers, and then choose Filter>Convert for Smart Filters, which packages the active layers into a single smart object. If you’re starting in Lightroom, select a photo, and then choose Photo>Edit In>Open as Smart Object in Photoshop.
TIP: To access your original layers in the future, double-click the smart object, and Photoshop opens them in a separate, temporary document. Make your changes in that document, choose File>Save (not Save As!), and then close the document. When you do, your changes appear in the original document. Sweet! [KelbyOne members may download the file used in this tutorial here. All files are for personal use only.]—We have Jack’s permission to let folks download the image.
Step Two:
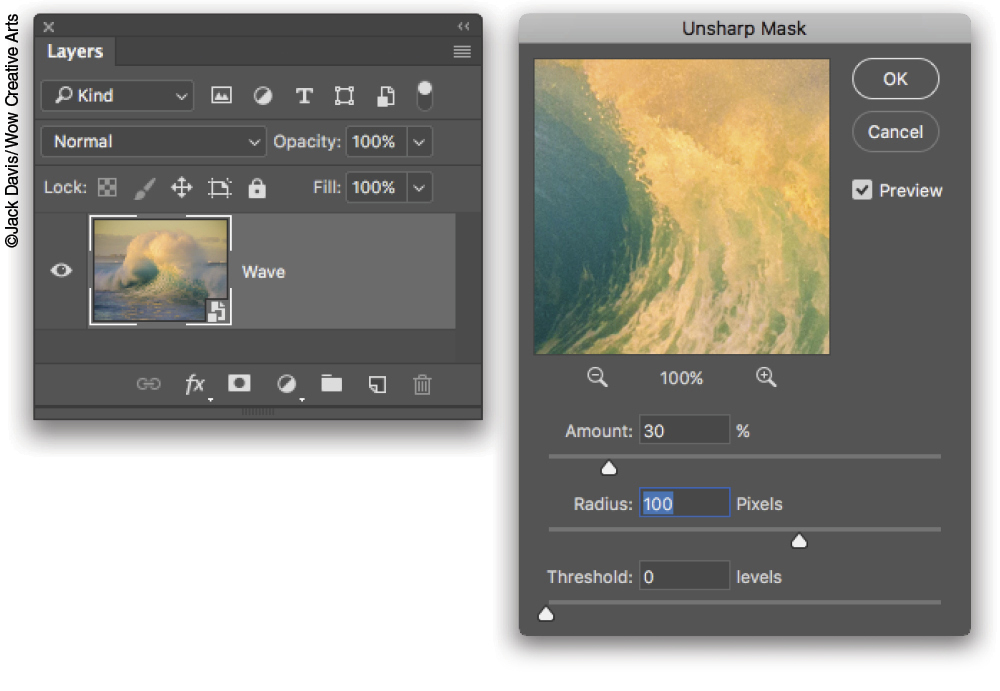
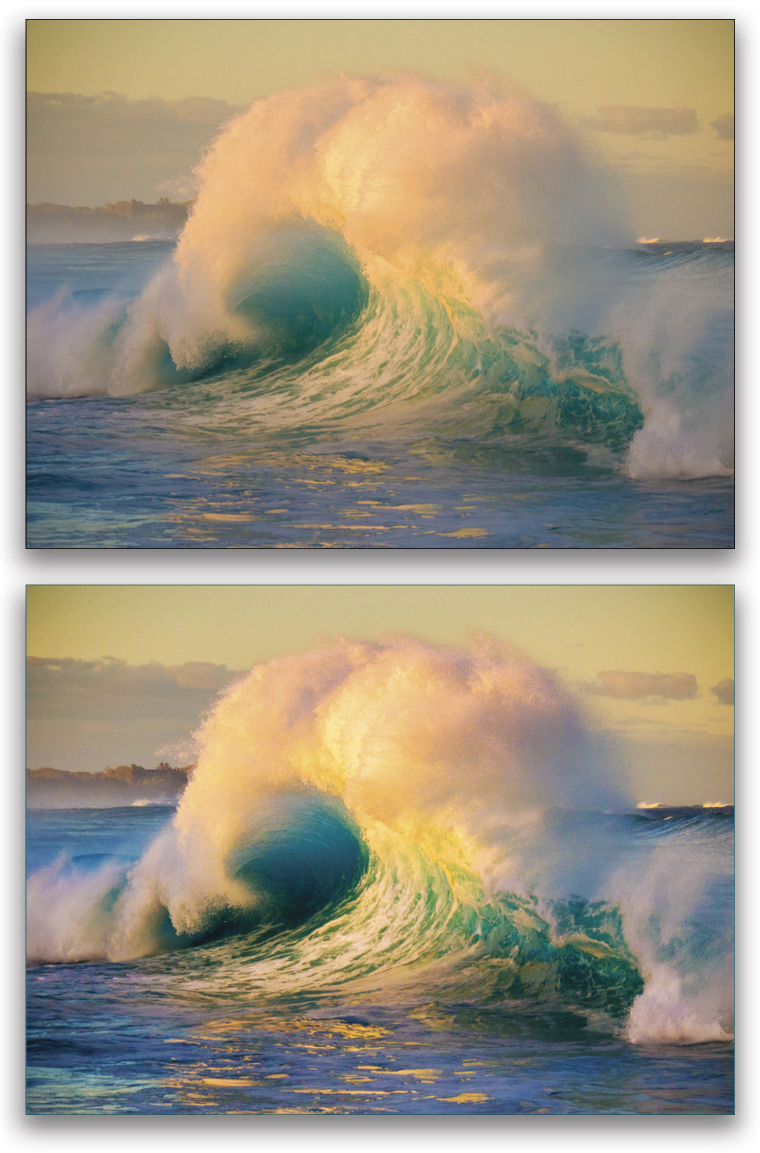
Choose Filter>Sharpen>Unsharp Mask. You’ve likely used this filter for sharpening; however, by using a larger radius and smaller amount than you normally would, you can enhance contrast in smaller regions of the photo and pull out delicious details in highlights and shadows. In the dialog, set the Amount between 5–30%, Radius between 30–100, and Threshold to 0. Click OK. Note: You may need to use larger values for high-resolution images.
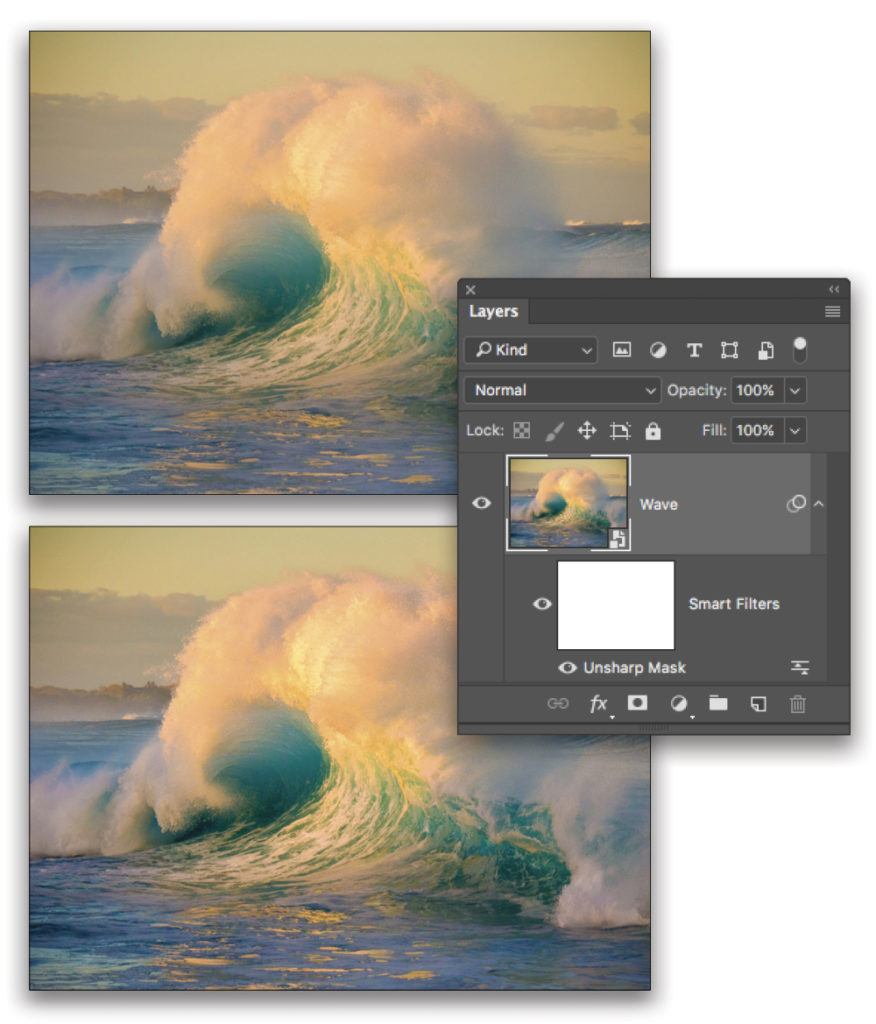
Here are before (top) and after (bottom) previews. To see a before and after version of this technique, click the visibility icon to the left of the filter name in the Layers panel. To experiment with other values in the Unsharp Mask filter, double-click the filter name in the Layers panel to reopen its dialog.
Now let’s look at using the High Pass filter to enhance local contrast. With this technique, you essentially end up with a dodge and burn layer comprised of 50% gray; however, by switching layer blend modes, the gray parts vanish, leaving you with a wonderfully high-contrast photo.
Step One:
Repeat step one above to open a photo as a smart object in Photoshop.
Step Two:
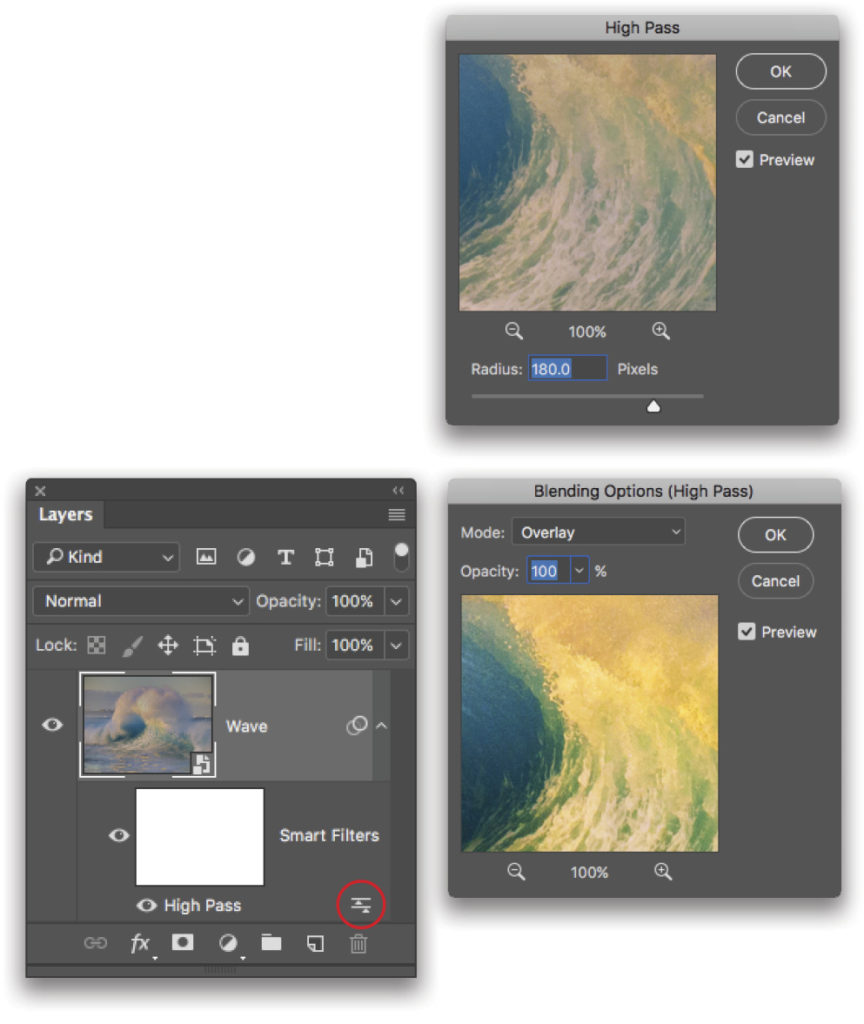
Choose Filter>Other>High Pass. In the resulting dialog, drag the Radius slider to the right to around 180 pixels and click OK. Your image turns oddly gray, but don’t panic; you’ll fix that in the next step.
Step Three:
In the Layers panel, double-click the tiny icon to the right of the filter’s name (circled here) to open its Blending Options dialog. Choose Overlay (Soft Light works, too) from the Mode pop-up menu and click OK. To see a before and after version, click the visibility icon to the left of the filter name in the Layers panel. To experiment with other Radius values in the High Pass filter, you guessed it, double-click the filter name in the Layers panel.
Here are before (top) and after (bottom) previews showing this super-slick technique. (Big thanks to Jack Davis for originally teaching me this!)
Finally, let’s use HDR Toning Presets to enhance local contrast. Unfortunately, this technique only works on single-layer documents, and it doesn’t work with smart objects; however, it can produce the most dramatic result of all.
Step One:
In Photoshop, choose File>Open and navigate to the photo you want to play with. If you’re starting in Lightroom, select a photo and choose Photo>Edit In>Edit in Adobe Photoshop CC, or press Command-E (PC: Ctrl-E).
Step Two:
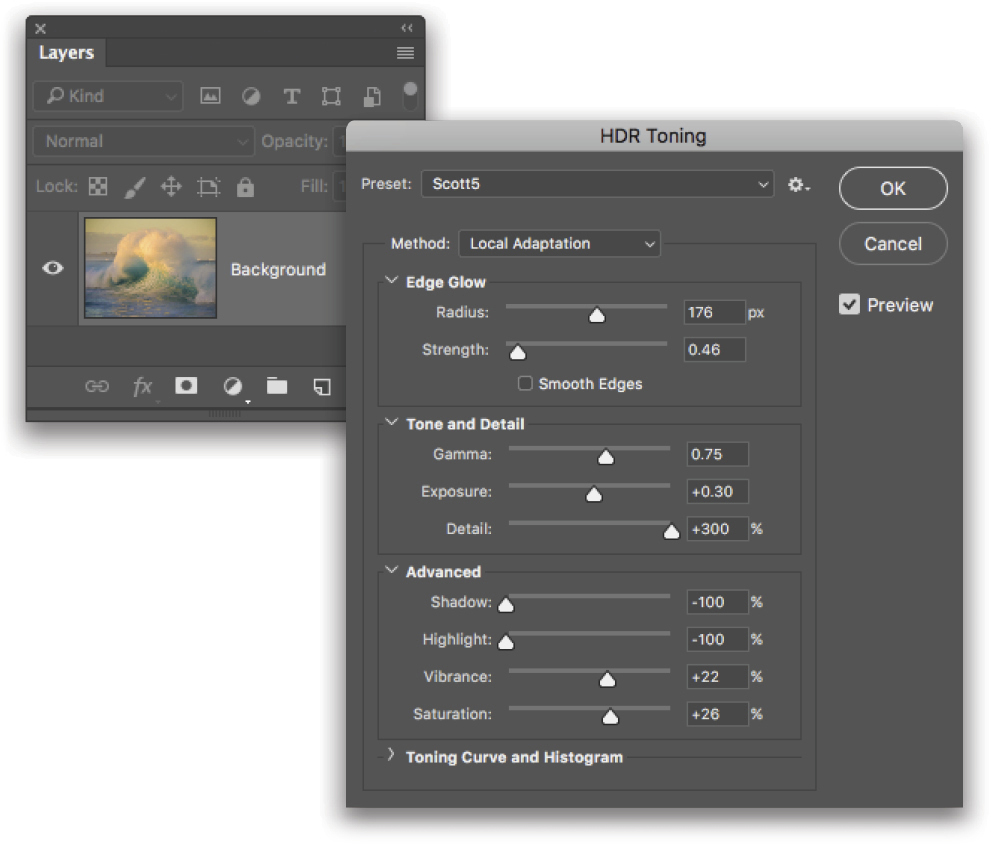
Choose Image>Adjustments>HDR Toning. In the resulting dialog, make sure the Preview checkbox is turned on, and then from the Preset pop-up menu, cycle through each option to see how it looks. (It’s worth peeking at each one—heck, our own Scott Kelby has a preset in the list, Scott5!) When you find a preset you like, you can fiddle with the settings in the other sections of the dialog to produce the look you want. If you create a look that you love, save it as a preset by clicking the gear icon to the right of the Preset pop-up menu. When you’re finished, click OK.
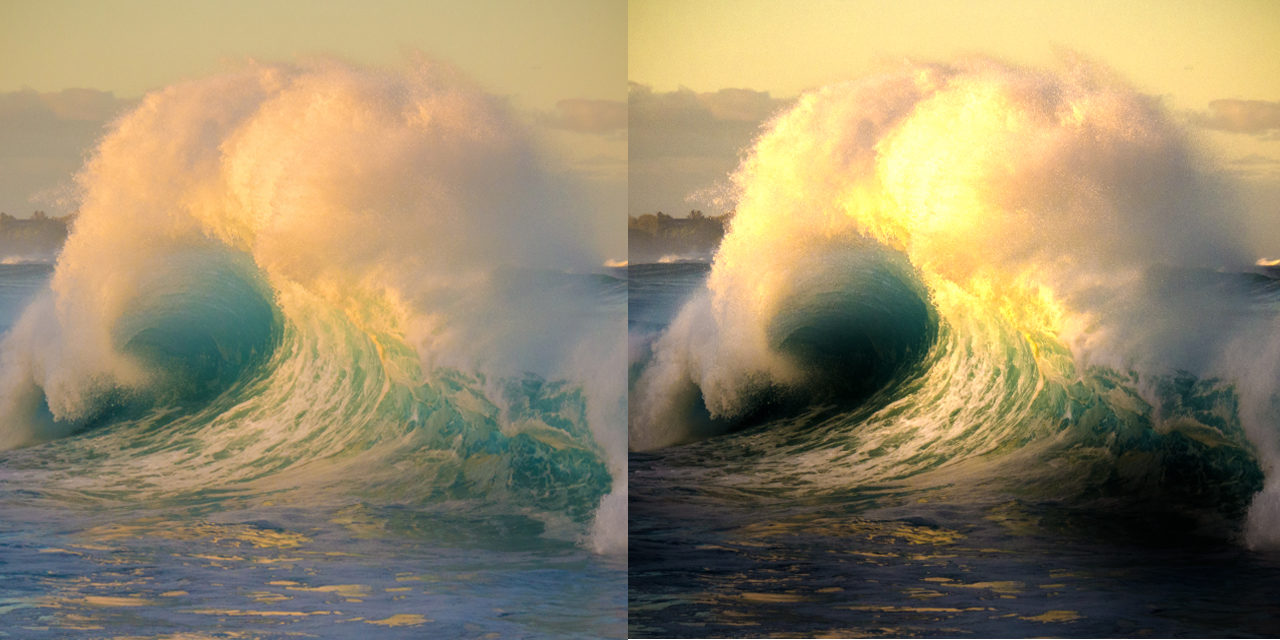
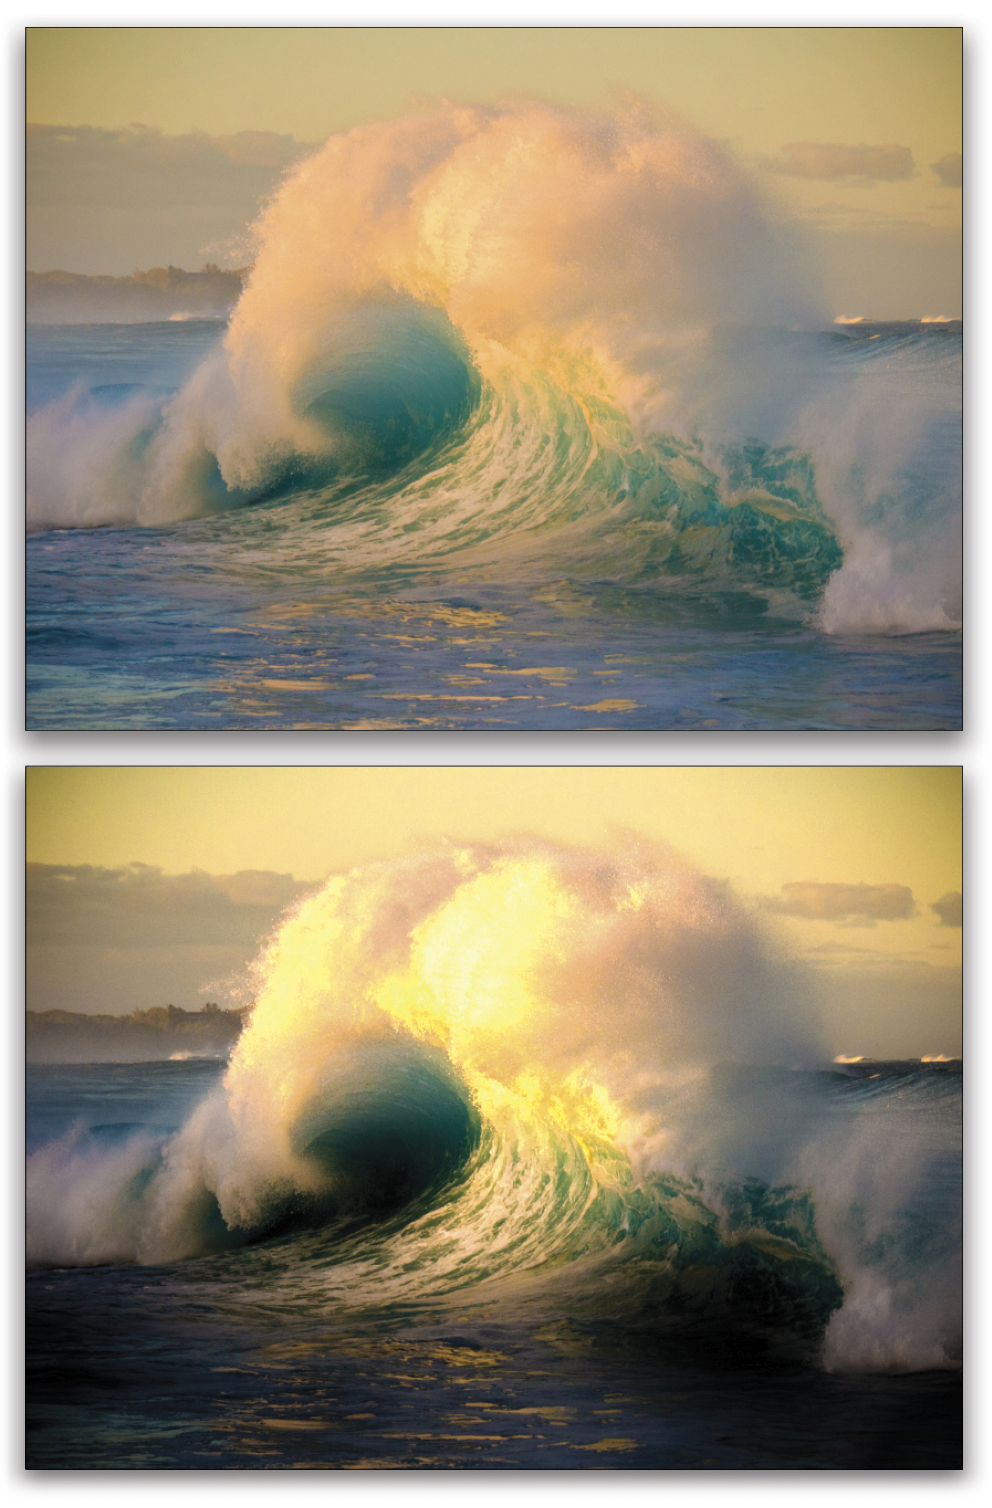
Here are before (top) and after (bottom) versions of the wave using the Photorealistic High Contrast preset.
As you can see, all three techniques are fast, yet they can make a big difference. The end result depends greatly upon the subject matter in your photo—the more large-scale shapes the better—and its resolution. And, while you can also enhance local contrast using the Clarity and Dehaze sliders in Lightroom or Camera Raw, the methods described here give you more control. Until next time, may the creative force be with you all!
This article originally published in the February, 2017 issue of Photoshop User magazine.


