Tattoos are permanent. There’s a lot of thinking, planning, and pain, not to mention money, that goes into getting a real tattoo. But what if you just wanna get a tattoo to show off in an Instagram post (Facebook, if you’re old-school)? Well then, why not just Photoshop it? That way you can get a new tattoo every week.
In this article, we’ll show you how to place tattoos on the skin in a realistic fashion using the wonders of blending modes and Blend If features in Photoshop. So without further ado, let’s get started!
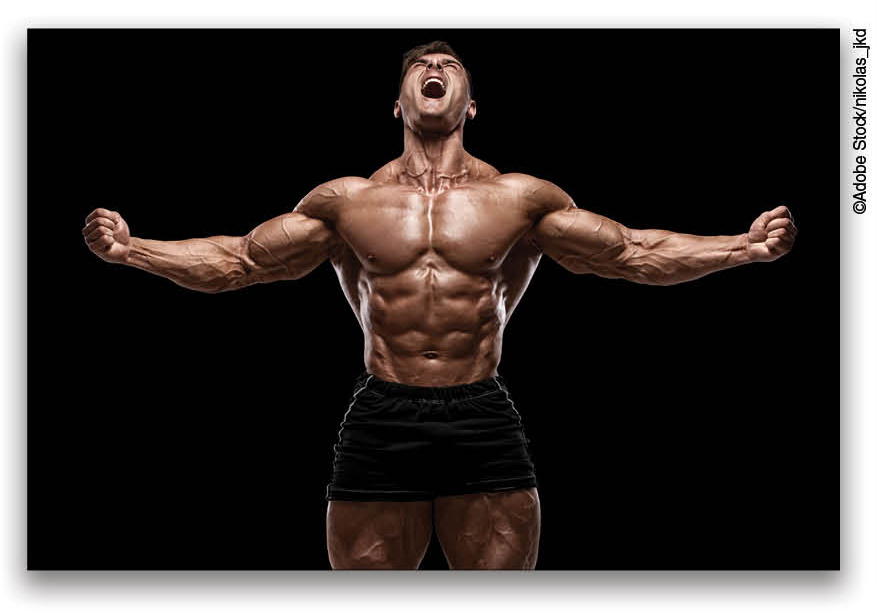
Step One: Open the Image
We’ll begin by opening the image of our subject on which to place the tattoo. This could be a picture of you or your model. If you want to follow along with the photo used here, you may license the full-resolution version from Adobe Stock, or download the JPEG preview for free by clicking the Save to Library button here.
If you’re using your own image, go to File>Open, locate your image, and then click Open, or if you’re working in Application Frame, go to Finder (PC: File Explorer), locate your image, and drag-and-drop it into Photoshop. If you downloaded the image from Adobe Stock, you can load it from your Libraries panel (Window>Libraries) by double-clicking it. To make it easier to work with the preview image, increase the resolution of the practice file. (We normally don’t recommend enlarging images, but this is only for practice purposes.) Go to Image>Image Size, turn on the Resample checkbox, select Preserve Details 2.0 from the Resample drop-down menu, set the Width to 2,000 pixels, and click OK.
Step Two: Place the Tattoo
Locate the tattoo graphic that you want to use. We’re using a dragon illustration from Adobe Stock, which you can find by clicking here. Drag-and-drop the tattoo file inside the canvas where you have your subject. It’s essential that the tattoo has a transparent background, which is the case if you licensed this particular graphic from Adobe Stock. If you downloaded the preview version, drag it into your image from the Libraries panel. It will have a white background, but we’ll take care of that in a second. With the transform controls, adjust the size and position of the tattoo, and place it wherever you desire. Don’t worry, we’ll warp the tattoo according to the body later. Press Enter when it’s in place.
To remove the white background around the preview image, first Right-click on the layer in the Layers panel and choose Rasterize layer. Grab the Magic Wand tool (nested below the Object Selection tool [W] in the Toolbar) and, in the Options Bar, set the Tolerance to 20 and turn off Contiguous. Click on a white part of the dragon image to select all the white areas, and then press Delete (PC: Backspace). Press Command-D (PC: Ctrl-D) to deselect.
Note: If your tattoo is a flattened JPEG file with no transparent background like the preview image above, check out this great article by Dave Cross on “Better Masking and Selections” for other ways to mask out the background.
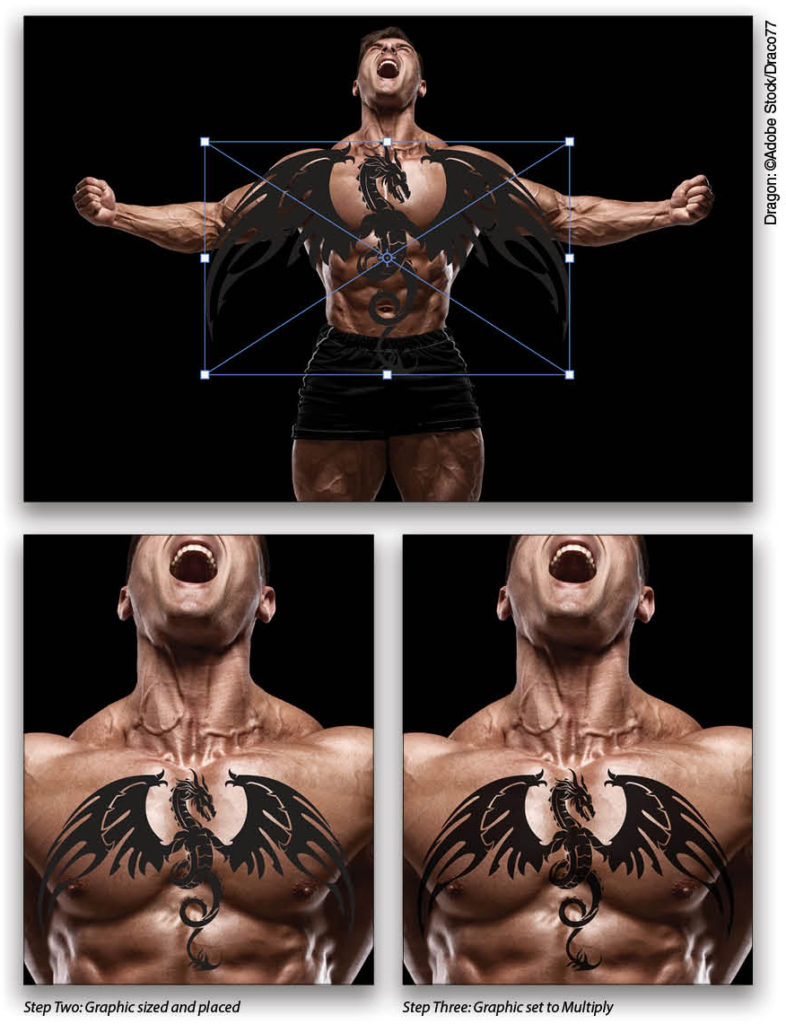
Step Three: Change the Blend Mode to Multiply
Double-click the name of the tattoo layer, and rename it “Dragon.” With the Dragon layer active, from the blending mode drop-down menu in the Layers panel, change the blend mode from Normal to Multiply. Why? Because Multiply is a blend mode that darkens. As a bonus, if you’re using the preview image, it will also drop out any white areas that may not have been deleted in the previous step.
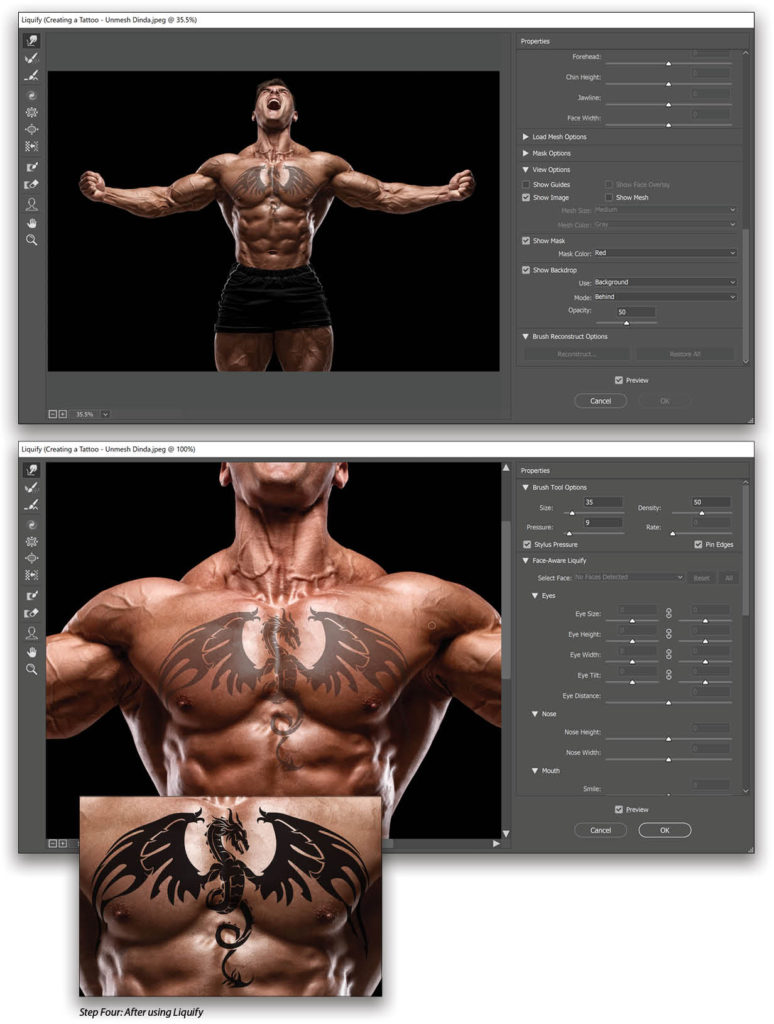
Step Four: Use Liquify to Shape the Tattoo
At this point, the tattoo looks flat with no sense of shadows and highlights; so let’s take care of the flatness first. With the Dragon layer active, if it’s not already a smart object, go to Filter>Convert for Smart Filters. (If Convert for Smart Filters is grayed out, that means the Dragon layer is already a smart object.)
Next, go to Filter>Liquify. On the right-hand side, scroll down and make sure Show Backdrop is checked. Set the Use drop-down menu to Background, the Mode to Behind, and Opacity to 50% so that you can see the subject as you adjust the tattoo.
With the Forward Warp Tool (W), shape the tattoo according to the contours of the body as shown here. (Tip: Keep the Pressure of the brush low to nudge the tattoo slowly, and use the Bracket keys on your keyboard to quickly change the size of your brush.) Once you’re satisfied with the result, click OK.
Step Five: Add Highlights with Blend If
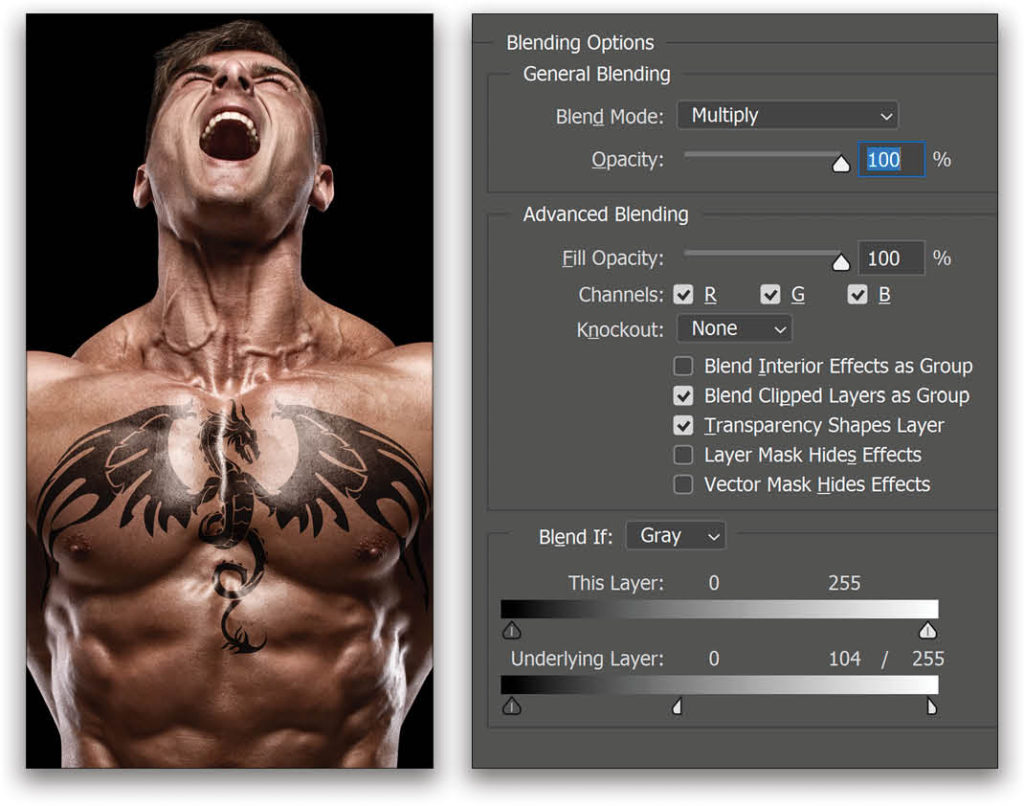
With the Dragon layer active, Right-click on the layer and choose Blending Options. In the Blend If section of the Layer Style dialog, drag the right slider of the Underlying Layer toward the left. The tattoo gradually disappears as the highlight areas of the subject on the “underlying” layer start to come through.
As you’ll notice, the transition is very harsh; so, hold the Option (PC: Alt) key and click on that right slider to break it apart. Separating it into two pieces allows us to make the transition between the visible and invisible areas smoother. For this example, we’ve chosen a value of 104/255 for the two parts of the right slider. Click OK.
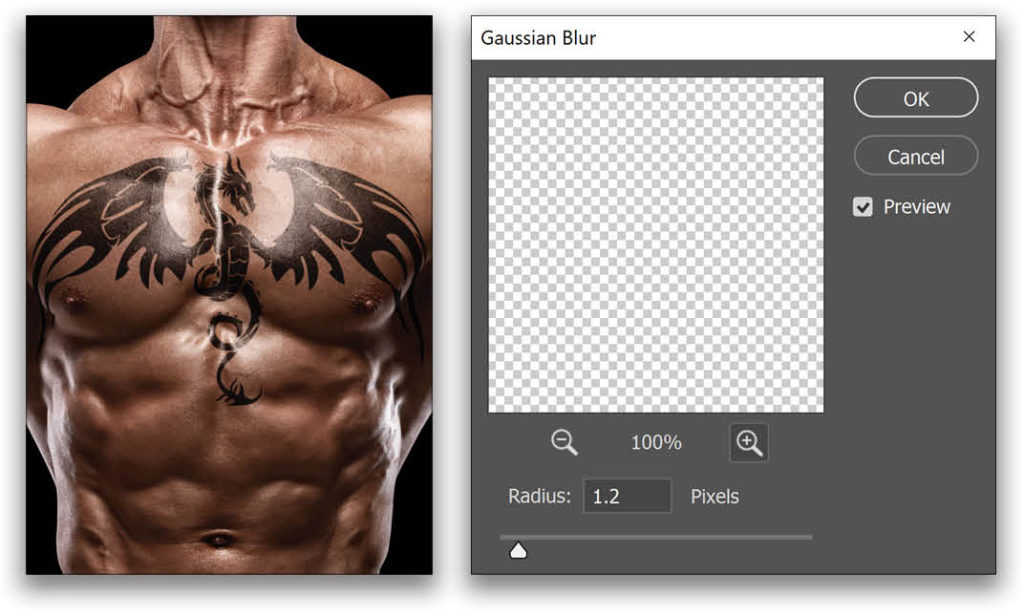
Step Six: Apply Gaussian Blur
Tattoos are never that sharp in real life, especially on the skin. To make it look realistic, with the Dragon layer active, go to Filter>Blur>Gaussian Blur, and apply a blur Radius of 1.2 pixels. (For the Adobe Stock preview image, try 0.3 pixels.) Click OK.
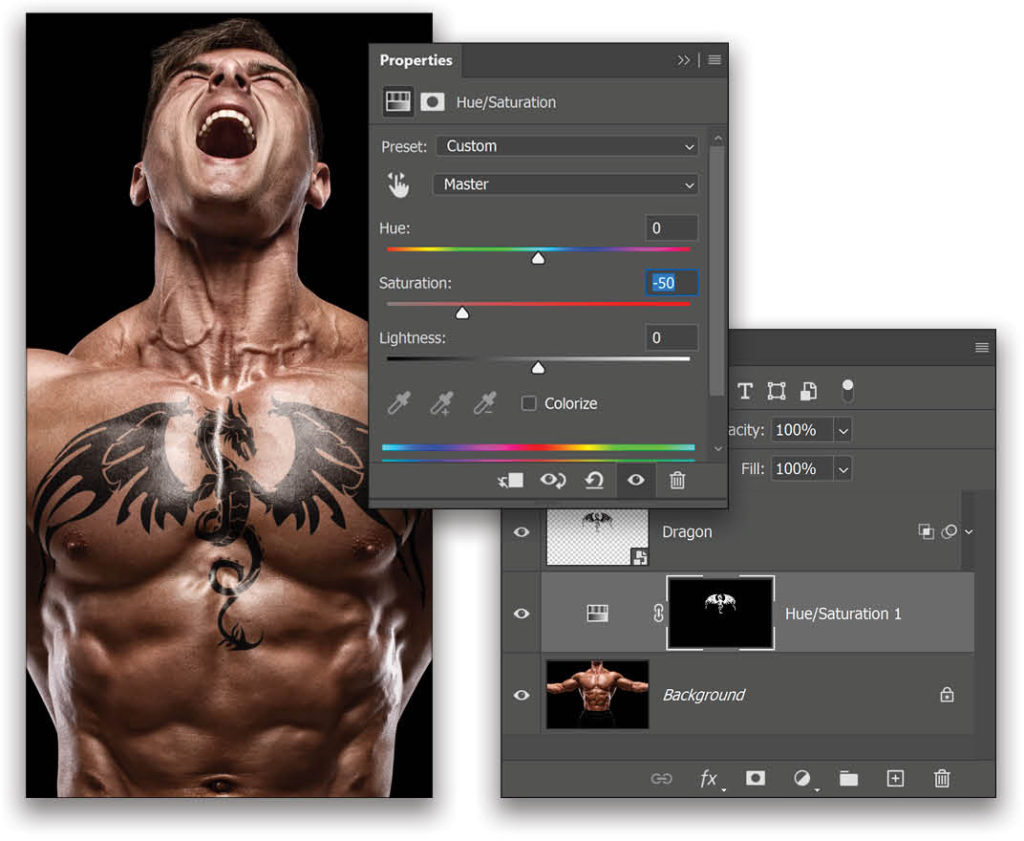
Step Seven: Take Away the Skin Color from the Highlights
Since we partially removed the highlight areas of the skin from the tattoo, the skin color ends up as a tint to the tattoo. We need to remove that. Hold the Command (PC: Ctrl) key, and click on the thumbnail of the Dragon layer. The tattoo will be selected.
With the Background layer active, click on the Create New Adjustment Layer icon (half-black/half-white circle) at the bottom of the Layers panel and choose Hue/Saturation. Notice that the Hue/Saturation adjustment layer used the selection of the tattoo to create its mask. In the Properties panel (Window>Properties), decrease the Saturation to –50.
Step Eight: Adjust Blend If (Optional)
If required, and at the cost of fading it a little bit, you can adjust the Blend If of the tattoo to make it look more natural. Right-click on the Dragon layer and choose Blending Options again. We dragged the left half of the right slider of the Underlying Layer to 76. Click OK.

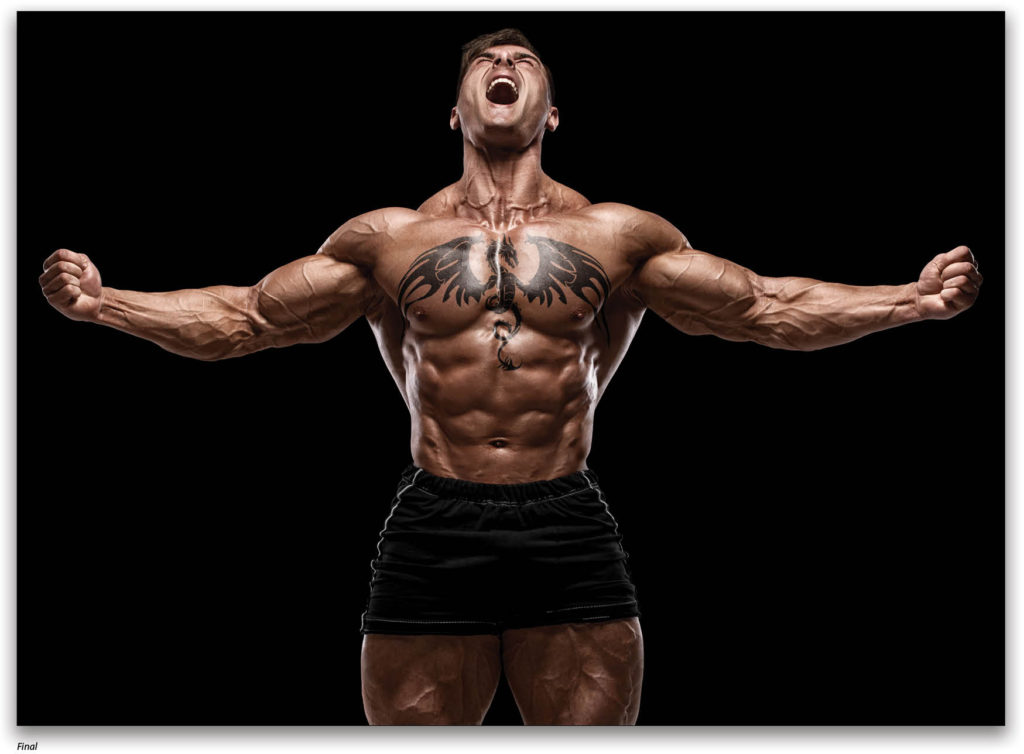
See how easy it was to place a tattoo on someone’s body? We knew that this tattoo would darken the skin, so we chose Multiply as the blend mode. Then, to add highlights, we simply removed the highlight areas of the skin from the tattoo using Blend If. That gave us a great result but at the cost of the skin color getting into the tattoo; so we simply desaturated that area using Hue/Saturation. When it comes to Photoshop, if you can just understand the concepts, you can create anything you’ve envisioned in your mind.
This article originally published in the June/July, 2020 issue of Photoshop User magazine.


