Owning a retouching company allows me a very unique view into other photographers’ businesses. I’m always interested by the different requests that come through the door; for example, I received an email from a very concerned wedding photographer a few years ago who was desperate for my help.
On this specific wedding, the bride’s makeup ran late and, as you may have guessed, they made it up by removing time from the group portrait section of the photography itinerary. I felt so sorry for the photographer. She was on time and ready to shoot, but because someone else ran late, she was penalized for it. I wish I could say this is the exception, but it happens all the time at weddings. The photographer was trying to work as fast as she humanly could, but she just didn’t have the time she needed to create group portraits with which she was happy.
“We didn’t have time to go to the second location that I’d picked out for the group portraits, so I had to make do with what I had. Unfortunately, the location we were in had really dappled light shining through the trees, and when I zoomed out to get the larger groups, some people ended up with dappled-light hot spots on their faces. Can you fix this kind of thing?” she asked.
I really felt for her, and luckily, since I too had been faced with the same problem some years ago when shooting a wedding, I could help her out! While I don’t shoot many weddings, I do one or two a year for past clients. I like it because it challenges me to do something creative and unique that I don’t do every day. I’m not known as a wedding photographer, so I know that when clients ask me to shoot their big day, it’s because of the relationship we have, not a specific aesthetic from my portfolio—but I digress.
In this issue, I’m going to teach you a technique for evening light on faces. Here’s a preliminary overview of what we’re going to do below: We’ll use Photoshop’s powerful selection tools to isolate the brighter tones on the face, and use an adjustment layer on a darkening blend mode to darken those areas, while simultaneously isolating the darker tones on the same face and using an adjustment layer on a brightening blend mode to brighten those darker areas. Wait, what? Don’t worry. I’ll explain this in detail below.
Step One:
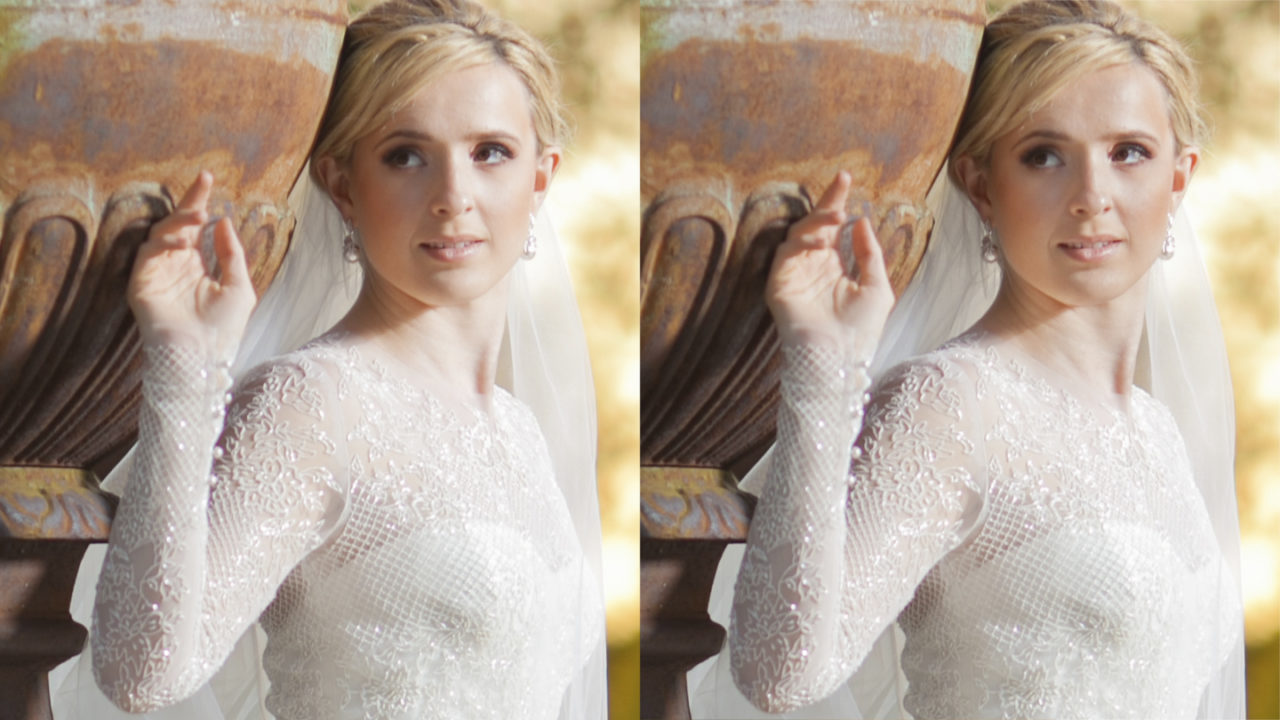
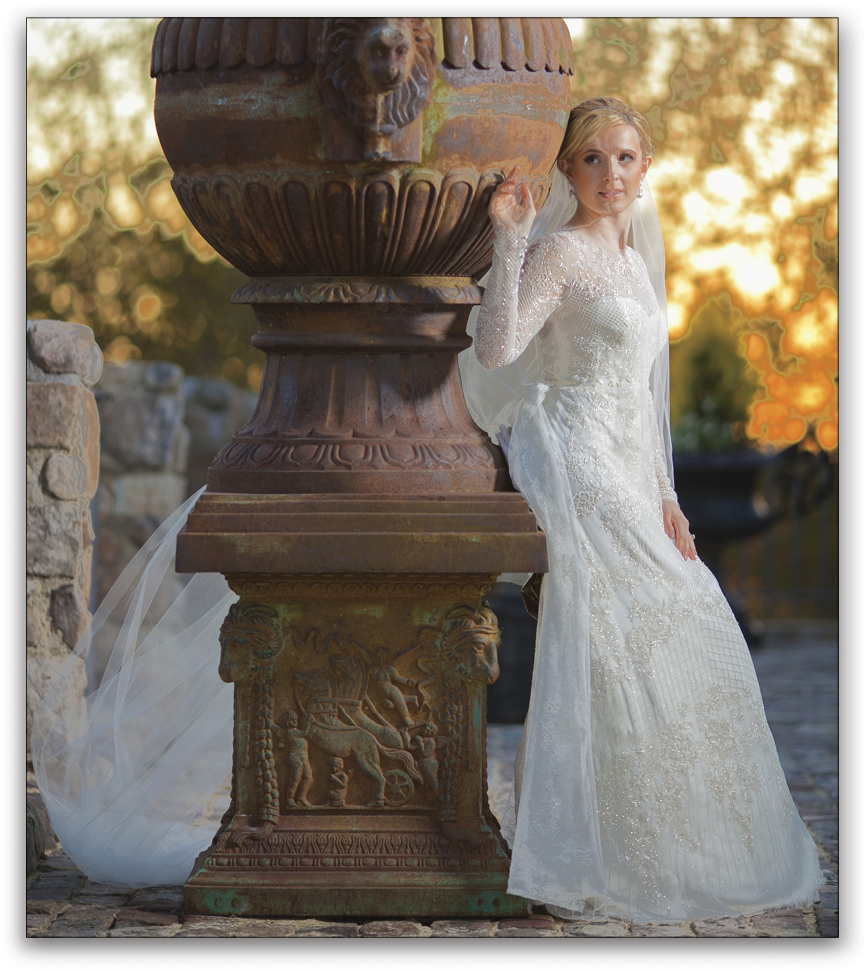
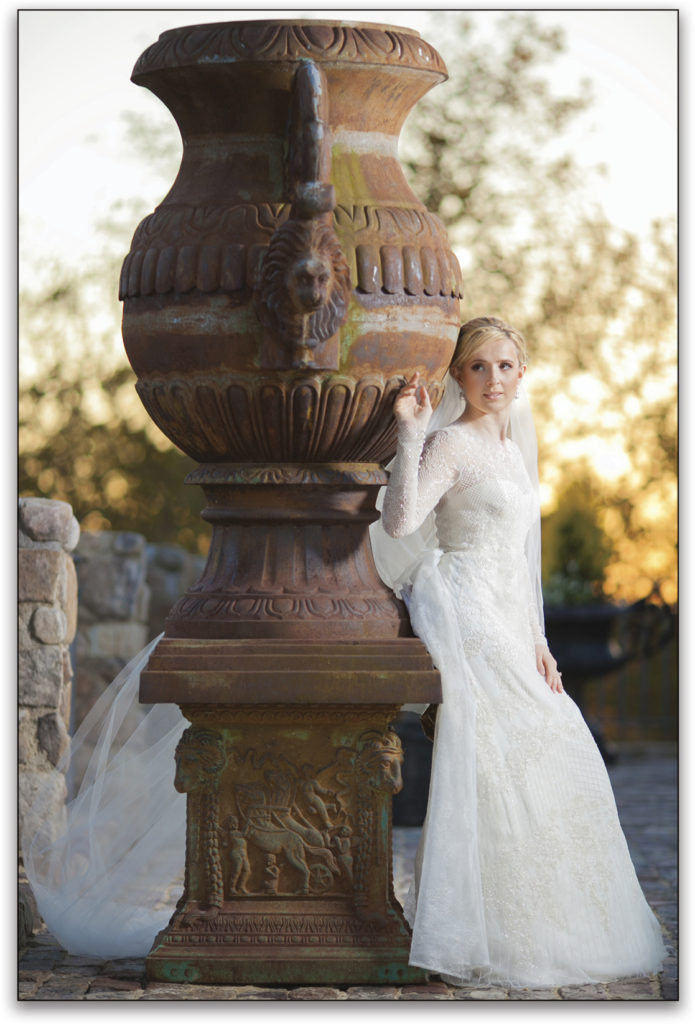
Let’s start with this image of a beautiful bride. As you can see, the shadowed side of her face and the highlighted side are quite extreme. I’d like to soften the difference in light exposure between the two sides, which means we’ll need to darken the bright side, and lighten the dark side.
[KelbyOne members may download the file used in this tutorial here. All files are for personal use only.]
Step Two:
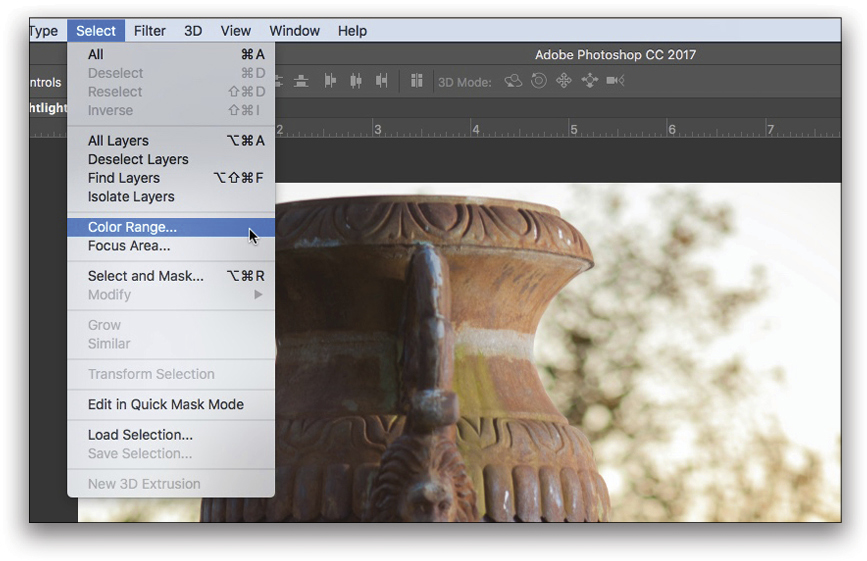
Next, we’ll isolate the highlighted tones on her face. Let’s start by creating a Hue/Saturation adjustment layer (Layer>New Adjustment Layer>Hue/Saturation). We’ll name this layer “Tone Down Highlights,” and click OK. The layer mask thumbnail for the adjustment layer should be active, but if it’s not, just click on it in the Layers panel. Then we’ll use my favorite tool to select the highlighted areas: Color Range. So go to the Select menu and choose Color Range from the list.
Step Three:
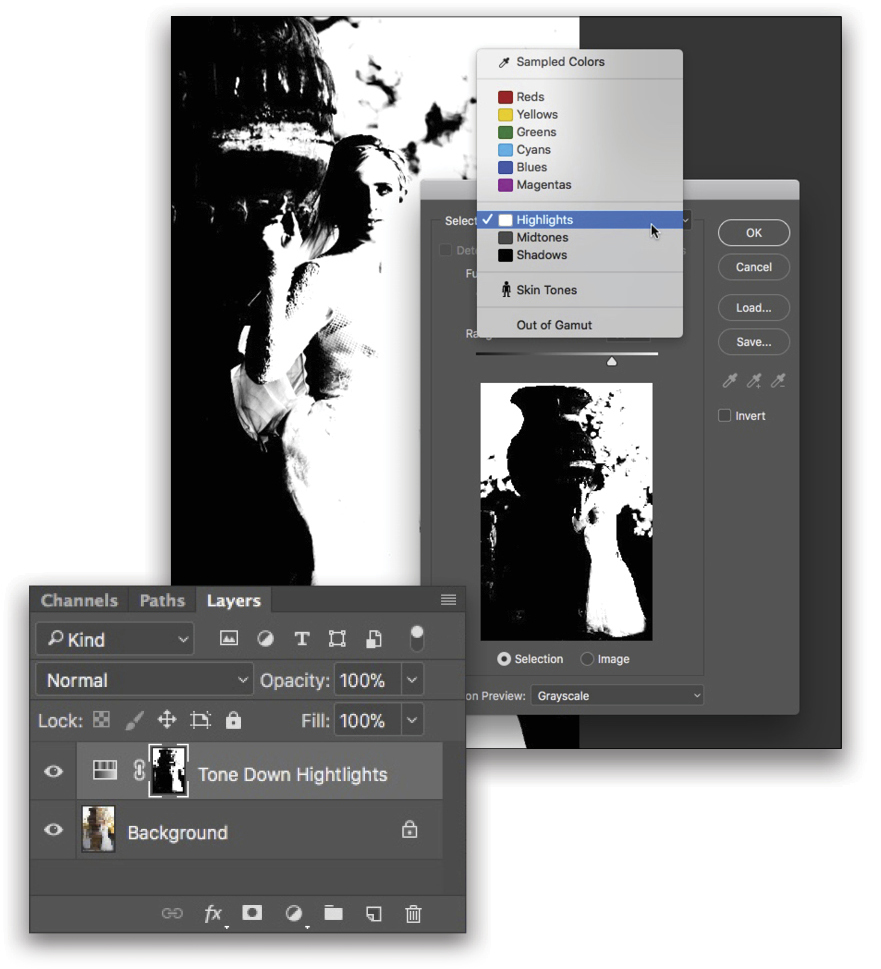
Once the Color Range dialog opens, choose Highlights from the Select drop-down menu. In the Color Range preview, you’ll see that the bright side of her face is white and the dark side is black. Note: Make sure the Invert checkbox isn’t checked in the Color Range dialog. Click OK. You shouldn’t see a change on your image just yet, but if you look at the mask icon of your Tone Down Highlights layer, you should see both black and white on the mask now, based on the Color Range settings.
Step Four:
Now, we can change the blend mode of our Tone Down Highlights layer from Normal to Multiply. That will immediately darken all the bright areas in the image. Here’s what the image looks like at this point. I know you can see the lines where the darkening effect is visible and where it isn’t, but just bear with me!
Step Five:
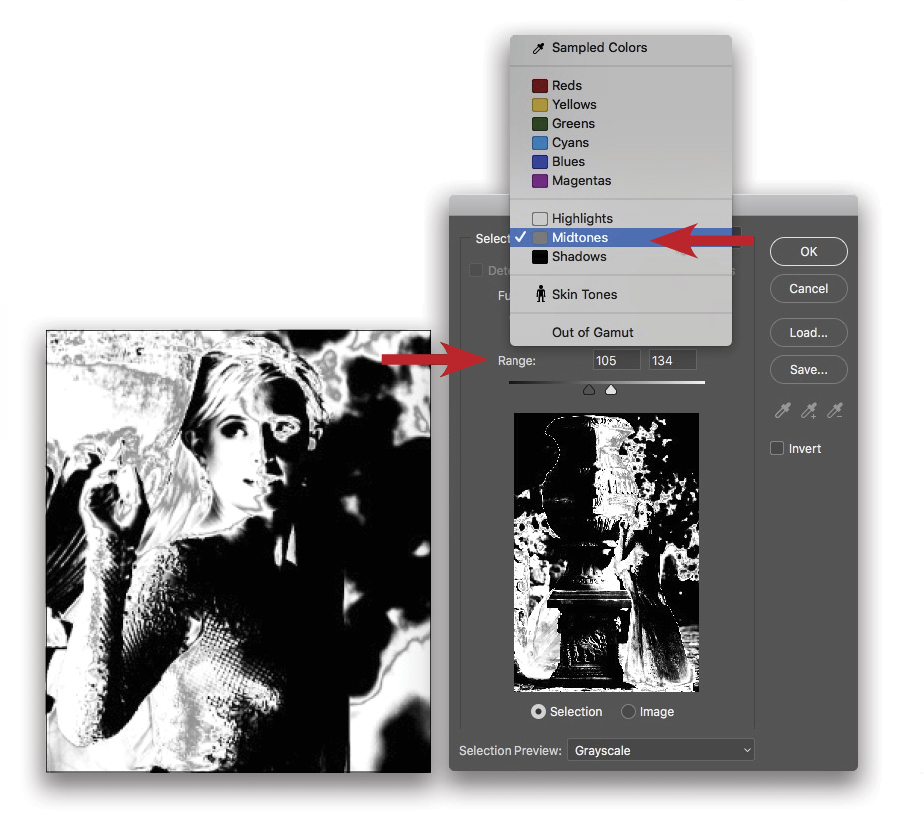
Let’s create a second Hue/Saturation adjustment layer and call this one “Brighten Shadows.” Again, make sure the layer mask thumbnail for this adjustment layer is active. Go back to Select>Color Range, but this time choose Midtones from the Select drop-down menu.
Note that the darker side of her face is now white and the highlight areas are now black. That’s because of the placement of the two Range sliders within the Color Range dialog. Move those arrows back and forth to isolate the area of the image that you’d like to brighten. For this image, those values are 105 and 134. Click OK.
Step Six:
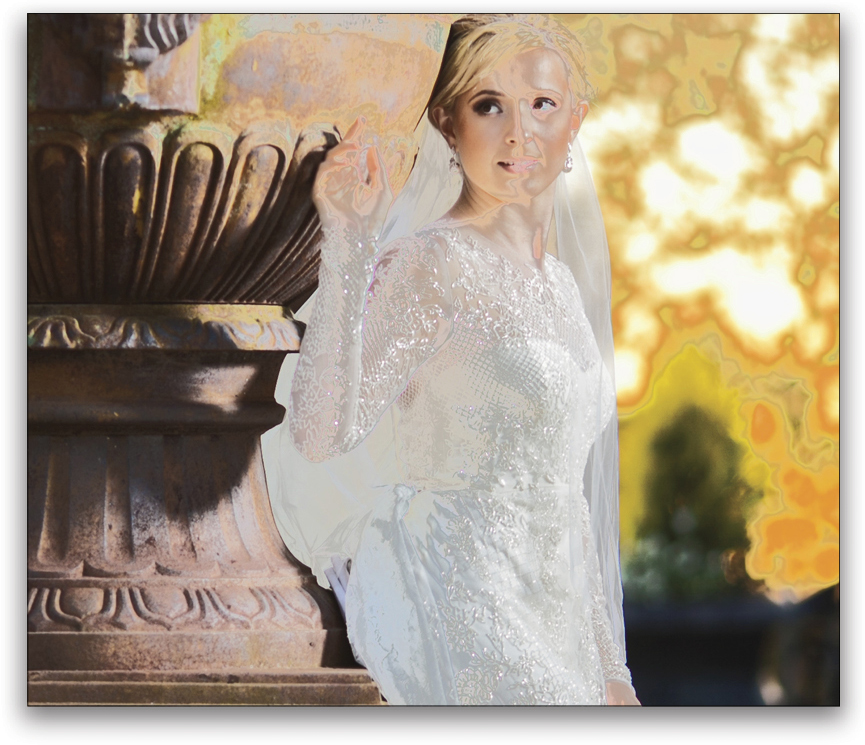
You won’t see a visible change (just like last time), but now that we have our mask created, we can change the blend mode of our Brighten Shadows layer from Normal to Screen, which will brighten that area. Looks pretty crazy, right?
Step Seven:
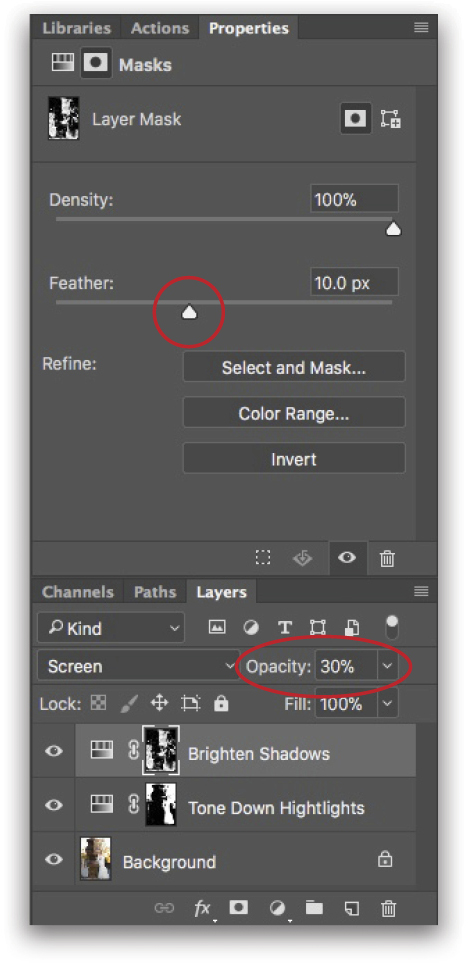
Now it’s time to add some finesse to these adjustments we’ve created. I like to do that using two things: the Opacity slider in the Layers panel, and the Feather slider located in the Properties panel.
Let’s first tackle the Brighten Shadows portion. Click on the Brighten Shadows mask thumbnail in the Layers panel. Then click on the word “Opacity” and drag to the left. This will decrease the amount of visibility that layer has. I decreased the Opacity of this layer to 30%. Next, we need to blur the lines of the mask. To do this, go to your Properties panel and increase the mask Feather to 10 pixels.
Step Eight:
Let’s do the same for the Tone Down Highlights layer. We’ll decrease the Opacity of this layer until we feel it does a good job of darkening the right side of her face. I chose to decrease the Opacity slider until the image was 50% visible. Next, just as in Step Seven, we’ll Feather the mask of the Tone Down Highlights layer by 10 pixels. This will blur the lines that were originally made by this adjustment layer.
Step Nine:
Now her face looks great, and the light has been softened. Yay! But this effect is currently being applied to the whole image, which means all the bright tones of the image have been darkened, and all the midtones have been brightened. So the whole image is looking kind of flat.
We’ll fix this by putting both of our adjustment layers into a layer group. In your Layers panel, select the Tone Down Highlights layer, and then hold down Shift as you click on the Brighten Shadows layer to select both of them at the same time. Next, press Command-G (PC: Ctrl-G) to put them both in a layer group. Double-click the name of the group and rename it “Even Face Tone.” Then, we’ll add a black mask to this layer group by holding the Option (PC: Alt) key while clicking the Add Layer Mask icon (circle in a square) at the bottom of the Layers panel. This will remove the effect from the entire image.
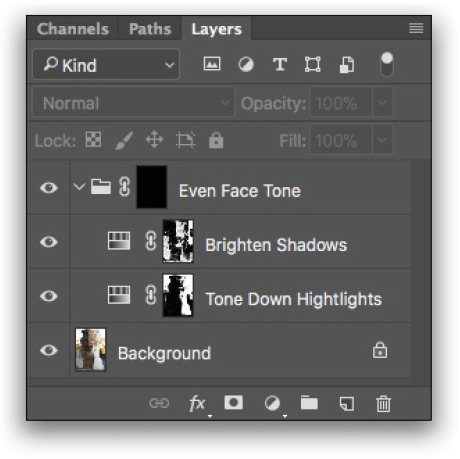
Step 10:
Now, we can reveal our super-duper, light-evening effect only over the bride’s face by painting with a white brush over the head and neck area! With the mask active for the layer group, just choose the Brush tool (B), press D to set your Foreground color to white, and paint where you want to reveal the effect.
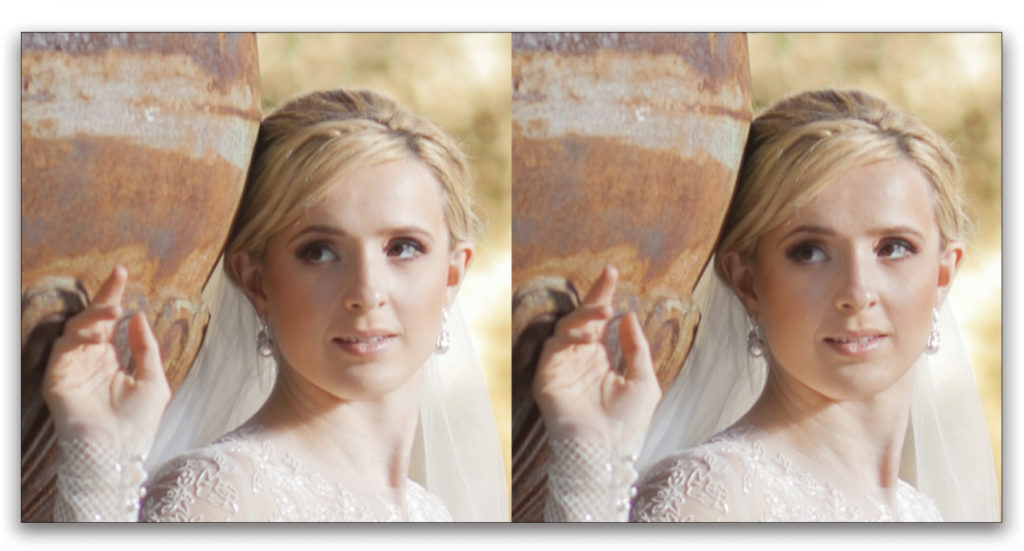
Here’s a side-by-side close-up of the before and after.
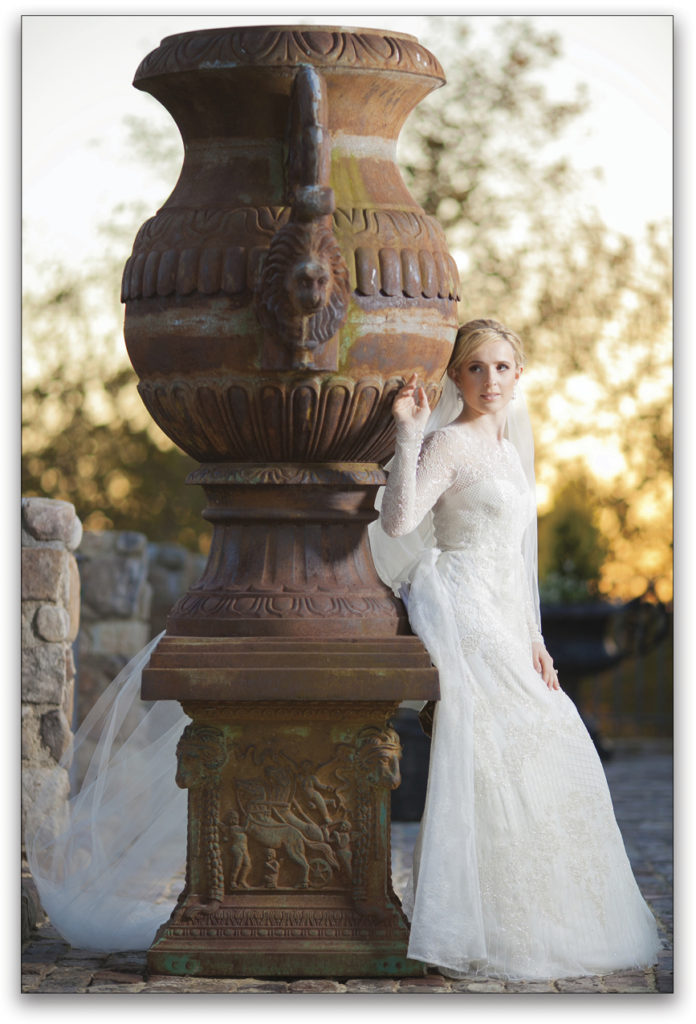
And here’s the full final image. I know this effect is minimal, but the best retouching is always minimal and unnoticeable! That’s what makes it good retouching.
This technique can be used on anything to create intricate masks (automatically, with no freehand masking by you) and selectively decrease contrast. So there’s how you fix the photographic mistake of shooting in light that’s too harsh!
If you’d like to learn more from Kristina Sherk on fixing photographic mistakes, check out her awesome KelbyOne course, Master Post-Processing: 10 Mistakes Every New Photographer Makes and How to Fix Them.
This article originally published in the March, 2018 issue of Photoshop User magazine.


