
In this article, we’re going to focus on using custom brush settings for masking when you need to work quickly. Anyone who has been working with masking for a long time will tell you how important it is to understand your brush tools. There are a powerful set of controls related to the various types of brushes that can help you fake your way into the right selection or mask that you need.
Painting with custom brushes, such as the grass brush, is often a great way to isolate things based on the edge texture of the subject you want to mask/select. You can use this same grass brush technique to mask fur on an animal, or maybe to help blend the edge of a mask on a beard or hair. There are many options, but the technique is fast and effective because of the variance created by the Jitter controls on the brush that matches the texture of the image. (More on this later in the article.)
Say that you want to isolate the lower section of grass from this Adobe Stock image—the part of the grass image that’s in focus, showcasing the most texture. Using the Lasso tool, or any traditional selection tool, would be challenging and time consuming. So we won’t use a selection tool for this at all!
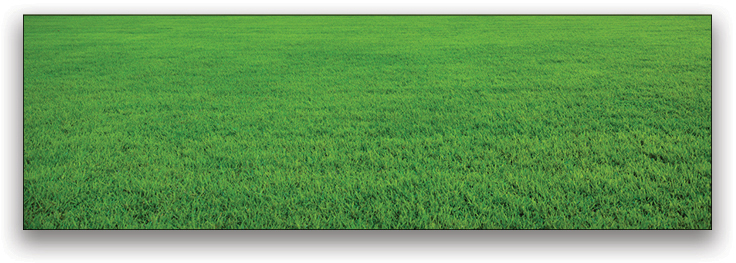
If you’d like to download the low-res watermarked version of this image to follow along, click this link, log in with your Adobe ID, and click the Save to Library button. Double-click the image in the Libraries panel (Window>Libraries) to open it in Photoshop. To make it easier to work with the image, increase the resolution of the practice file. (We normally don’t recommend enlarging images, but this is only for practice purposes.) Go to Image>Image Size, turn on the Resample checkbox, set the Height to 2,000 pixels, and click OK.
Fast Finishing
To learn how to be fast at this technique, we’re going to use the Brush Settings. Choose the Brush tool (press B on your keyboard). By default, you’ll usually work with either a hard, or soft round brush, but there are settings for each brush that allow you to adjust the dynamics relating to that brush.
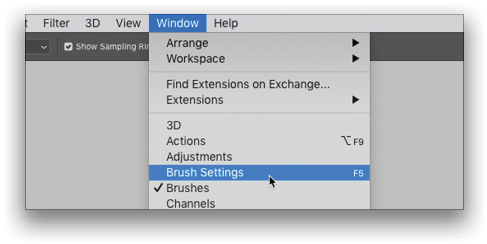
After you’ve selected your Brush, go to Window>Brush Settings (or press F5) to open the panel, which is all about the controls for the selected brush. (It’s different from the Brushes panel, which gives you a gallery of your available brushes.)
We’ll focus on one very important area and one important concept for this technique.
Shape Dynamics
Click on the words “Shape Dynamics” (in the list on the left), and you can control several settings. Some are more dynamic than others, relating to hardware tools like a graphic tablet and pen (such as a Wacom); and others are just rendering intents for the chosen brush.
The key word to understand here is Jitter. You’ll see it all over the Brush Settings panel. The best word I can use to describe Jitter is “variance,” which is all about making something inconsistent; and Jitter controls do exactly that. Each Jitter control is basically a threshold for how much variance you want to cause when the brush is being used.
For example: Size Jitter means to vary the size of the brush randomly as you’re painting. You can influence this by using the next control slider, Minimum Diameter, which defines the minimum size to which the brush can change while painting. By adding Angle Jitter (the random rotation of the brush) and Roundness Jitter (compressing the aspect ratio of the brush randomly as you paint), you can create unpredictable organic forms with the brush.
Near the bottom of the Shape Dynamics options are on/off checkboxes for Flip X Jitter and Flip Y Jitter: Flip X Jitter randomly flips the brush horizontally, and Flip Y vertically. It’s worth noting that the randomness will react relative to how fast you paint with the brush and, with enough Jitter settings and the human randomness caused when painting fast, you’ll never see two brushstrokes that are the same.
Choosing the Right Brush Type
There are many brushes that come with Photoshop—too many to mention here—but if you haven’t explored the Brushes panel (click on the Brushes tab in the Brush Settings panel), just note that many folders of brushes are available to you containing more than the default that you see. In the Brushes panel, you’ll find folders such as Dry Media Brushes and Special Effects Brushes. If these aren’t enough for you, in the flyout menu at the top right of the panel, choose Get More Brushes, which will take you to the Adobe.com website, and you can surf for even more options.
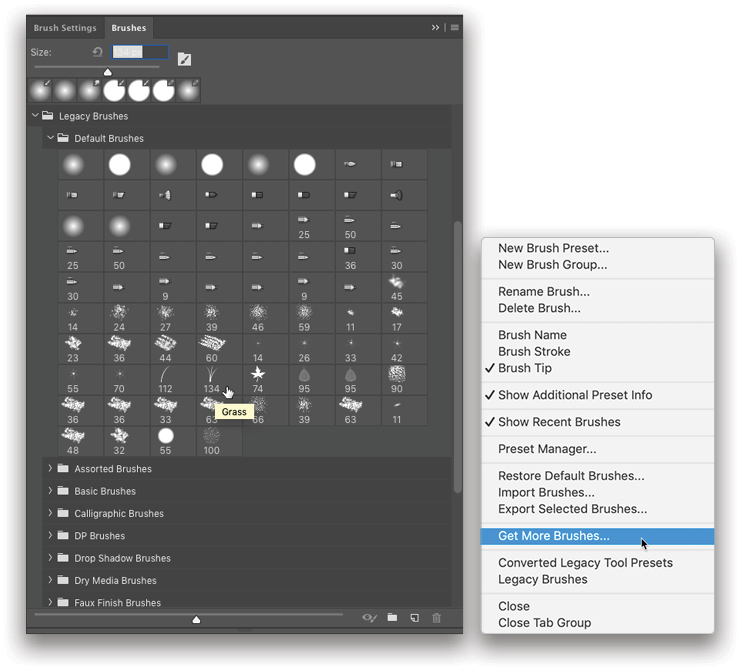
For selecting some grass from our photo, we’re actually going to use the Grass brush, which is part of the default set within Photoshop (it’s in the Default Brushes folder in the Legacy Brushes folder). Dune Grass could also work, but the regular Grass brush works more quickly for this technique. After choosing the Grass brush, let’s go back to the Brush Settings panel and add some Jitter controls.
Setting Up the Brush
By default, the Grass brush comes with a lot of pre-existing settings turned on, some of which we’ll need to turn off: For example, on the left side of the Brush Settings panel, click on the checkbox to turn off Color Dynamics and Transfer. Note: Don’t click on the name, as that would take you to those specific controls, which we don’t need to see.
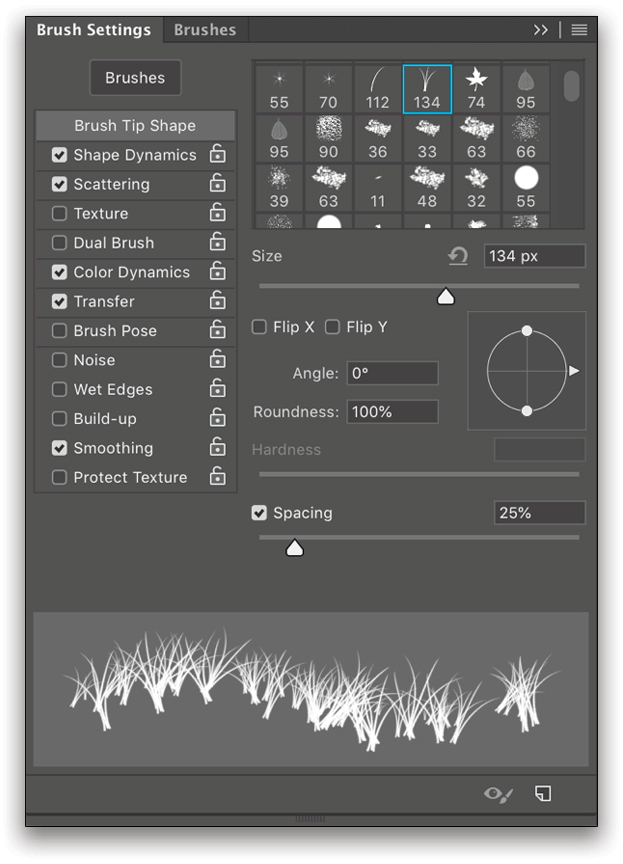
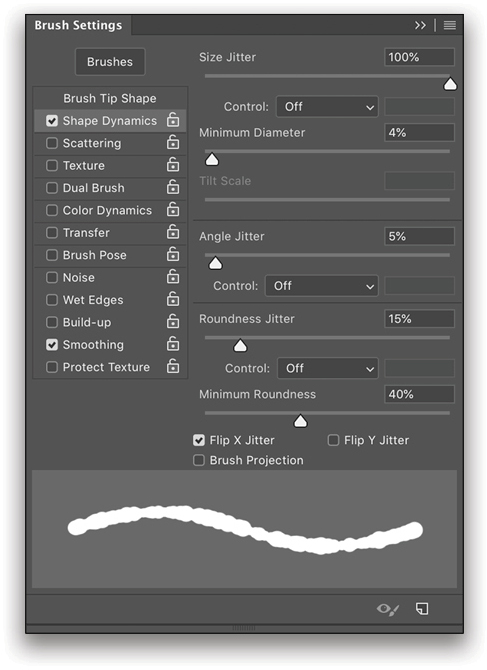
At the bottom of the panel is a preview representing how your brush will look when used. The variance from Jitter is good on this brush by default, but we want to adjust it. So, click on the Shape Dynamics option near the top left of the panel (click directly on the words, not the checkmark), and adjust the settings here until your Grass brush looks like it has some variance. In our example, we turned on the Flip X Jitter option near the bottom of the panel, increased the Minimum Diameter threshold for Size Jitter (43%), and then adjusted the Angle Jitter (6%) and Minimum Roundness (57%) options.
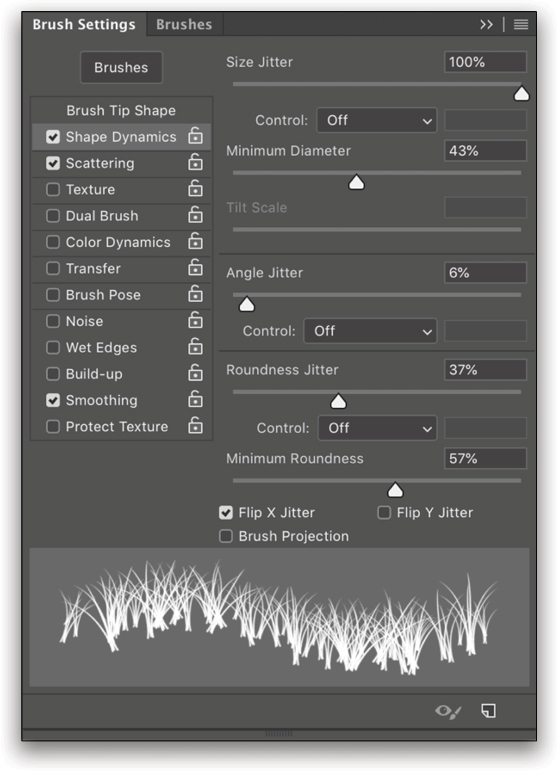
The goal is to make a very dense, spiky brush where the blades are still rising mostly vertically. But that shaping really depends on the photo you’re masking.
The next set of options will help control the density of the brush as it’s being applied.
Scattering
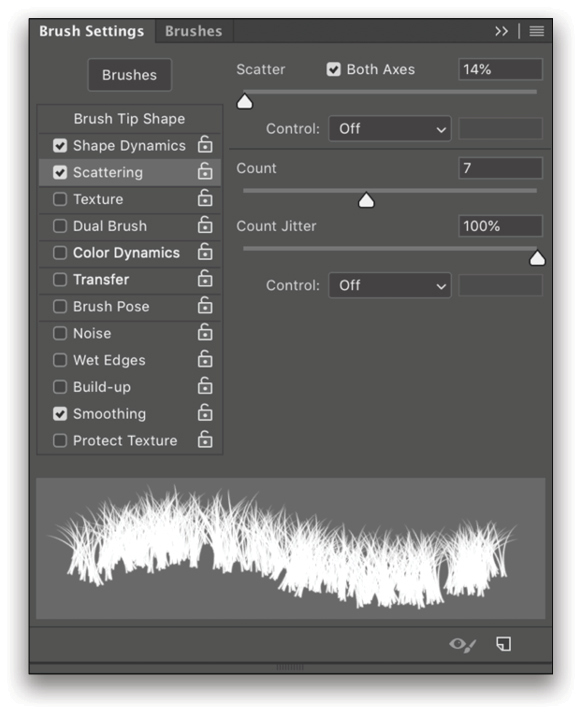
To help fill in the gaps, click on Scattering in the list on the left side of the panel. If you increase the Scatter value, you’ll see the preview below change; it’s spacing out the brush over the distance you’ll paint. If you decrease the Scatter value, you’ll create a more dense impression from this brush shape. If you do increase the Scatter, which creates bigger gaps, increasing the Count number will help fill in any gaps created by the Jitter or Scatter controls.
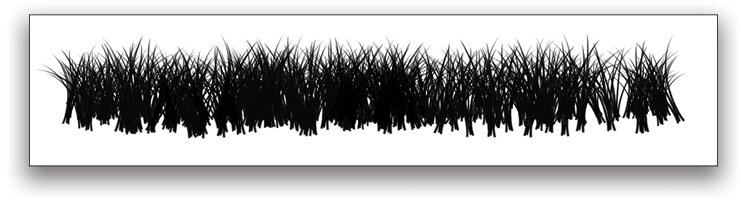
The result for our example can be seen in the brushstroke here: This is one stroke, one click-and-drag, to make a spiky silhouette of what grass looks like. When you’re familiar with these brushes and the settings available, tailoring the brush should only take about 10 seconds. With all images that have a textured edge like this, you could quickly mask out a section using this brush!
Painting a Border of Grass
Now, let’s go back to our Grass image from Adobe Stock. Make sure the layer is selected and then click the Add Layer Mask icon (circle in a square) to add a layer mask to the image layer.
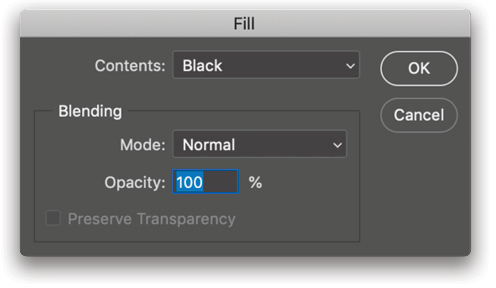
Make sure your layer mask is selected in the Layers panel (you’ll see white frame corners on it) and fill the mask with black: Go to Edit>Fill, choose Black from the Contents drop-down menu, and click OK. This will hide the entire grass image, leaving you with only a transparent background. Now press D to make your Foreground color white. This will ensure that anywhere you paint on the mask will reveal the image that’s hidden behind the black mask.
Check that your custom Grass brush (with all its custom Jitter settings) is still selected, and set its Opacity (up in the Options Bar) to 100%. As you paint with white on the Layer Mask, spiky previews of the grass texture will appear. Make sure your brush doesn’t look bigger or smaller than the texture you’re trying to match, meaning that the Grass brush blades shouldn’t look different in size than the grass blades in the picture.
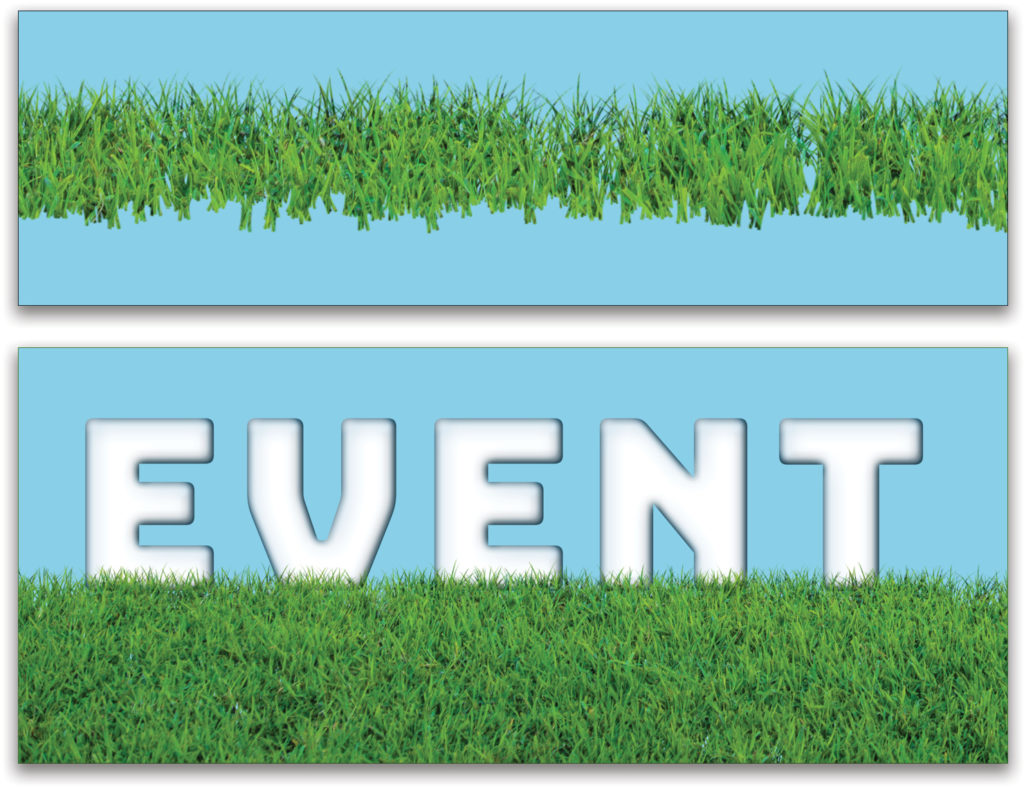
As you paint, you’ll begin to see a nice border of grass with a believable texture, as if you cut out that grass with a very fine selection. The Jitter creates enough variance so that it’s believable, with no distinguishing pattern that’s obvious to the human eye. Here, I added a new layer below my grass layer and filled it with a blue color just so you can see the effect.
Keep painting until you fill in enough of the mask to produce your grass-edging border. Then, add any other elements needed for your design. Here, we just added some text.
There you have it! Faking a selection-masked edge of something without actually making a precise selection. And you can use those textures to fake your way into some great-looking edge selections.
This article originally published in the October, 2019 issue of Photoshop User magazine.


