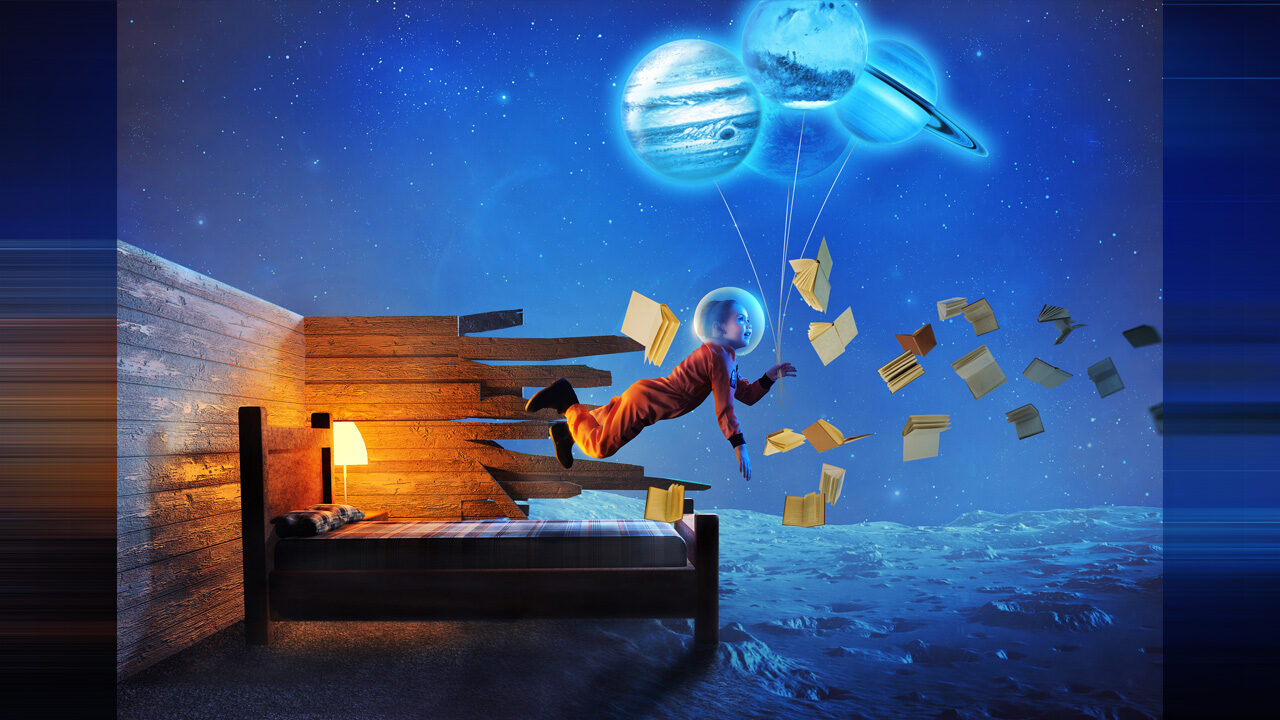
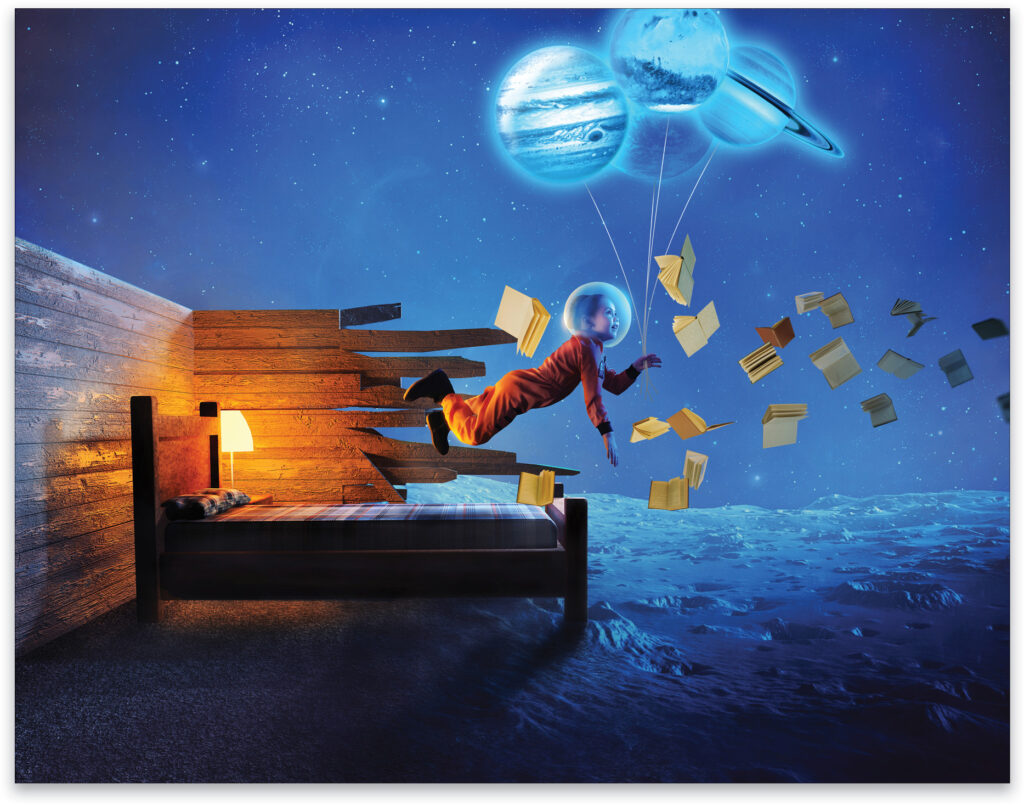
Ever get lost in a good book? Ever get so lost that it feels like you’re immersed in a totally different environment that barely even resembles our own world? There is perhaps no more escapist form of entertainment than a novel you just can’t put down. In this project, we attempt to visualize that surreal, almost dreamlike, experience of losing yourself in a vivid sci-fi dreamscape.
This project does make use of stock files from Adobe. If you don’t wish to purchase the full-sized versions, using the smaller, watermarked versions will serve just fine to learn the techniques.
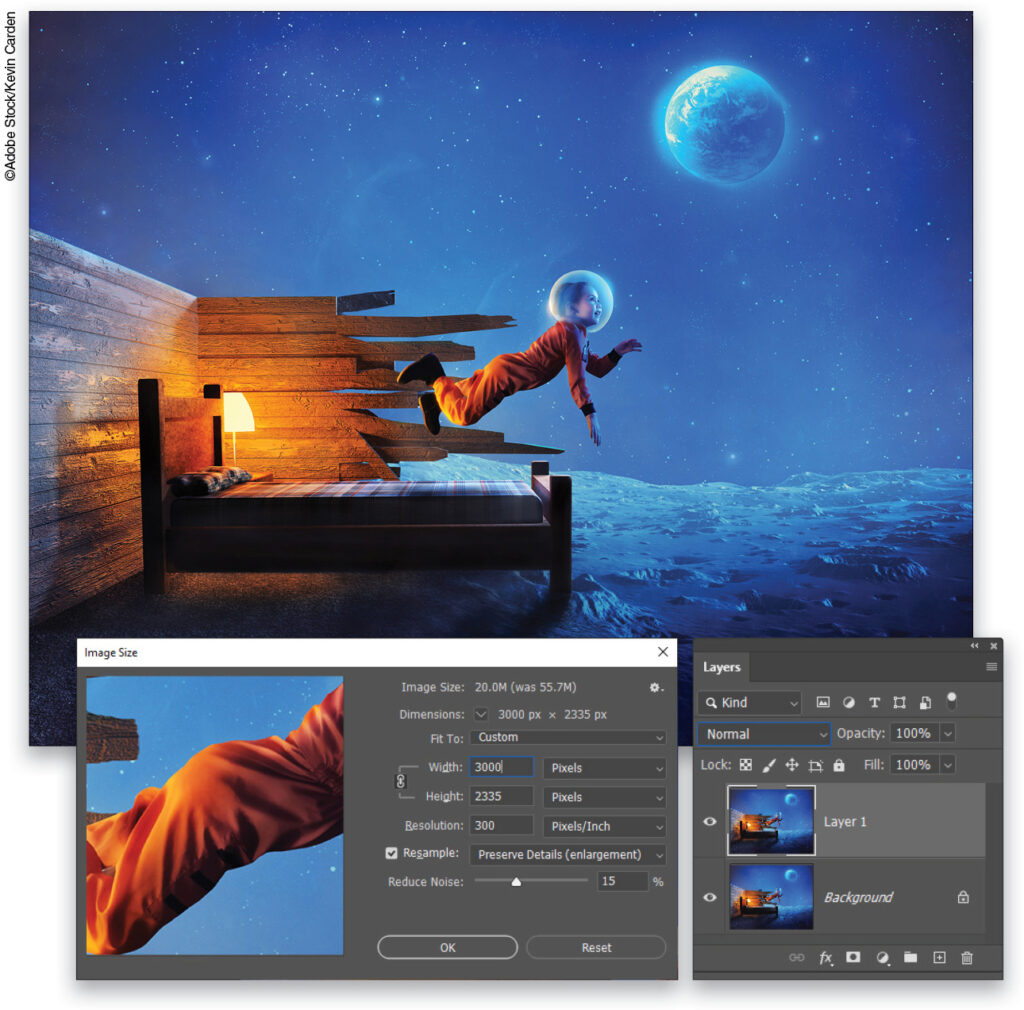
To make it easier to work with the image, increase the resolution of the practice file. (We normally don’t recommend enlarging images, but this is only for practice purposes.) Go to Image>Image Size, turn on the Resample checkbox, select Preserve Details 2.0 from the Resample drop-down menu, set the Width to 3,000 pixels, and click OK.
Press Command-J (PC: Ctrl-J) to duplicate the Background layer, which is automatically named Layer 1.
STEP ONE: If you’d like to download the low-res watermarked versions of this image to follow along, click this link, log in with your Adobe ID, and click the Save to Library button. Right-click the image in the Libraries panel (Window>Libraries) and choose Edit to open it in Photoshop.
STEP TWO: Use the Elliptical Marquee tool (nested with the Rectangular Marquee tool [M] in the Toolbar) to create a circular selection around the Earth. Keep the selection large so it fully encompasses the glow as well. You can press-and-hold the Spacebar while you’re drawing the selection to reposition it.
Use the Content-Aware Move tool (nested below the Spot Healing Brush tool [J] in the Toolbar) to slide the Earth’s pixels to the left until it’s situated directly above the child’s hand. Our ultimate goal is to make it look like she’s holding on to a group of “balloons” that are actually planets. Press Enter to commit the move, and press Command-D (PC: Ctrl-D) to cancel the selection. If the Content-Aware Move left some strange artifacts, use the Spot Healing Brush to correct them.
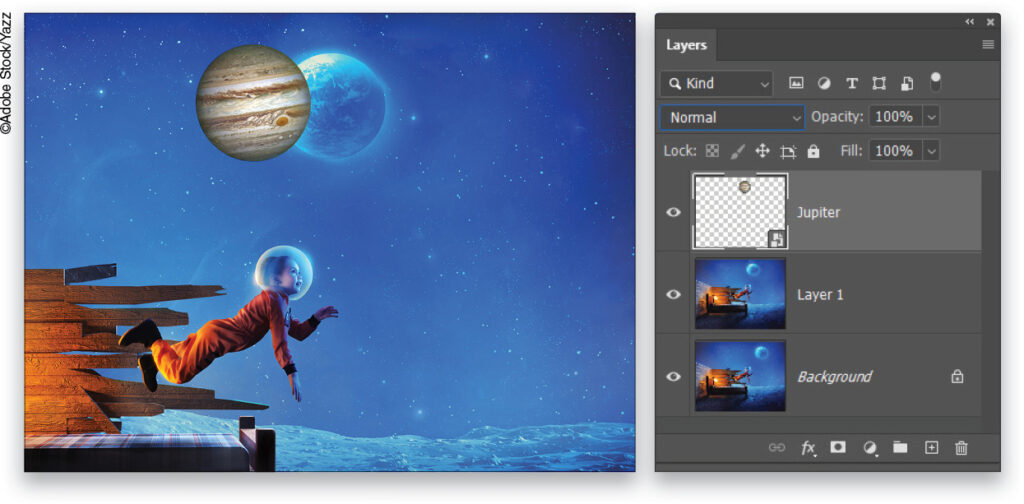
STEP THREE: Click here to find the image of the planets that we’re using, and click the Save to Library button. Open the image in Photoshop and resize it as we did in Step One with the first image. Using the Elliptical Marquee tool again, make a round selection around the Jupiter image, keeping the selection just inside the edge of the planet so as not to grab any of the black background. Again, use the Spacebar to reposition the selection as you’re drawing it. Press Command-C (PC: Ctrl-C) to copy those pixels.
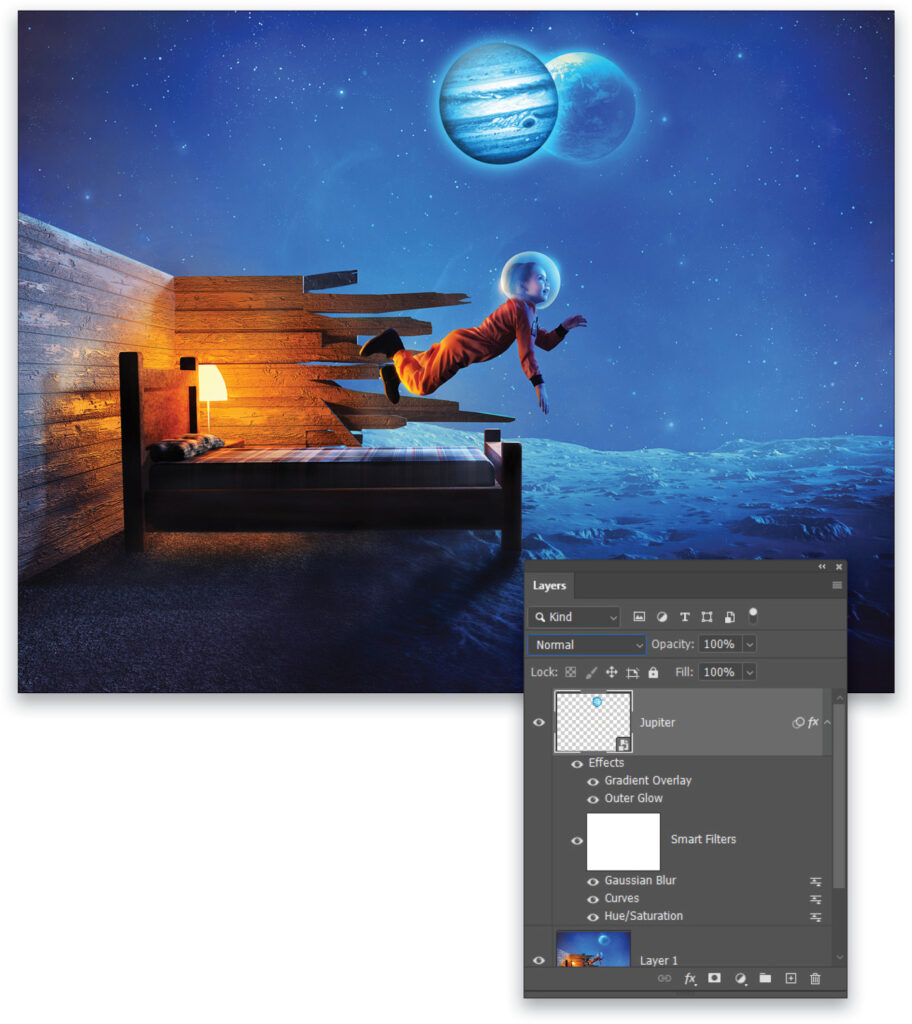
Go back over to the main project file and press Command-V (PC: Ctrl-V) to paste the copied pixels in as a new layer. Double-click the name of the layer in the Layers panel, and rename it “Jupiter.” Change it to a smart object by going to Layer>Smart Objects>Convert to Smart Object.
Press Command-T (PC: Ctrl-T) for Free Transform, and then scale and position the planet to appear as another balloon next to the Earth. We also clicked-and-dragged outside the bounding box to slightly rotate the planet. Press Enter to commit the transformation.
STEP FOUR: Go to Image>Adjustments>Hue/Saturation and check the Colorize box. Set the Hue to 202, Saturation to 64, and keep the Lightness at 0. Click OK, and then run a Curves adjustment from the same menu. Adjust the curve in the Curves dialog as shown here until the planet appears very bright (click on the curve to add points). Click OK, and then follow that with Filter>Blur>Gaussian Blur. Set the Radius to 0.5 Pixels, and click OK.
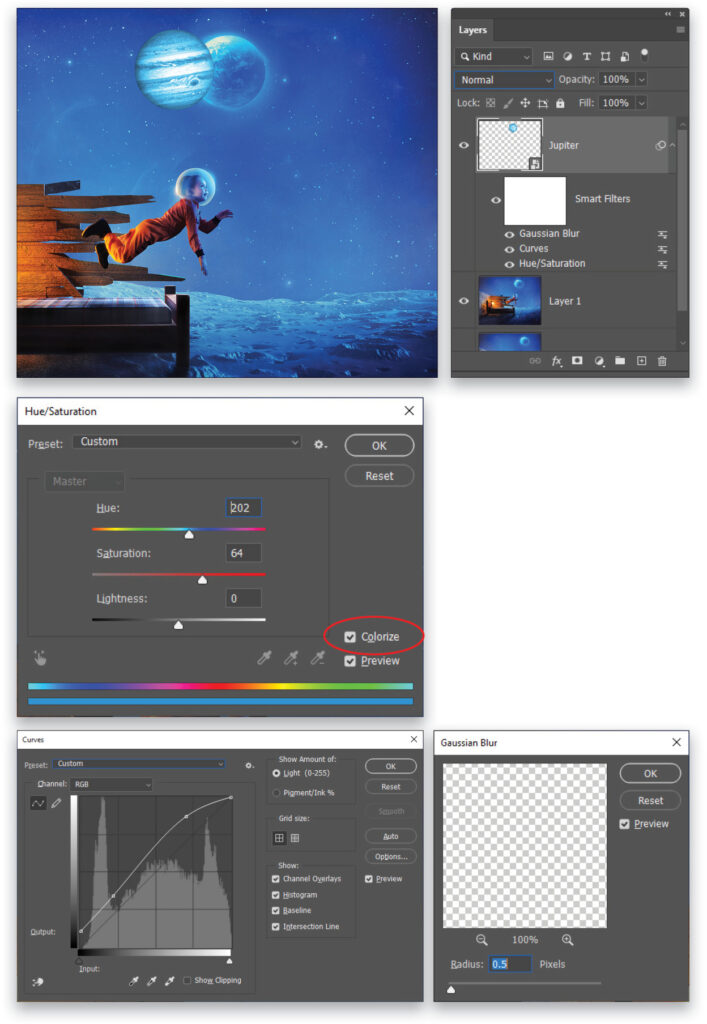
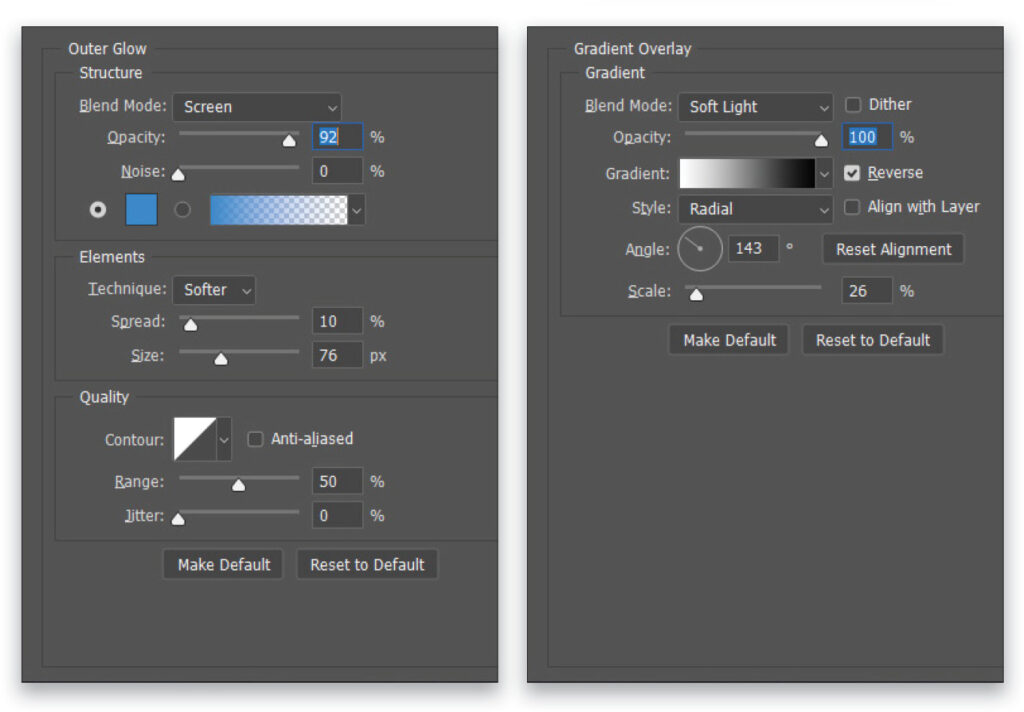
STEP FIVE: Next comes a whole handful of layer styles. Double-click to the right of the Jupiter’s layer name in the Layers panel to open the Layer Style dialog. Begin with an Outer Glow effect with the Blend Mode set to Screen (to both turn on and activate its settings, click directly on the words “Outer Glow” in the list on the left). Set the Opacity to 92%, Spread to 10%, and Size to 76 px. Click on the color swatch, choose a pale blue (#188ee7), and click OK to close the Color Picker.
Still in the Layer Style dialog, our next style is a Gradient Overlay with the Blend Mode set to Soft Light. Click on the Gradient thumbnail to open the Gradient Editor and select the Black, White preset in the Basics group. Click OK to close the Gradient Editor, and then enable the Reverse option and turn off Align with Layer. Set the Style drop-down menu to Radial, Angle to 143°, and Scale to 26%. Click-and-drag on the canvas area while the layer style dialog is still open to position the dark portion of the gradient at around the 8 o’clock position on the planet (you might have to drag quite a bit). Don’t click OK yet in the Layer Style dialog, as we’re not quite done with the layer styles.
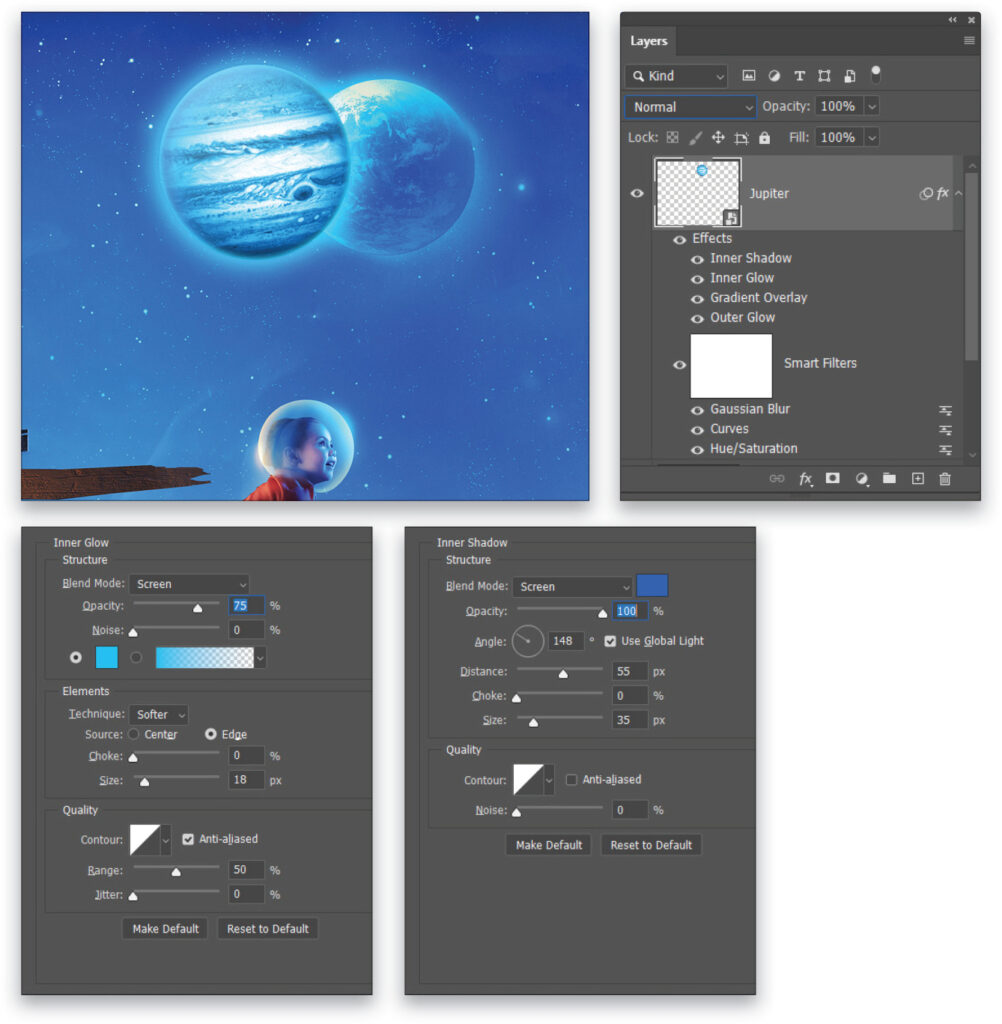
STEP SIX: Add an Inner Glow layer style with the Blend Mode set to Screen, Opacity at 75%, the color at a pale blue (#24c0ef), and Size set to 18 px. Finally, add an Inner Shadow layer style with the Blend Mode set to Screen, color at a midtone blue (#175fcc), Opacity at 100%, Angle at 148°, Distance at 55 px, and Size at 35 px. Now you can click OK to apply the layer styles.
STEP SEVEN: Repeat the steps for adding Saturn and Mars as planetary balloons. For Saturn, you can use the Quick Selection tool (nested with the Object Selection tool [W] in the Toolbar) to select the planet and its rings. If it selects too much, just press-and-hold the Option (PC: Alt) key and drag over those areas to remove them from the selection. After you copy each planet into the working file, don’t forget to convert it to a smart object before you resize and position it.
We want to apply the same adjustments and layer styles to the new planets. An easy method of copying smart filters from one smart object to another is to hold the Option (PC: Alt) key and drag the Smart Filters group from one layer to another in the Layers panel. The layer styles can be copied in the same way, just click-and-drag the word “Effects” instead.
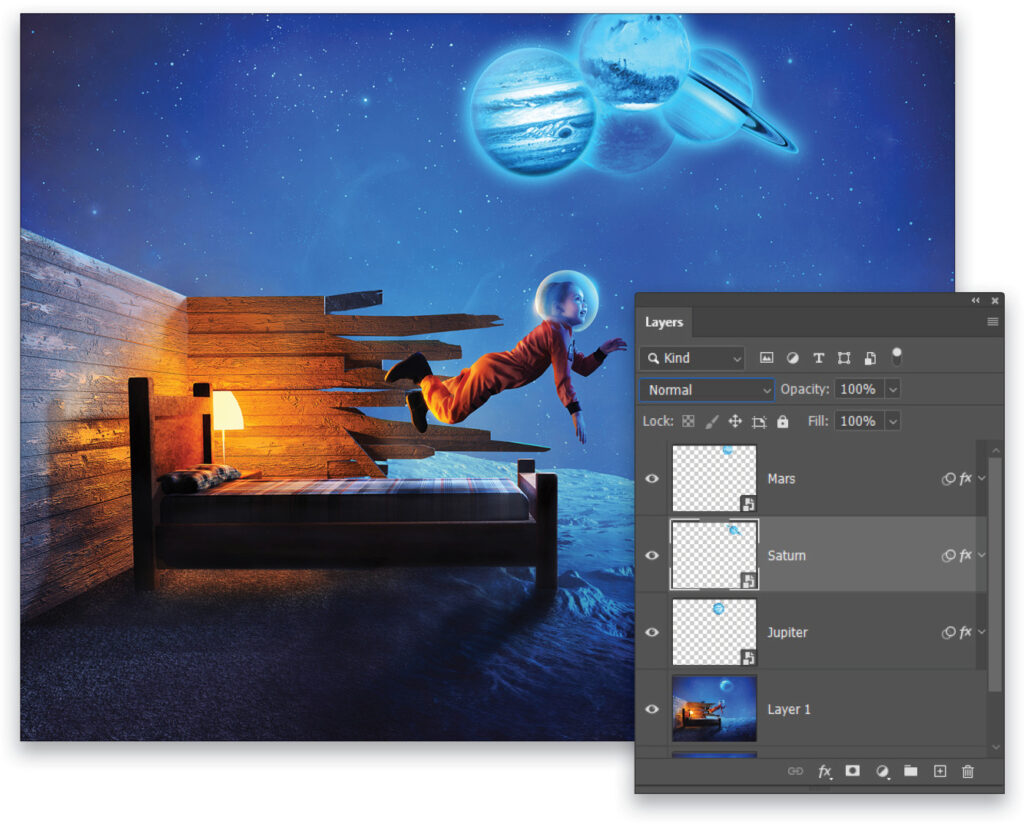
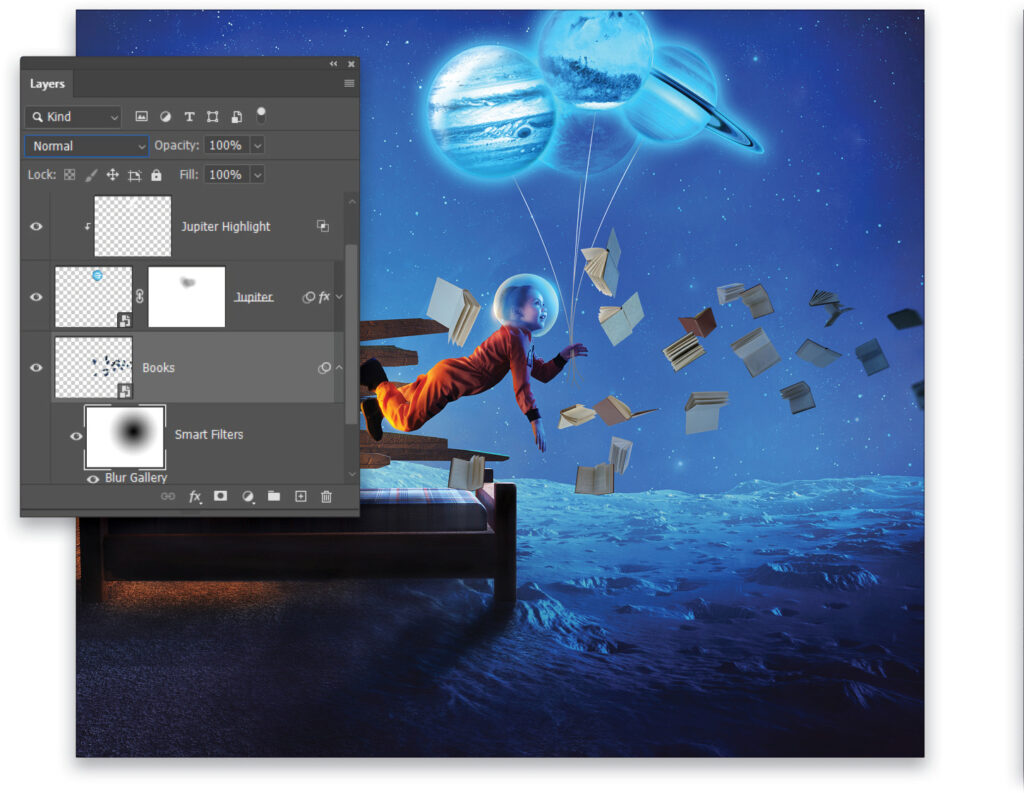
STEP EIGHT: Jupiter is just a touch too dark at the lower left, so add a layer mask to the Jupiter layer by clicking the Add Layer Mask icon (circle in a square) at the bottom of the Layers panel. Switch to the Brush tool (B) with a Soft Round tip, press X until the Foreground color is black, and set the Opacity to 40% in the Options Bar. Use the Bracket keys ([ ]) on your keyboard to resize the brush as needed, and gently paint around the lower-left portion of Jupiter just so the shadows aren’t quite as deep.
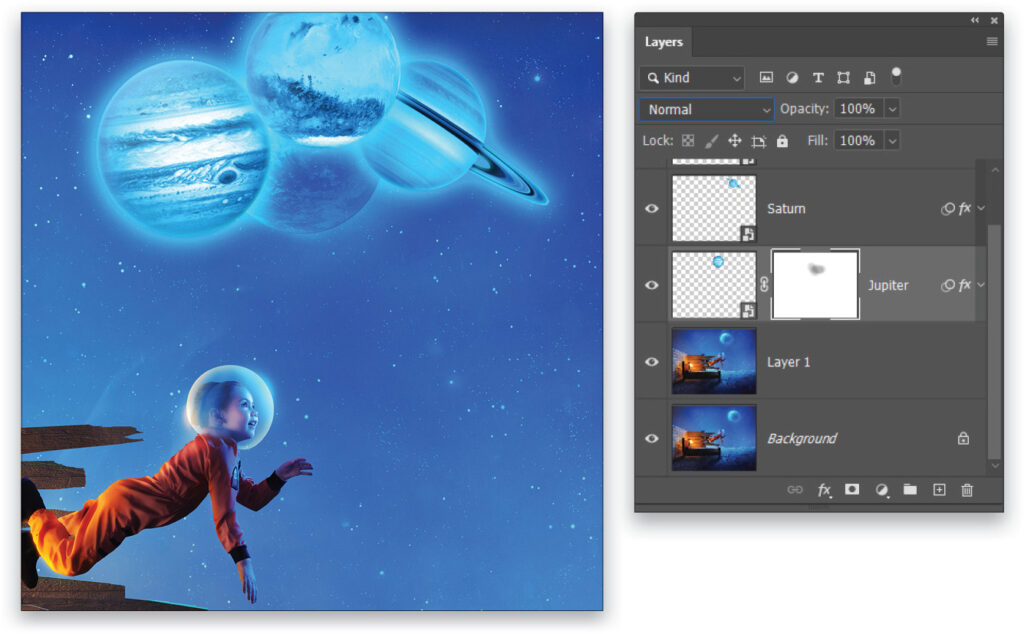
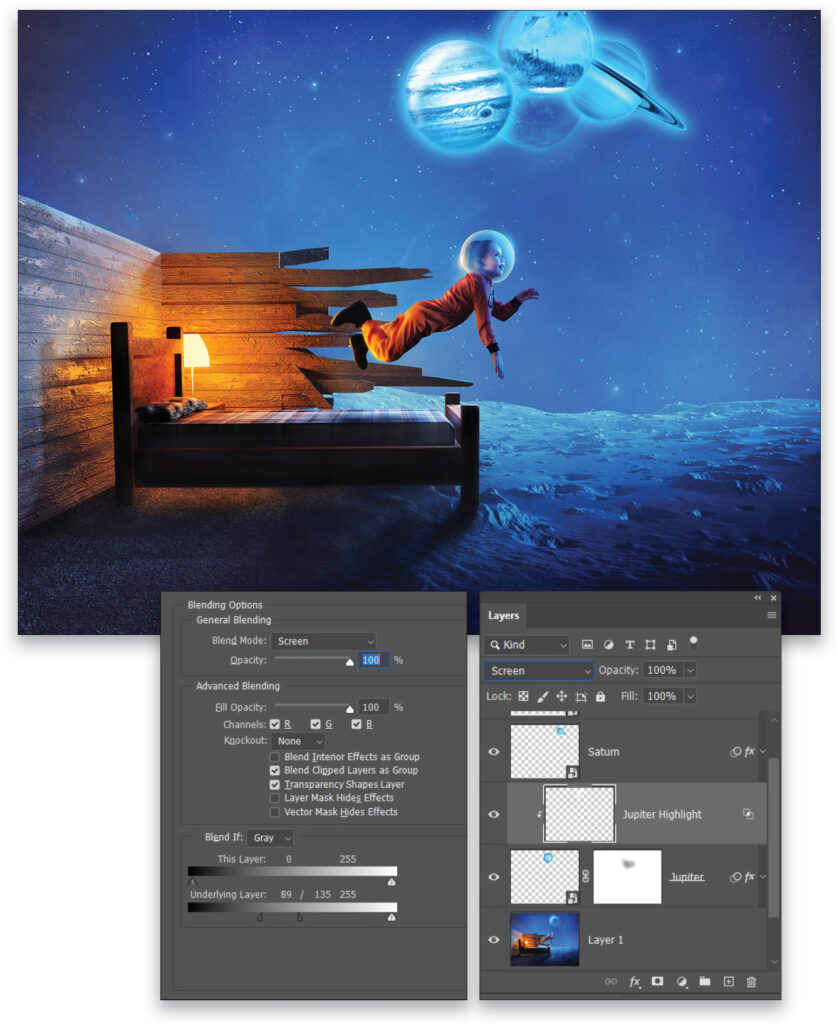
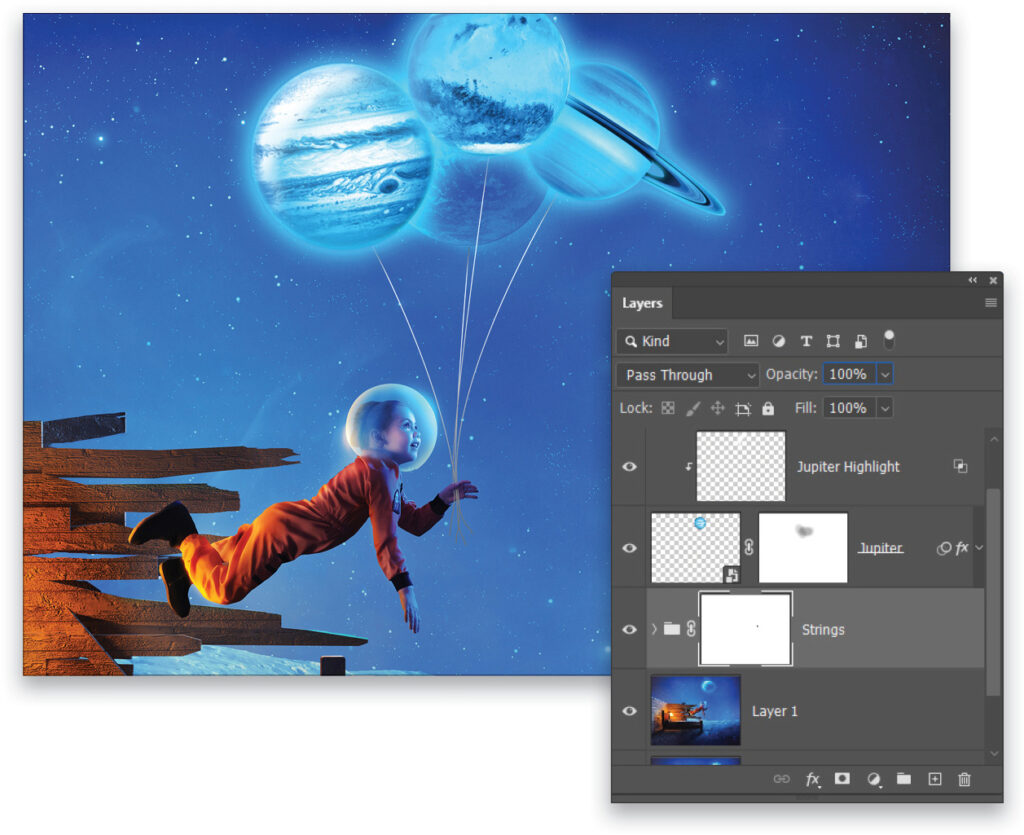
STEP NINE: Add a new layer called “Jupiter Highlight” above the Jupiter layer, and set the blending mode to Screen near the top left of the Layers panel. Use the same soft round Brush, but this time with white paint (press D then X) and the Opacity at 100%, to cover over the top left rim of the Jupiter planet. Then go to Layer>Create Clipping Mask to clip the Jupiter Highlight layer to the Jupiter layer.
Open the Layer Style dialog and go to the Blending Options area. In the Underlying Layer slider, hold down the Option (PC: Alt) key, and click on the left-hand, dark handle to split it. Set the right half to 135 and the left half to 89. This will allow some of the darker areas of the planet to show through the highlight. Click OK.
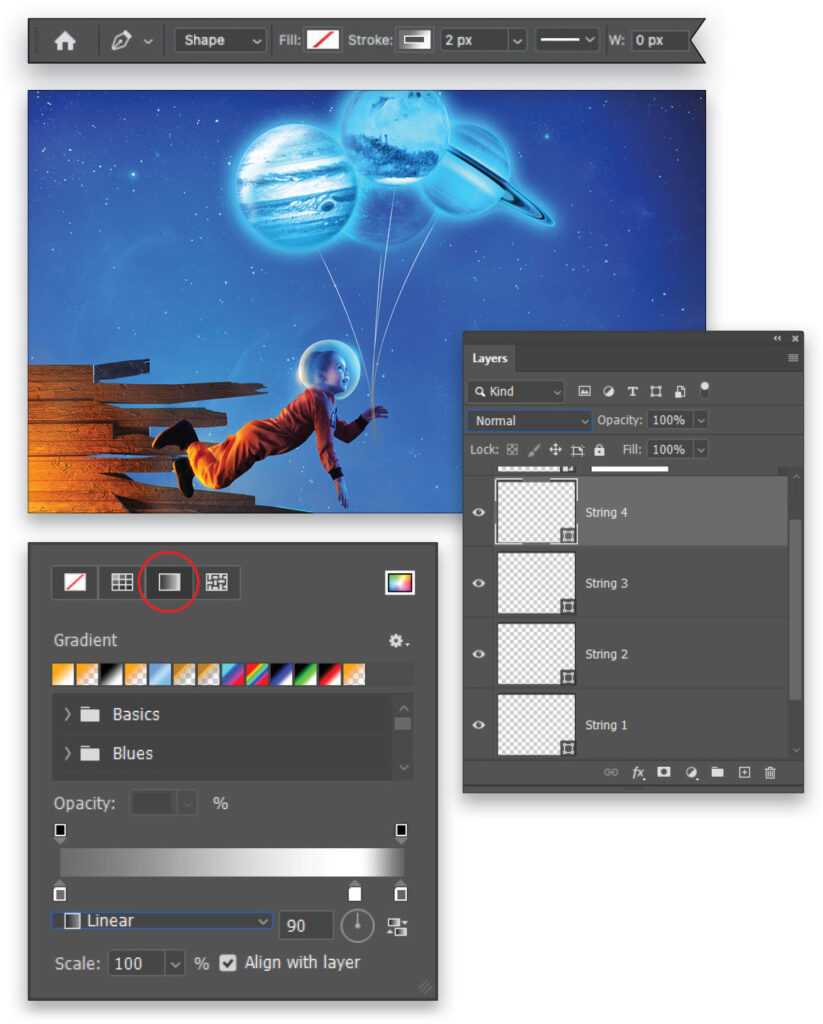
STEP 10: Make Layer 1 the active layer and grab the Pen tool (P). In the Options Bar, set the Tool Mode to Shape, Fill to No Color, and Stroke to 2 px. For the Stroke color, click on the swatch just to the right of it in the Options Bar, select the Gradient icon at the top, and choose the Black, White preset in the Basics group.
Double-click the left color stop (it looks like a little house) below the gradient ramp and set it to a midtone gray. Click OK to close the Color Picker and then repeat for the right color stop. Click below the gradient ramp near the right color stop to add another color stop that’s set to white.
Using the Pen tool, click just below one of the planets to start the path, click on the child’s hand, and drag to add a curve to the shape; it should look like a string coming from one of the planet balloons down to the child’s hand. Command-click (PC: Ctrl-click) anywhere in the document to complete that shape layer and then start a new shape layer for each balloon string.
STEP 11: With the top string layer active, Shift-click the bottom string layer in the Layers panel to select all of them, and press Command-G (PC: Ctrl-G) to create a group from the layers. Name the group “Strings,” and then add a mask to the group. Use a very small round Brush on the mask with black paint (make sure the brush Opacity is at 100% in the Options Bar) to mask out the string area that should be behind the child’s thumb. You’ll probably need to zoom in quite a bit.
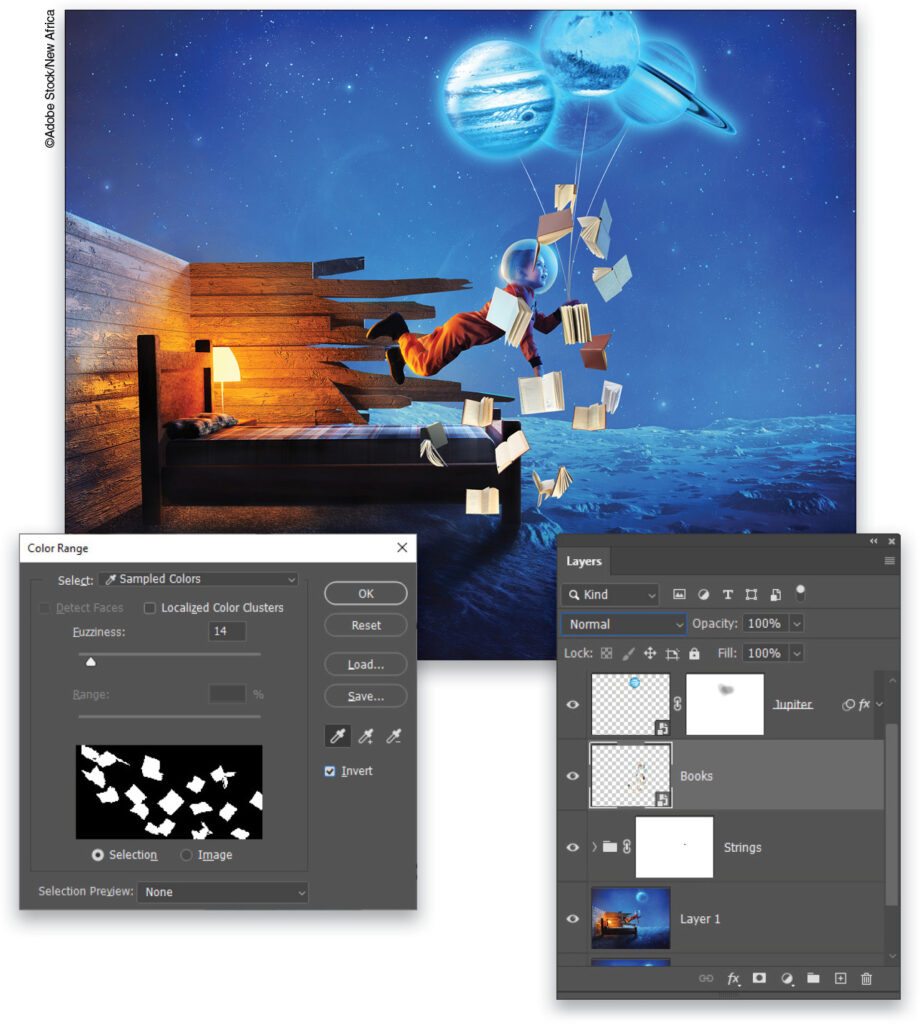
STEP 12: Click here to download and open the low-res stock image of the books we’re using, and then increase its image size as we did with the previous images. Go to Select>Color Range and use the eyedropper to select the white background. Check the Invert box in the Color Range dialog so the selection is of the books, and not the background. Adjust the Fuzziness slider until all the books are completely white and then click OK.
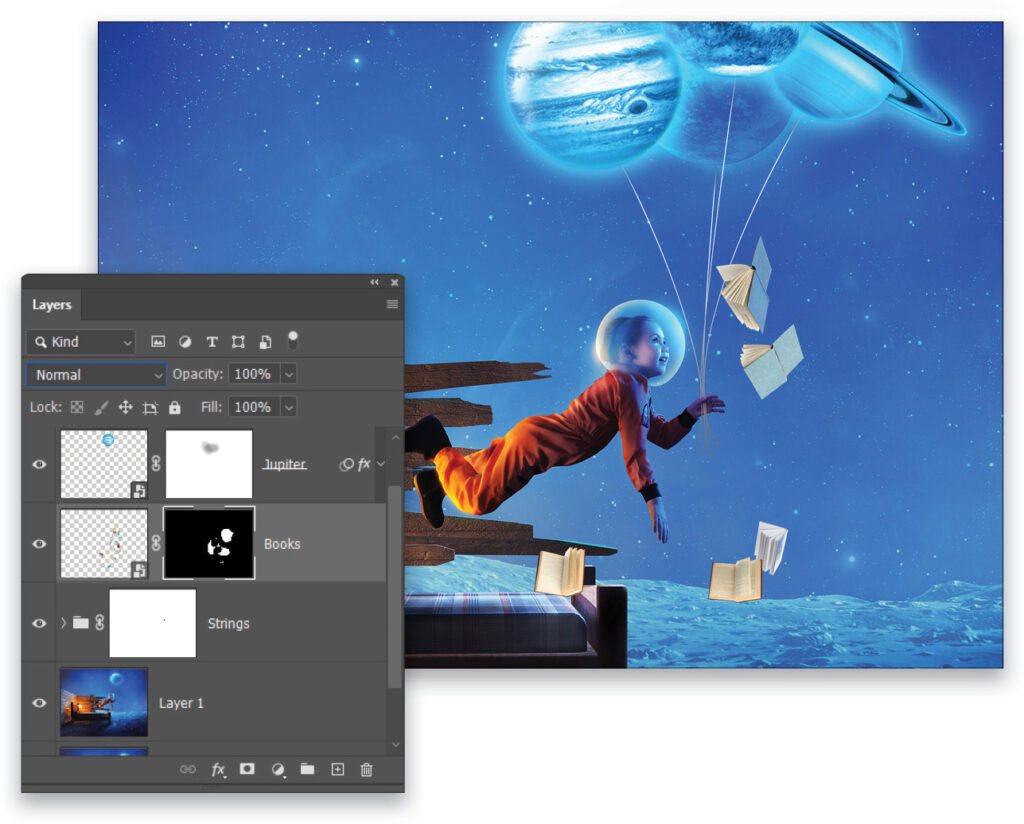
Press Command-C (PC: Ctrl-C) to copy the selected pixels. Then return to the main project file and press Command-V (PC: Ctrl-V) to paste the books in as a new layer. Use Free Transform (Command-T [PC: Ctrl-T]) to scale and rotate the books so they’re surrounding the child, intentionally placing an open book directly in her line of sight. In this instance, we also Right-clicked inside the bounding box and selected Flip Horizontal. Press Enter to commit the transformation. Name this layer “Books.”
STEP 13: Some of the books are in good positions, others are really not. We can be selective with where the books are by using a layer mask. Use the Lasso tool (L) to create a selection around the books that you wish to keep (after you select your first book hold the Shift key to add other books to the selection), and then click the Add Layer Mask icon at the bottom of the Layers panel to mask out all the other, unwanted books.
STEP 14: Duplicate the Books layer with Command-J (PC: Ctrl-J) and delete the mask from the duplicate by dragging its thumbnail to the Delete Layer icon (trash can) at the bottom of the Layers panel. Readjust the scale and position of the books to place them exactly where you want them, select the books you want to keep on this layer, and create another layer mask to remove the unwanted books.
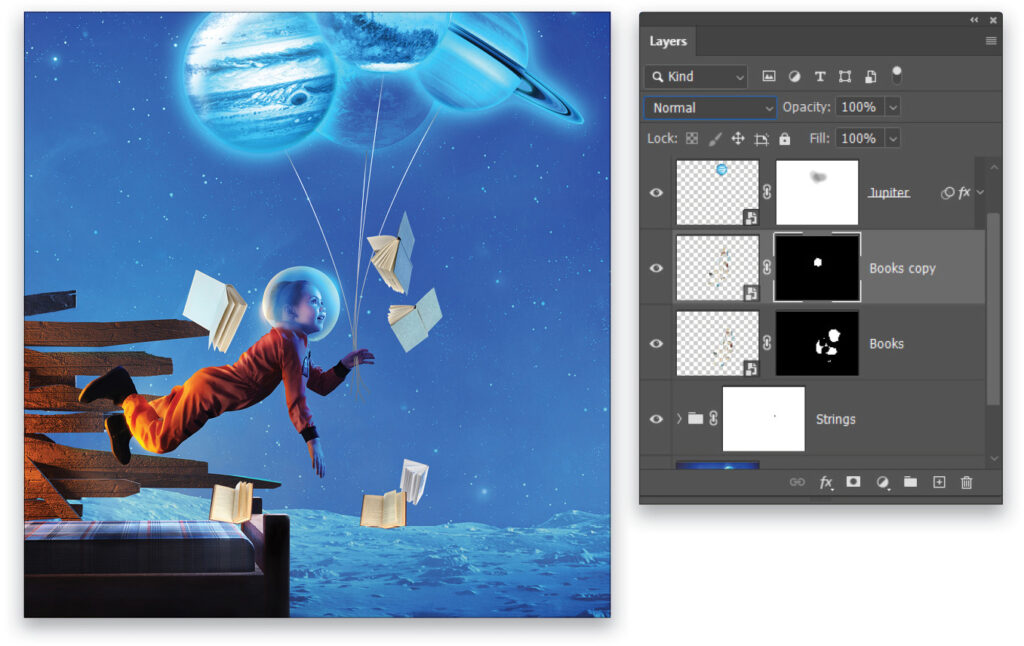
STEP 15: Make another copy of the Books layer, drag the duplicate below the Books layer in the Layers panel, and remove the mask. Scale this copy down a bit and rotate and position the layer off to the right side so it appears the cloud of books is trailing off in that direction. Add a layer mask to this layer, and use the Brush tool set to black to remove unwanted books from this layer.
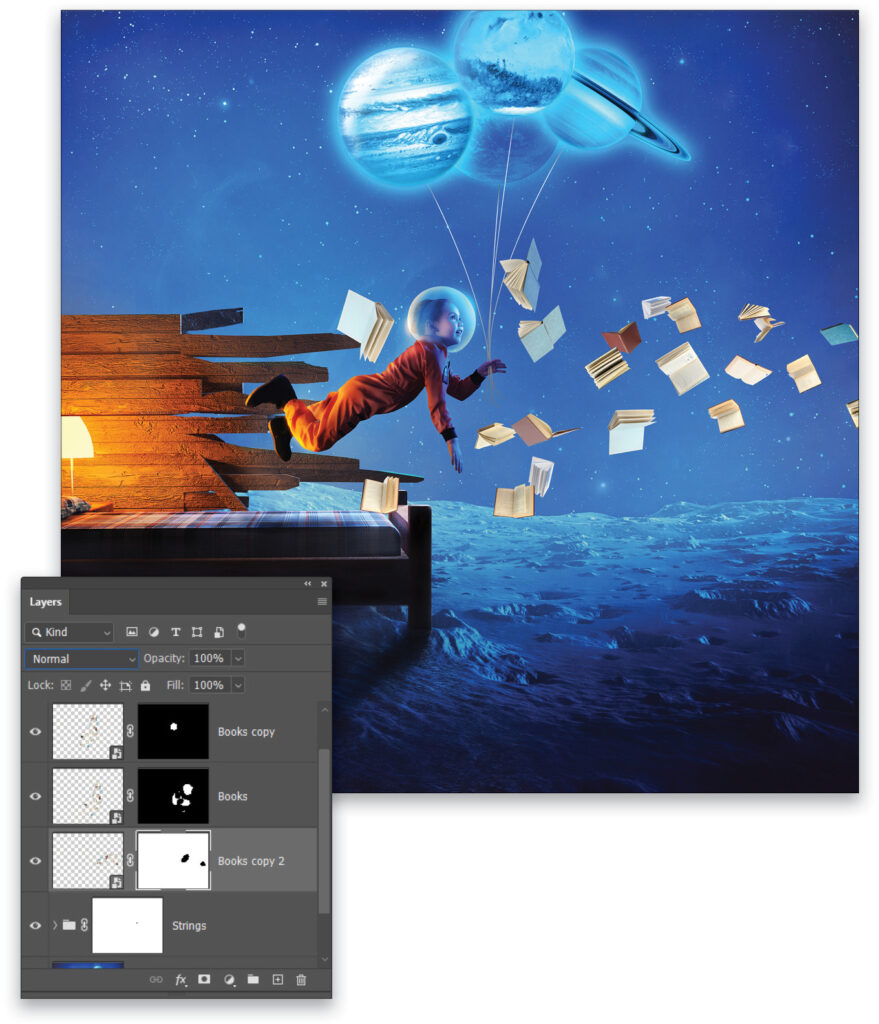
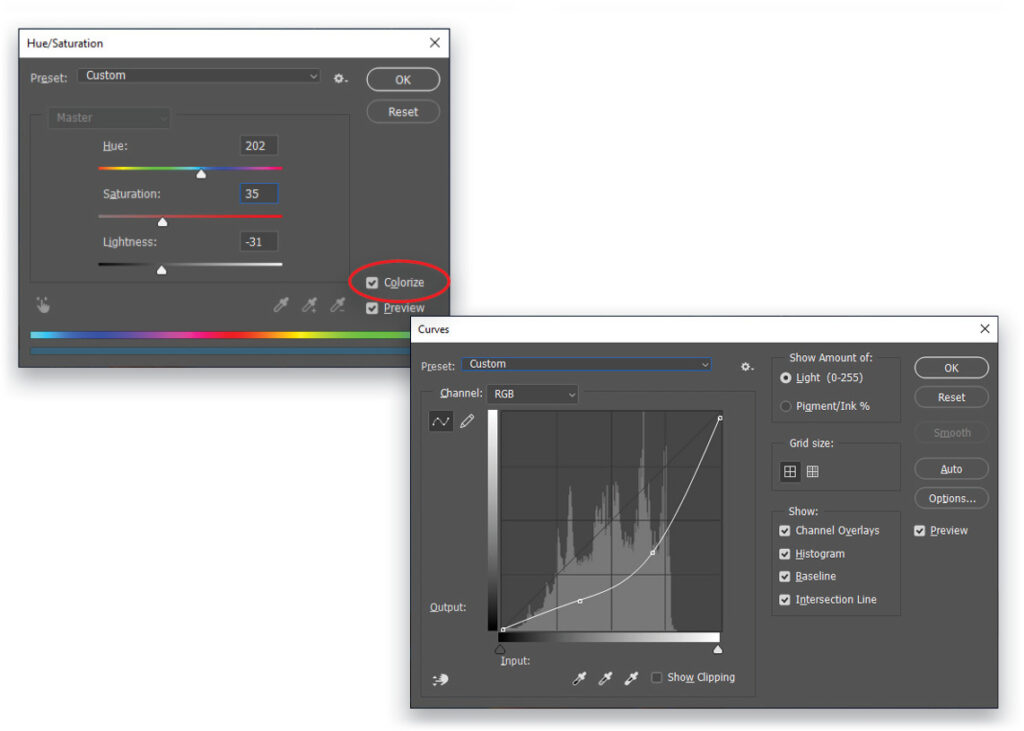
STEP 16: Select all of the book layers in the Layers panel and go to Layer>Smart Objects>Convert to Smart Object. Rename the layer “Books,” and then run a Hue/Saturation adjustment. Enable the Colorize option, and set the Hue to 202, Saturation to 35, the Lightness to –31, and click OK.
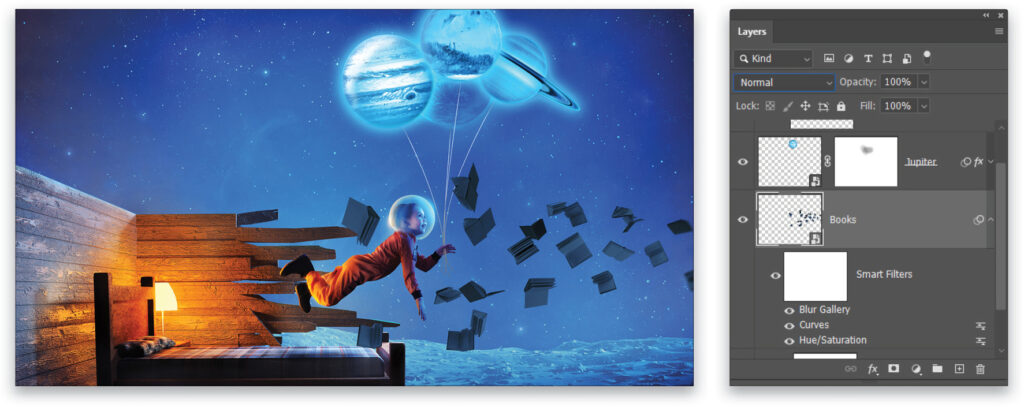
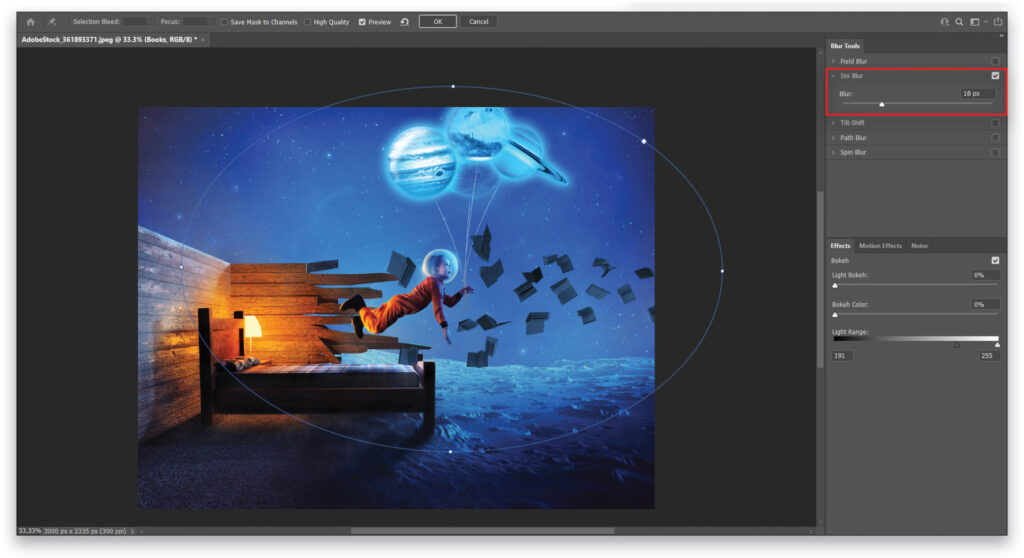
Add a Curves adjustment, and adjust the curve as shown here to darken the books’ appearance. Then go to Filter>Blur Gallery>Iris Blur. Adjust the position and shape of the Iris Blur as shown here, set the Blur to 18 pixels in the Blur Tools panel, and click OK up in the Options Bar.
STEP 17: The visual effect on the books needs to fall off as the books get further away from the subject. To do so, click on the mask for the Smart Filters and switch to the Gradient tool (G). Up in the Options Bar, click on the gradient preview thumbnail to open the Gradient Editor; select the Black, White preset in the Basics group; and click OK to close the Gradient Editor. Click on the Radial Gradient icon in the Options Bar and, starting on the child, drag the gradient outward toward the edge of the canvas.
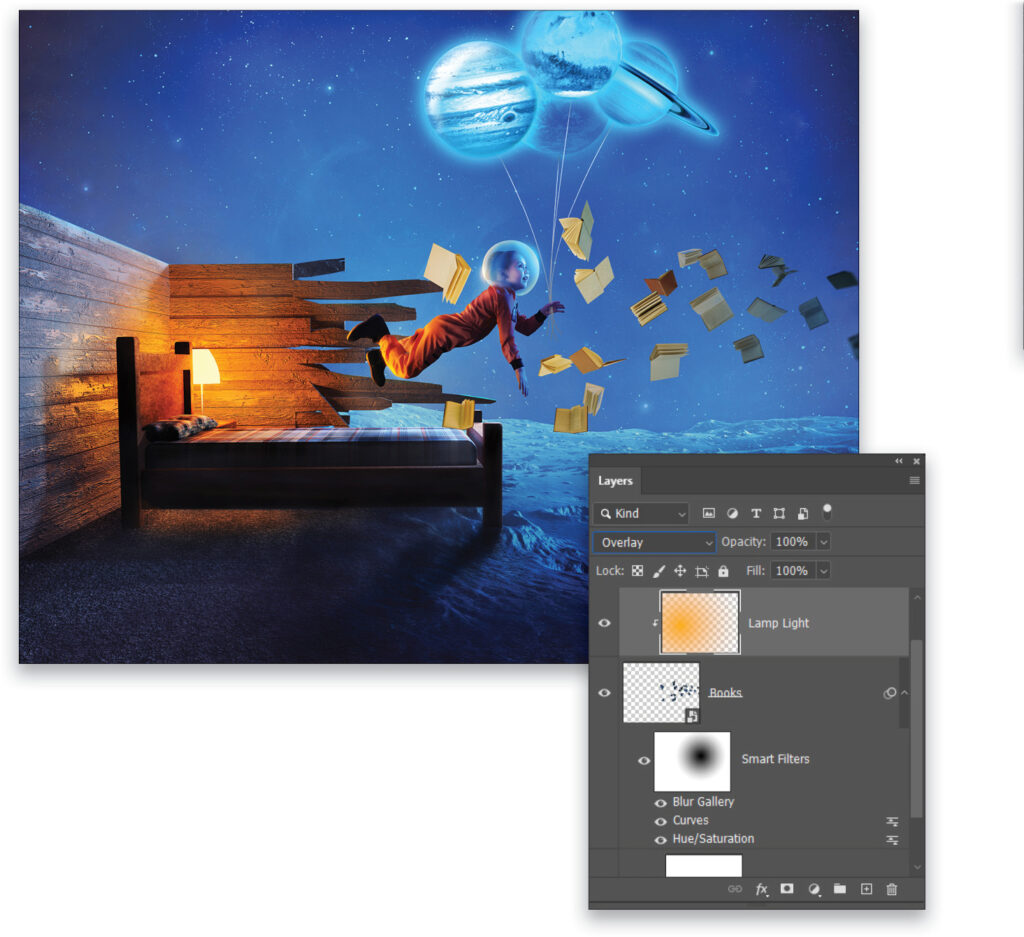
STEP 18: For a final effect, create a new layer named “Lamp Light” above the Books smart object layer. Set the blending mode to Overlay and clip the layer to the Books layer with Layer>Create Clipping Mask. Grab the Gradient tool, still set to Radial in the Options Bar.
Click on the Foreground color swatch near the bottom of the Layers panel, set it to a pale orange (#faa811), and click OK to close the Color Picker. In the Gradient Editor, select the Foreground to Transparent preset in the Basics group and click OK. Start the gradient on the lamp and pull it out toward the edge of the canvas. This gives the books the appearance of being lit by the lamp.
Many of the techniques in this project are steps that create very small and subtle changes. Frequently, compositing images involves making these small adjustments, which then accumulate to create a larger effect. It can often be an exercise in patience, but the end result shows that it’s worth it.
This article originally published in the September, 2021 issue of Photoshop User magazine.
About Photoshop User and KelbyOne
Photoshop User magazine comes out digitally 12 times a year and is part of KelbyOne, the leading educational resource for Photoshop, Lightroom, and photography. Pro members have access to more than 900 video courses and 100 back issues of Photoshop User. To learn more about KelbyOne, click here.


