What if I told you that you could create an amazing design effect using just one photo, one layer style, and one text layer? This is one of those effects I stumbled upon while experimenting with other effects. It’s incredibly versatile and simple to set up and, once you have the effect built, you’ll want to try it on everything. It even has some uses you might not have thought of. Join me as we dive in and design with styles and stripes.
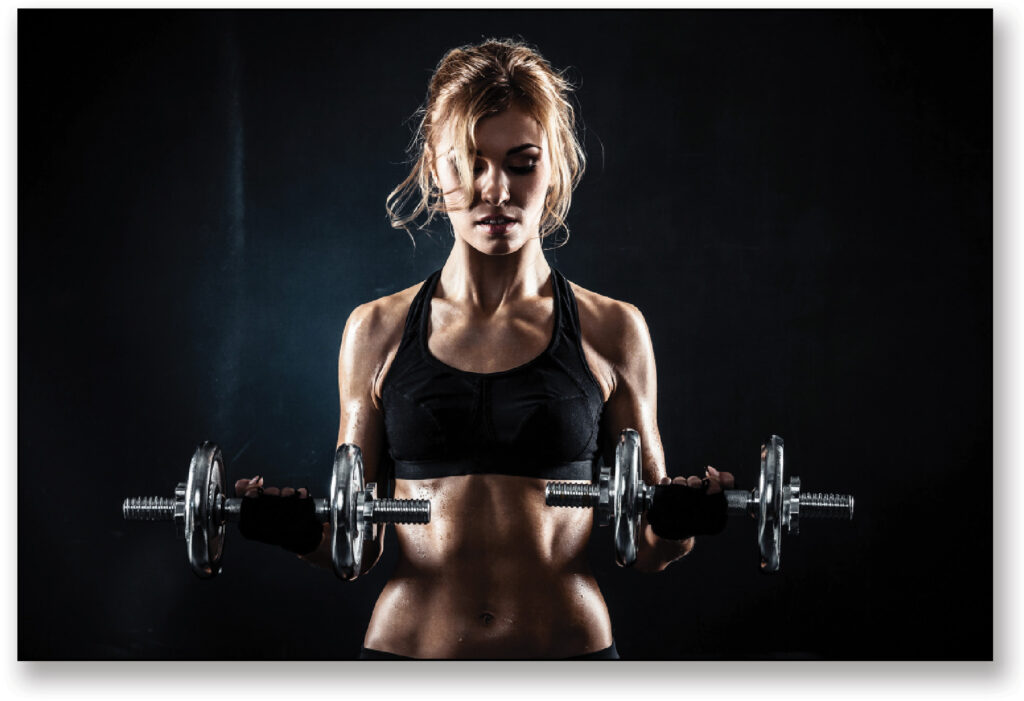
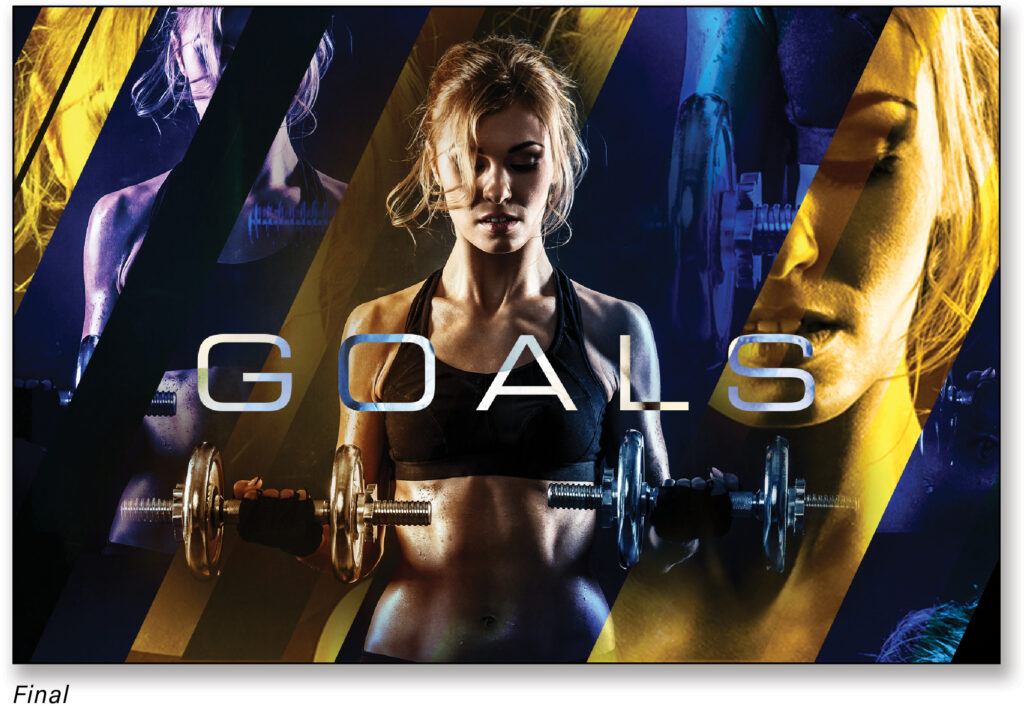
Step One: Start by opening the main image you want to use for the design. We’re going with a sports theme with this workout image that I found on Adobe Stock. It has a dark background with a subtle amount of texture that will play well with some of the color effects we’ll apply. If you’d like to download the low-res watermarked version of this image to follow along, click this link, log in with your Adobe ID, and click the Save to Library button. Double-click the image in the Libraries panel (Window>Libraries) to open it in Photoshop. To make it easier to work with the image, increase the resolution of the practice file. (We normally don’t recommend enlarging images, but this is only for practice purposes.) Go to Image>Image Size, turn on the Resample checkbox, select Preserve Details from the Resample drop-down menu, set the Width to 2,000 pixels, and click OK.
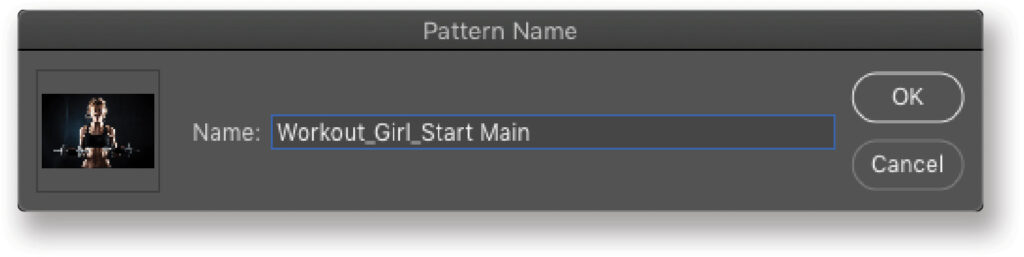
Step Two: In the following steps, we’re going to apply the texture from the image via layer styles, so we’ll need to define the entire image as a pattern. Go under the Edit menu and choose Define Pattern. Name the pattern when prompted and click OK.
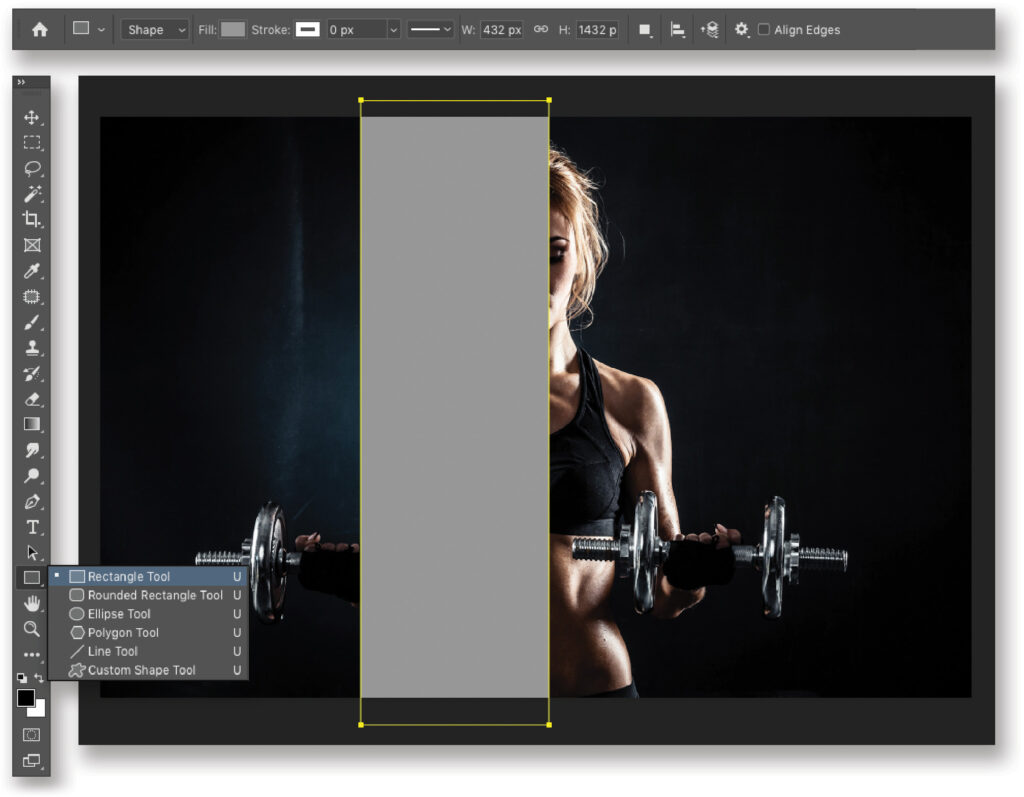
Step Three: To keep things easy, let’s start by building the effect on a simple shape. Go to the Toolbar and select the Rectangle tool (U). Make sure the Tool Mode is set to Shape in the Options Bar, and choose a Fill color. It doesn’t matter what color you choose; just make sure it will be visible over the dark background.
Draw a rectangle shape over the middle area of the image, covering just slightly more than half the main subject, as shown here. As you’re drawing the shape, you can press-and-hold the Spacebar to reposition it. You’ll see it created a new shape layer in the Layers panel.
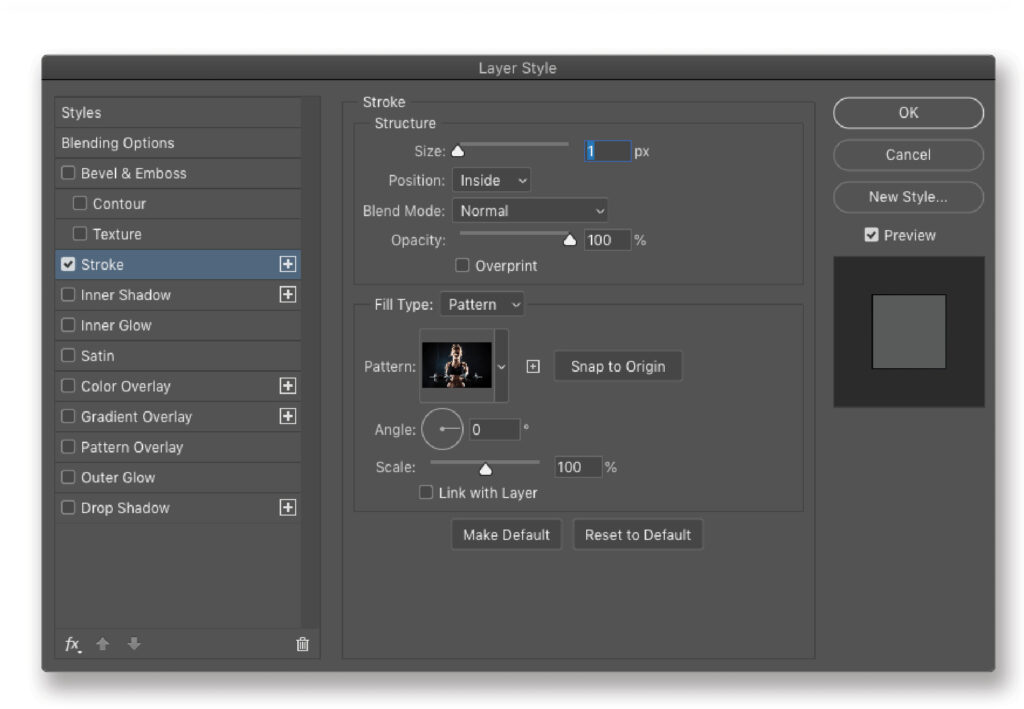
Step Four: With the shape layer still selected, click on the Add a Layer Style icon (ƒx) at the bottom of the Layers panel, and choose Stroke. Go to the Fill Type drop-down menu, and choose Pattern.
Click on the Pattern thumbnail preview to open the Pattern Picker, and scroll to the bottom to locate the image pattern you defined earlier. To make sure the image lines up with the original Background layer, uncheck Link with Layer and click Snap to Origin. Also make sure that the Angle is set to 0° and the Scale to 100%. Don’t click OK yet!
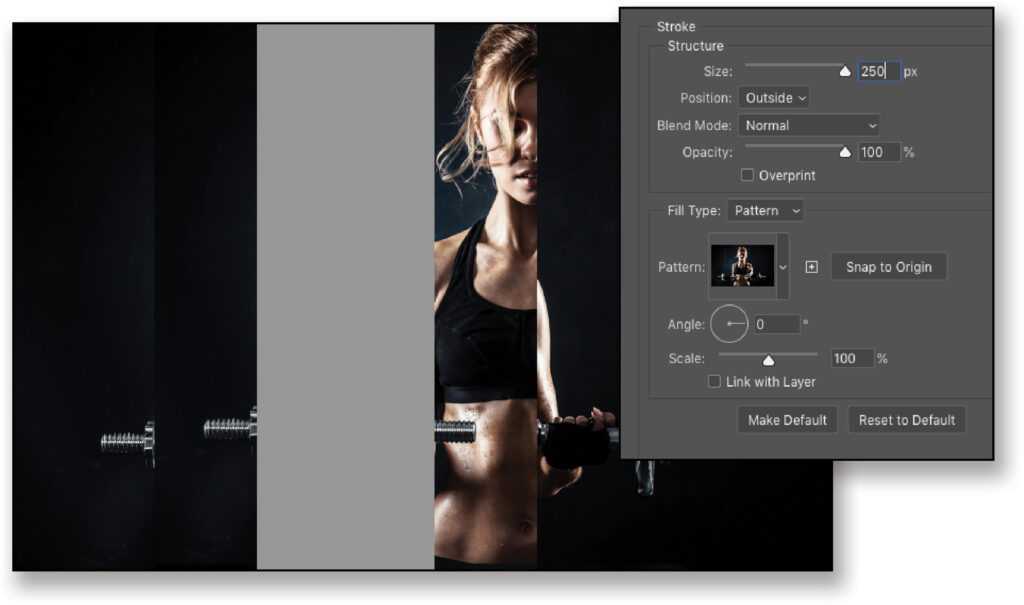
Step Five: Go to the Structure section at the top of the Layer style dialog and max out the Size at 250 px. Set the Position to Outside and the Opacity at 100%. After all this, your image should still look as it did before with the vector shape, but while you have the Layer Style dialog open, click-and-drag on the canvas to manually offset the image pattern within the stroke around the shape. Drag it to the left as shown here, and increase the Scale to create some variation (we set it to 105%). Don’t click OK yet!
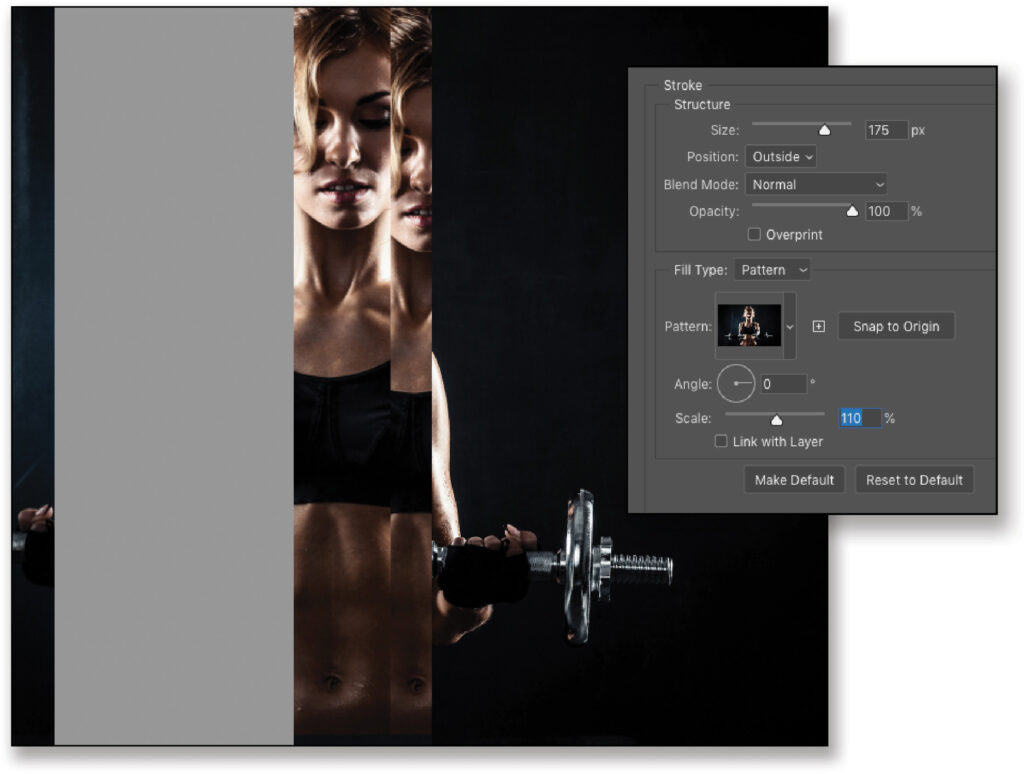
Step Six: Now click the plus symbol to the right of Stroke in the list of Styles on the left side of the Layer Style dialog. This will create another instance of the Stroke style on this layer. Set this stroke’s Size to 175 px, and increase the Scale in the Fill Type section to 110%. Then click-and-drag this image pattern within the new Stroke to the left. Don’t worry about where you place the subject, you can always change it later. You can start to see the multilayer effect taking shape. Don’t click OK yet!
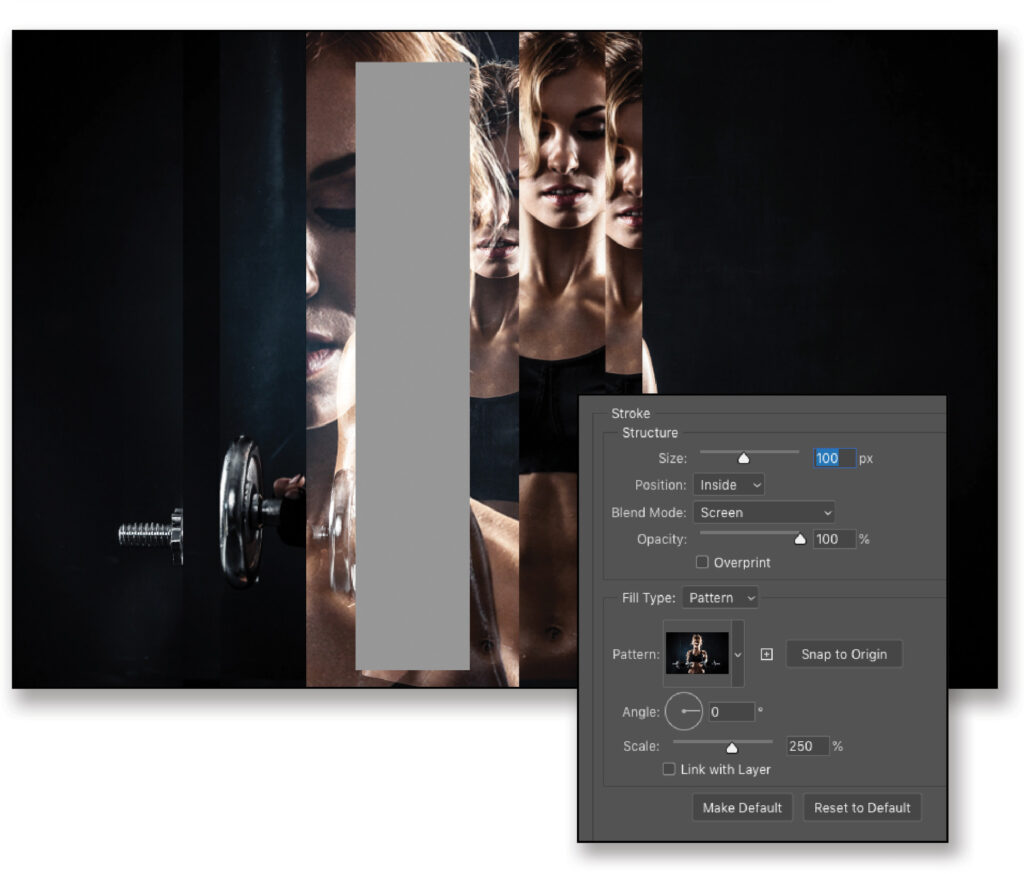
Step Seven: Go back to the Styles list in the Layer Style panel, click on the bottom Stroke instance, and click the plus sign to its right to create a new instance. By default, it places the new instance above the selected one, so once the new instance is created, reselect the bottommost Stroke instance.
Set the Size to around 100 px and change the Position to Inside so it overlaps the main rectangle vector shape in the image. Now, changing the Blend Mode to something like Screen will allow it to blend with the image on the Background layer below. Increase the Scale to around 250%, click on the image, and drag the pattern around to better fit in the stroke area. Since this one is so large, you’ll have to drag quite a ways. Don’t click OK yet!
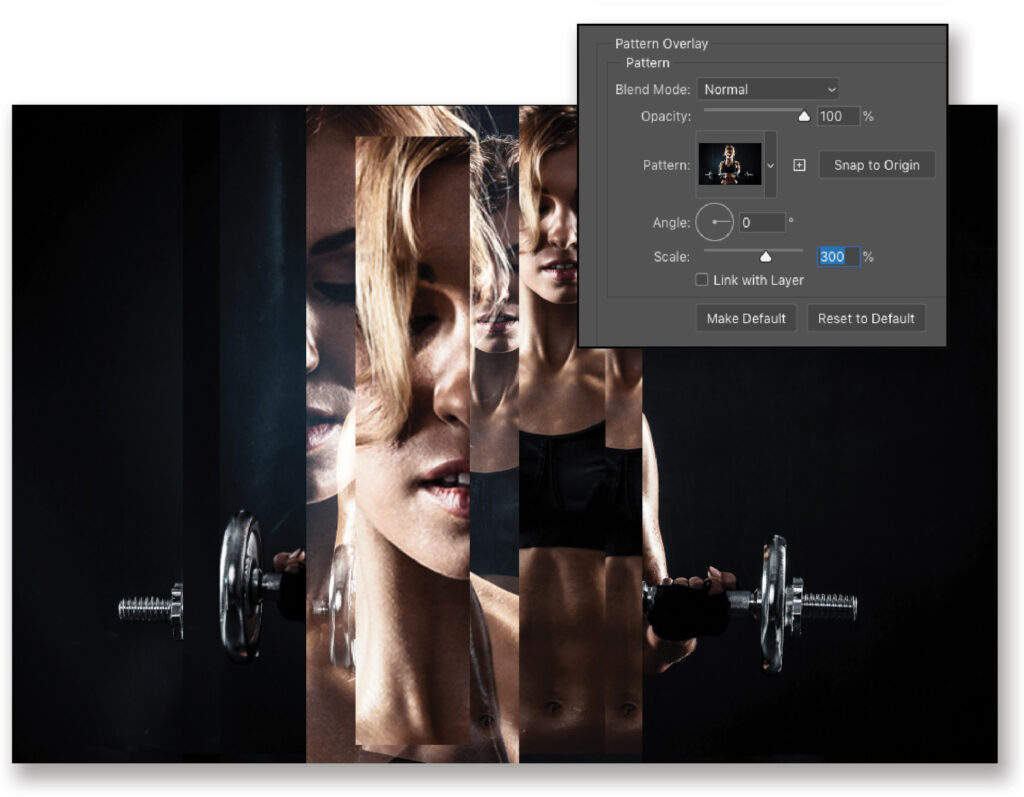
Step Eight: Now activate Pattern Overlay in the list of Styles on the left. Doing the same thing as we did with the Stroke, select your defined pattern in the Pattern Picker, turn off Link with Layer, and then adjust the Scale of this one to around 300%. Click on the image and move the subject around until it’s in view inside the shape. Again, don’t click OK yet!
Step Nine: At this point, we have our style set up with several Stroke instances and a Pattern Overlay that make up the various areas where the subject is visible. The reason we turned off the Link with Layer setting in each instance is because we want to be able to move the rectangle shape and strokes without moving the image pattern contained in each. If the image patterns were linked to the layer and you were to move the shape layer around, the pattern would move with it.
To test this, click OK, switch to the Move tool (V), and drag the shape around. Because the image patterns are locked in place, what you should see is a sort of multi-panel window effect as it passes over the original layer.
Step 10: Now let’s add some color effects. Open the Layer Style dialog again by double-clicking on one of the Stroke entries below the shape layer in the Layers panel. Select the Stroke instance that we started with where the size is 250 px. Sadly, we can’t rename the Stroke instances in the list, so you have to go through them to find the right one based on its settings.
Once you have the correct Stroke instance selected, click the plus symbol to its right to create another instance of this instance (if that makes sense). Then, change the Fill Type back to Color. Click on the Color swatch to open the Color Picker, and choose a color. We’re starting with a light blue. The great thing here is that because it’s a layer style you can experiment with colors now or later. Click OK to close the Color Picker.
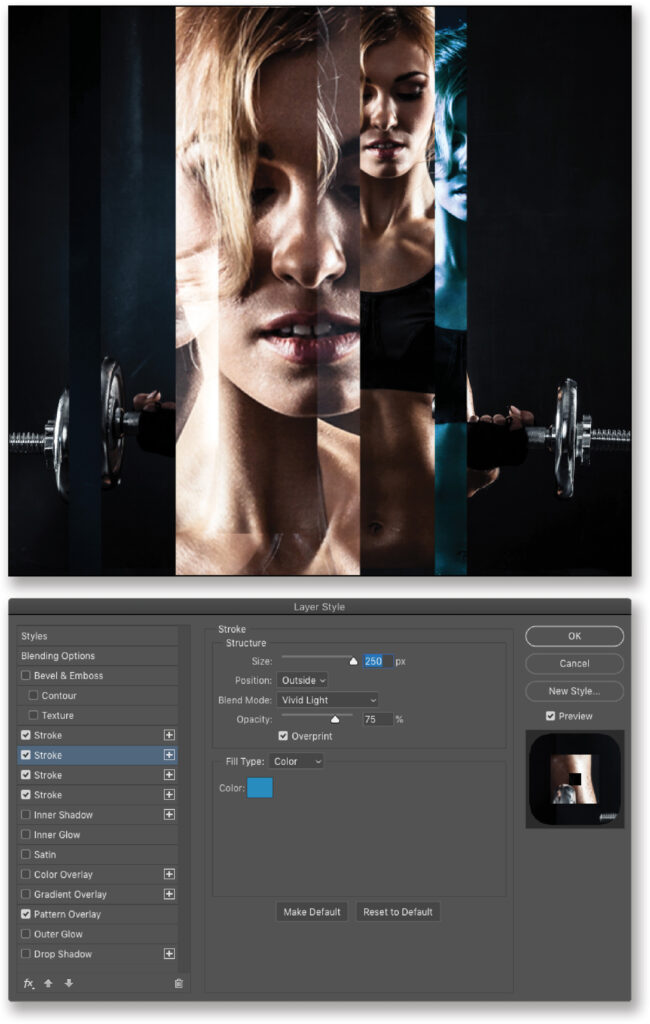
Up in the Structure settings, leave the Size at 250 px so it fully covers the effect of the Stroke below. Next, play with the Blend Mode to get the best look. All images and tones behave differently with blend modes so be sure try several. We’re using Vivid Light with the Opacity down to 75%.
You might notice that you can no longer see the image pattern in the Stroke instance immediately below. Because we want these stroke instances to interact with each other, you’ll need to check on Overprint in the Layer Style dialog. This will allow the color effect to blend with the image pattern in the Stroke instance below.
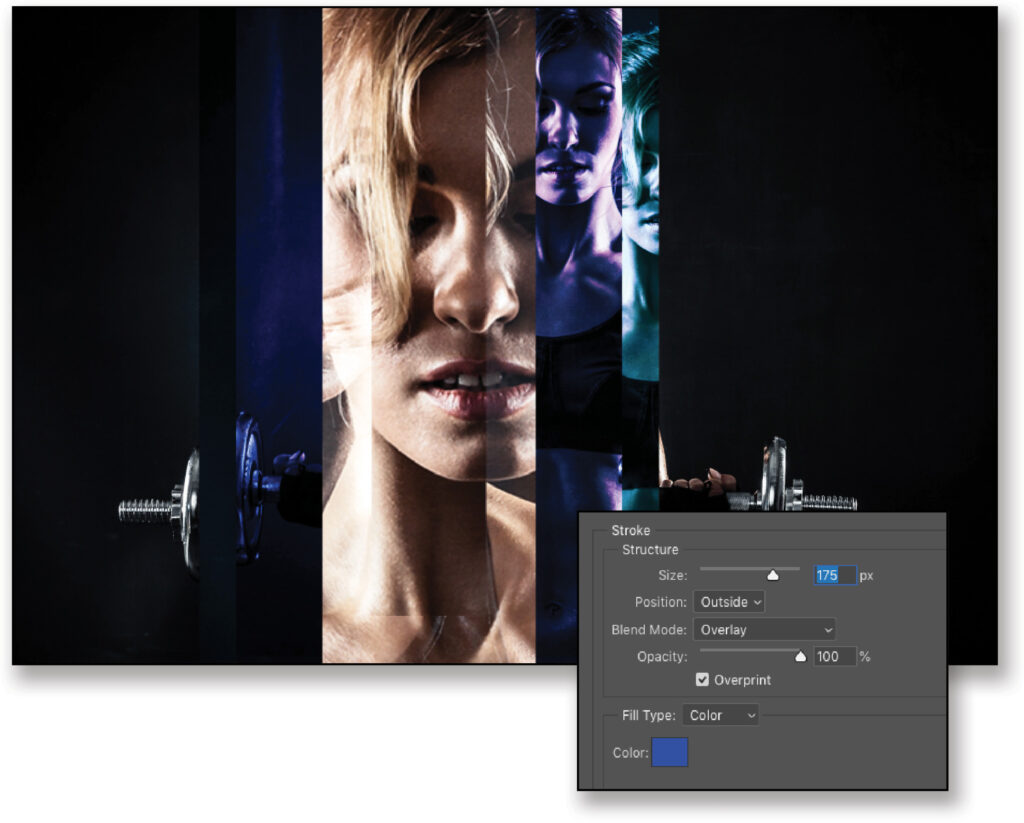
Step 11: Repeat the previous step with the top Stroke instance in the list. This time, though, we’re using a darker blue and setting the Blend Mode to Overlay. Don’t forget the Overprint setting. Remember, you don’t have to apply the color effect to every instance. It really depends on the design you’re building. But again, because you’re using layer styles, you have the freedom to experiment with several variations.
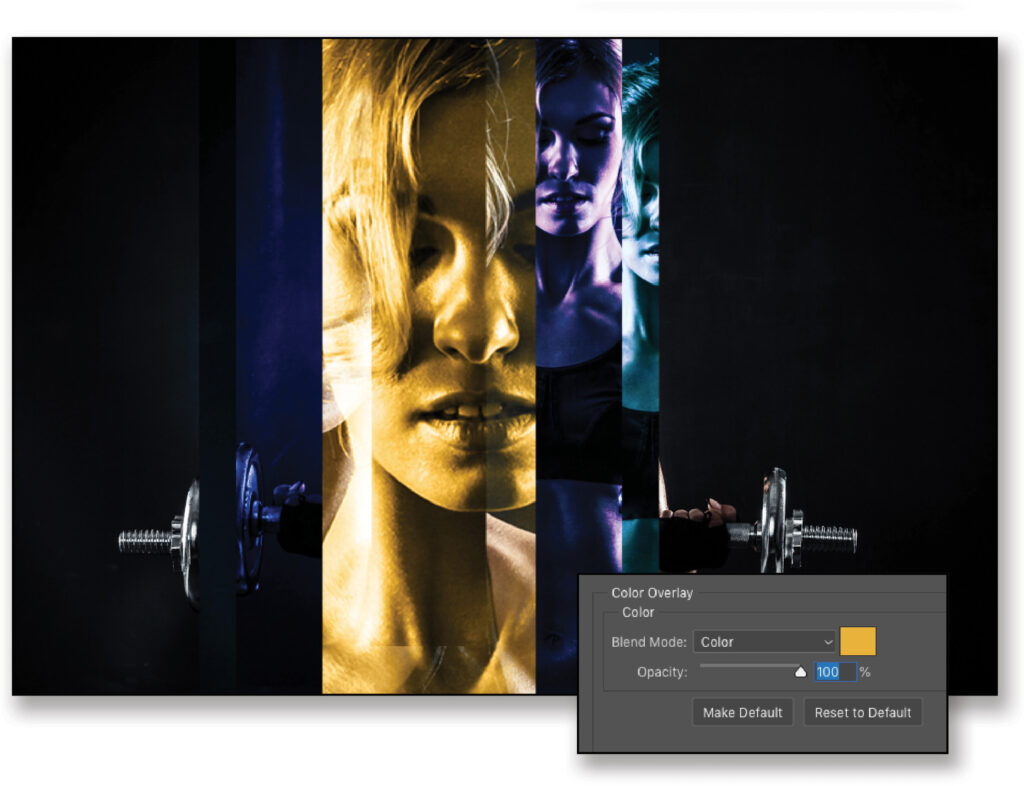
Step 12: Finally, activate Color Overlay in the list of Styles to apply a color effect to the image pattern inside the shape. We’re using a simple orange color with the Blend Mode set to Color. Click OK to apply all the layer styles.
Step 13: The effect is determined by the shape of the object to which it’s applied. We used a simple shape to create the effect but here’s an interesting way to creatively apply the effect to other shapes.
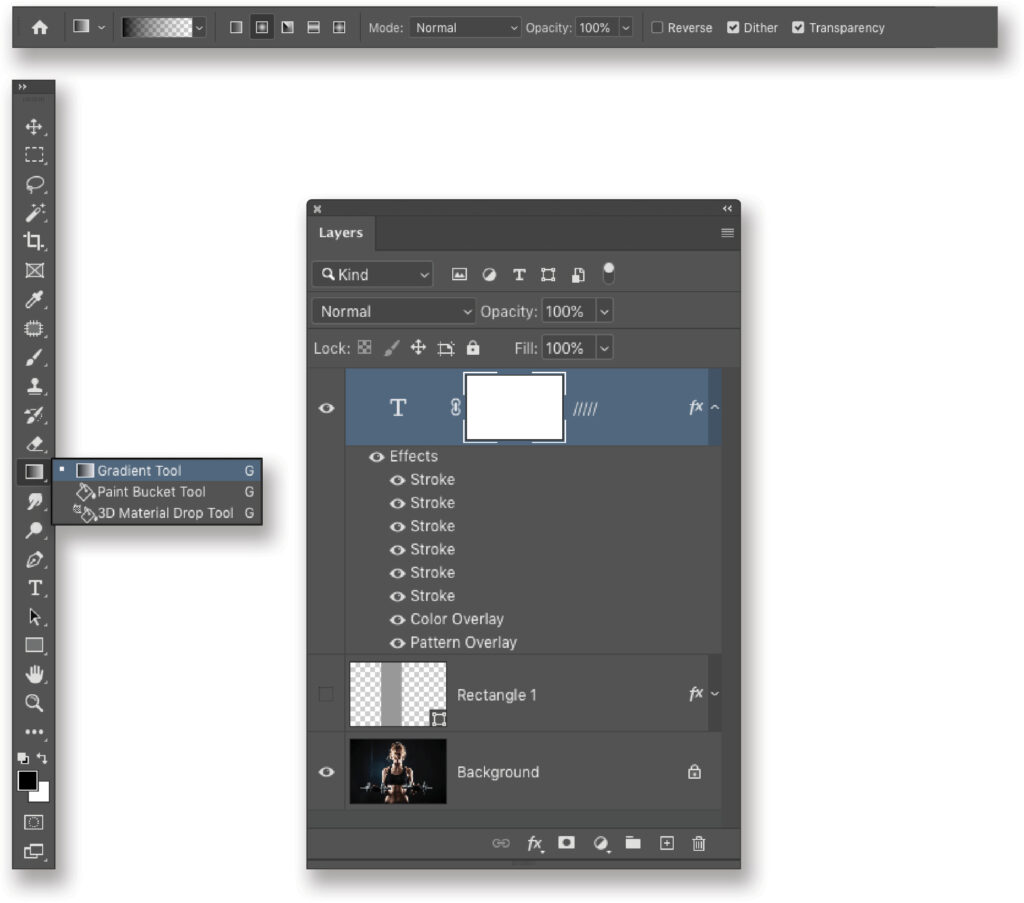
Turn off the current shape layer with all its layer styles by clicking its Eye icon in the Layers panel. Select the Type tool (T) in the Toolbar, and click in the canvas to set a text layer. For the font, we’re using Swis721 BlkEx BT, but any thick bold font will work fine. As for the color, just make sure it’s something easy to see on the image.
Now just type five forward slashes. With the default tracking (space between characters), the slashes are nicely spaced apart as you can see here. Our font size is around 450 px, but yours will be determined by the font you’re using and the resolution of your document.
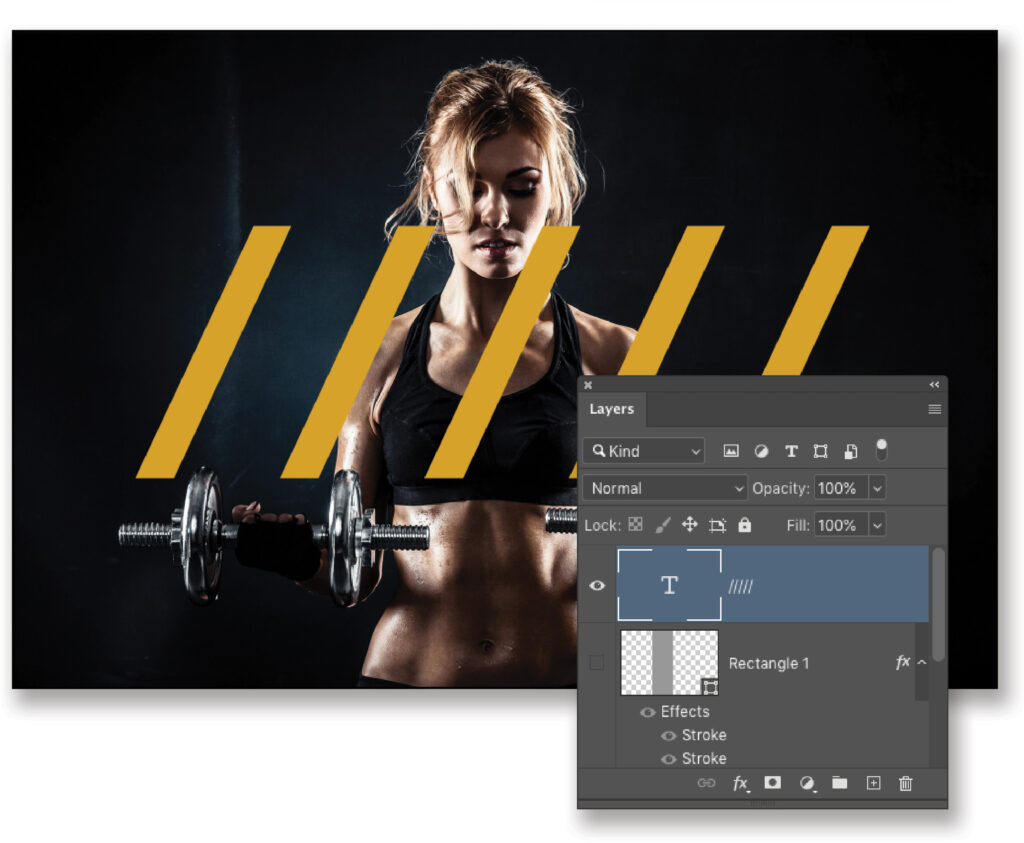
Step 14: With the Type tool still active, click on the text object to set the cursor between the second and third slashes. Hold down the Option (PC: Alt) key and press the Left Arrow key on your keyboard continuously to adjust the kerning (space between two characters) to close the gap between the two slashes until they look like a single thicker slash. Repeat this step for the last two slashes, as well. The objective here is to create slanted lines with varied thicknesses.

Step 15: Right-click on the name of the hidden shape layer in the Layers panel and choose Copy Layer Style in the pop-up menu. Then, Right-click on the text layer and choose Paste Layer Style. The strokes will look weird on the text because the outer corners are rounded, plus the strokes are much thicker on these smaller shapes, so we need to scale the layer style.
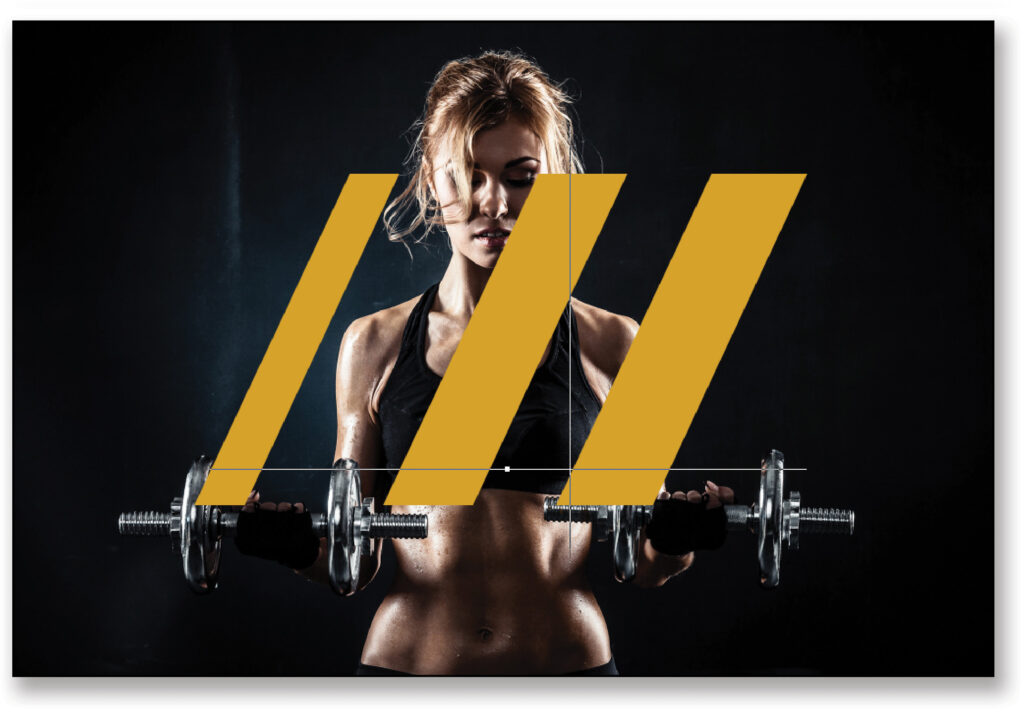
Step 16: With the text layer active, press Command-T (PC: Ctrl-T) to activate Free Transform. Hold down the Option (PC: Alt) key so the object will scale from the center, grab any of the corner handles, and drag outward to scale up the text object until its edges are beyond the canvas boundaries, hiding the rounded stroke edges and leaving just the slashes with the stylized image effect. There you have it, a mutli-colored background effect with one layer style and a text layer
But wait, we’re not done!
Step 17: Once you have the slashes scaled to fit in the canvas area, use the Move tool to drag the layer around to see how the images appear in the various strokes. Once you have the text shapes in the final position, open the Layer Style dialog again and adjust the position and Scale of the image patterns in each of the Stroke instances and the Pattern Overlay to better fit the current position of the text elements. Again, these are layer styles, so you have freedom to make changes anytime you want.
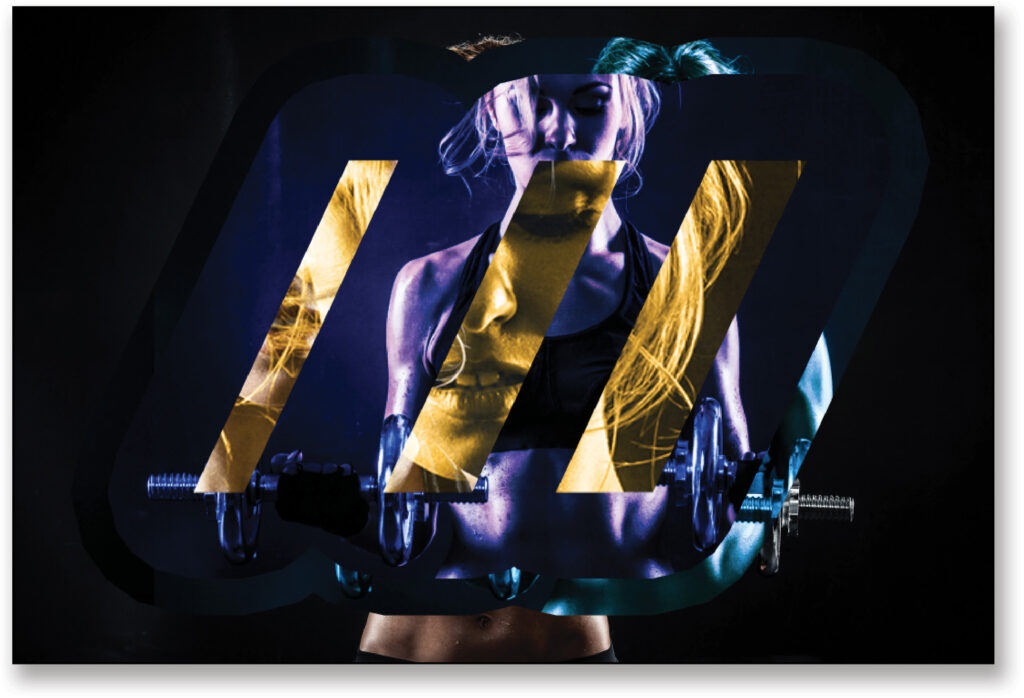
Step 18: To give the overall design a more finished look, let’s bring back the original image with which we started. With the text layer active, click the Add Layer Mask icon (circle in a square) at the bottom of the Layers panel. Press D then X to set black as the Foreground color, and select the Gradient tool (G) in the Toolbar. In the Options Bar, click the gradient thumbnail preview to open the Gradient Editor, select the Foreground to Transparent preset, and click OK to close the Gradient Editor. Choose the Radial Gradient style icon in the Options Bar.
Step 19: Starting in the middle of the image, drag out a radial gradient to reveal the original image below. You’ll probably notice that you don’t see it. Why? Because Photoshop is redrawing the layer styles around the masked area. To fix this, go back into the Layer Style dialog, to the Blending Options section (it’s the top option in the list of Styles on the left), and check on Layer Mask Hides Effects. Now you can see the original subject peering through. Add additional gradients to reveal more of the subject if you want, but as usual, don’t overdo it.

Step 20: Add a new blank layer above the Background layer. Click on the Foreground color swatch near the bottom of the Toolbar to open the Color Picker, select an orange color similar to what you used for the Color Overlay layer style, and click OK to close the Color Picker. Click on the Background color swatch, and choose a similar blue to what you used in the Stroke styles. With the Gradient tool still active, go to the Options Bar, choose the Foreground to Background preset in the Gradient Editor, and select the Linear Gradient type icon.
Hold down the Shift key and drag from shoulder to shoulder. Then, change the layer blend mode to Soft Light. This will generate an edge glow effect on the subject influenced by the background colors.
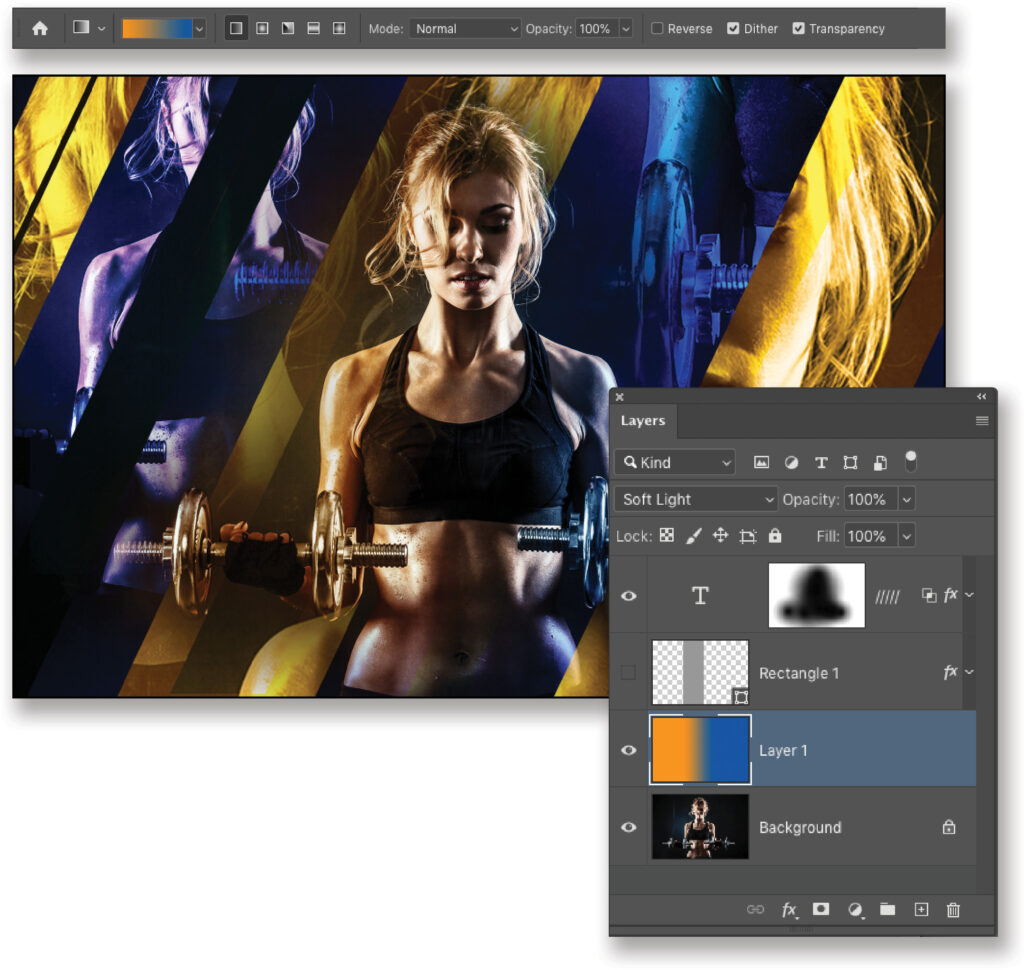
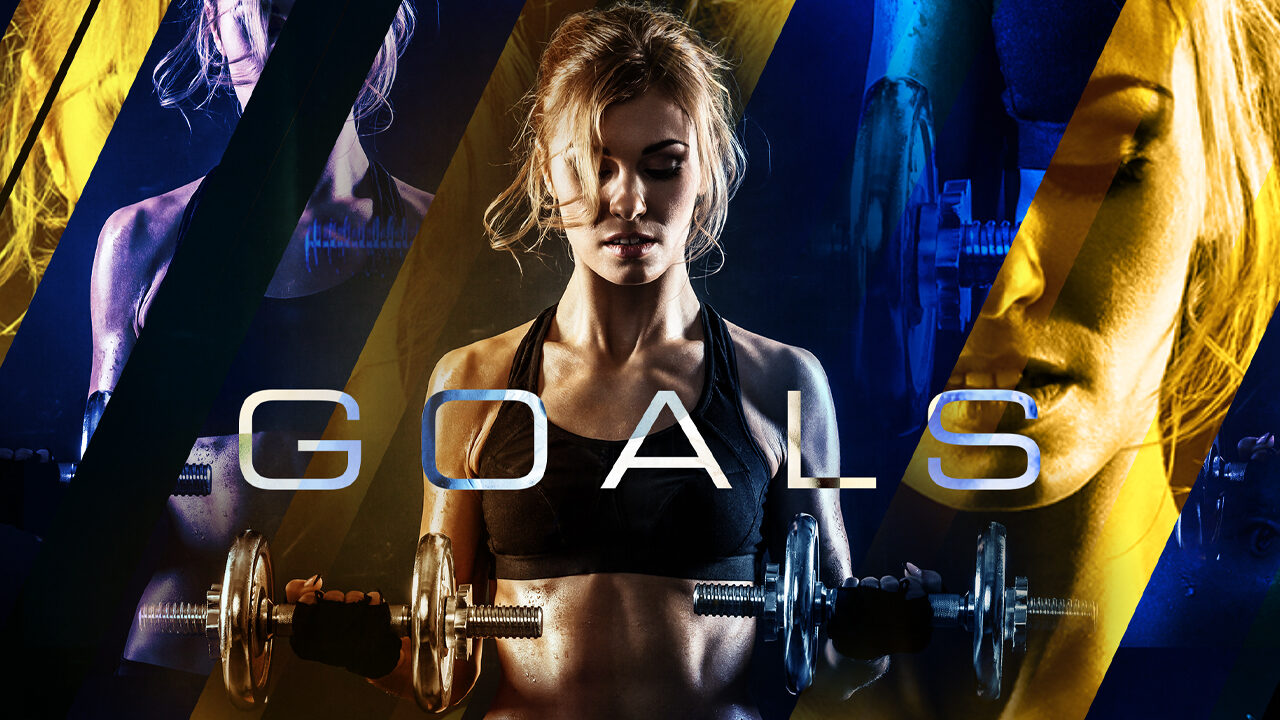
Step 21: Finally, I added some text filled with white and the blend mode set to Difference to blend the text with the image in a cool way. Now that you have the styles set up, you can change any aspect of them to cater to your own designs. Think of it as a template of sorts.
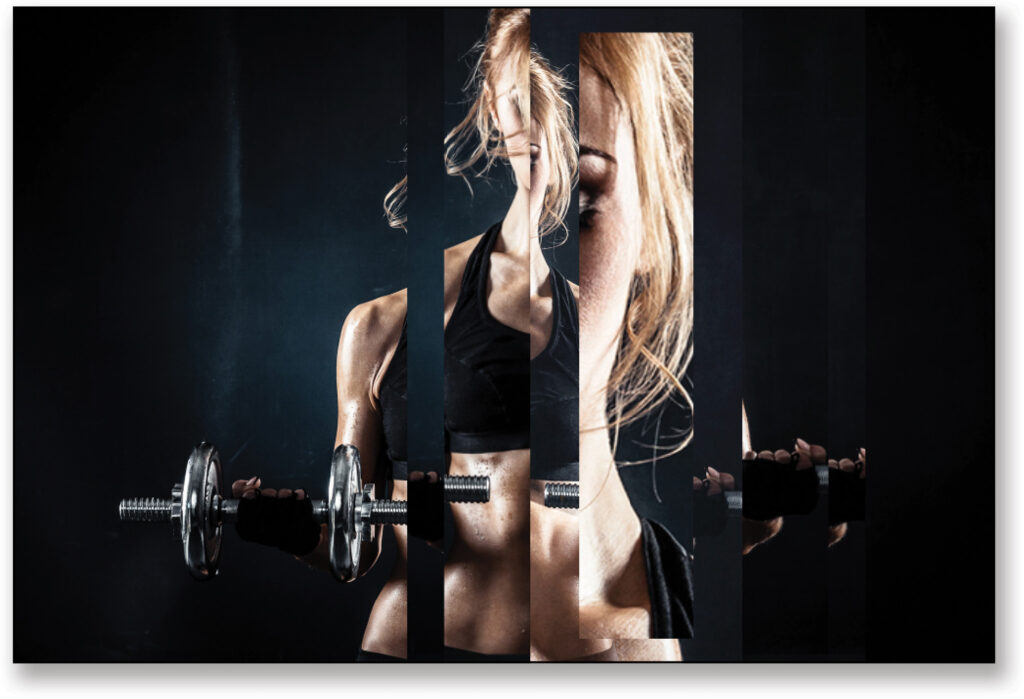
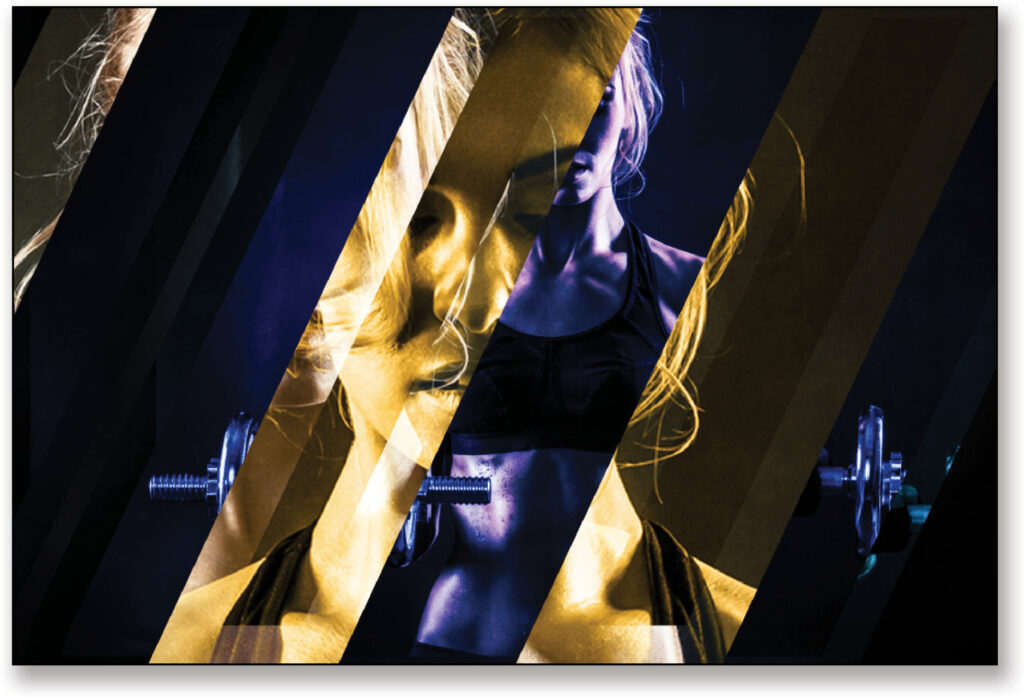
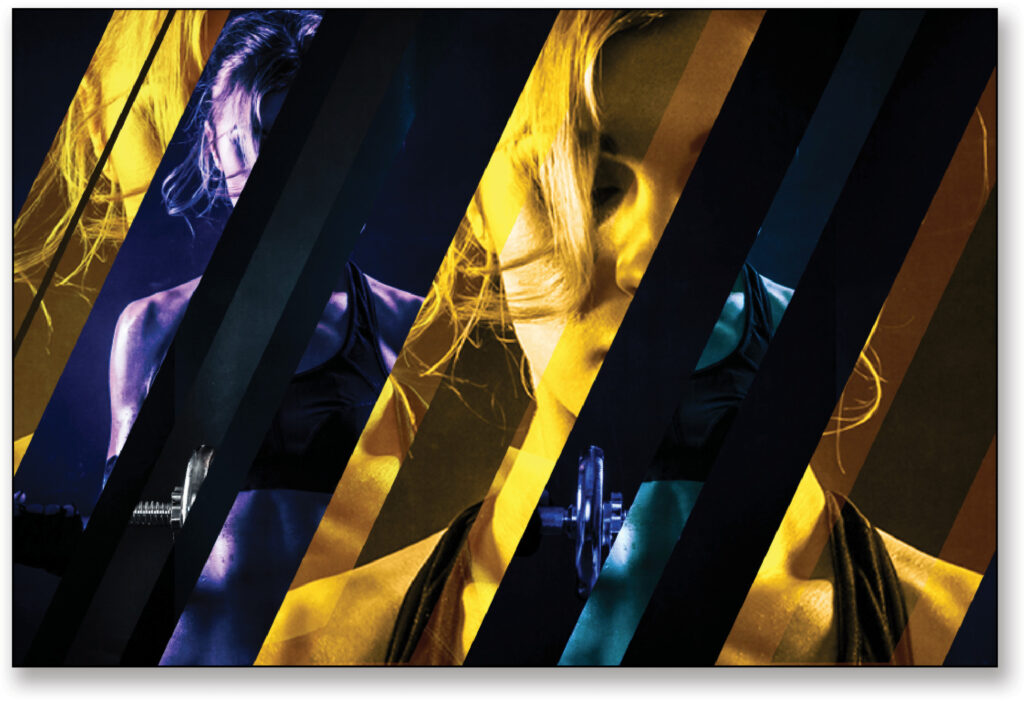
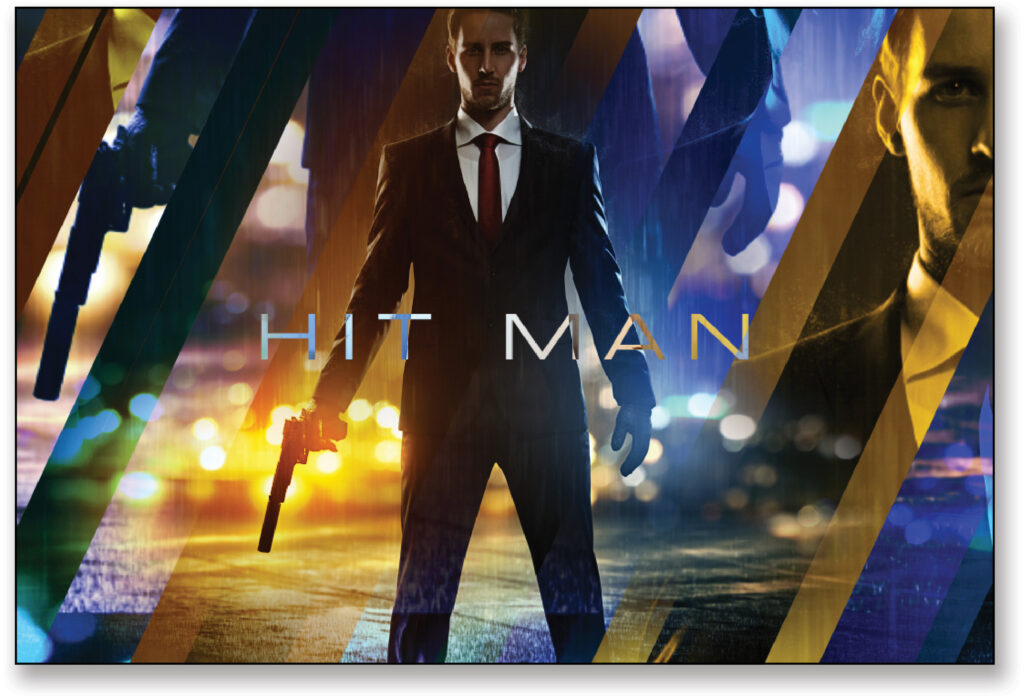
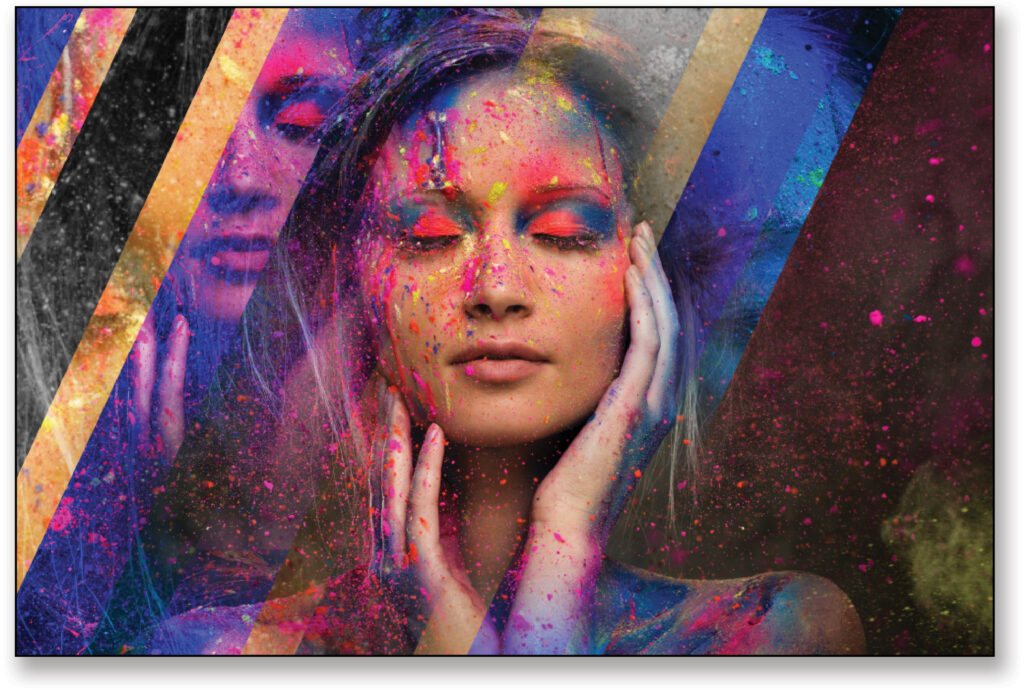
Takeaways: There are so many things going on here that it’s worth experimenting with variations of colors, stroke widths, images, and even different shapes. Below are a couple examples of using the styles and text layer that we created in the steps above with different images and colors to create whole new designs in a fraction of time. Just remember to define each new image as a pattern, and then replace the patterns in the layer styles with the new pattern.
While you can save the document as a future template, remember you can also save the style itself in Photoshop. In the Layer Style dialog, click the New Style button, give your style a name, click OK, and it will now appear in your Styles panel (Window>Styles) where it’s handy to use on the fly, or perhaps share with other designers as a crucial timesaver.
There are myriad possibilities with this one simple effect, so I challenge all of you to post your own versions in the KelbyOne Community so we can see what you can create!
Extra Special Bonus: The possibilities with this effect don’t end with just static effects. Check out this bonus video where I show you how to create a broadcast-quality motion graphics transition in Photoshop using the very image we just created!
This article originally published in the November, 2020 issue of Photoshop User magazine.
About Photoshop User and KelbyOne
Photoshop User magazine comes out digitally 12 times a year and is part of KelbyOne, the leading educational resource for Photoshop, Lightroom, and photography. Pro members have access to more than 900 video courses and 100 back issues of Photoshop User. To learn more about KelbyOne, click here.


