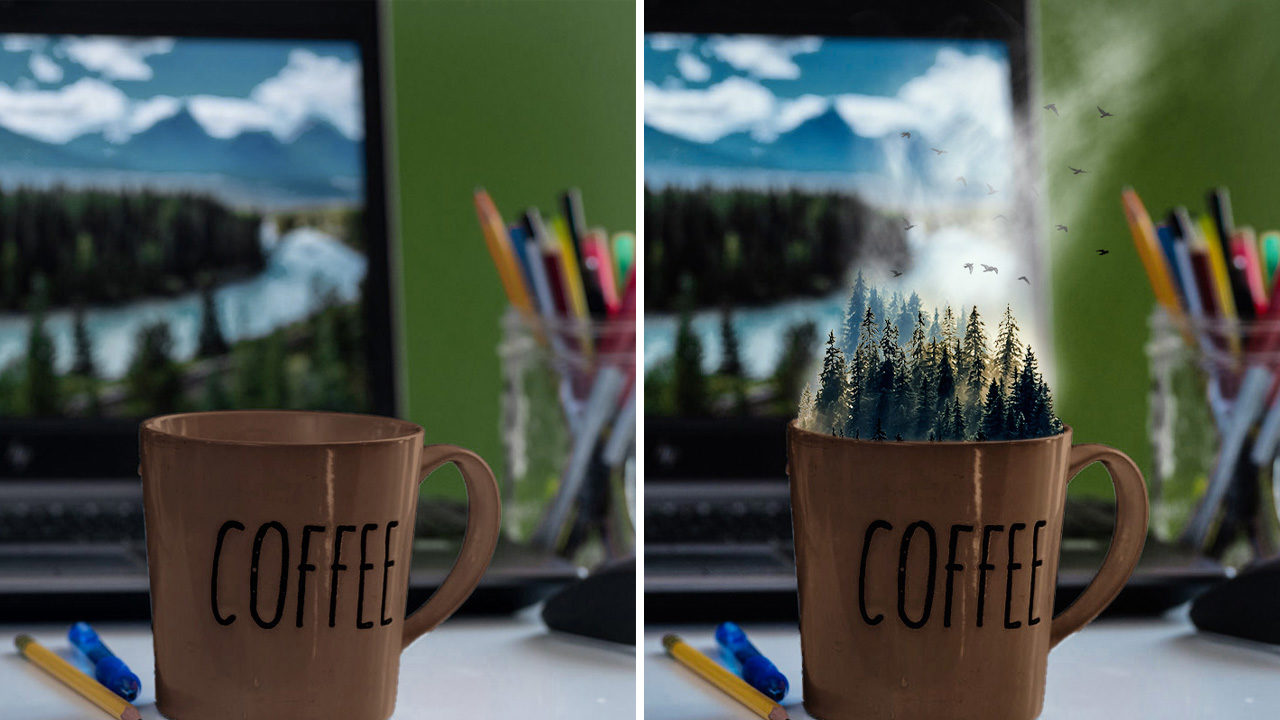
Just how much does that afternoon cup of coffee at your desk mean to you? Those still moments enjoying a mug of hot caffeine as your mind wanders before you set yourself back into your routine. Perhaps dreaming of that upcoming vacation, or even just the weekend outdoors instead of in the office. Cherished moments, to be sure.
In this project we seek to capture some of that magic by turning a regular cup of joe into a magical daydream. The inspiration coming from how the steam from the cup can be reminiscent of fog as it winds through a lush forest. With a bit of compositing know-how, we can use Photoshop to fully capture that image. This project uses forest and bird images from Adobe Stock, but the base background is provided for you. KelbyOne members can click here to download it.
Step One: Begin by opening the provided image CupOfDreams-BG.jpg. This image will serve as the base for our project. The intent is to convey the coffee cup full of daydreams brought on by the lush forest landscape on the computer monitor.

Step Two: Go to File>Place Embedded and choose the image you’d like to use for this project. If you’d like to download the low-res watermarked version of this image to follow along, click this link, log in with your Adobe ID, and click the Save to Library button. Drag the downloaded image in the Libraries panel (Window>Libraries) to the background image in Photoshop.
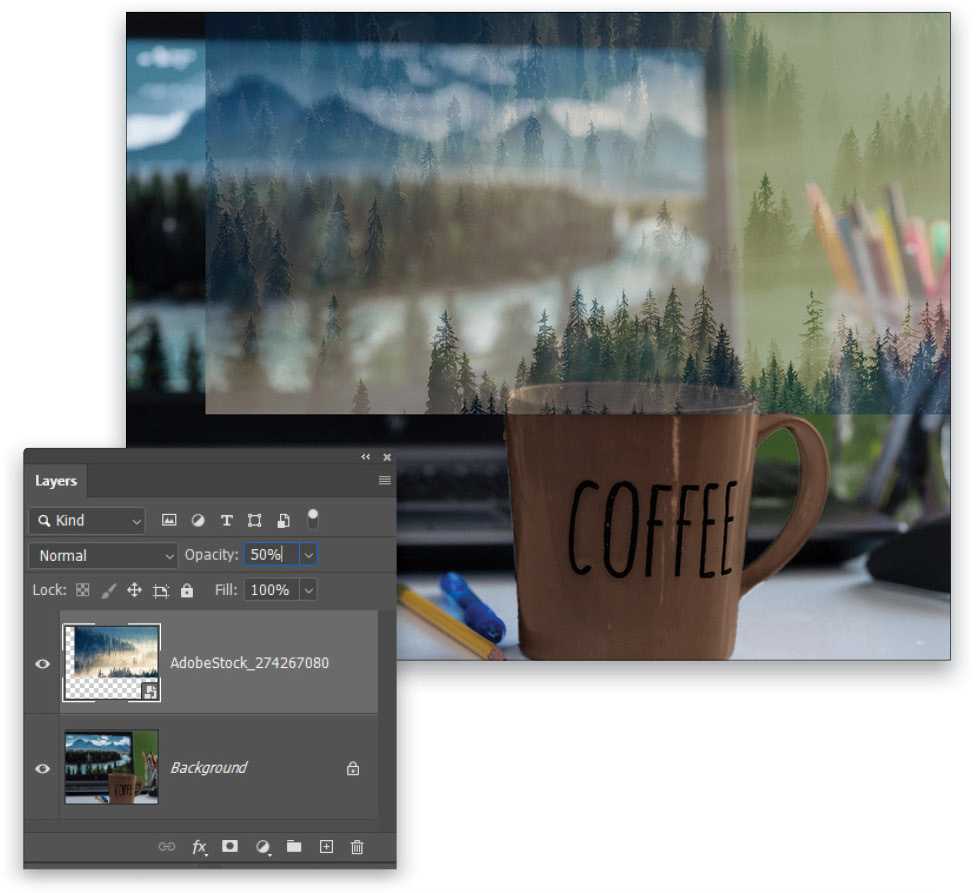
Either way, Photoshop places the document as a smart object which makes it easy to scale and position. Scale the stock image and place it so the clump of trees at the bottom appear to sit within the coffee cup. It’s helpful to temporarily reduce the Opacity of the layer in the Layers panel to around 50% while transforming it to get the fit just right. Just remember to restore the layer to full 100% Opacity after placing it where you need it. Press Enter to commit the placement.
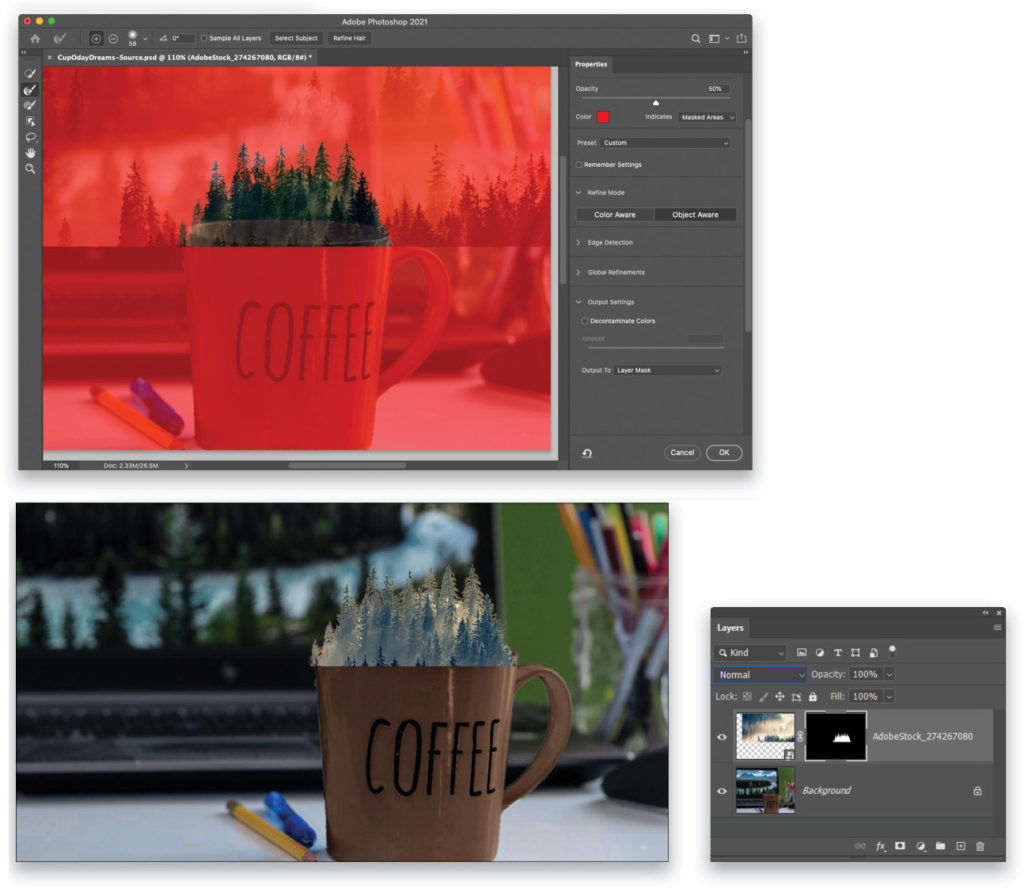
Step Three: Grab the Quick Selection tool (nested below the Object Selection tool [W] in the Toolbar) and use it to create a selection of the front trees. Click the Select and Mask button in the Options Bar to enter the Select and Mask workspace. Set the View menu in the Properties panel to Overlay (V) and the Opacity to 50%. Use the Refine Edge Brush tool (R) to refine the selection around the tops of the trees. Then set the Output To drop-down menu in the Output Settings section to Layer Mask, and click OK to return to the regular Photoshop interface.
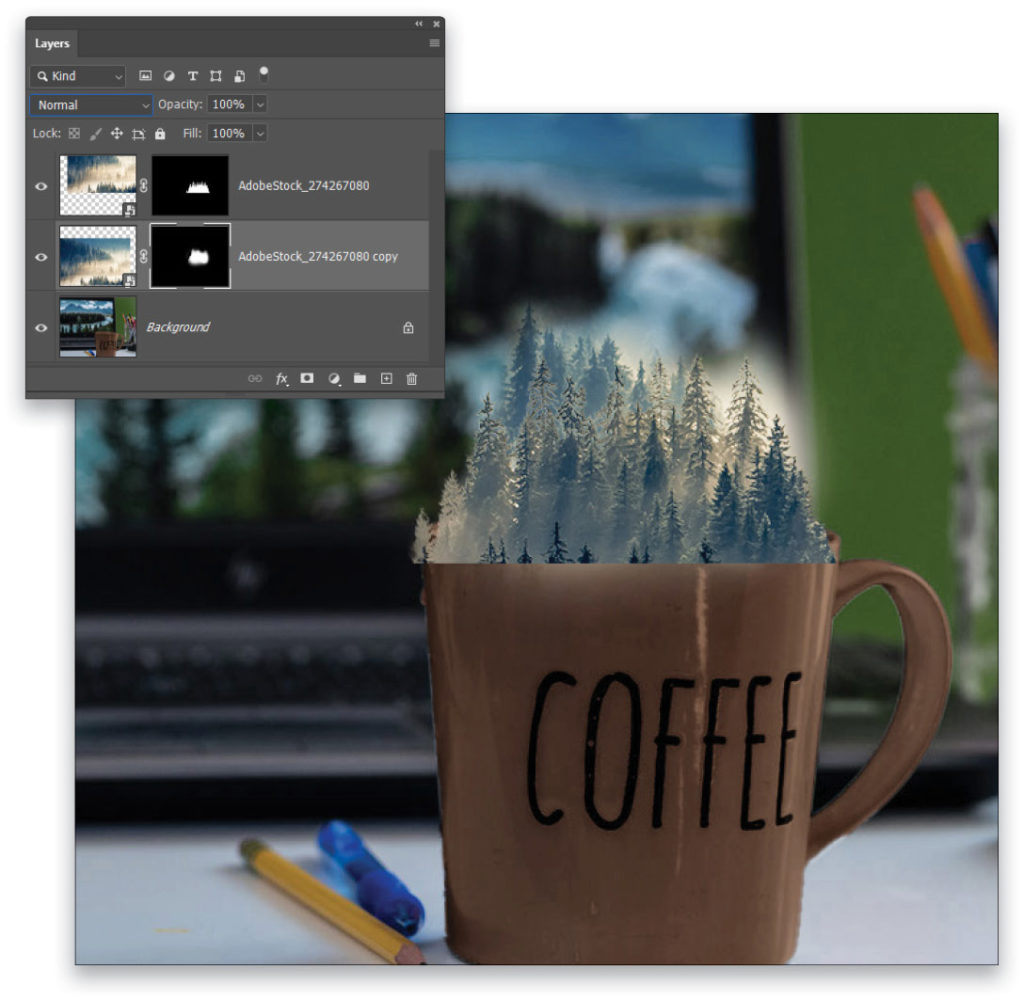
Step Four: In the Layers panel, hold down the Option (PC: Alt) key and drag downward on the stock layer thumbnail. This will create a copy of that layer and put it beneath the original. Right-click on the thumbnail of the layer mask and select Delete Layer Mask. Then reposition this layer so that a group of faded trees from the midground area are shown just behind our group of foreground trees. Use the Opacity trick again to assist with the positioning.

Step Five: Hold down the Option key (PC: Alt) and click the Add Layer Mask icon (circle in a square) at the bottom of the Layers panel. This will add a fully black mask that completely obscures the layer contents. Grab the Brush tool (B) and press D to set the Foreground color to white. Then using a Soft Round brush tip, paint the trees back into visibility. This way you can specifically control which trees you want to be seen. You’ll need to initially reveal more than you need so you can see the trees, and then press X to switch the Foreground color to black, and paint to remove areas that you don’t want. Switch back and forth between white and black as needed. It’s okay to keep some of the hazy atmosphere around the trees.
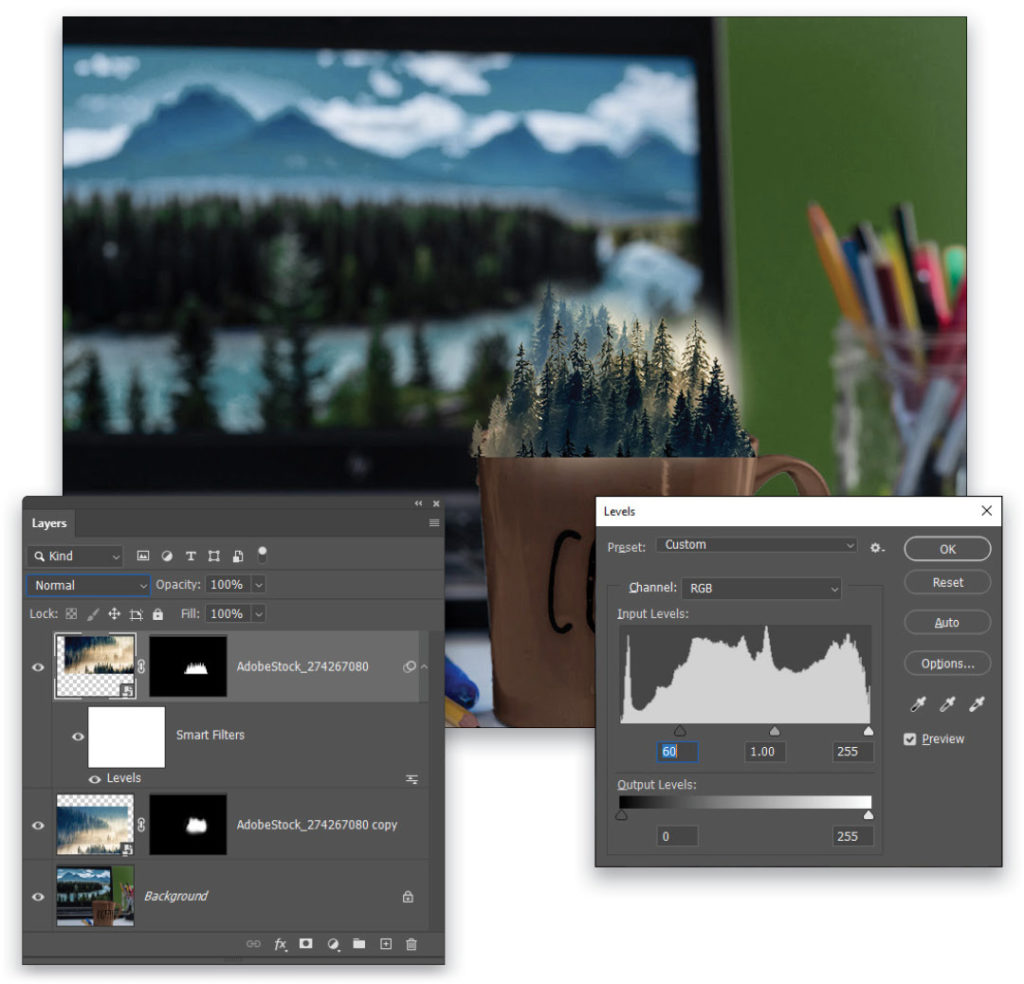
Step Six: Click on the original stock layer again in the Layers panel to make it the active layer. Go to Image>Adjustments>Levels, pull the left shadows slider over to about the 60 mark, and click OK. This will darken the foreground trees and make them stand out more against the mist behind them.
Step Seven: With the top layer active, Shift-click the forest layer beneath it so they’re both selected in the Layers panel. Press Command-G (PC: Ctrl-G) to group the layers together, double-click the name of the group, and rename it “Forest Group.”
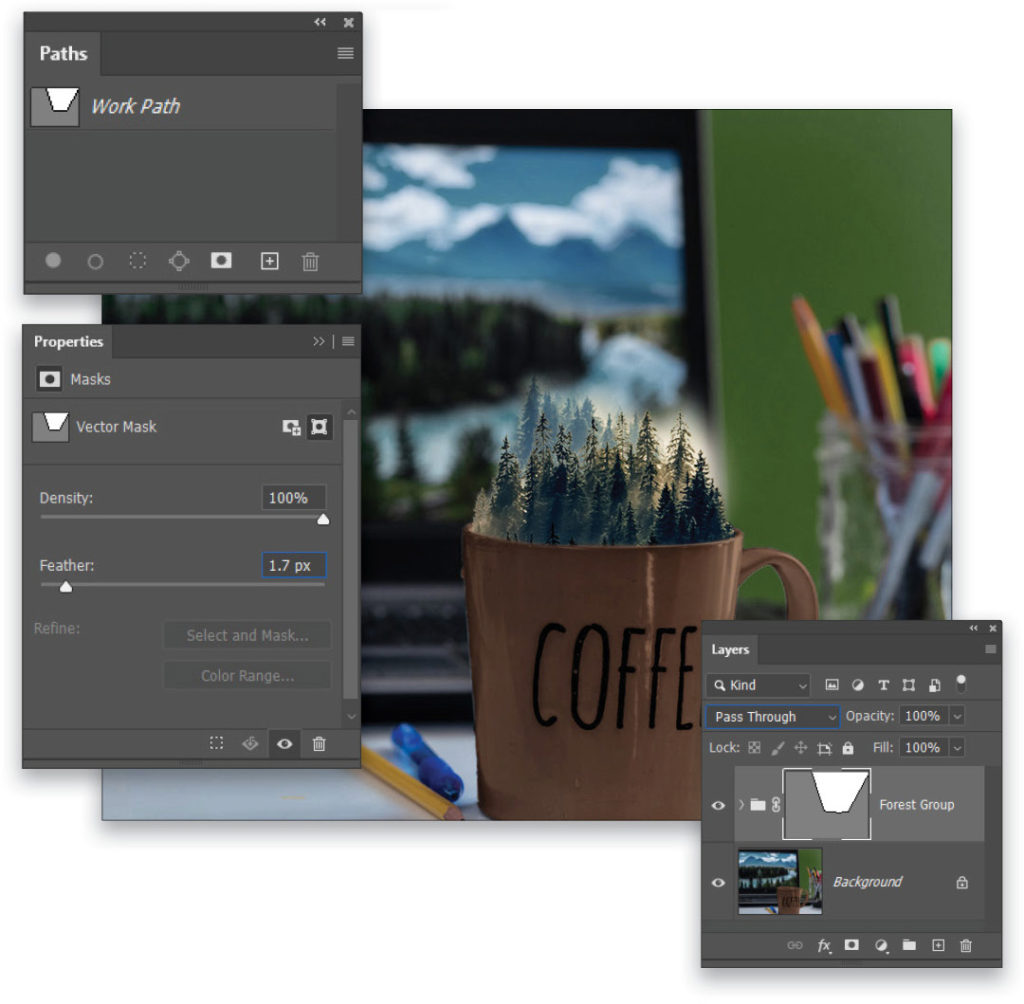
Open the Paths panel (Window>Paths) and click on the Work Path that’s already embedded in the download image; otherwise, you can create your own path using the Pen tool (P). The bottom of this path follows the front rim of the coffee cup. Go to Layer>Vector Mask>Current Path to use the path as a mask for the Forest group. It should now appear as if the trees are completely inside the cup. In the Properties panel (Window>Properties), increase the Vector Mask’s Feather setting to 1.7 px to slightly soften the mask edge.
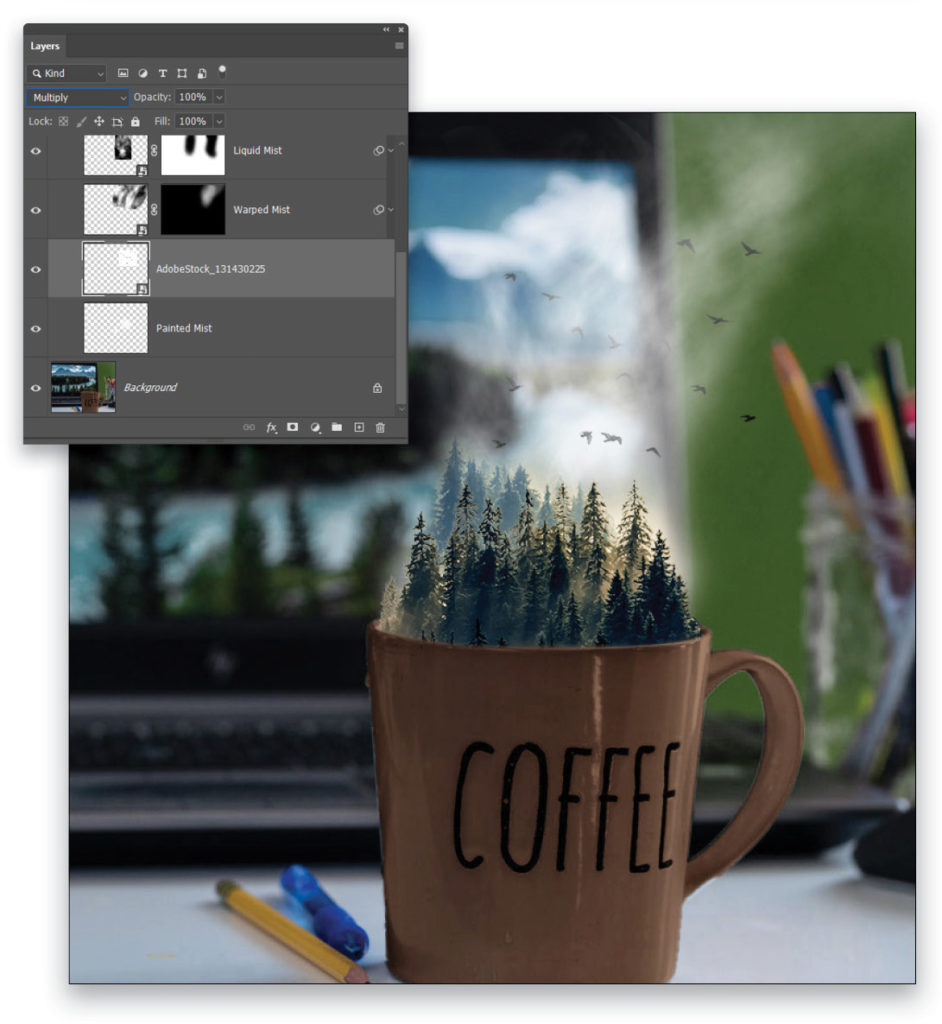
Step Eight: Add a new layer with Layer>New>Layer, call it “Liquid Mist,” and click OK. Position it below the stock layers but still in the Forest Group. Use the Rectangular Marquee tool (M) to create a tall rectangular selection that goes well above the trees and is the same width as the inner edge of the coffee cup. While you’re drawing the selection, you can press-and-hold the Spacebar to reposition it.
Tap the D key to set the colors to the default black and white. Then, hold down the Option (PC: Alt) key and go to Filter>Render>Clouds to fill the selection with a more “contrast-y” version of the Clouds filter. You want a somewhat even distribution of black and white in the Clouds filter, so if there’s too much white or black, you can run it as many times as you want until you get a pattern you like. Cancel the selection with Select>Deselect.

Step Nine: Change the layer to a smart object by going to Layer>Smart Objects>Convert to Smart Object. Set the blending mode to Screen and go to Filter>Liquify. Use the Forward Warp tool (W) at a large size along with the Twirl Clockwise tool (C) to push the cloud texture around to give it a very fluid appearance. While using the Twirl Clockwise tool, you can press-and-hold the Option (PC: Alt) key to make it twirl counterclockwise. If you want to see the background image in the preview, turn on Show Backdrop in the View Options section in the Properties panel. When ready, click the OK button to apply the filter.

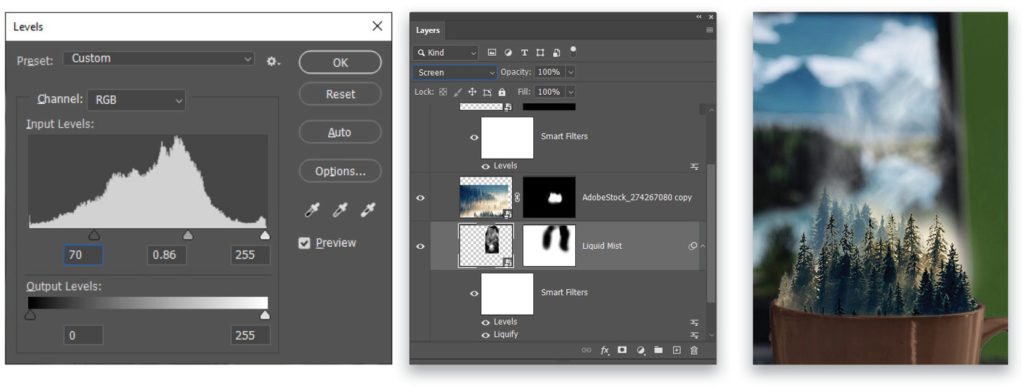
Step 10: If the texture seems to have too much bright white, then use the Levels adjustment again and drag the left shadow slider inward to lighten it enough to see more details of the mist. Adjust the midtones slider to lighten it even more if needed. Click OK, and then add a layer mask. Use the Brush tool again with black paint and a soft-edged tip to remove the hard edges of the texture and further control where the swirling mist is visible. Don’t worry if your mist is a little thin or has gaps; we’ll continue to build up the effect.
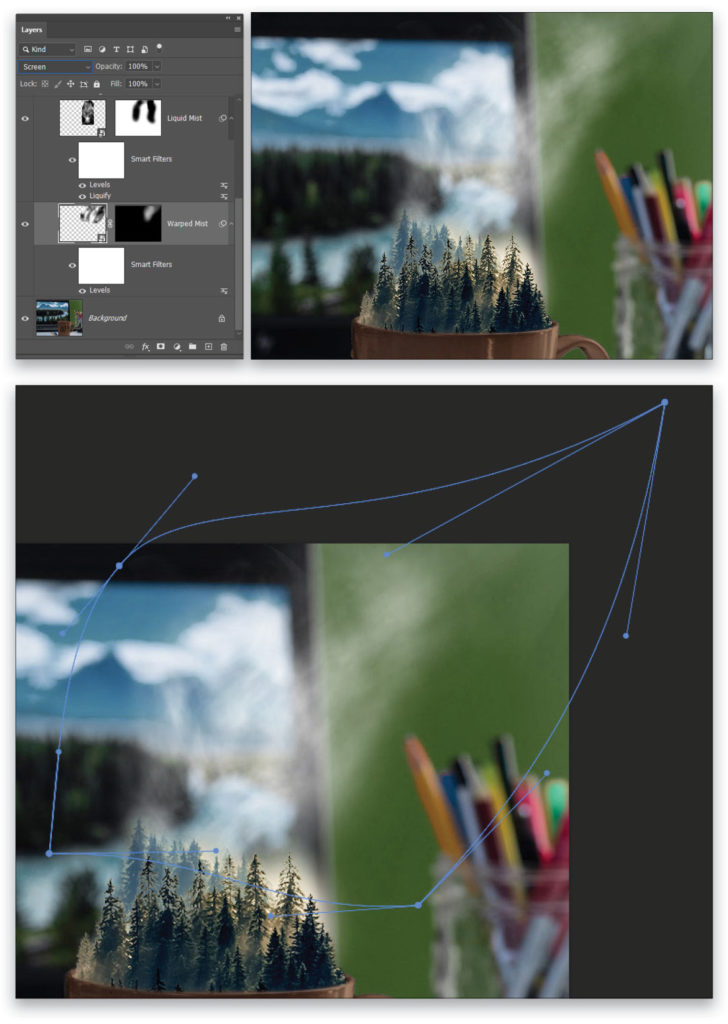
Step 11: Add another layer called “Warped Mist,” and use the same process we used in Step Eight to generate another cloud texture layer. Be sure to set its blend mode to screen and convert it to a smart object. For this texture, instead of using the Liquify filter, use Edit>Transform>Warp and use the warp handles to distort the shape and flow of the clouds. Press Enter to commit the transformation. Then use Levels to adjust the contrast and a layer mask to control the visibility as needed
Step 12: Add one more layer beneath the other mist layers and name it “Painted Mist.” Now use the Brush tool again with white paint. Reduce the brush Opacity to 40% in the Options Bar and paint in some white fog to fill in the obvious gaps left by the other mist layers. This shouldn’t be a huge effect, just a subtle touchup to make sure the mist layers all flow together well. Adjust the brush size as needed.

Step 13: Now we’re going to add the bird image from Adobe Stock. You can find it by clicking here. If you download the low-res preview version, drag it into your document from the Libraries panel. Make sure the bird stock layer is inside the Forest Group, but beneath at least one of the Mist layers. Scale the layer so the birds appear to be in the correct proportion in relation to the trees, then set the blending mode to Multiply to render the white areas invisible, allowing only the bird pixels to show through.
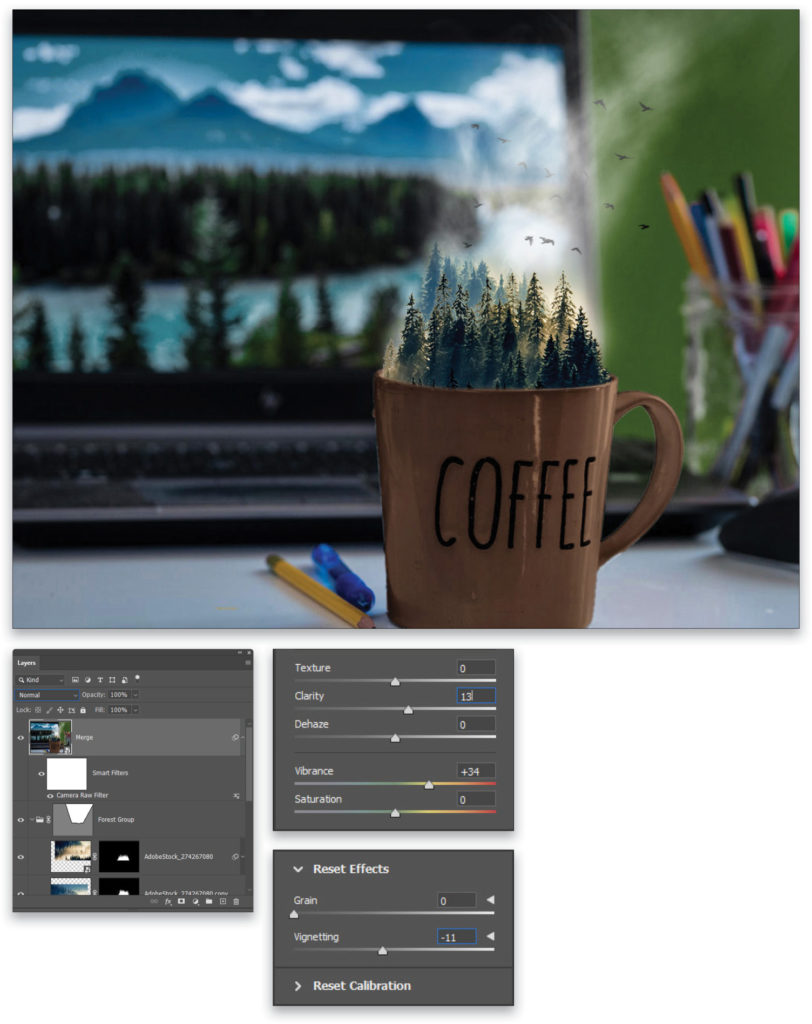
Step 14: Click on the group folder in the Layers panel to make it active, hold down the Option (PC: Alt) key again, and go to Layer>Merge Visible. This places a merged layer at the top of the layer stack. Change this layer into a smart object and go to Filter>Camera Raw Filter. In the Basic tab increase the Clarity to +13 and the Vibrance to +34. In the Effects tab, set the Vignetting to –11. Then apply the filter with the OK button.
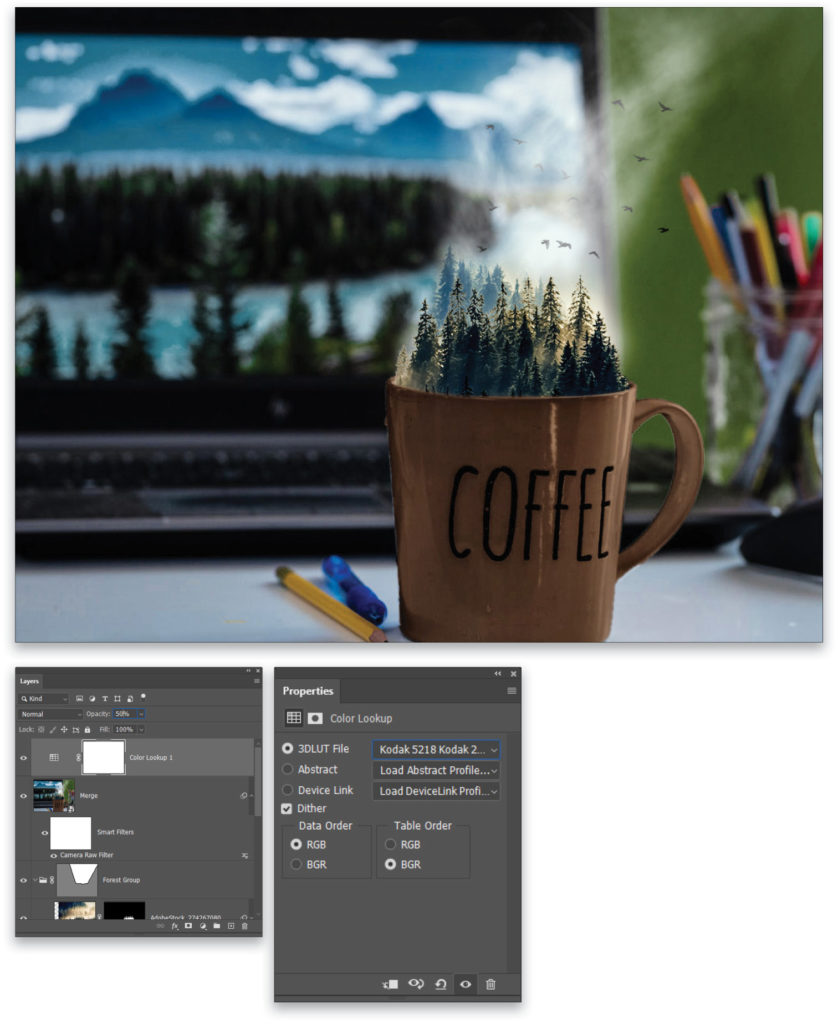
Step 15: For a final subtle effect, add a Color Lookup adjustment layer (Layer>New Adjustment Layer>Color Lookup). In the Properties panel, set the 3DLUT File to Kodak 5218 Kodak 2383 (by Adobe).cube. Then reduce the Opacity of the adjustment layer to 50%. The benefit of the Color Lookup adjustment is that it helps unify the way the colors are displayed and makes the compositing more convincing. After that, enjoy your daydream in a cup!
The primary lessons to take away from this project is how to use multiple layers to build up an effect, and judiciously apply them using layer masks as well as overall group masks. Don’t feel the need to create everything with just a single layer when multiple layers provide more control and achieve a better final effect.
This article originally published in the February, 2021 issue of Photoshop User magazine.


