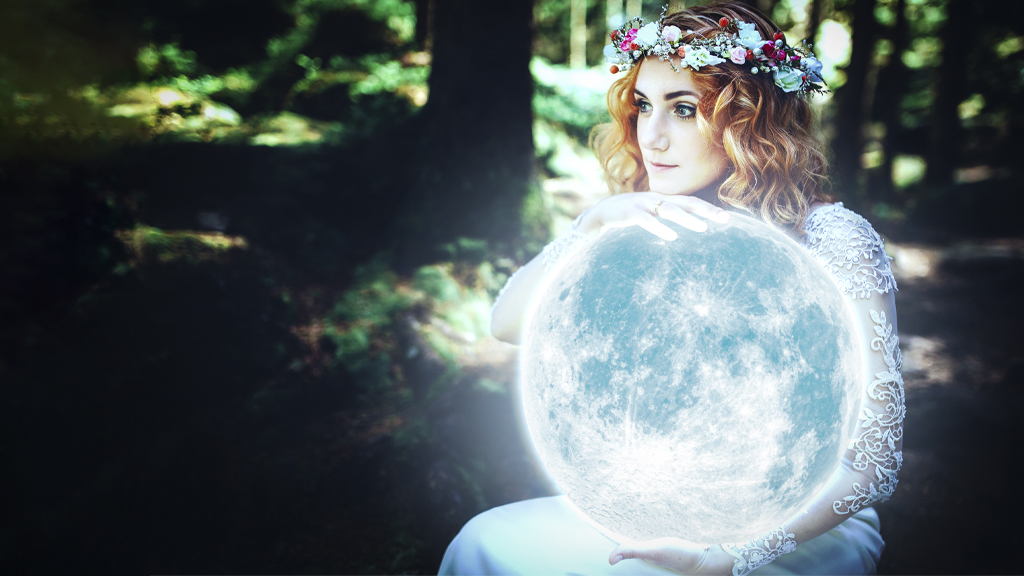
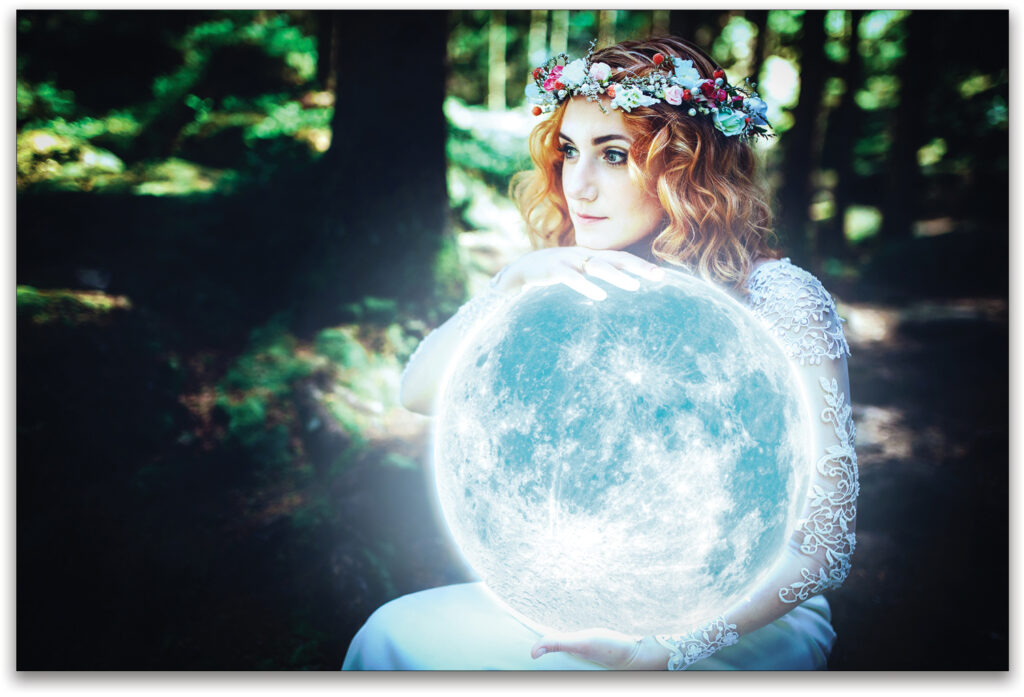
One of the joys of being a digital artist is creating fun and visually interesting images that are physically impossible in real life. There’s a current trend toward compositing the moon into scenes as if it were a physical object small enough to hold in your lap. This idea is further explored when it’s depicted as something a fairy or maiden would embrace. Then, turning the lunar body into a light source within the scene just brings the whole idea home, and we end up with a fun, surreal composite of a Maiden of the Moon.
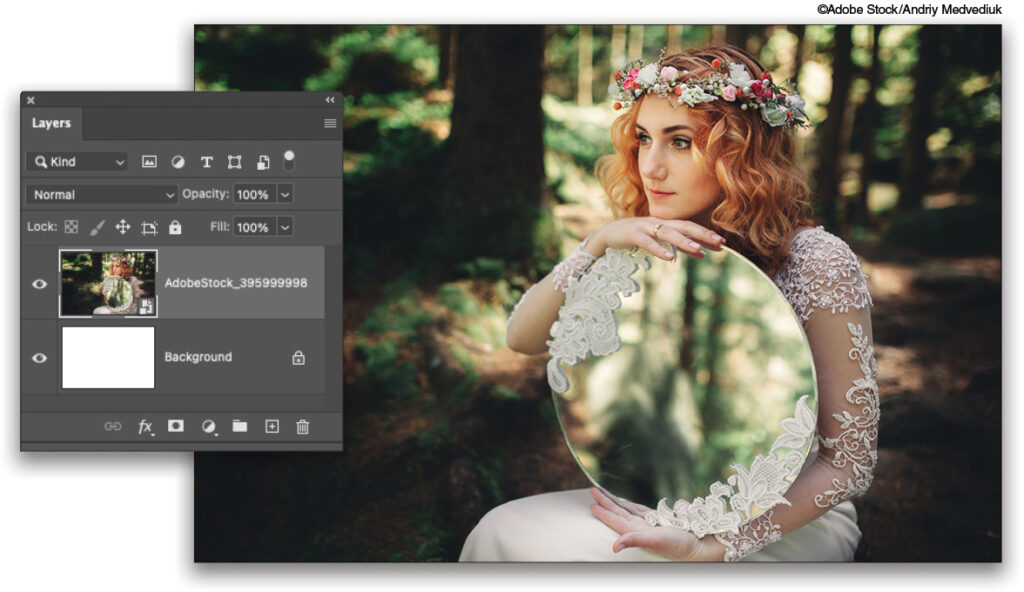
STEP ONE: Open Photoshop and create a new document with File>New, and set the Width to 3000 px and the Height to 2000 px. Then, go to File>Place Embedded and select the image you’d like to use. If you’d like to download the low-res watermarked version of this Adobe Stock image of the young woman holding a round mirror to follow along, click this link, log in with your Adobe ID, and click the Save to Library button. Drag the image from the Libraries panel (Window>Libraries) to the new file.
Scale the image until it fills the canvas completely, and then press Enter to commit the transformation.
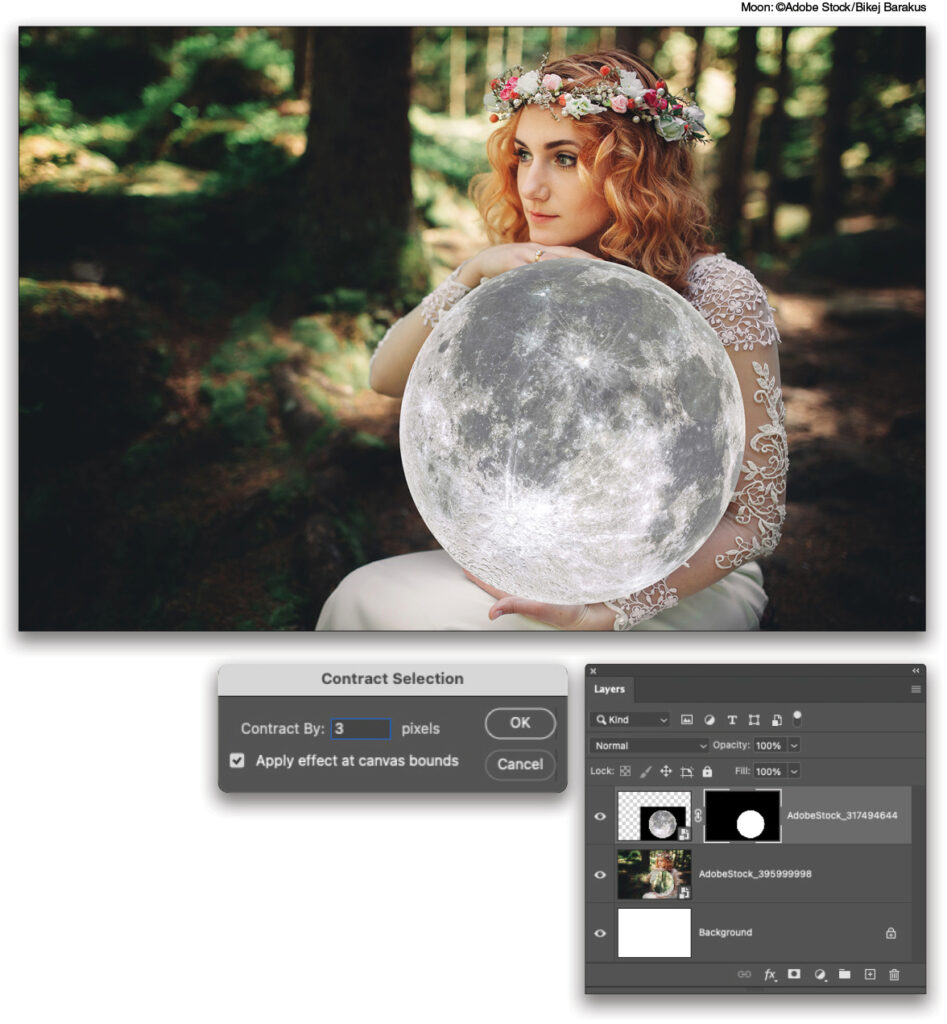
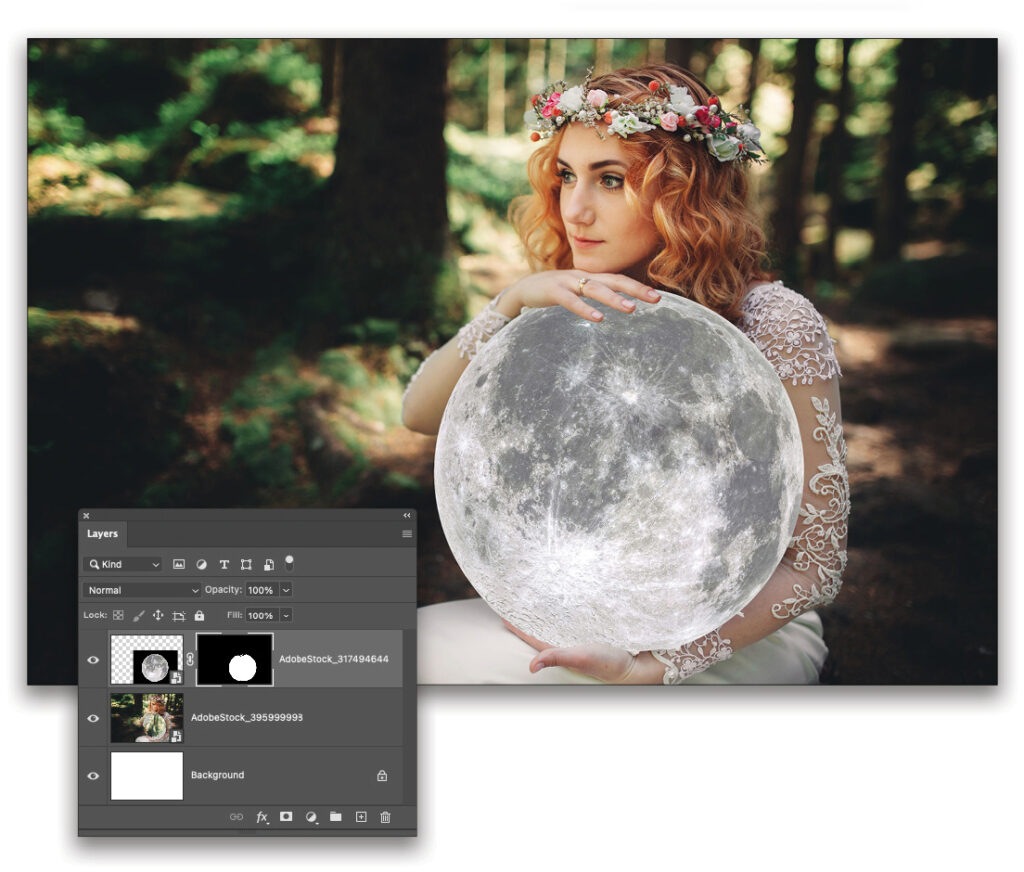
STEP TWO: Click here to find and download the low-res version of the moon image from Adobe Stock and click-and-drag it into the scene from the Libraries panel. At the top of the Layers panel, set the Opacity to about 75% to see the background better behind the moon, so it’s easier to scale the image down, and place it right into the woman’s hands. After committing the transformation (press Enter), return the Opacity to a full 100%. Then, go to Select>Subject and Photoshop automatically creates a round selection around the moon. To make sure none of the black background pixels are captured, go to Select>Modify>Contract and use a setting of 3 pixels. Now, click on the Add Layer Mask icon at the bottom of the Layers panel (it’s the third icon from the left) to create a layer mask from the selection.
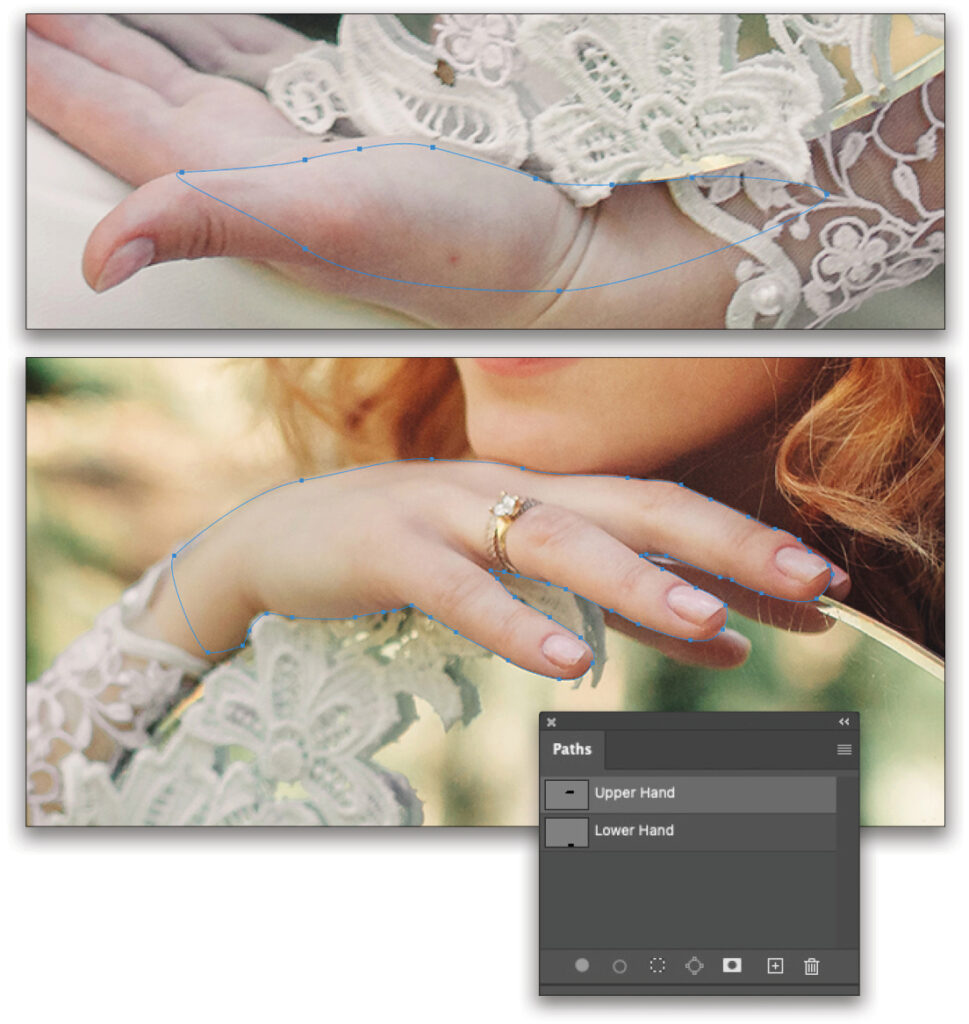
STEP THREE: For the moon to look like she’s actually holding it, her fingers should be visible. So, click on the Eye icon to the left of the moon layer to hide it, and then get the Pen tool (P) from the Toolbar. Up in the Options Bar, make sure the mode is set to Path, and then zoom in close on the hands and carefully trace a path around each hand. Be sure to click on the Create New Path icon at the bottom of the Paths panel (it’s the second icon from the right) before tracing a path around the second hand, and as you complete a path, rename it in the panel for easy reference. [If you’re new to the Pen tool click here to check out “Pen Tool Shortcuts,” and then click here for “Let’s Get Surgical” for a more detailed look at the Pen tool.”—Ed.]
STEP FOUR: Reveal the moon layer again and click on its layer mask thumbnail to make that the active element. Then Command-Shift-click (PC: Ctrl-Shift-click) on each path’s thumbnail in the Paths panel to create a selection from them. Make sure your Foreground color is set to black, and then press Option-Delete (PC: Alt-Backspace) to fill the selection with black, which masks out her hands from the moon layer. Press Command-D (PC: Ctrl-D) to cancel the selection. If the masking needs some touch-ups, get the Brush tool (B) from the Toolbar and use a small, round brush with black paint to adjust the edges as needed.
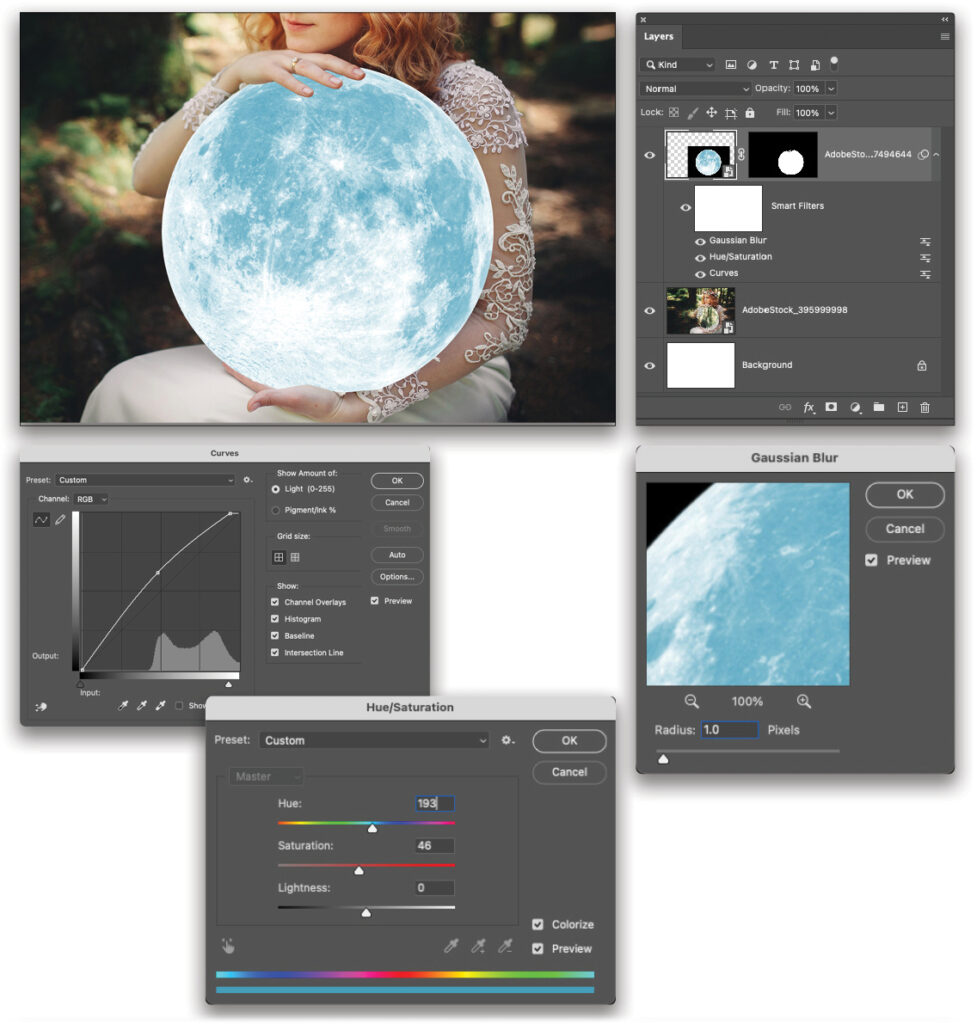
STEP FIVE: Click on the regular layer thumbnail of the moon to focus on the layer, and not the mask. Go to Image>Adjustments>Curves, add a point to the middle of the curve, drag it upward about half-a grid-space, and then click OK. Next, go to Image>Adjustments>Hue/Saturation, turn on the Colorize checkbox, set the Hue to 193 and the Saturation to 46, and then click OK. Next, go to Filter>Blur>Gaussian Blur, use a Radius setting of 1.0 Pixels, and click OK. Now we should have a bright blue-tinted moon that matches the focus of the model cradling it.
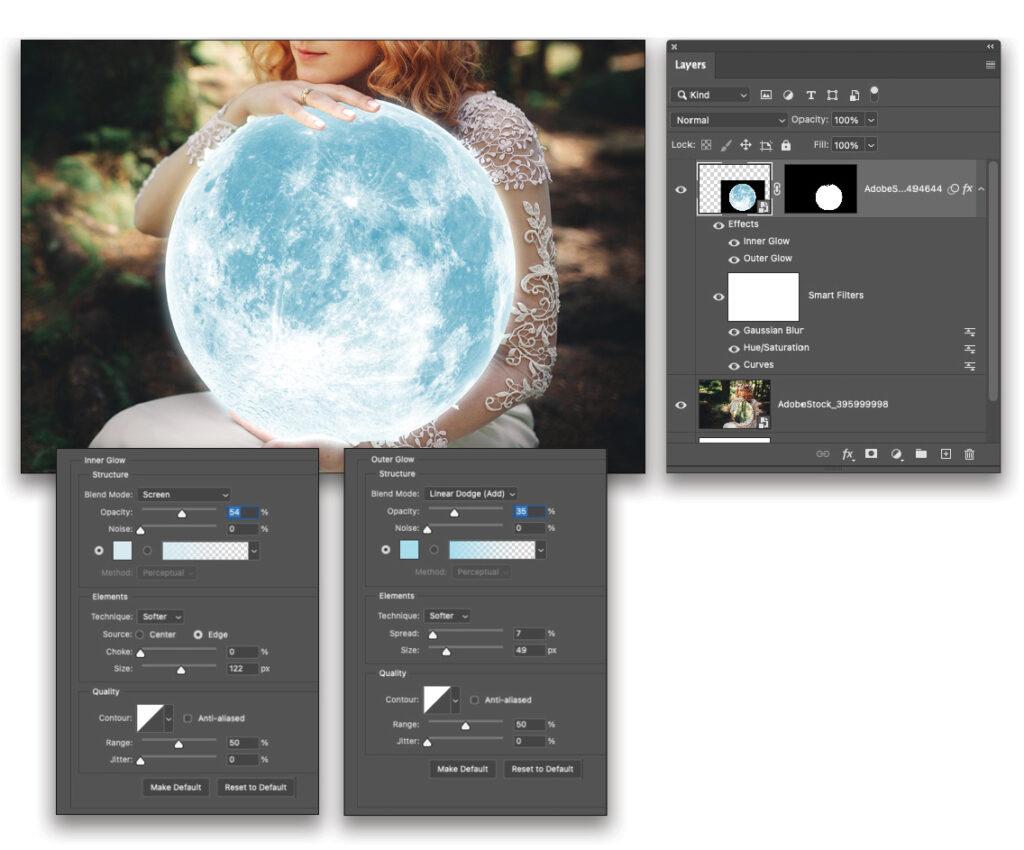
STEP SIX: Click on the Add a Layer Style icon (the ƒx icon) at the bottom of the Layers panel and choose Inner Glow from the drop-down menu to open the Layer Style dialog. Set its Blend Mode to Screen and Opacity to 54%. Click on the color swatch, choose a pale blue (#d7eaf0), and then set the Size to 122 px. Next, click on Outer Glow on the left and set its Blend Mode to Linear Dodge (Add) and Opacity to 35%. Click on the color swatch, choose a bright blue (#a7dcec), and then set the Spread at 7% and the Size to 49 px. Click OK and the result should be a soft glow effect that makes the moon seem illuminated.
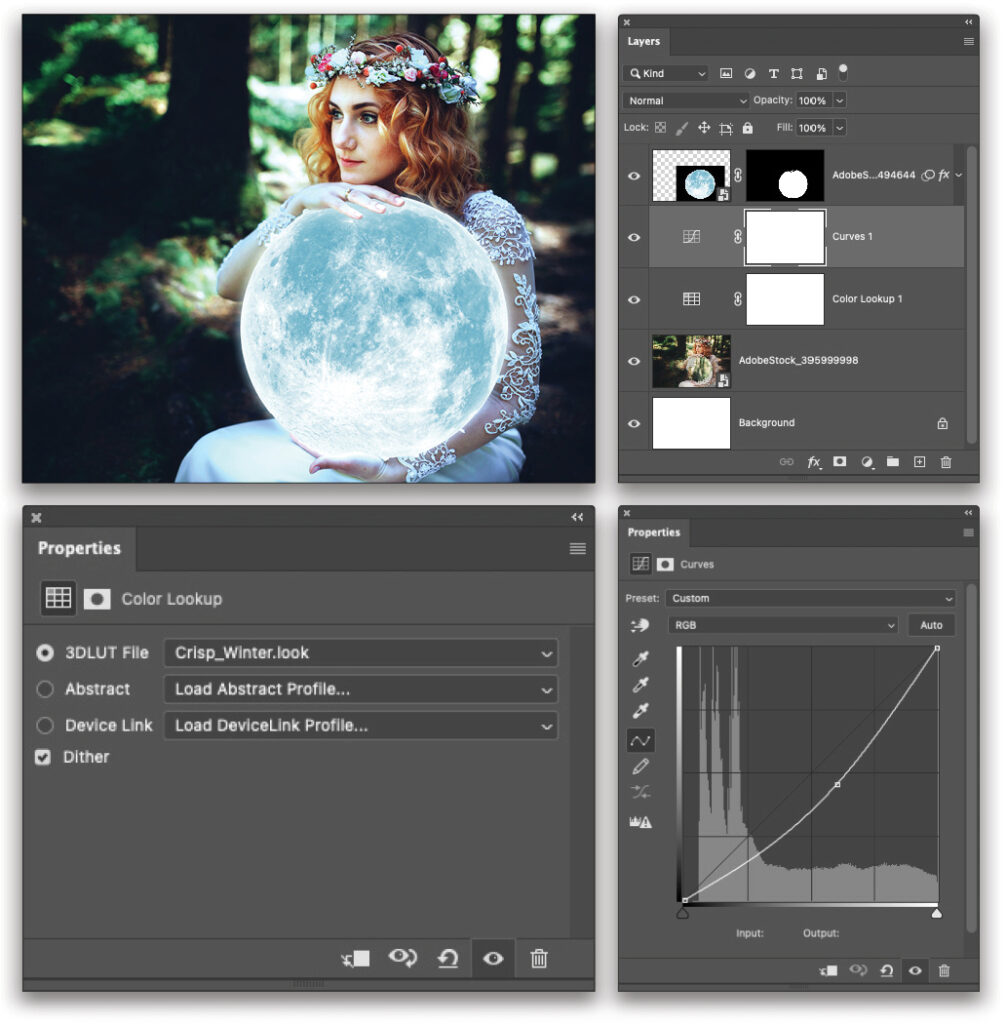
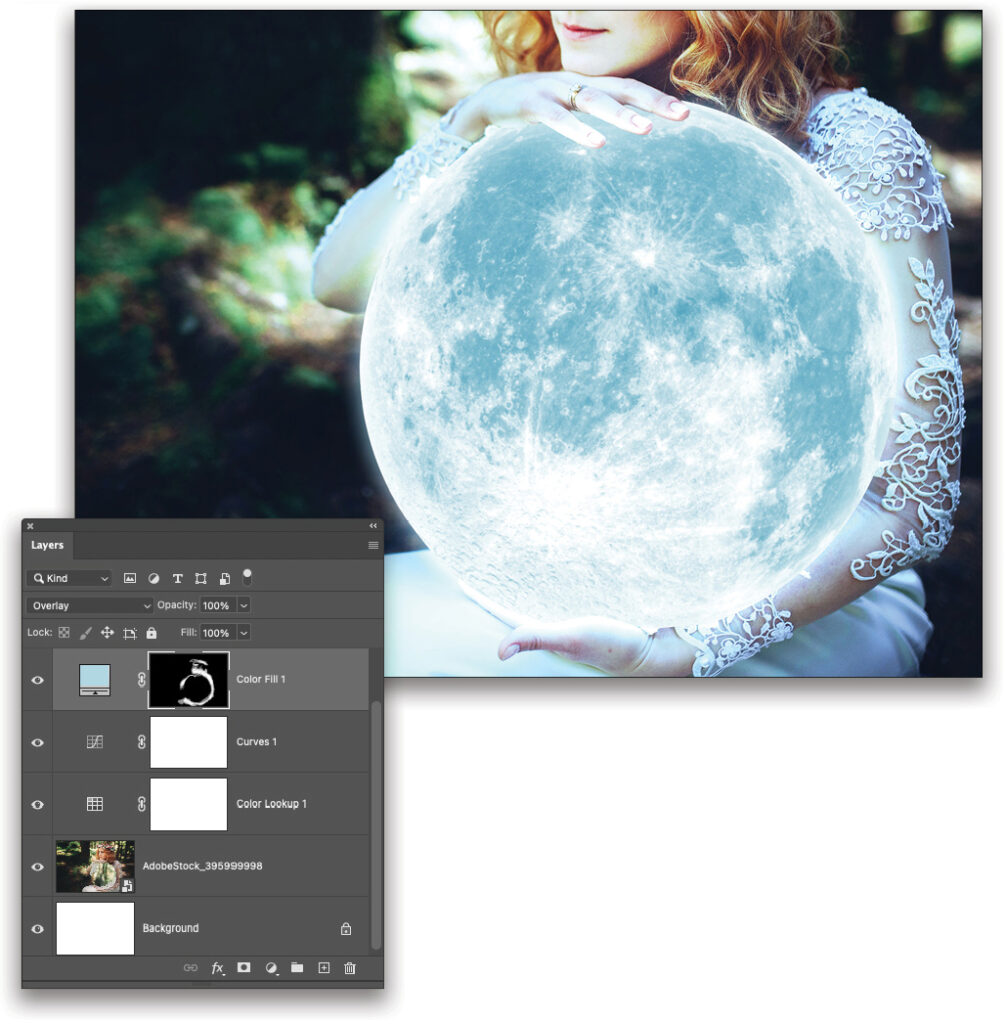
STEP SEVEN: While the glowing moon has a soft blue glow, the surrounding image appears too warm to fit with such a cool light source. So, in the Layers panel, click on the layer of the young woman, and then click on the Create New Adjustment Layer icon (the half-white/half-black circle) at the bottom of the panel and choose Color Lookup from the drop-down menu. In the Properties panel, set the 3DLUT File to Crisp_Winter.look. This helps the image match the cool blue tones of the moon; but the background is a bit too bright. So, click on the Create New Adjustment Layer icon again, choose Curves, and then place a point at the middle of the curve. Pull it downward about a quarter of a grid space.
STEP EIGHT: Go to Layer>New Fill Layer>Solid Color. In the New Layer dialog, set the layer’s blending Mode to Overlay and click OK. Then, in the resulting Color Picker, move the Eyedropper tool over the moon to sample a bright blue from it (#afd6e2) and click OK. This will work as a type of lighting layer to adjust the lighting on the model.
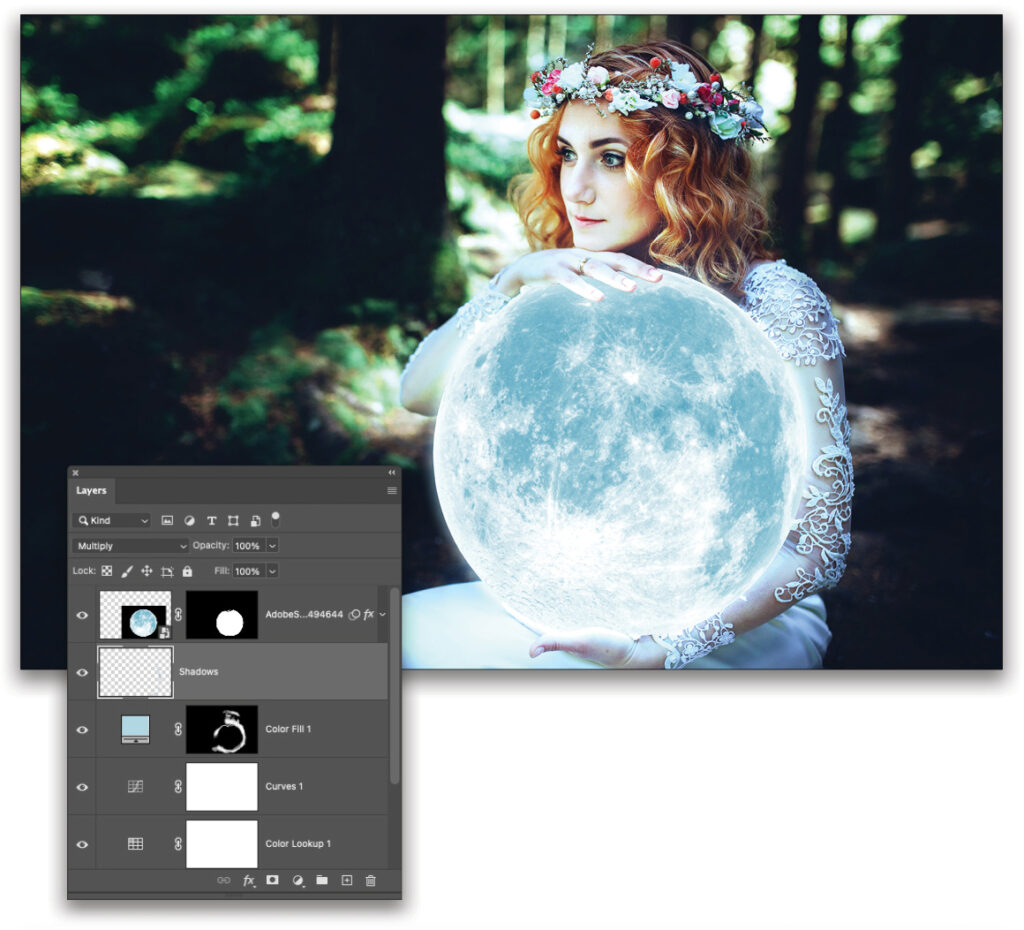
Click on the Color Fill’s layer mask in the Layers panel, and then press Command-Delete (PC: Ctrl-Backspace) to fill it with black. Now, get the Brush tool (B) from the Toolbar, and with a soft, round brush, use white paint on the mask to apply the lighting to the young woman. If you have a pressure-sensitive tablet, that’s very helpful for this step; otherwise, up in the Options Bar, reduce the brush Flow to about 20% and gradually build up the effect with multiple strokes. Focus on adding light to her face, hands, and arms, being aware that the moon is supposed to be the light source.
STEP NINE: Additional lighting also requires additional shadows. So, press Command-Shift-N (PC: Ctrl-Shift-N) to create a new layer and name it “Shadows.” With the Brush tool still active, up in the Options Bar, set the blending Mode to Multiply, and then hold the Option (PC: Alt) key and click to sample a darker blue from the moon (#9ccfdd). Now, paint in some shadow areas on the outside edges of her arms, the top of her head, and any other area where there would logically be a shadow cast from the moon light.
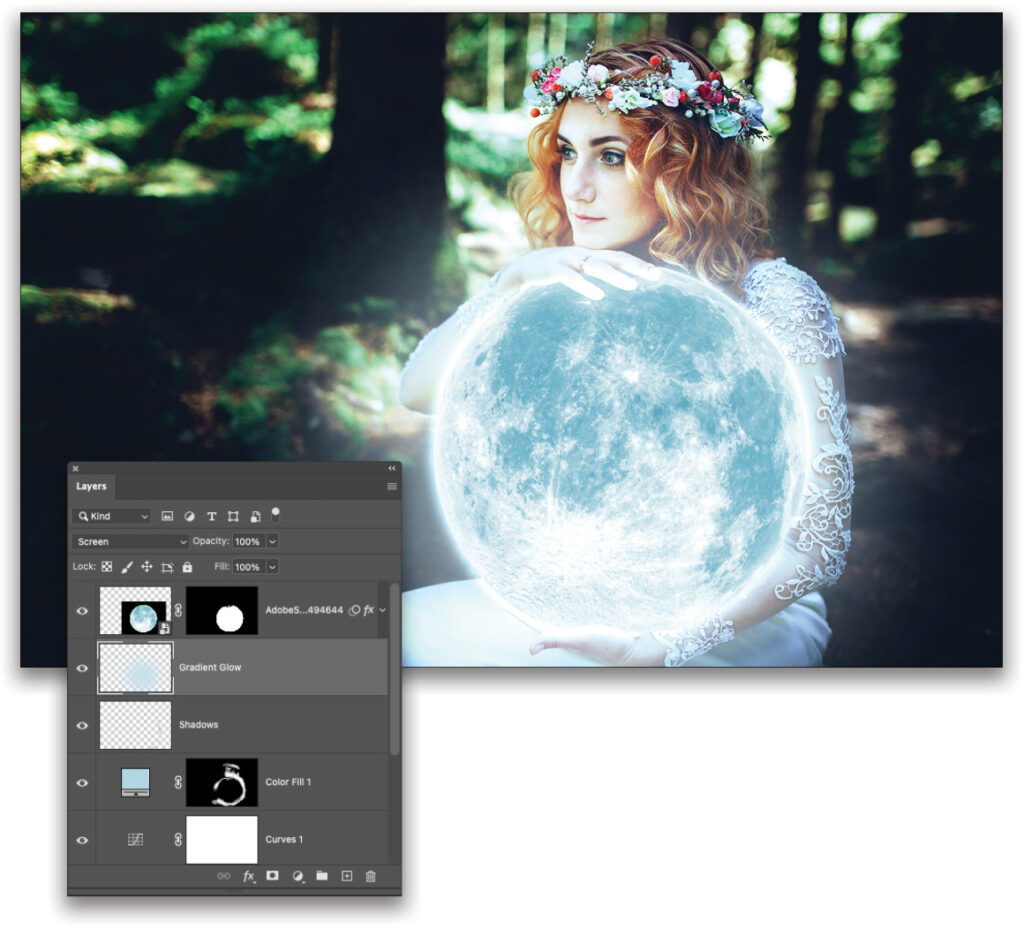
STEP 10: For some additional soft lighting, add another new layer and name it “Gradient Glow.” Set its blending Mode to Screen, and set your Foreground color to the same pale blue color used in the Color Fill layer (#afd6e2). Grab the Gradient tool (G) from the Toolbar, and up in the Options Bar, click on the Radial Gradient icon, and then choose the Foreground to Transparent preset from the Gradient Picker. Now, drag out a gradient starting at the center of the moon and extending to around the top of the woman’s head. To intensify the effect, add the gradient multiple times.
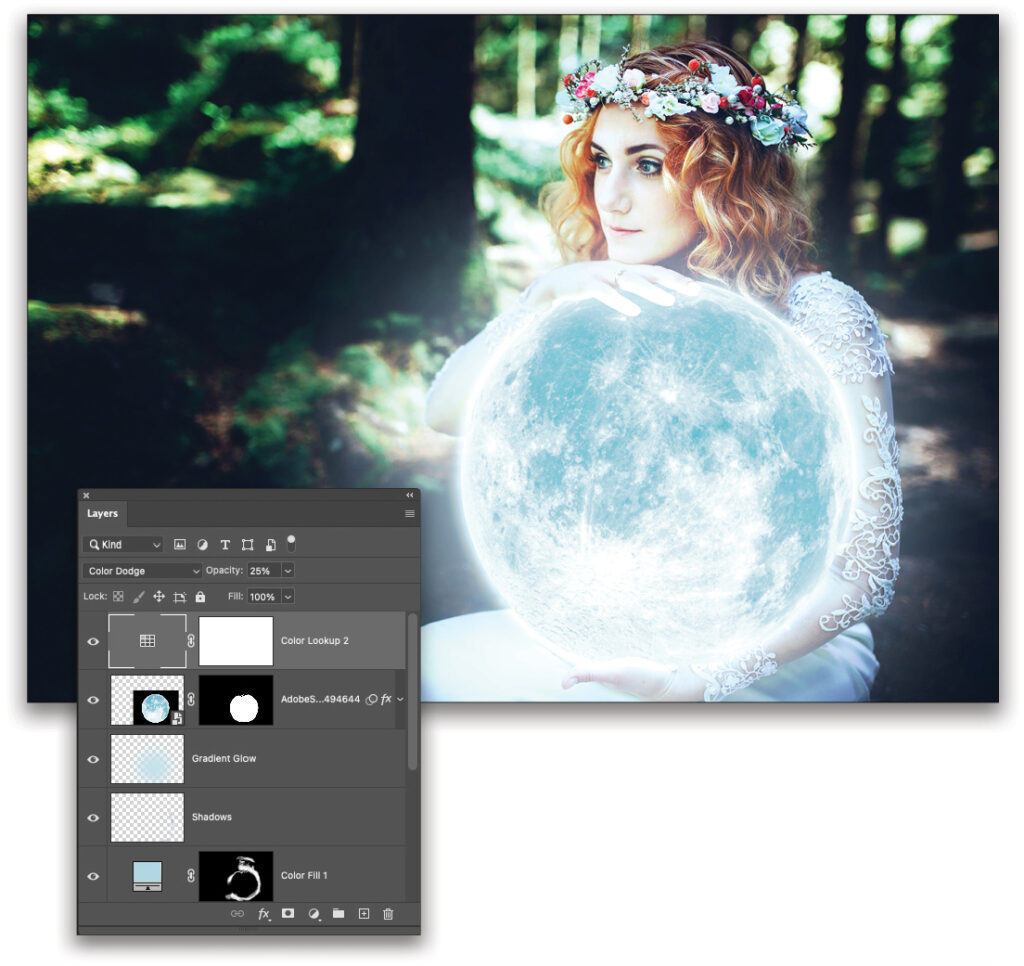
STEP 11: Click on the moon layer at the top of the layer stack, and then add another Color Lookup adjustment layer. Set the 3DLUT File to FoggyNight.3DL, and then set the layer’s blending mode to Color Dodge and reduce its Opacity to 25%. This is just another layer of color adjustment to help the entire scene appear more cohesive.
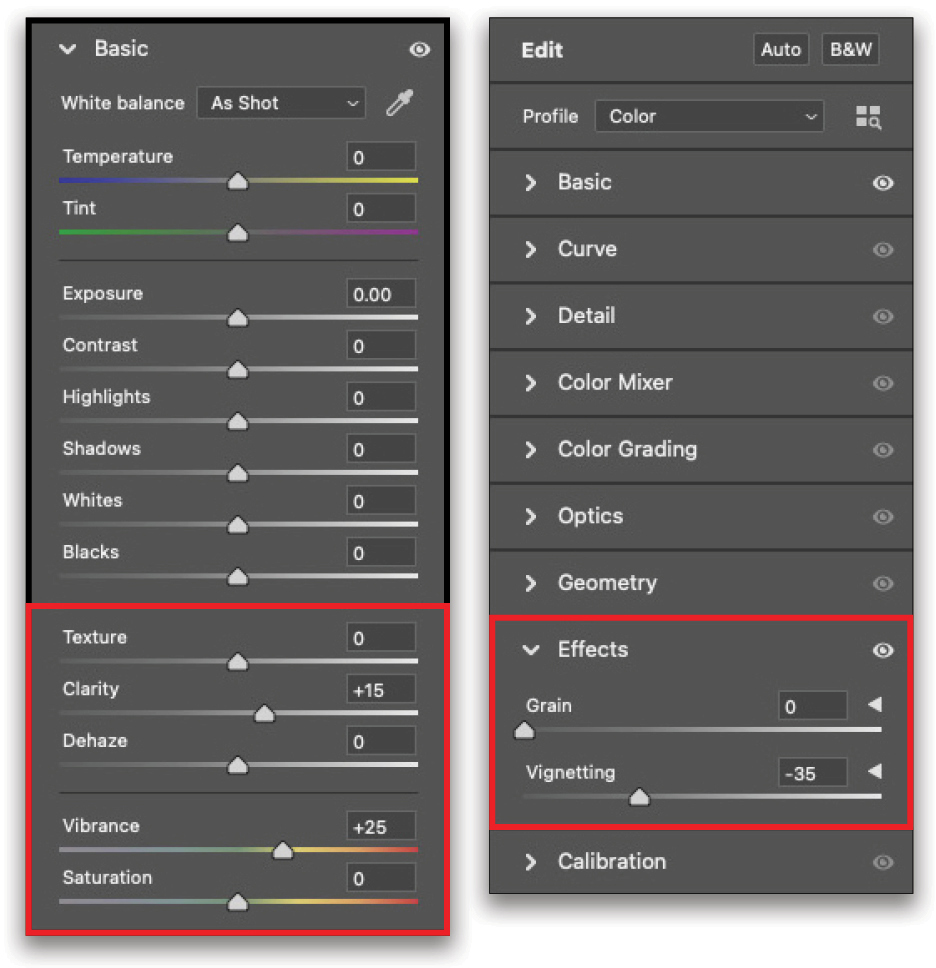
STEP 12: Now, press-and-hold the Option (PC: Alt) key and go to Layer>Merge Visible to add a merged layer to the top of the layer stack, and then go to Filter>Convert for Smart Filters. Now, go back under the Filter menu and choose Camera Raw Filter. In the Basic panel, set the Clarity to +15 and the Vibrance to +25, and then in the Effects panel, set the Vignetting to –35. Click OK and enjoy your surreal image of a young Maiden of the Moon!

In general, the secret behind good compositing is paying close attention to lighting and color agreement. By isolating the light treatment to a single layer, and then using an additional layer for shadows, you have a lot more control over the lighting in the scene. It’s approaches like this that make Photoshop such an amazing tool for these types of projects.
This article originally published in the December, 2022 issue of Photoshop User magazine.
About Photoshop User and KelbyOne
Photoshop User magazine comes out digitally 12 times a year and is part of KelbyOne, the leading educational resource for Photoshop, Lightroom, and photography. Pro members have access to more than 900 video courses and 100 back issues of Photoshop User. To learn more about KelbyOne, click here.


