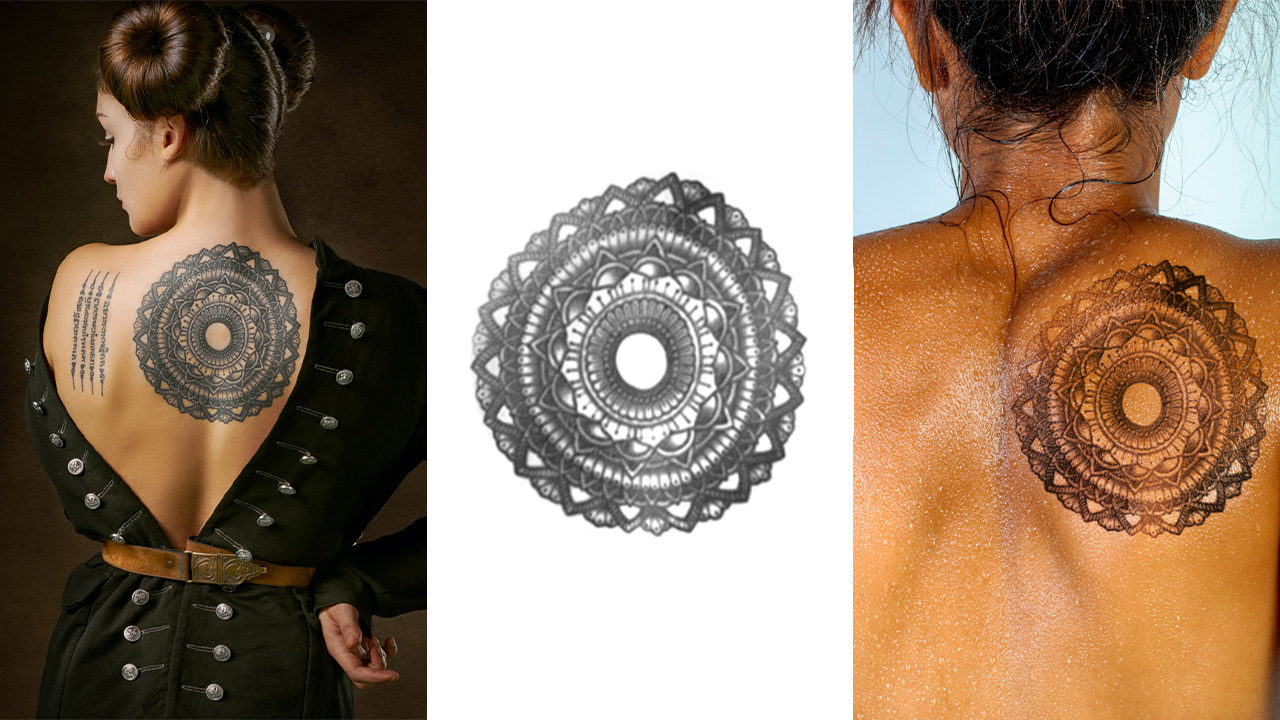
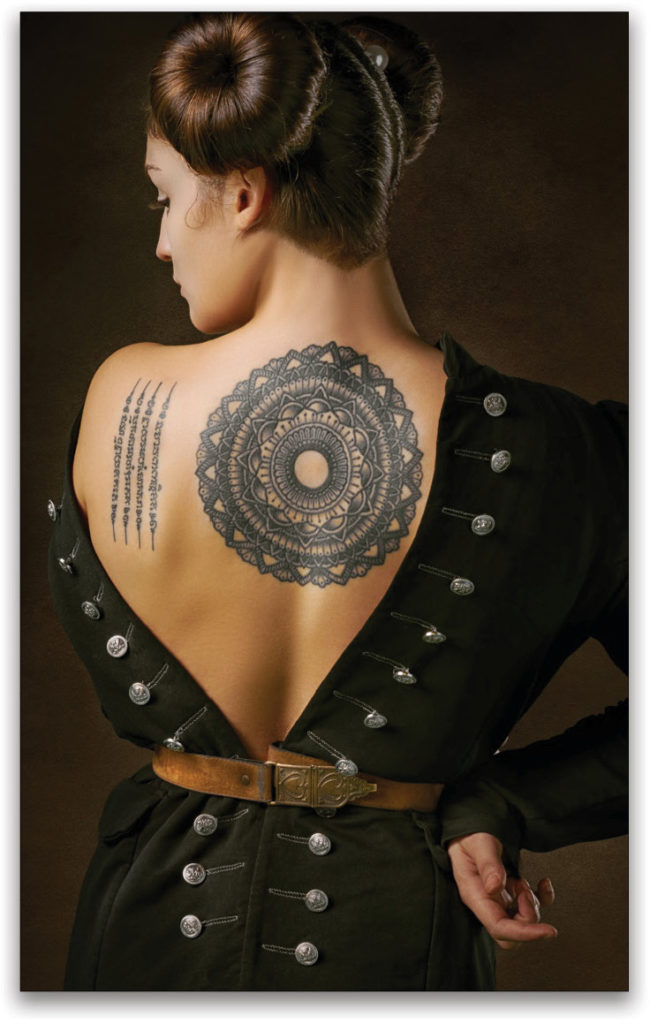
An interesting question was posed recently in one of the Photoshop groups I follow on social media: How would you select a tattoo design on a person? There was your usual array of responses ranging from “Use the Magic Wand tool” to “I’d trace it with the Pen tool.” No answer is wrong if it gets the job done at a quality that’s satisfactory to you or your client. What is surprising, though, is that people are seeing the “object” of the tattoo, and not the “tonality” of it.
For example, the Object Selection tool (W), which is a fairly recent addition to Photoshop CC, will make quick work of this. Just set its Mode to Lasso in the Options Bar, draw a freeform selection around the tattoo, and then let the artificial intelligence (AI) go to work. This tool is still truly amazing to most users who have been editing for more than 10 years, and it’s continuing to advance with machine learning and every Photoshop update. (Check out Kristina Sherk’s Photo Effects article on how Select Subject has been improved for selecting portraits in the a Photoshop update.)
You can see here, where the tattoo has been copied to a separate layer, that the Object Selection tool made a good selection on the first pass, but it’s basically still an object. If we want the “design” of the tattoo, we need all those little blends and details between the line work. What’s really worth noticing is that there aren’t a lot of tones in this tattoo; it’s basically a grayscale-shaded tattoo on a human skin tone, which means it can be more isolated by tone, and then converted into a selection via a few simple steps. You can find the image that we’re using in this tutorial by clicking here.
Step One: Isolate the Tones
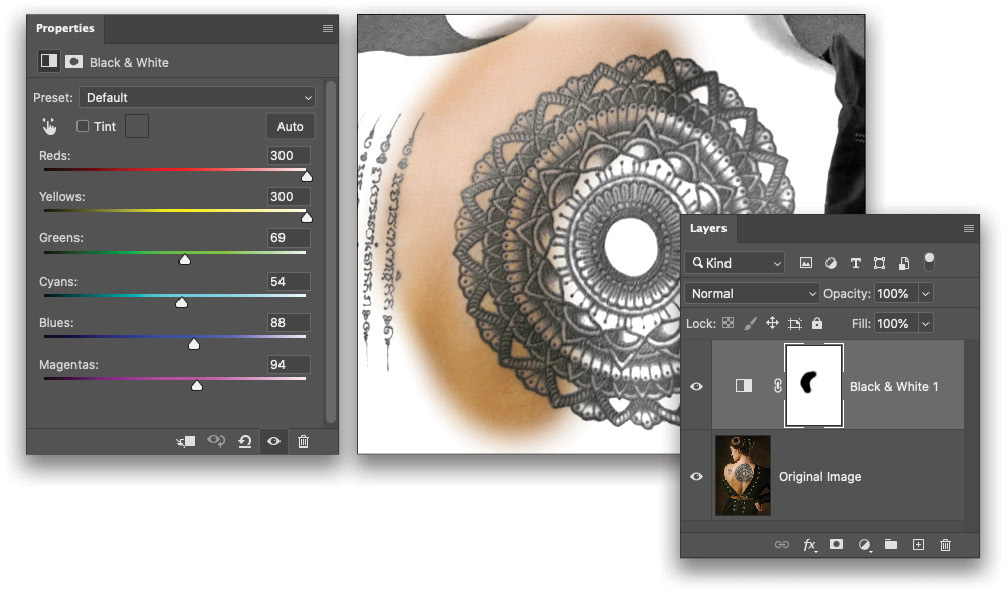
Using a Black & White Adjustment layer (Layer>New Adjustment Layer>Black & White), you can target and “blow out” the colors of the skin to as bright a value as possible. Try to find the right amount that doesn’t erase many details from the tattoo. Most skin tone hues exist in the red and yellow frequencies of the color spectrum, so if we push the reds and yellows all the way over, it will make the subject’s skin tones white or close to white.
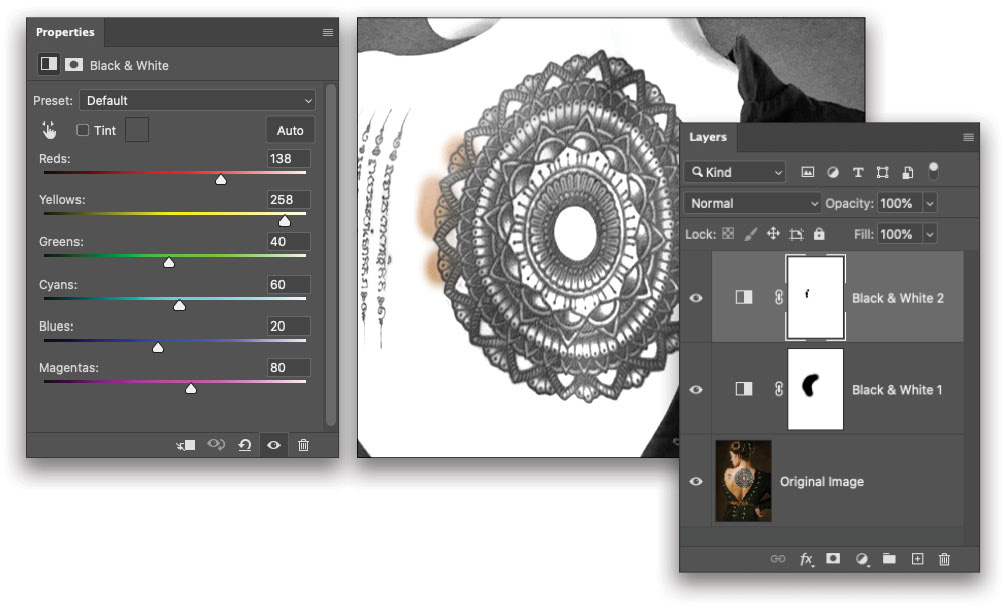
Because there are some natural highlights on the contours of her back in this example, we actually need to use three Black & White adjustment layers. On the first adjustment layer, after increasing the brightness of the Reds and Yellows in the Properties panel (Window>Properties), look for any areas on the tattoo that are blown out and losing detail. Switch to the Brush tool (B), click on the layer mask thumbnail of the Black & White 1 adjustment layer in the Layers panel, and press D then X to set the Foreground color to black. Paint with a soft brush to mask those areas out, revealing the original color of the image.
Now add a second Black & White adjustment layer above the first one. The color area that you masked out in the first adjustment layer will turn black and white. Increase your Reds and Yellows sliders in the Properties panel again to blow out that area of the skin tone. Look for any areas in the tattoo that have lost detail, and mask them out as we did with the first Black & White adjustment layer.
Add one more Black & White adjustment layer, and adjust the Reds and Yellows to blow out the skin tone once again. You shouldn’t have to mask anything at this point.
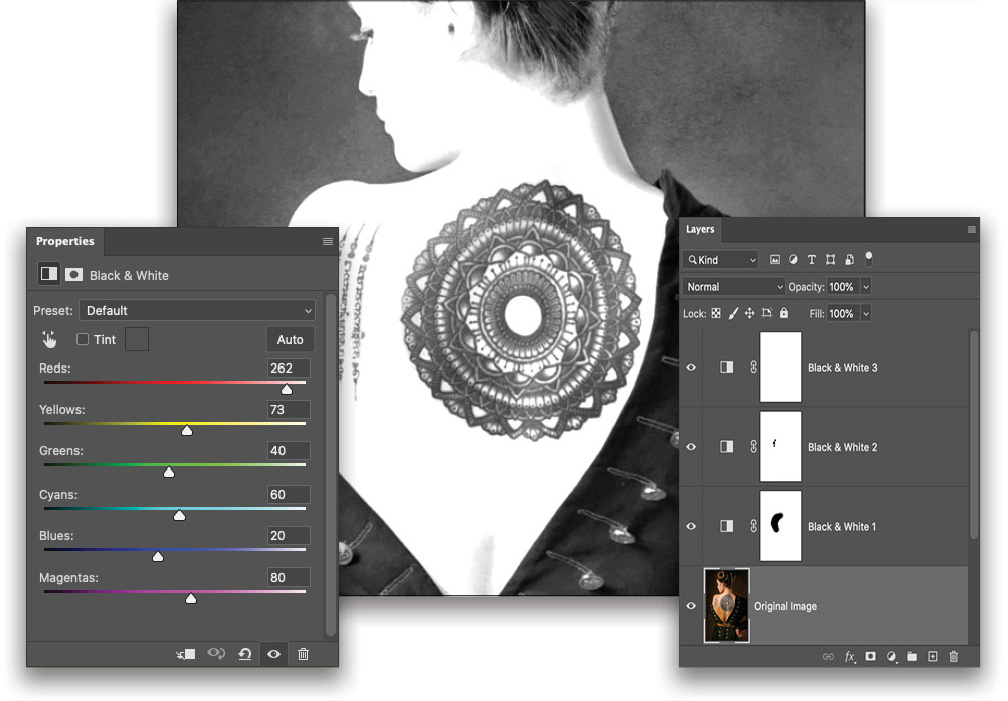
This is a great way to adjust visual contrast and separate various areas of the image tonally. Traditionally, people would do this with dodge-and-burning techniques, but this is very effective and less destructive.
Step Two: Merge a Copy
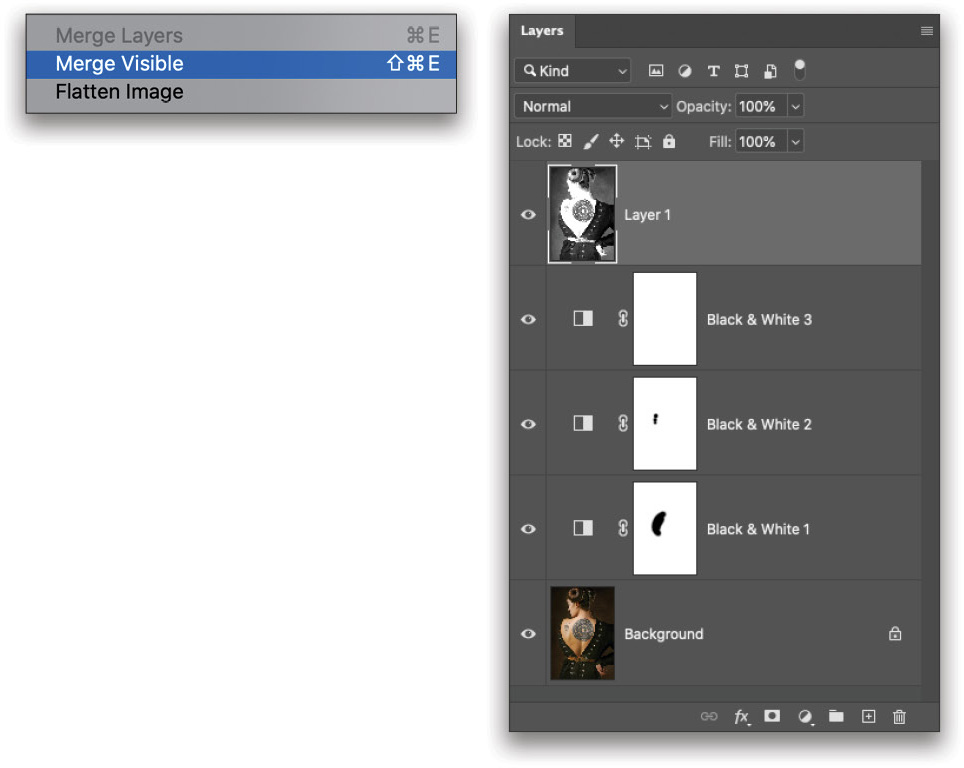
Now looking at the tonality, this technique has surrounded the tattoo with almost perfectly white pixels. The next step is to merge all of those adjustment layers and the image layer into a single layer that we can use to create our selection; however, we want the original photo to be unaffected. So click on the topmost layer in the Layers panel, hold the Option (PC: Alt) key, and go to Layer>Merge Visible. This will merge all existing visible layers into a new layer but leave all the original layers unaffected.
Step Three: Remove Unwanted Detail
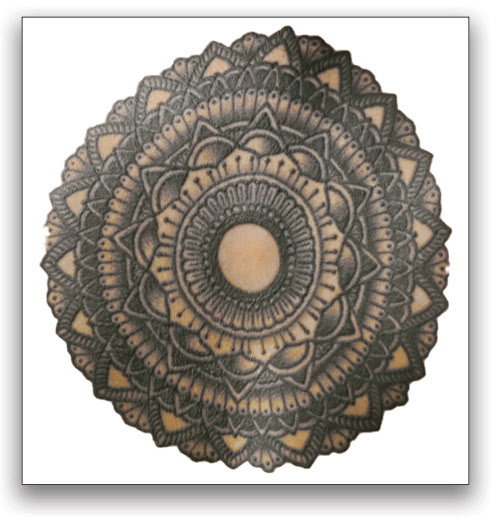
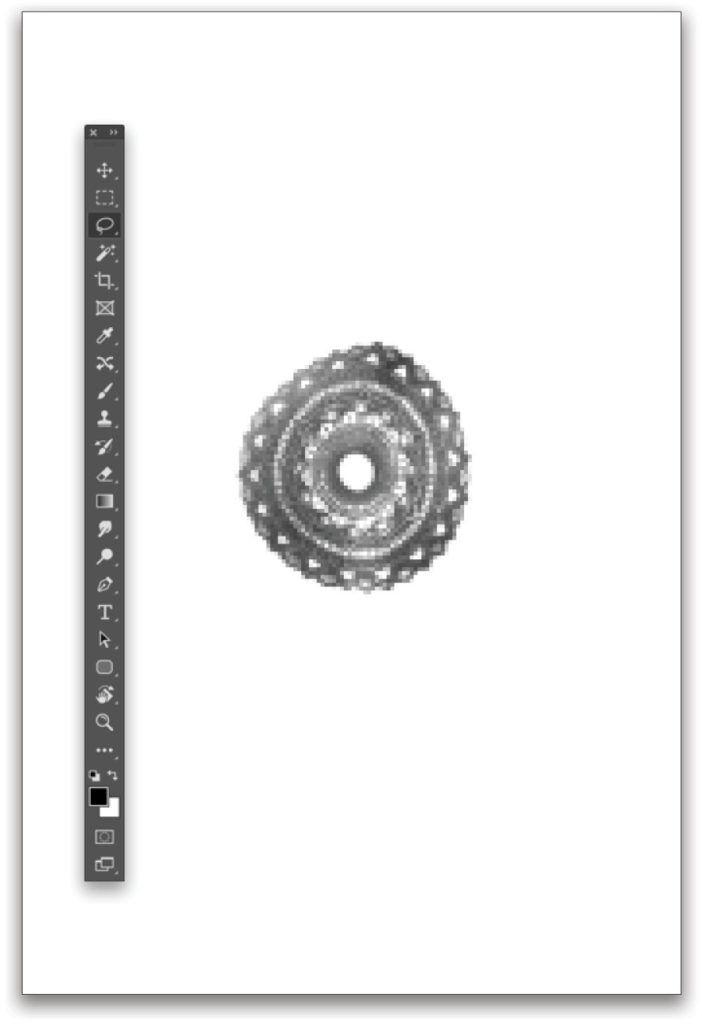
On your merged layer, you can now get rid of any details that aren’t part of the tattoo. You could paint with white with a hard round brush to block out those details, but I think a faster technique is to first draw a loose selection around the tattoo using the regular Lasso tool (L). Next use Select>Inverse and that will give you a selection of everything but the tattoo area. Now press the letter D on your keyboard to set the Background color to white, and then press Command-Delete (PC: Ctrl-Backspace) to fill the selected area with the Background color. Now you should have a canvas with only the tattoo detail on it. Press Command-D (PC: Ctrl-D) to deselect.
Step Four: Improve Remaining Detail
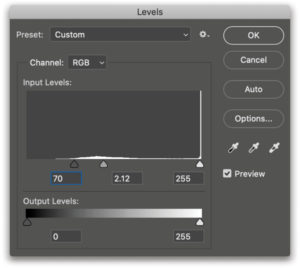
Use this step is to improve the overall appearance of the detail in the tattoo by increasing its contrast. It’s best to do this using a Levels adjustment, found at Image>Adjustments>Levels, as this offers more control to refine the contrast in the low or high frequencies, and then blend them with the middle gamma slider. (If you’re comfortable with Curves, that would work better still.) Using Levels on the isolated tattoo layer, you can see here that we increased the contrast only in the low frequency by bringing in the low key slider to 70 and the middle gamma slider to 2.12, compressing the tonal range in the shadows.
Step Five: Make It an Alpha Channel
The next step is to convert the tattoo into an actual reference for a selection. Alpha channels, and really any kind of mask, are just representations of a selection using shades of gray from 0–255. If it’s 255 (white), it will all be selected; if it’s 0 (black), it won’t be selected. Depending on where the tone falls in that range dictates how much it can be selected from a mask.
To turn the tattoo into an alpha channel, simply start by selecting all the pixels on the isolated tattoo layer by going to Select>All, and you should see the marching ants around the border of your canvas. Press Command-C (PC: Ctrl-C) to copy the selected area. It’s important to keep your selection active.
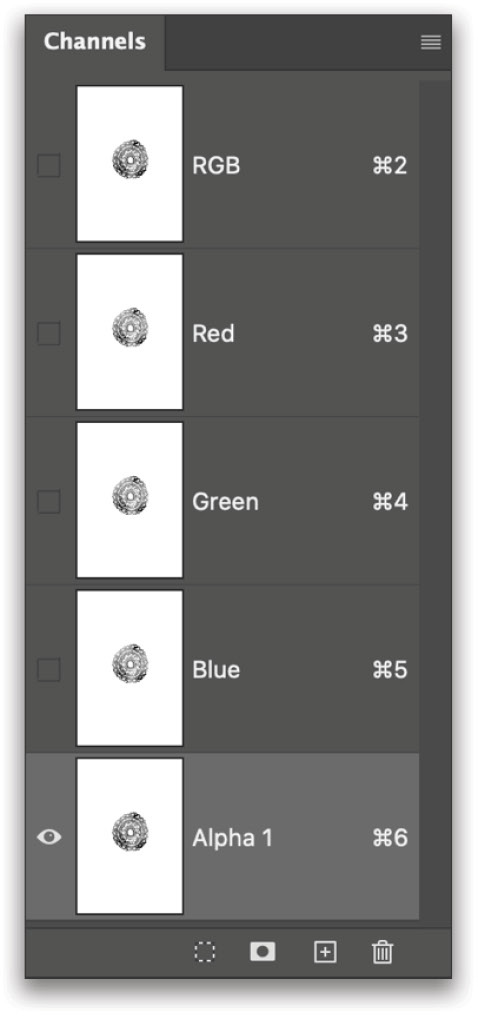
Now, at the bottom of the Channels panel (Window>Channels), click the Create New Channel icon (it’s the one with the little plus symbol). This will create a solid black alpha channel. With your selection still active, use Edit>Paste to insert the pixel information that you just copied into your alpha channel. Because you had the selection active, it will align perfectly with the original layer.
Step Six: Make It Work!
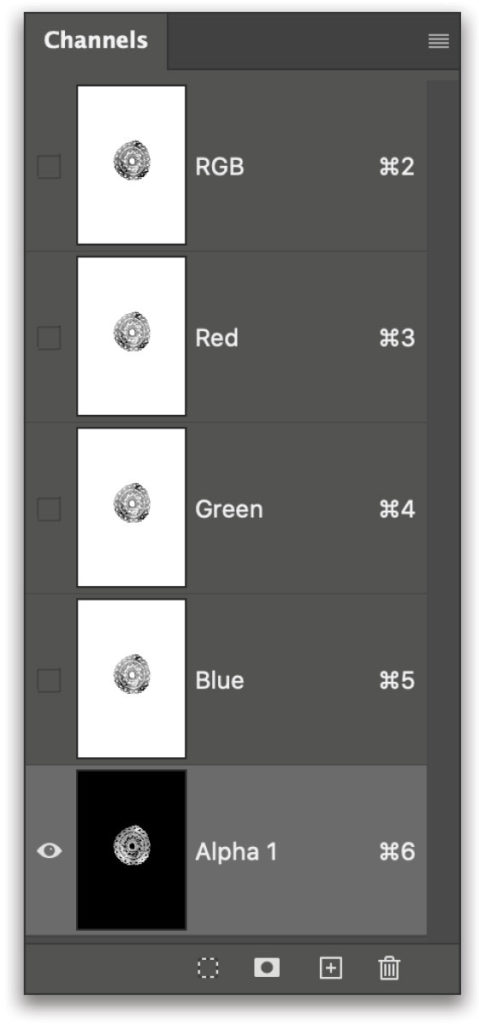
Because the alpha channel you just made is white with dark pixel details for the tattoo, we need to reverse this by going to Image>Adjustments>Invert. This will make the tattoo detail light and the negative space black.
You now have a mask of the tattoo! All those little nooks and crannies and extra details are isolated, and you didn’t have to spend a lot of time Shift-clicking with the Magic Wand tool, or trying to force Select Subject to recognize all the little gaps in the design. This is “old skool” and it’s how we’ve done lots of complicated selections for years.
Step Seven: Load Your Selection
Click on the RGB channel in the Channels panel to go back to the image information of your layers rather than looking at only the alpha channel. Then, go back to your Layers panel and turn off the visibility of all your Black & White adjustment layers by clicking their Eye icons, and delete the merged visible layer used to isolate the tattoo. If you’re scared to delete anything, throw them all into a layer group and then turn off the visibility of the group.
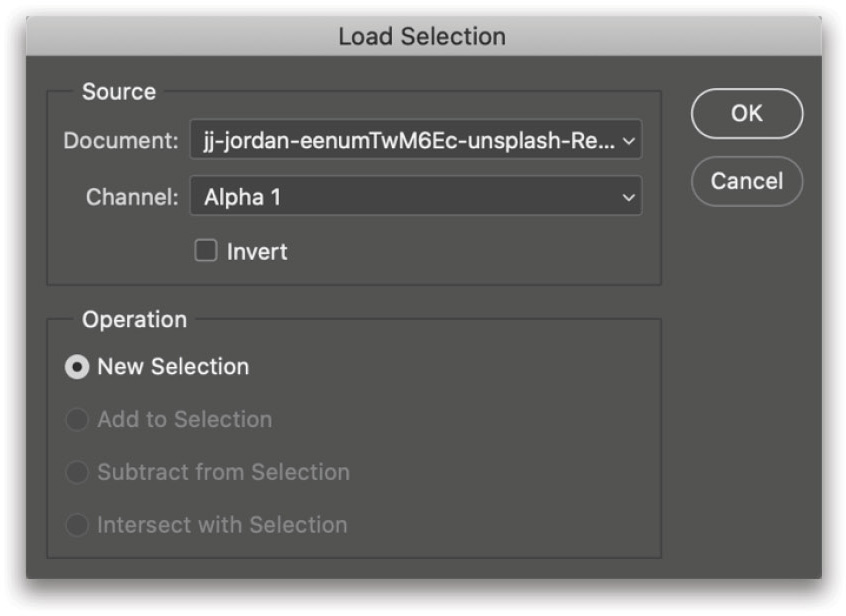
Go to Select>Load Selection, and where it says Channel, choose Alpha 1. Click OK, and you’ll have an active selection of the tattoo in the image.
Step Eight: Paste the Tattoo into Another Image
From here, you could copy the tattoo from the original image layer, and paste it into another photo or design. Here’s an example of moving it onto another person’s back (you can find this image here). Once placed as a new layer above this destination image, simply changing the Layer’s blend mode from Normal to Linear Burn near the top left of the Layers panel and reducing the layer Opacity to 80% gives a really effective

This article originally published in the August, 2020 issue of Photoshop User magazine.


