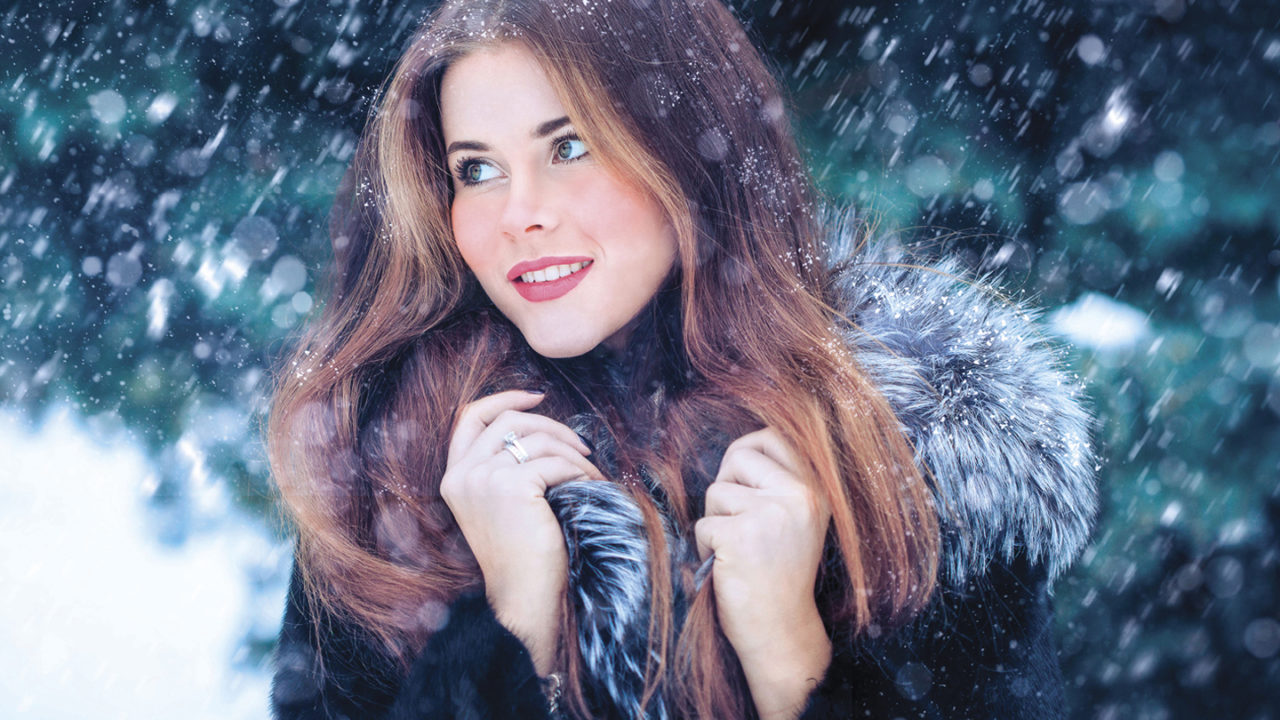
With winter rearing its frosty head in most parts of the country, it’s likely that most outdoor photography will involve the elements of the season. As beautiful as it is, shooting in falling snow can be quite a challenge. Those delicate flakes are composed of water after all, and traditionally water and cameras don’t mix very well. The erratic nature of falling snow also presents its own challenges. It’s impossible to keep flakes from obscuring your subject’s face, and if the flakes are large enough, they can play havoc with your auto-focus sensors—all leading to a potentially very cold, frustrating, and unproductive photo shoot.
As an alternative while the snow is falling, consider staying inside where it’s warm, and adding the snow effect in Photoshop. In this tutorial, we explore a handful of techniques that can be used to easily and realistically add falling snow for a beautiful environmental winter portrait.
Step One
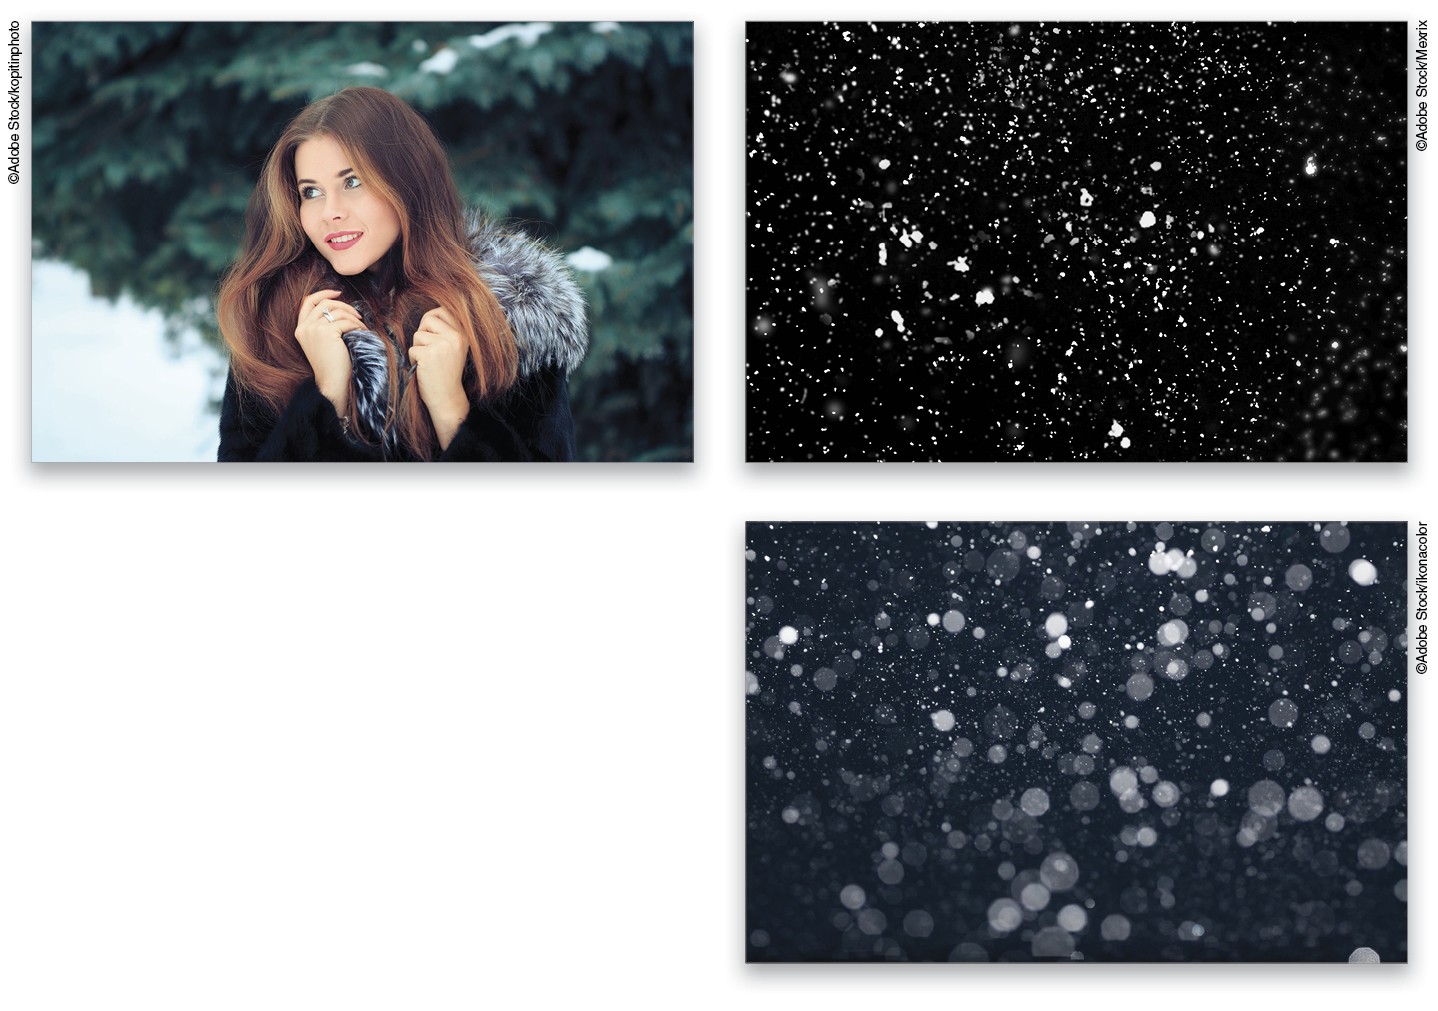
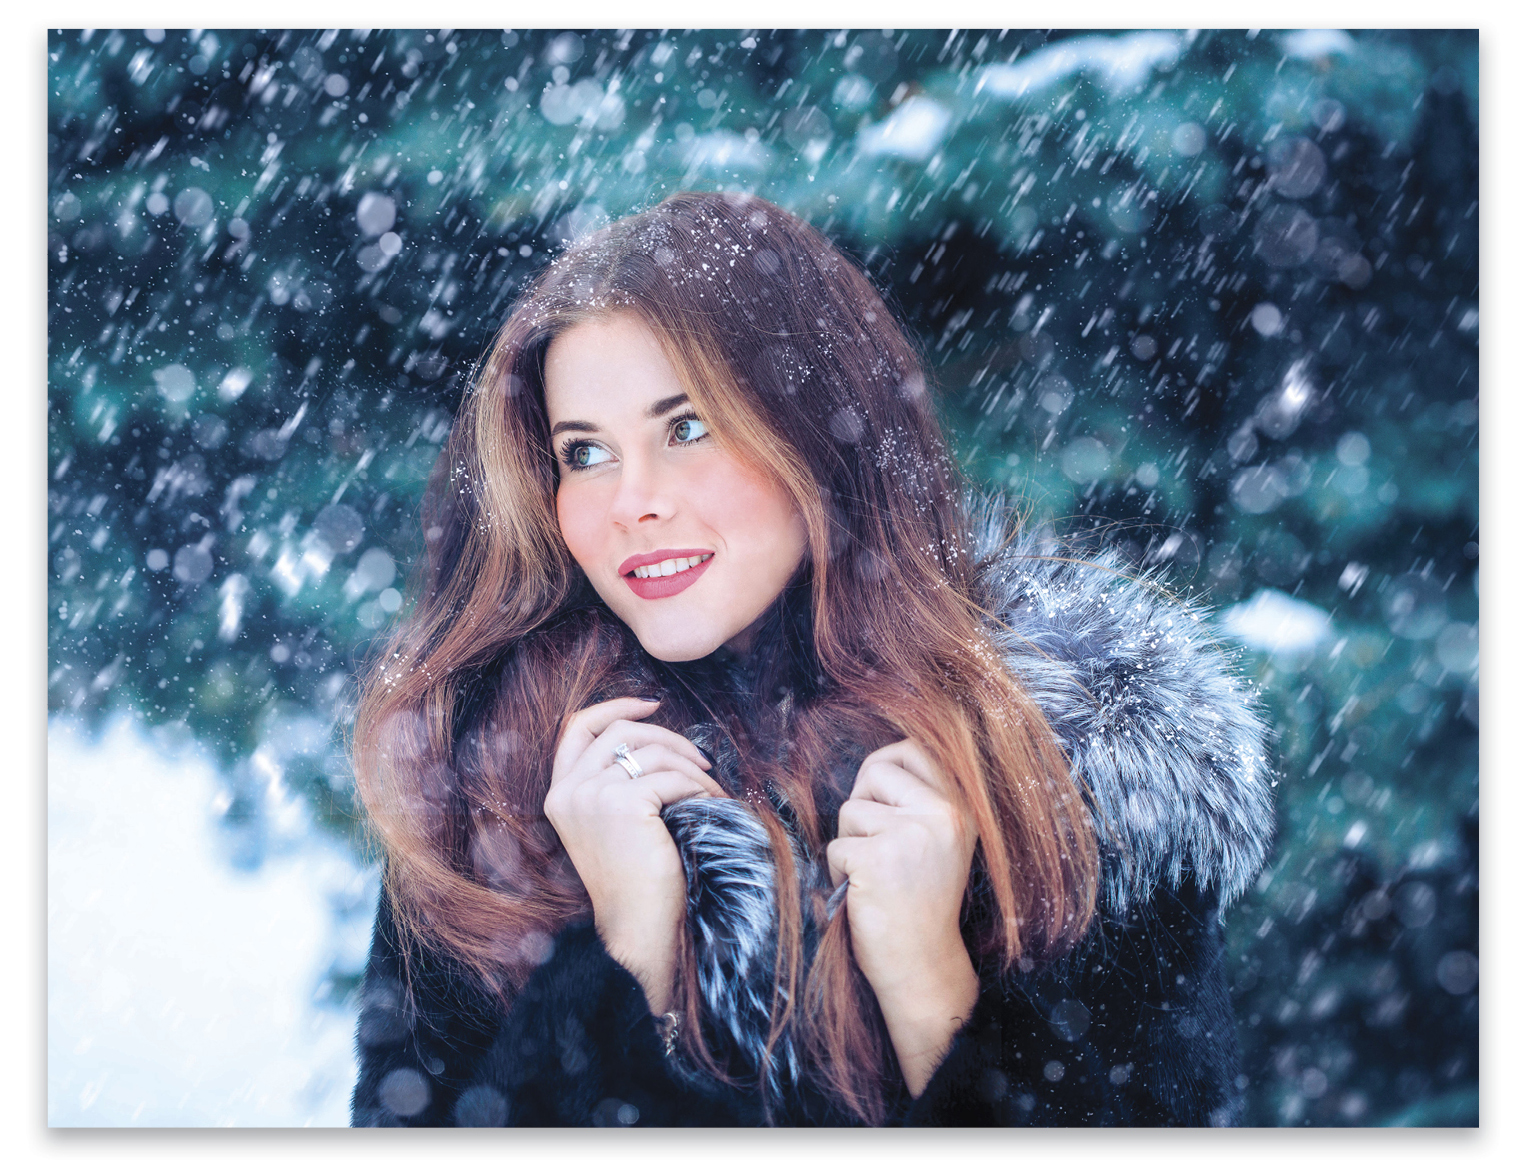
The most critical aspect of crafting a convincing environmental portrait is the portrait itself. We’ll begin with a portrait of an attractive young model out in a snowy landscape and two images of falling snow isolated against a dark background. Open all three of these images in Photoshop.
[KelbyOne members may download the files used in this tutorial at http://kelbyone.com/magazine. All files are for personal use only.]
Step Two
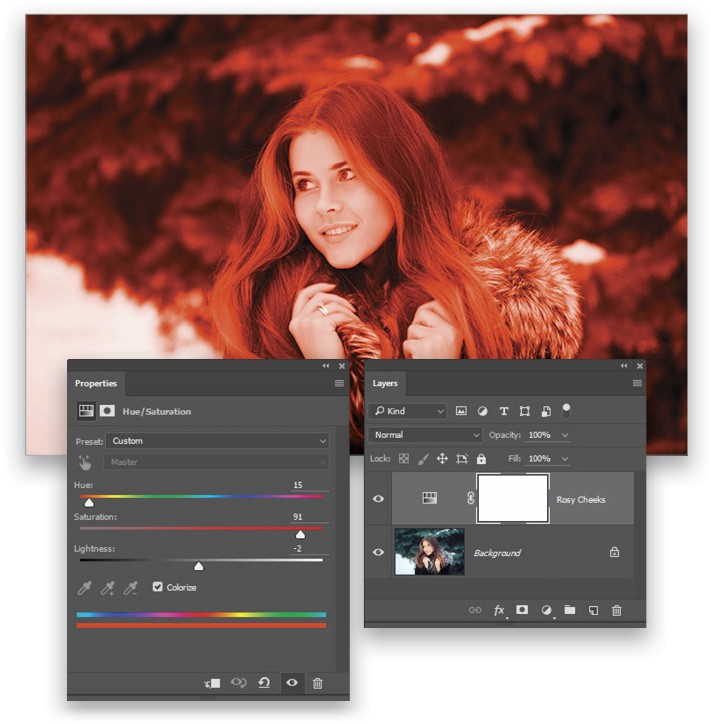
Cold weather will create visible changes to exposed human skin. Our bodies naturally collect blood in the areas where it’s most important. In our faces, that means our cheeks and noses receive a rosy tint, so in the Winter Portrait image, add a new Hue/Saturation adjustment layer through the Adjustments panel (Window>Adjustments). Double-click the name of the adjustment layer in the Layers panel and name it “Rosy Cheeks.” In the Properties panel (Window>Properties), check the Colorize option, set the Hue to 15, Saturation to 91, and the Lightness to –2.
Step Three
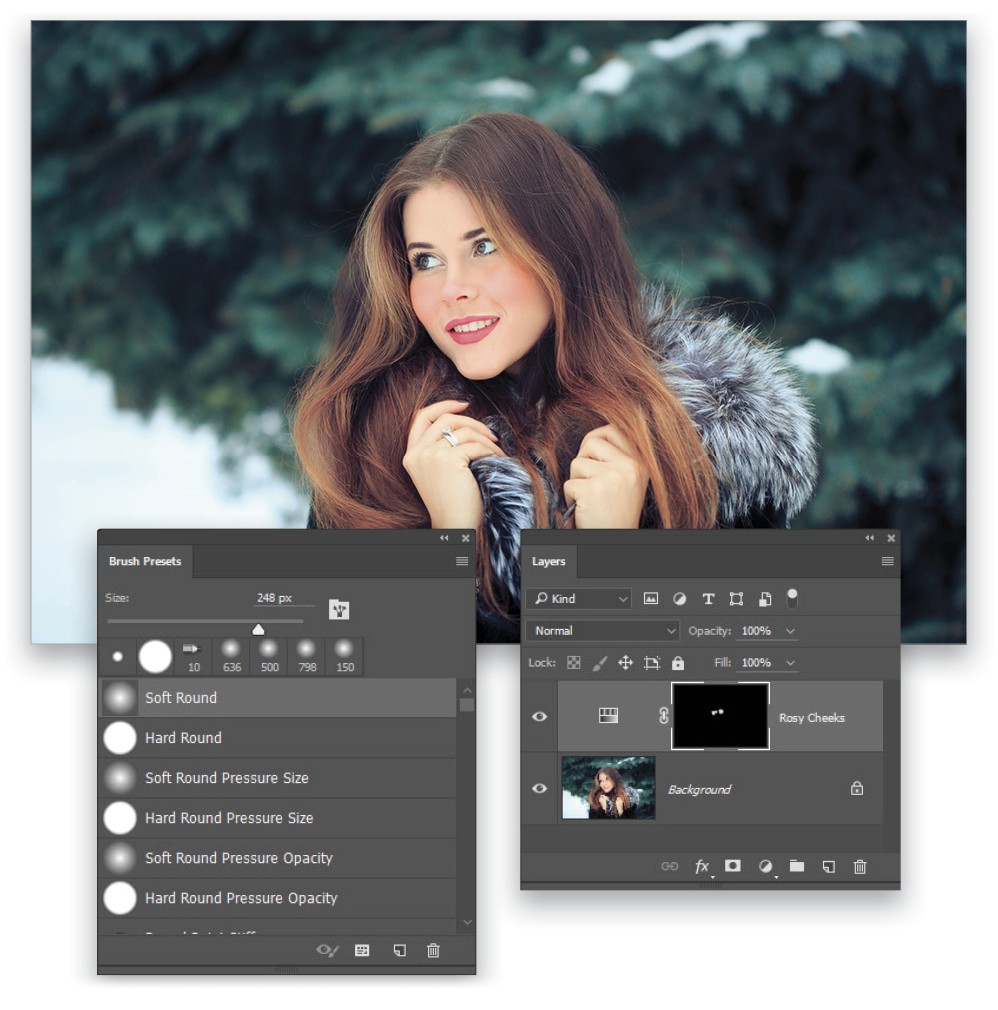
In the Layers panel, click on the layer mask of the adjustment layer thumbnail so it’s the currently active entity. This controls the application of the colorization and we’ll use it to restrict that color. Begin by using Edit>Fill, selecting Black in the Contents drop-down menu, and clicking OK to fill the mask with black, effectively hiding the red color. Then, grab the Brush tool (B) and use a Soft Round Brush tip from the Brush Presets panel (Window>Brush Presets) with white paint (press X until the Foreground color is set to white) to gently brush the color onto the cheeks and nose of the model. Use the Bracket keys on your keyboard to quickly change the size of the brush.
Step Four
The opposite effect of the rosy cheeks is that areas with less blood tend to lose color. Add another Hue/Saturation adjustment layer and reduce the Saturation to –34. Then use the same technique with the layer mask to apply this effect to only her forehead, chin, and fingers. This is intended to be a subtle effect, so be gentle with its application.

Step Five
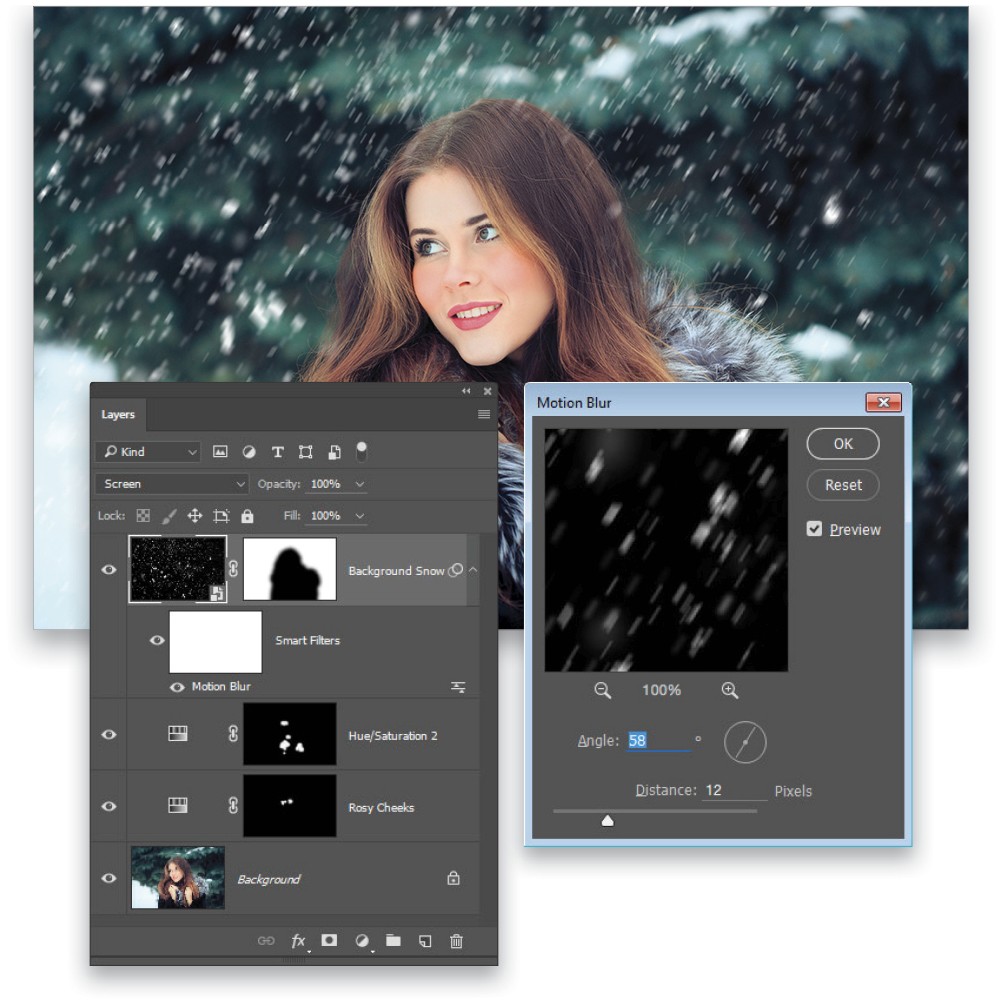
Switch to the FallingSnowOnBlackBackground image. Use the Move tool (V) to drag this image onto the portrait image. Scale the image to fill the frame with Edit>Transform>Scale. Press Enter to commit the transformation. Convert the layer to a smart object through Layer>Smart Objects>Convert to Smart Object, and rename it “Background Snow.” Set the blend mode to Screen near the top left of the Layers panel to render the black background invisible. Add a white layer mask with Layer>Layer Mask>Reveal All and use the Brush tool with black paint (press X again until the Foreground color is black) to hide the snow that’s falling in front of the model.

Step Six
The falling snow appears to be simply floating in the air; the effect will be more successful if there’s a sense of motion to it, so click on the Background Snow layer thumbnail in the Layers panel and go to Filter>Blur>Motion Blur. Set the Angle to 58°, the Distance to around 12 pixels (for a high-res image, use around 50 pixels), and click OK. The filter is applied as a smart filter, so if these settings aren’t to your liking, you can always double-click the name of the filter in the Layers panel to come back and change them.
Step Seven
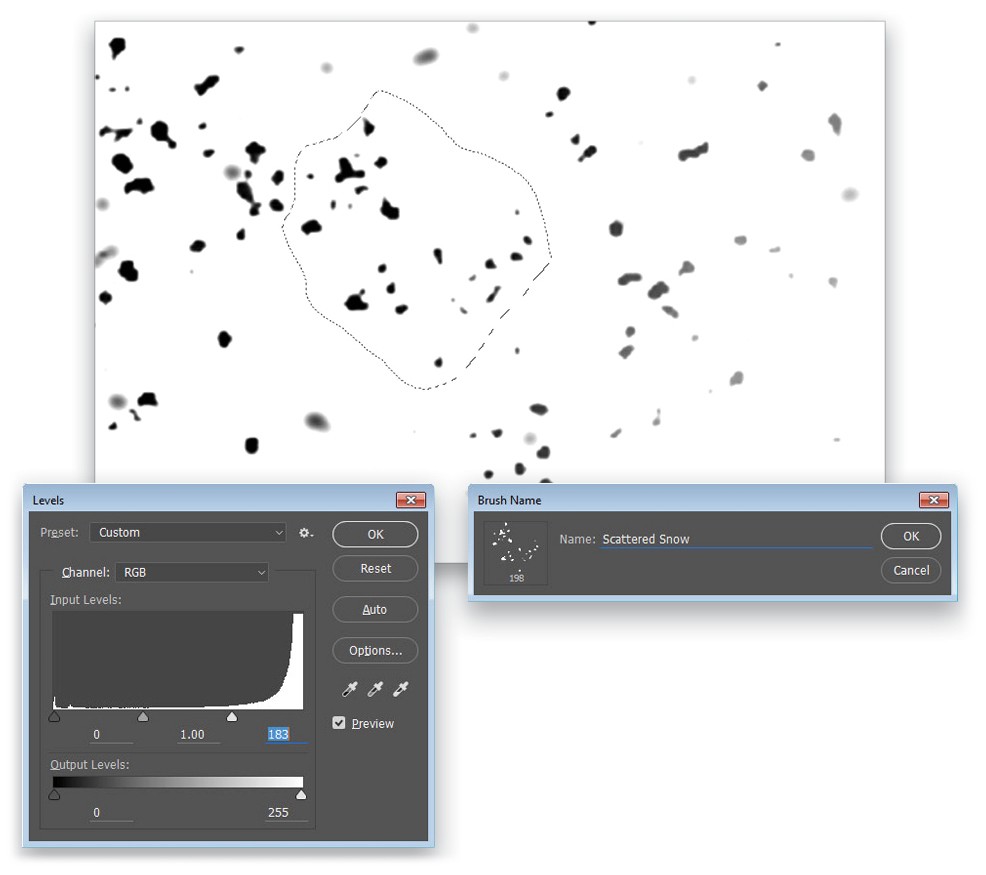
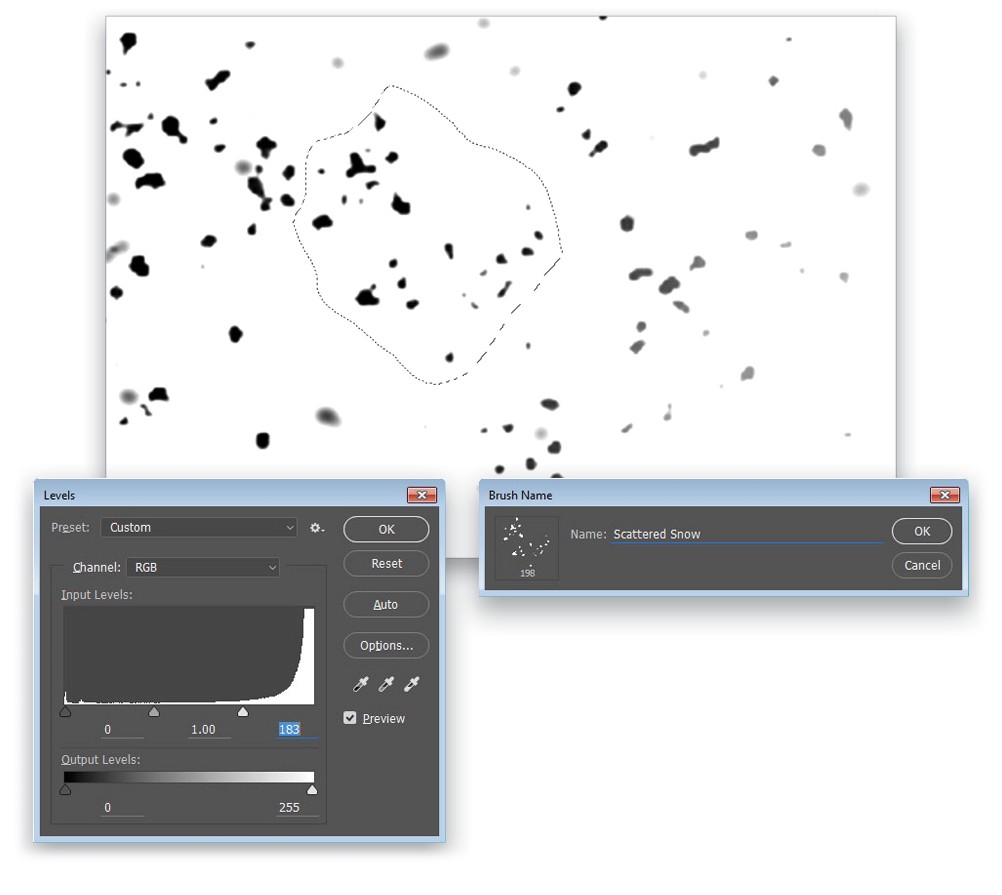
The next task is to create a custom brush to paint in the snowflakes that have fallen on the model. Switch back to the FallingSnowOnBlackBackground image. Photoshop brushes need to be black on white, so go to Image>Adjustments>Invert or press Command-I (PC
Ctrl-I). Increase the contrast with Image>Adjustments>Levels by pulling the rightmost slider below the histogram to about 183 and clicking OK. Then, use the Lasso tool (L) to select a small area of clustered snowflakes, and go to Edit>Define Brush Preset. Name your brush “Scattered Snow,” and click OK.
Step Eight
Switch to the Brush tool, and open the Brush panel with a quick press of F5 or go to Window>Brush. In the Brush Tip Shape settings, set the Size to 35 px (set it to around 175 px for a high-res image) and the Spacing to 10%. In the Shape Dynamics settings, set the Size Jitter to 44%, the Angle Jitter to 98%, Roundness Jitter to 35%, Minimum Roundness to 25%, and check both the Flip X Jitter and Flip Y Jitter options. In the Scattering settings, click the Both Axes option, set the Scatter to 134%, and Count Jitter to 21%. (Tip: Consider using the New Brush Preset icon at the foot of the panel to save all of these settings in a single brush preset.)
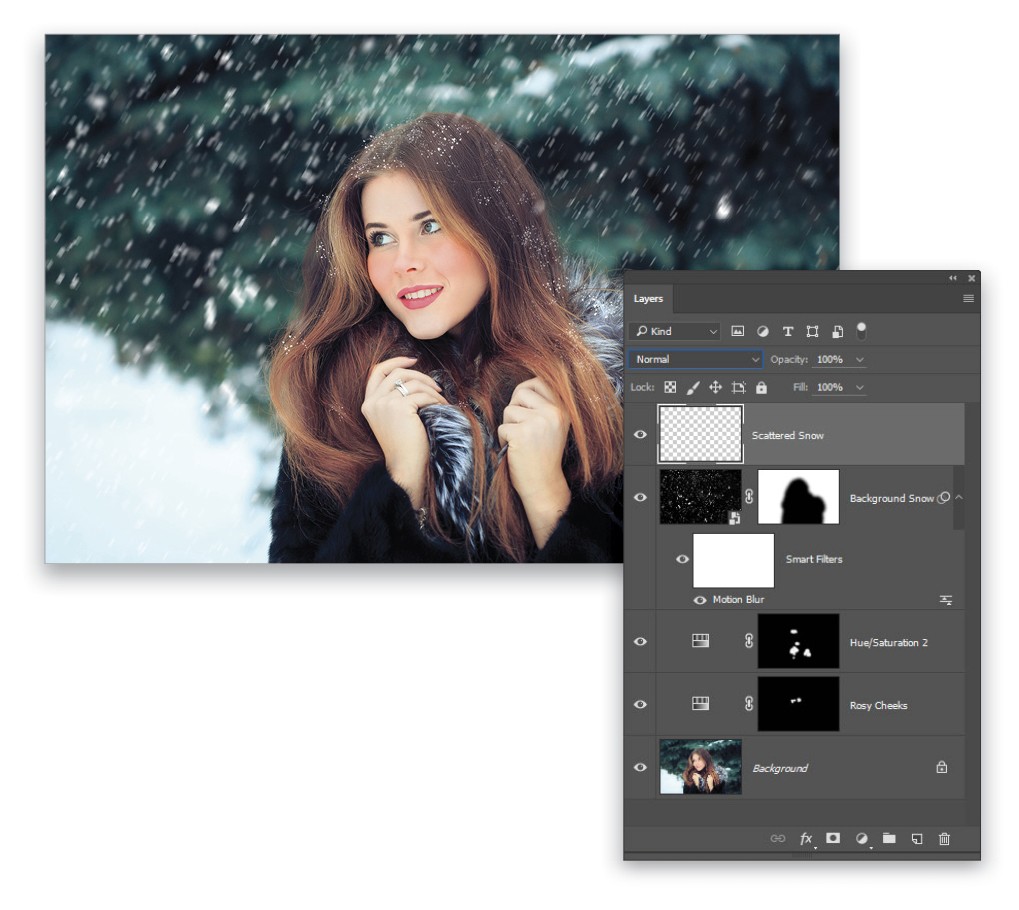
Step Nine
Return to the portrait image and add a new layer with Layer>New>Layer or use Shift-Command-N (PC: Shift-Ctrl-N). Name the layer “Scattered Snow” and use the newly minted brush with white paint to gently dab some snowflakes onto the model’s hair and coat. (You’ll want to single-click to apply the snowflakes rather than click-and-drag.) The scattering of the brush makes it a bit uncontrollable so use the Eraser Tool (E) to remove stray flakes.
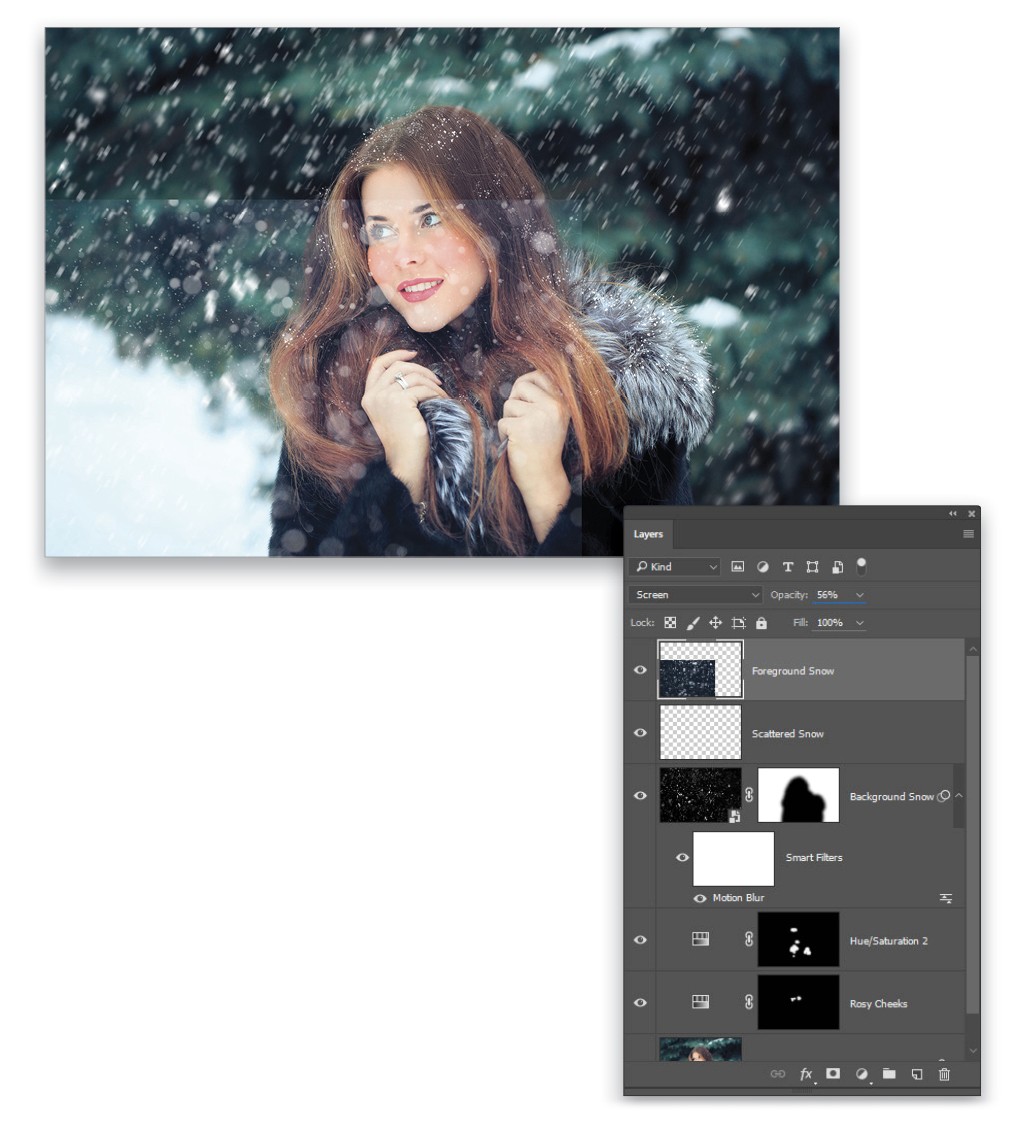
Step 10
Using the Move tool, drag the SnowFallingNightSky image onto the portrait file. Use Edit>Free Transform or Command-T (PC: Ctrl-T) to scale and position this image into the lower-left portion of the frame. It should cover just more than half the height and width. Press Enter to commit the transformation. Set the blend mode to Screen to render the black areas invisible. Then, reduce the layer Opacity to 56% so the snowflakes aren’t overly prominent.
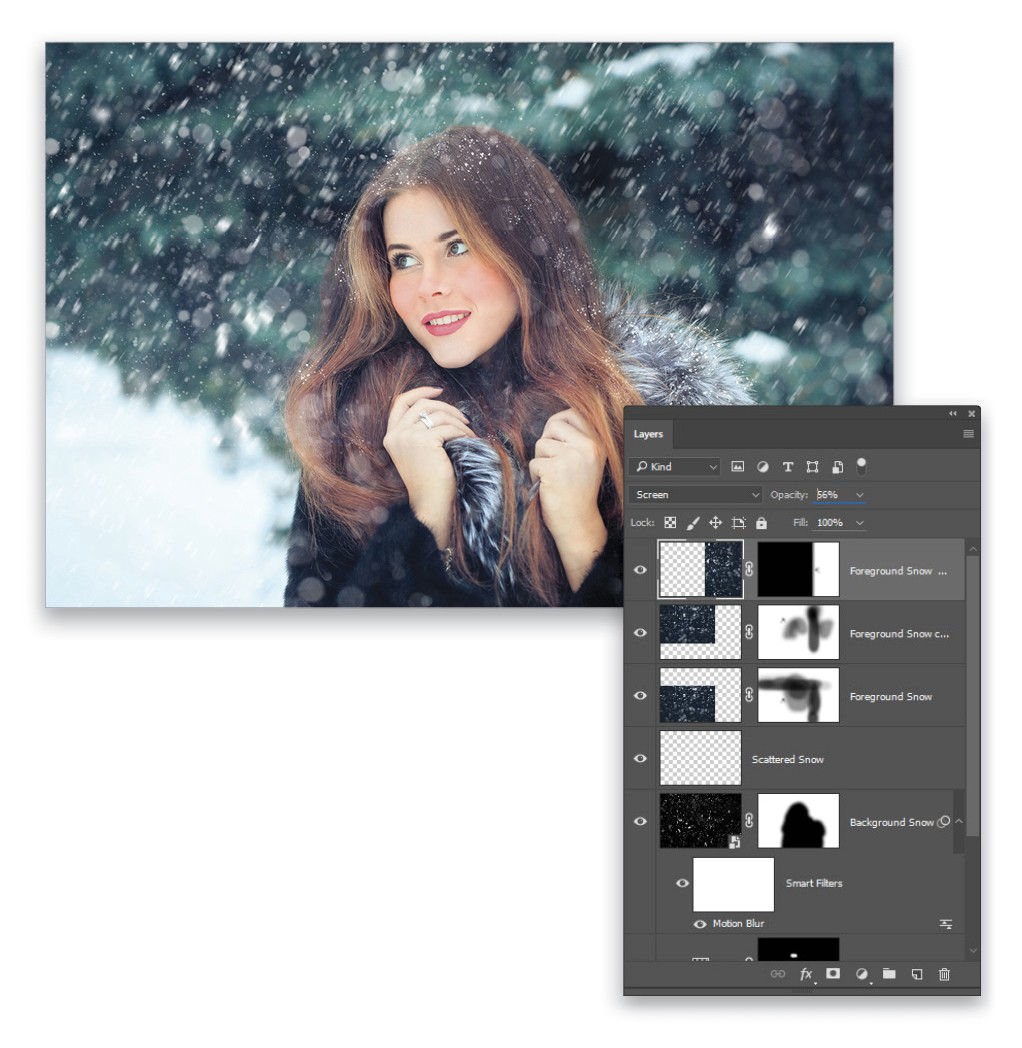
Step 11
Duplicate the Foreground Snow layer twice. (Tip: Pressing Command-J [PC: Ctrl-J] is a quick way to create duplicate layers.) Using Free Transform, rotate and position the duplicate layers to fill the rest of the frame. Avoid scaling the layers individually as they should all be a consistent size. There will be areas of obvious overlap, so add a layer mask to each Foreground Snow layer and use a Soft Round brush tip with black paint on the masks to remove the obvious seams and overlaps. Also use the brush on the masks to clear away any flakes that are obscuring the model’s face. You can lower the Opacity of the brush in the Options Bar to reduce the intensity of some of the snowflakes without painting them away completely.
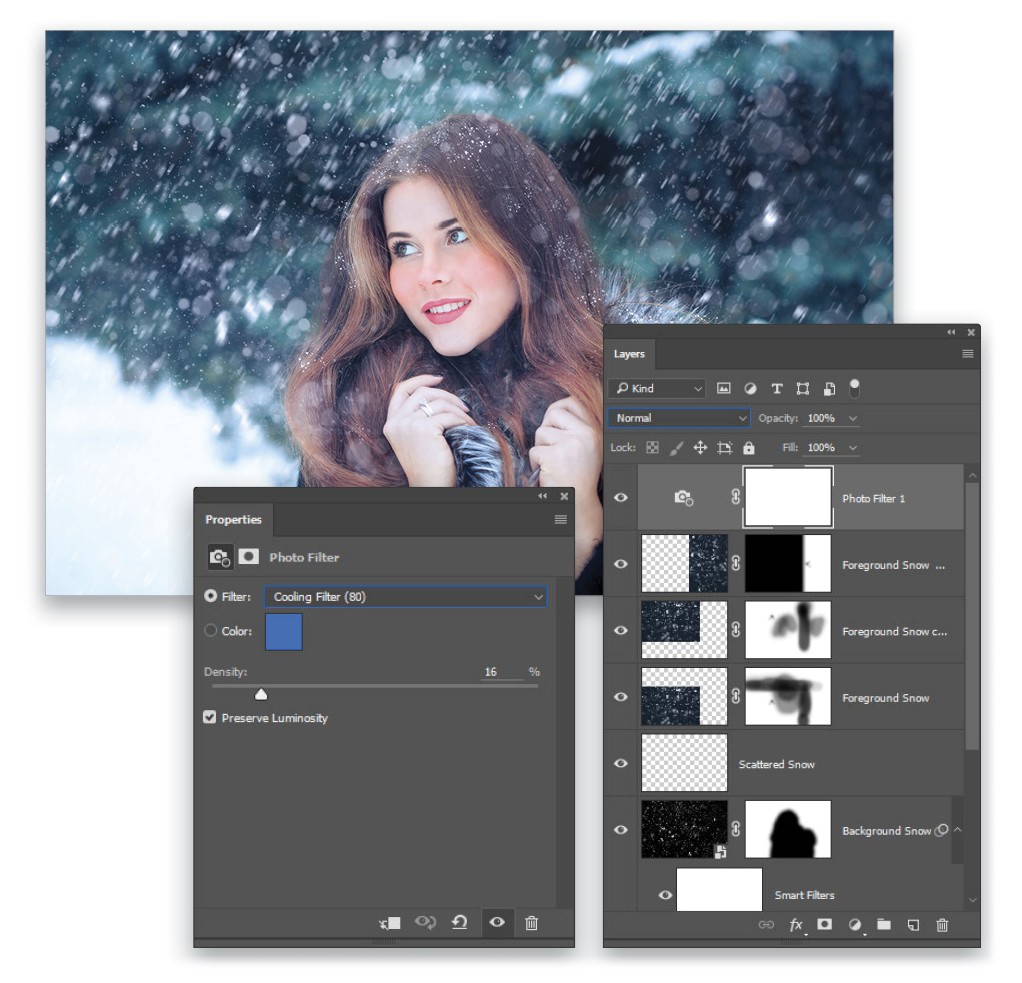
Step 12
To enhance the cold effect even further, add a Photo Filter adjustment layer from the Adjustments panel, and drag this layer to the top of the layer stack in the Layers panel. In the Properties panel, choose Cooling Filter (80) from the Filter drop-down menu. Set the Density to 16% and check the Preserve Luminosity option. This adds a subtle bluish hue to the overall image that contributes to the idea of it being cold.
Step 13
Create a merged layer by holding down the Option (PC: Alt) key and going to Layer>Merge Visible. Convert this layer to a smart object and go to Filter>Camera Raw Filter. In the Basic tab, set the Clarity to +30 and the Vibrance to +43. Click OK to close the filter and behold your final winter portrait image!
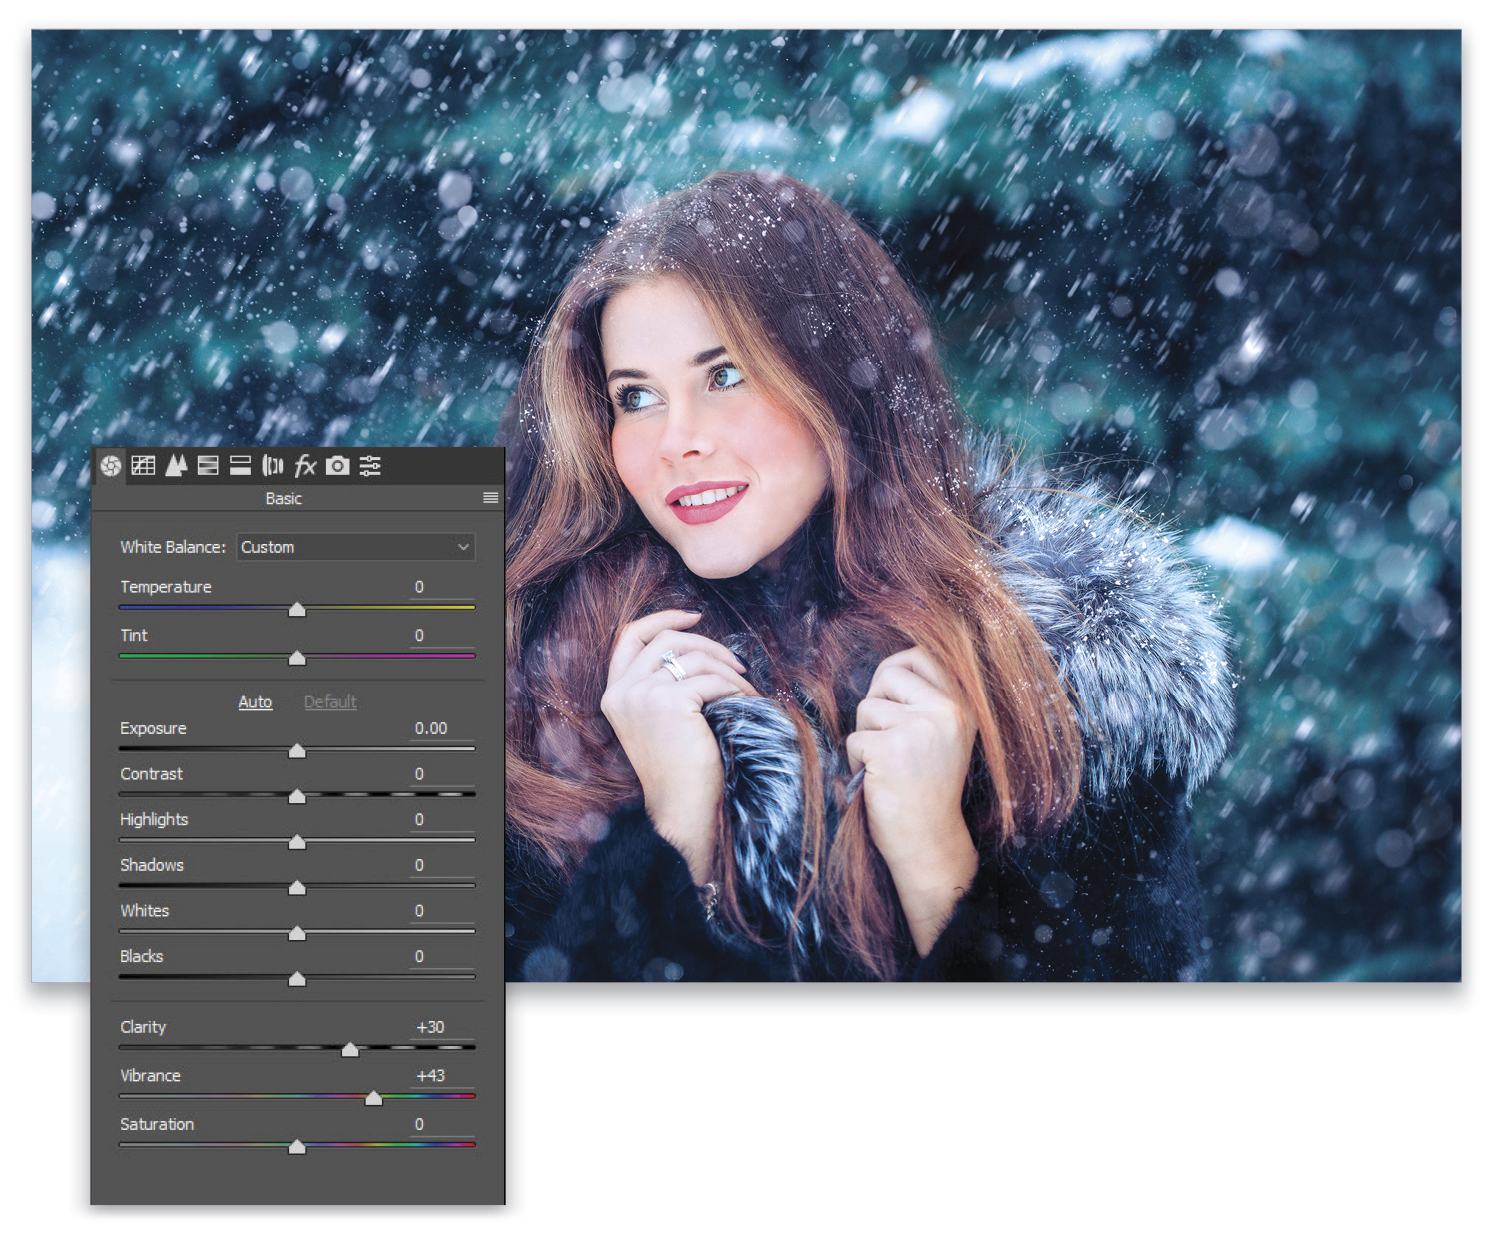
Adding environmental effects, even something as complex as thousands of falling snowflakes, isn’t that difficult to accomplish. The key is to realize the small details that need to be included, such as rosy cheeks, snowflakes on hair and garments, and different depths of snowfall images. Each of these elements is small, but together they add up to a larger effect that’s beautifully realistic.
This tutorial originally published in the December, 2016 issue of Photoshop User magazine.


