
Retouching often requires you to go between extreme detail and looking at the overall image. It can be a real challenge to keep track of everything that needs to be done, especially after a significant amount of time staring at the same image. Even worse, sometimes corrections we make with cloning and healing may leave artifacts behind that aren’t easy to spot. This issue, I’ll show you how to use some “helper layers” that will make it easier both to find areas that need correction and to keep fatigue at bay.
Solarization
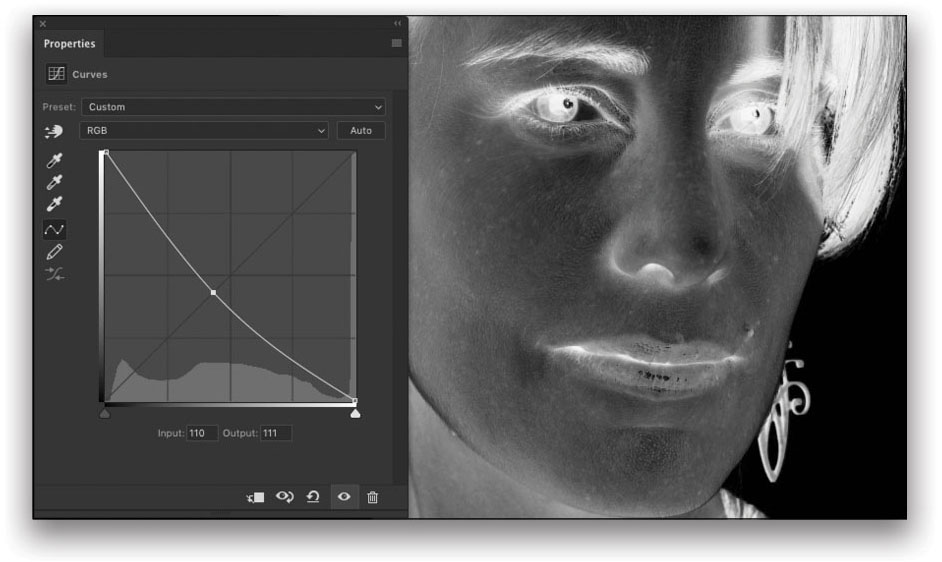
A solarization curve really exaggerates small changes and can highlight subtle blemishes that need to be fixed, lets you keep track of fine details like skin texture that can sometimes be smeared while healing and cloning, and reveals the effects of dodging and burning. The curve is simple to set up: After adding a Curves adjustment layer to your layer stack (Layer>New Adjustment Layer>Curves), in the Properties panel, click about 1/4 of the way up on the line, and drag up, then click another 1/4 to the right and drag down, then repeat so you have a total of four points on the curve. Once you have your anchor points in place, drag them around carefully to resemble the curve in this image.
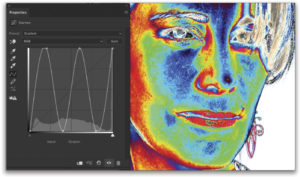
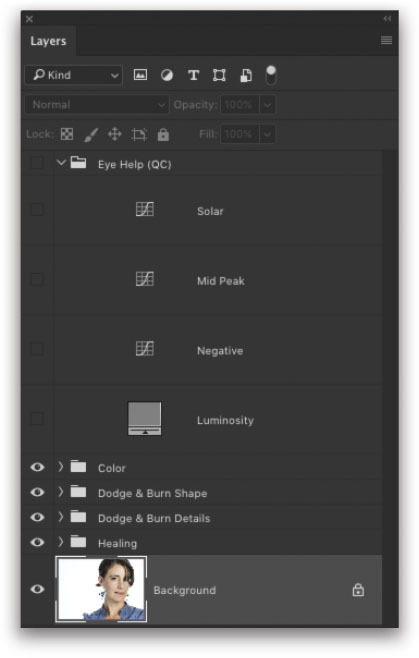
Keep all of your helper layers at the very top of your layer stack so you can see how all of your corrections behave, and be sure to name them appropriately—“Solar,” in this case. With the solarization curve in place, lots of things should jump out at you, including tiny features, and the transitions between colors and between brightness levels. Things like small hairs, weird pores, and makeup oddities should be plainly visible, as well as skin textures and oily highlights in some places.
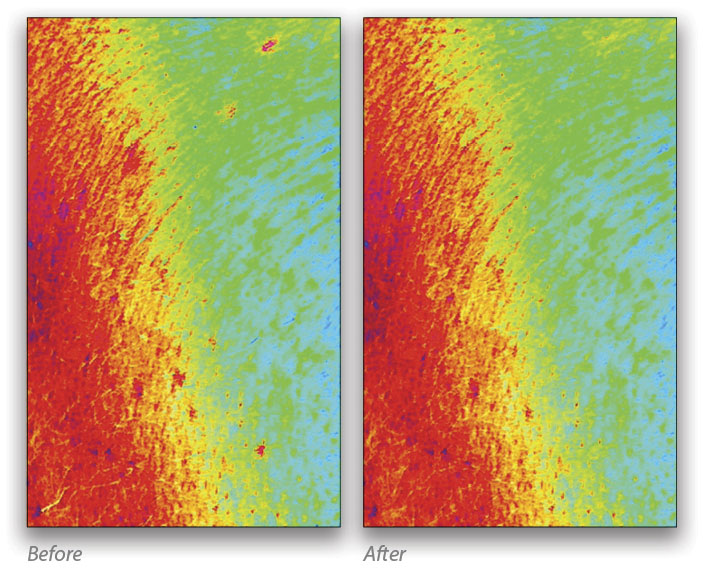
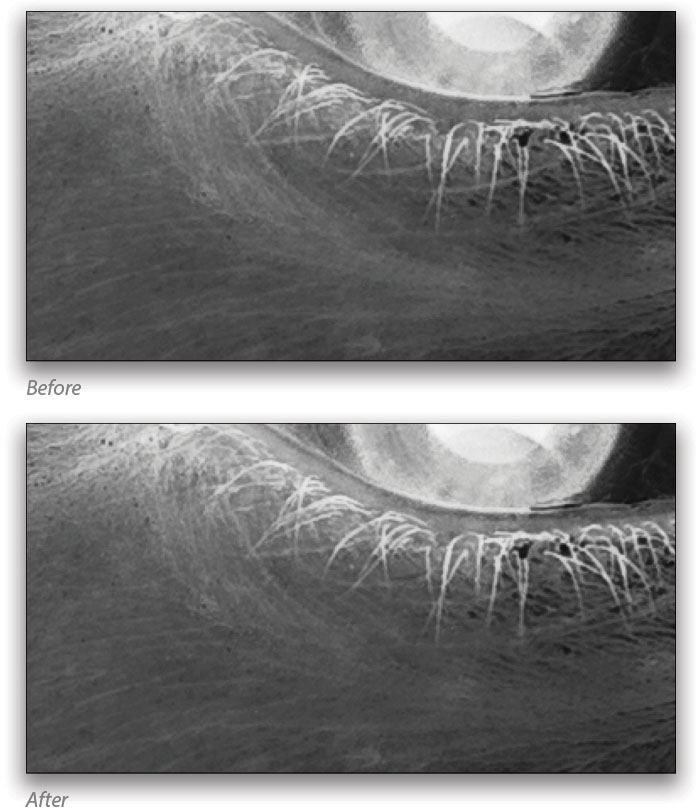
Don’t worry about trying to relate the solarized colors to real colors—just pay attention to the transitions between areas. When you’re working on healing and cloning, it’s helpful to leave the solarization layer on in tricky areas, like a single hair over textured skin. It will be immediately obvious if you change the direction of texture, or make something too smooth. Toggling dodge and burn layers on and off below the solar layer will show odd transitions and regions that need better blending.
Midrange Peak
The next curve I like to use is a midrange peak. It lets you see the smoothness of wider gradients without being broken up like solarization. I use this for checking skin texture, and it’s what I typically use when healing and cloning out small hairs and some blemishes on the face.
Turn off the solarization curve layer and add another Curves adjustment layer named “Mid Peak.” This time, click on the middle of the curve and drag it to the top. Now click on the highlights anchor point in the top right and drag it straight down. Finally, move the white control slider (at the bottom right) slightly in to the left, and the black control slider (at the bottom left) a bit in to the right. This gives you a nice smooth bump right in the middle.
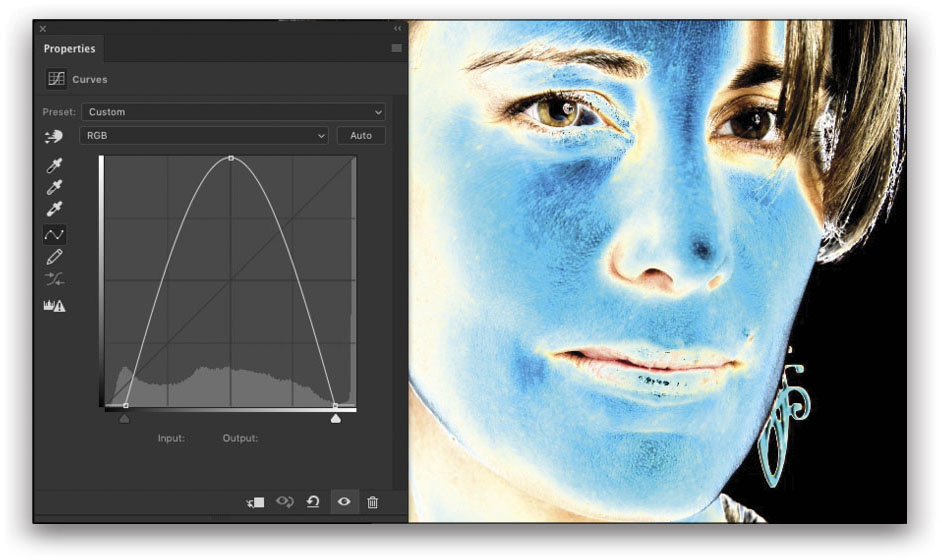
The result is kind of inverted, but not completely. Notice how the skin tells you pretty much everything that’s going on. Texture may be easier to see with a midrange peak instead of solarization.
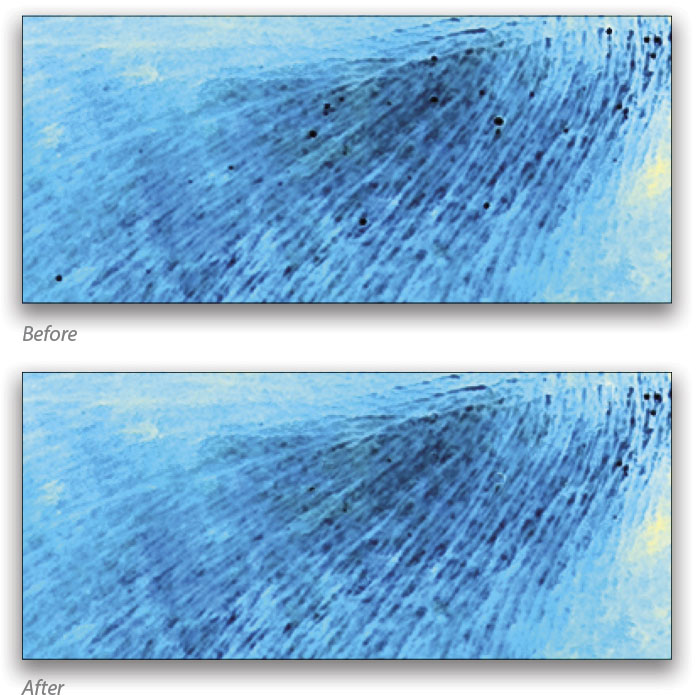
The difference from a solarization curve is that it’s a little easier to keep the original picture in mind. Here’s a trick for doing fine healing: Create a blank layer above your Background layer, set the blend mode to Darken, and use the Spot Healing Brush (J) to go after tiny black dots and really dark hairs when using the Mid Peak layer. These are actually little sparkles and fine, light hairs on the normal image. Blemishes that are reddish/brownish or have a light or white halo around them are probably actually dark features in the base image, so heal those on another layer set to Lighten blend mode. You can continue working on these layers without the mid peak adjustment, too.
Dodging and burning with the mid peak adjustment tends to be better suited for fine corrections, such as removing dark lines under eyes, or reshaping bumps in the skin without removing them completely. While you can use it for larger features, it tends to be difficult to estimate the intensity of changes, so just toggle it on and off rather than working with it constantly on in that case. For overall shape and contouring, use the next set of helper layers.
Luminosity and Negative
This time, we’re going to add two adjustment layers to help see the results of dodging and burning. The first will be a Solid Color fill layer (Layer>New Fill Layer>Solid Color). In the New Layer dialog, set the blend Mode to Color, and click OK. When the Color Picker appears, in the HSB section, set S to 0% and B to 50%, and click OK to fill the layer with 50% gray. This effectively desaturates your image, so you aren’t distracted by color; you’re looking at the luminosity, which would be a great name for that layer (hint, hint).
The next is another Curves adjustment layer just above the Solid Color fill layer, but with a twist. Grab the left anchor point and drag it to the top, then drag the right anchor point to the bottom. This acts just like the invert adjustment layer, but has the added benefit of letting you adjust contrast with the curve. Now drag the middle of the curve slightly up or down—you’ll adjust this from time to time while working to change the contrast of the image, which is helpful to judge overall results of dodging and burning. Name this one “Negative.”
There are tons of dodge and burn methods, so choose your favorite. I wrote about a few techniques, so give those a try. My favorite is to use separate Curves adjustment layers for dodging and burning and painting on the layer masks. [Also see “Retouching Men vs. Women” starting on page 62 where Brittany Smith uses this dodging and burning technique.—Ed] The point is to work non-destructively on independent layers. Consider using two sets: one for fine details that you’ll use with the mid peak method above, and one for shaping to be used with this luminosity/negative helper.
To use this set of helper layers, first select all of them in the Layers panel, group them together (Command-G [PC: Ctrl-G]), and name the group “D&B Helper.” Then, toggle the group on/off every few strokes while making your corrections. Generally, work with just the Luminosity layer, and use the Negative layer now and then to help spot problem areas or over-correction. The goal is to keep from creating harsh transitions or pushing a bit too far. You can also toggle the Solar layer on and off, while the D&B helper group is active. The result is insanely contrasty! Those barely shaded areas and hidden edges will suddenly pop out. If you toggle all the helper layers on and off, you’ll get a really good idea of how subtle shading can affect body shapes and smoothness. And, be sure to toggle the Dodge & Burn groups on and off to see your progress.
These helper layers can bring out stuff you’ve never noticed in your images, giving you more power and control over your retouching. To make the best use of them, here are some general tips:
- Keep your helper layers in a single group so you can combine them and more easily see a before/after by turning them on and off together.
- When working at close detail, be sure to zoom out every few minutes to keep perspective. The Bird’s Eye view is one way to do this (press-and-hold the letter H on your keyboard and then click-and-hold in your image), or open your image in a second window using Window>Arrange>New Window for [name of file].
- Tweak the various settings on each layer to get the most out of it. The whole point is to give you a different view of your image to pick out areas that need correction.
Remember that these are “helpers,” so only use them when they make sense. Don’t feel obligated to add them to every project, but do get used to how they function. And, of course, see if you can come up with other types of helper layers to make your retouching job easier, such as saturation or hue helpers. If you find something useful in your explorations, share it online with us!
All photos ©Scott Valentine. This article originally published in the March, 2017 issue of Photoshop User Magazine.


