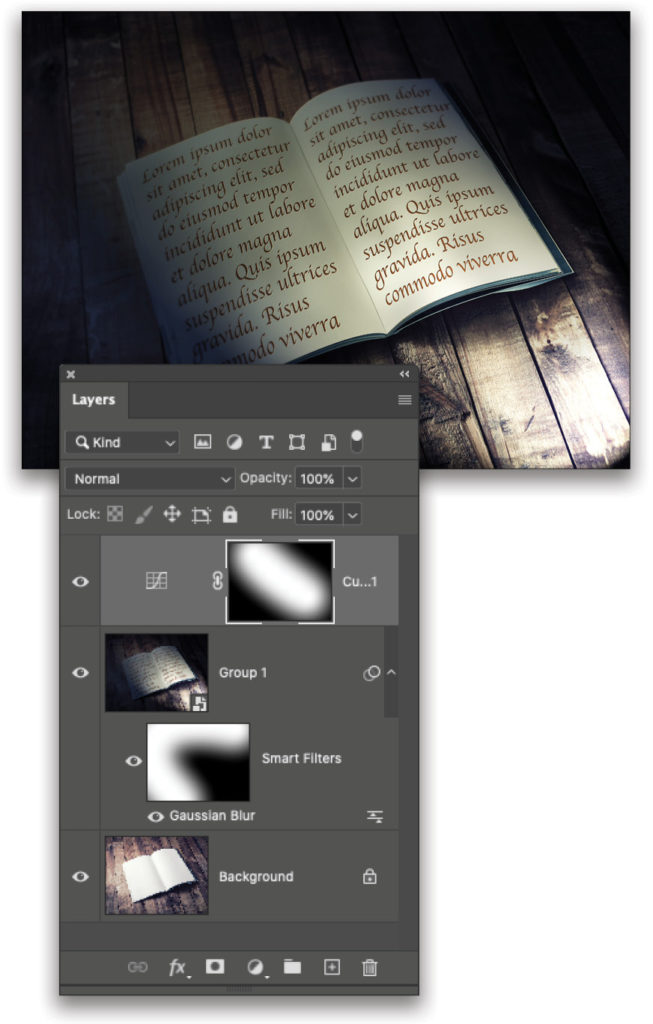
Did you know that you can paint in any adjustment or filter in Photoshop? That means you use the Brush tool (B) to apply the filter or adjustment only where you want it. Imagine the creative possibilities this opens.
When you apply an adjustment layer, it applies to the whole image. In the Layers panel, click on the white rectangle to the right of the adjustment layer’s thumbnail to make its layer mask active. Press Command-I (PC: Ctrl-I) to invert the mask from white to black, which will make the adjustment disappear in the image. Choose the Brush tool, and then press D to set your Foreground color to white. Now wherever you paint on your image (with the mask still selected), the adjustment will appear—an Adjustment Brush in Photoshop. Neat!
I also said filter, didn’t I? To do this with a filter, Right-click on the layer to which you want to add the filter and choose Convert to Smart Object. Now when you apply the filter to the entire image, it will be applied as a smart filter. In the Layers panel, you’ll see the Smart Filters mask below the layer and above the filter name. Click on the mask, press Command-I (PC: Ctrl-I) to invert it, and you’re ready to paint with white to add that filter where you want.

This tip previously published in Colin Smith’s Photoshop Tips column, in the June, 2020 issue of Photoshop User magazine.


