
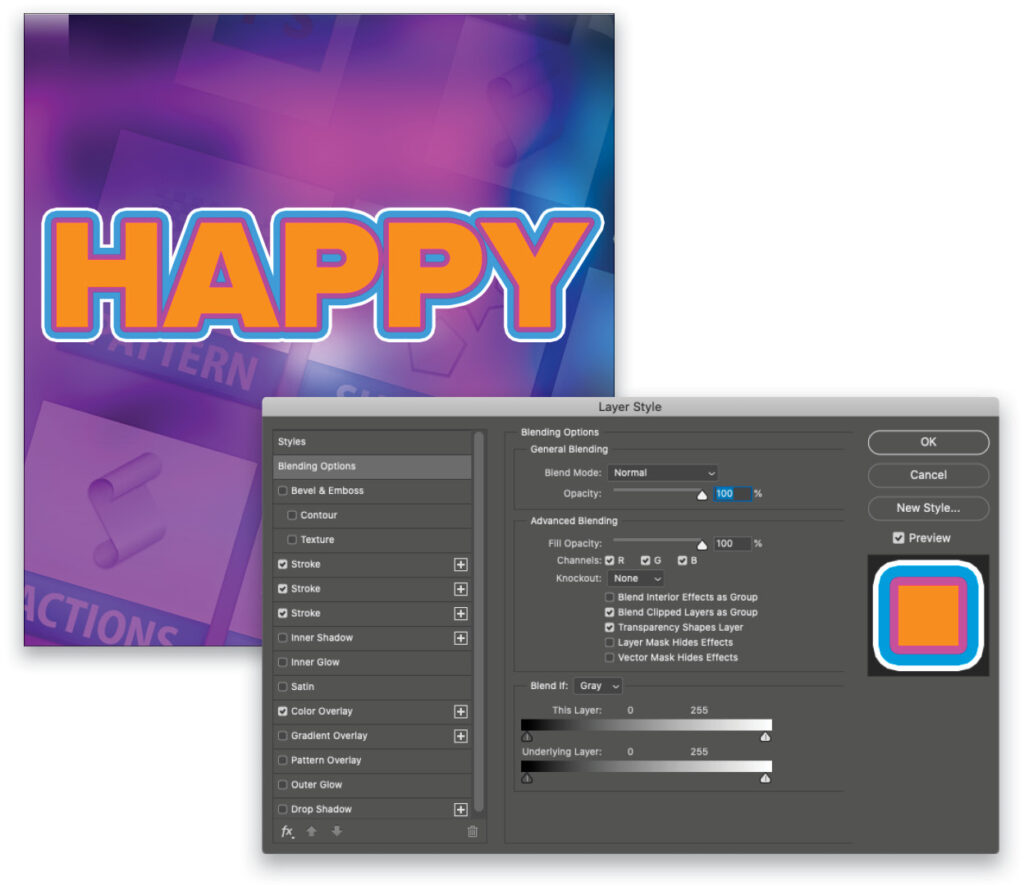
There are different ways to create a stroke (or outline) around an object. For this tip, we’re going to use layer styles because we want to outline our text with multiple strokes. (It’s kind of a 70s throwback thing that’s hip again). Click on the little fx icon at the bottom of the Layers panel, select Stroke, and set the Size, Position, Blend Mode, and Color. Now, to create a second stroke, click the plus to the right of Stroke in the list on the left side of the Layer Style dialog. Choose the bottom instance of the stroke and change its Size and Color. You won’t see anything until it’s wider than the stroke on top, because the one on top is hiding the one below it. Rinse-and-repeat and you have multi-stroked text.
This tip previously published in the January, 2021 issue of Photoshop User magazine in Colin Smith’s “Photoshop Tips” column.
About Photoshop User and KelbyOne
Photoshop User magazine comes out digitally 12 times a year and is part of KelbyOne, the leading educational resource for Photoshop, Lightroom, and photography. Pro members have access to more than 900 video courses and 100 back issues of Photoshop User. To learn more about KelbyOne, click here.


