If you’ve been around the Photoshop world for even a short time, it’s likely that you’ve heard the term “nondestructive,” as in “nondestructive workflow” or “working nondestructively.” In principle, this means to do things in a way where the result isn’t permanent (a.k.a. destructive) and can be edited later in various ways.
Some people tell me that they never change their minds, and that’s why they don’t worry about using these methods, while others ask why they should bother working this way. There are some very important reasons to consider using nondestructive techniques, well beyond changing your mind. We’ll look at those first, followed by some key techniques for working nondestructively.
ACCURACY: LAYER ADJUSTMENTS
By using techniques such as adjustment layers or Camera Raw smart objects, you can take advantage of their editability by deliberately overdoing an effect so it’s easier to create a mask, and then pulling back the effect when you’re finished masking. This method is great for compositing, selectively adjusting an image, and much more.
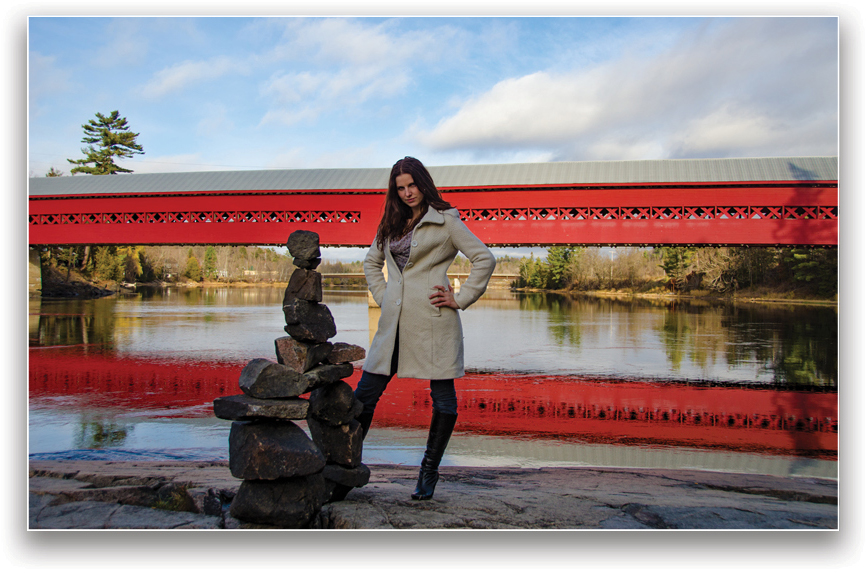
Here’s a simple example, where I want to make a subtle adjustment to the red of the covered bridge.
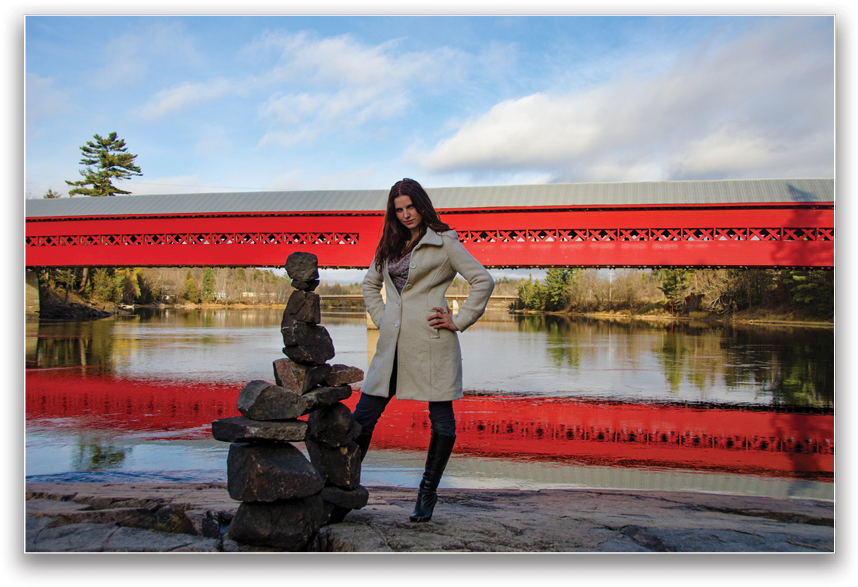
A method that I see many people use is to add a Hue/Saturation adjustment layer (Layer>New Adjustment Layer>Hue/Saturation), make the adjustments in the Properties panel, press Command-I (PC: Ctrl-I) to invert the mask to black to hide the effect on the entire image, and paint on the mask with the Brush tool (B) set to white to indicate where they want the effect to be visible. Trouble is, the change is so subtle that it becomes challenging to work with the mask.
Instead, think about “ending up” with the adjustment you want. In this example, I started with a basic selection of the red areas, without worrying too much about accuracy. Then when I add the Hue/Saturation adjustment layer, it automatically creates a mask based on my selection. Now, instead of making a subtle change to the red color in the Properties panel, I deliberately make a drastic adjustment, picking a setting such as this over-the-top blue.
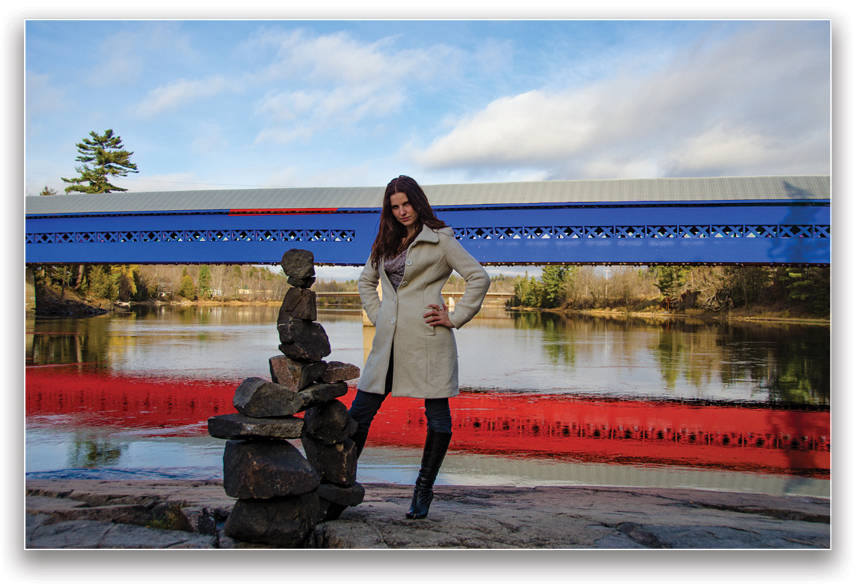
Once this adjustment is made—based on my initial selection—I can now continue to tweak the mask to make sure there are no red areas visible on the bridge or in the water reflection. Using the Polygonal Lasso tool (press Shift-L until you see the Lasso tool with straight lines and corners), I selected any remaining red areas along the bridge and filled the mask with white (press X until your Foreground color is white, then press Option-Delete [PC: Alt-Backspace]). I used a soft brush set to a slightly lower Opacity in the Options Bar to paint in the water reflection.
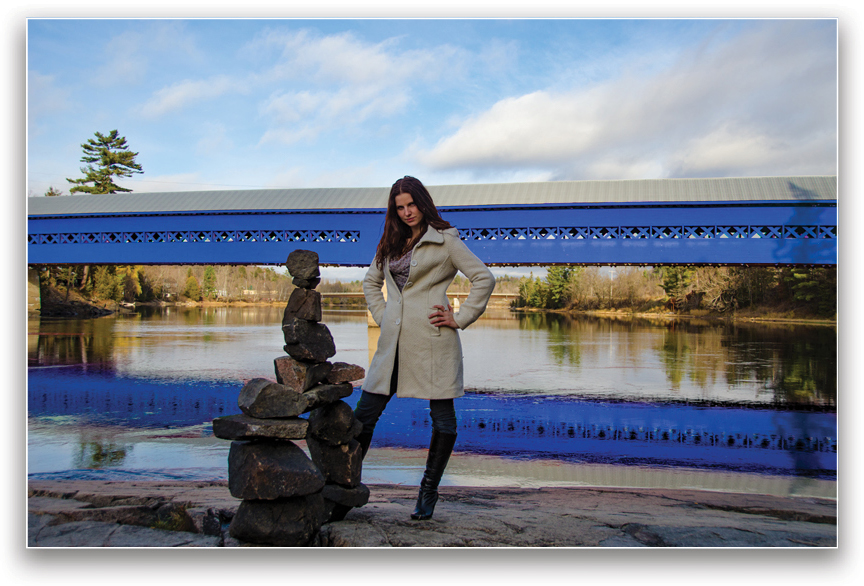
Once you’re satisfied with the mask, head back to the Hue/Saturation controls in the Properties panel and make the actual subtle change that you want.
I use this method all the time: Make a temporary over-adjustment so that it’s really easy to make an accurate mask, and then put the adjustment to its final settings. This is so much easier than attempting to paint on a mask when the subtle change you’re trying to apply makes it hard to tell whether you have everything masked or not.
ACCURACY: CAMERA RAW SMART OBJECTS
You can use a similar method with Camera Raw smart objects. With the click of a checkbox you can create a link between Camera Raw and Photoshop. This opens all kinds of interesting possibilities, with the ongoing ability to (in effect) apply Camera Raw settings within Photoshop.
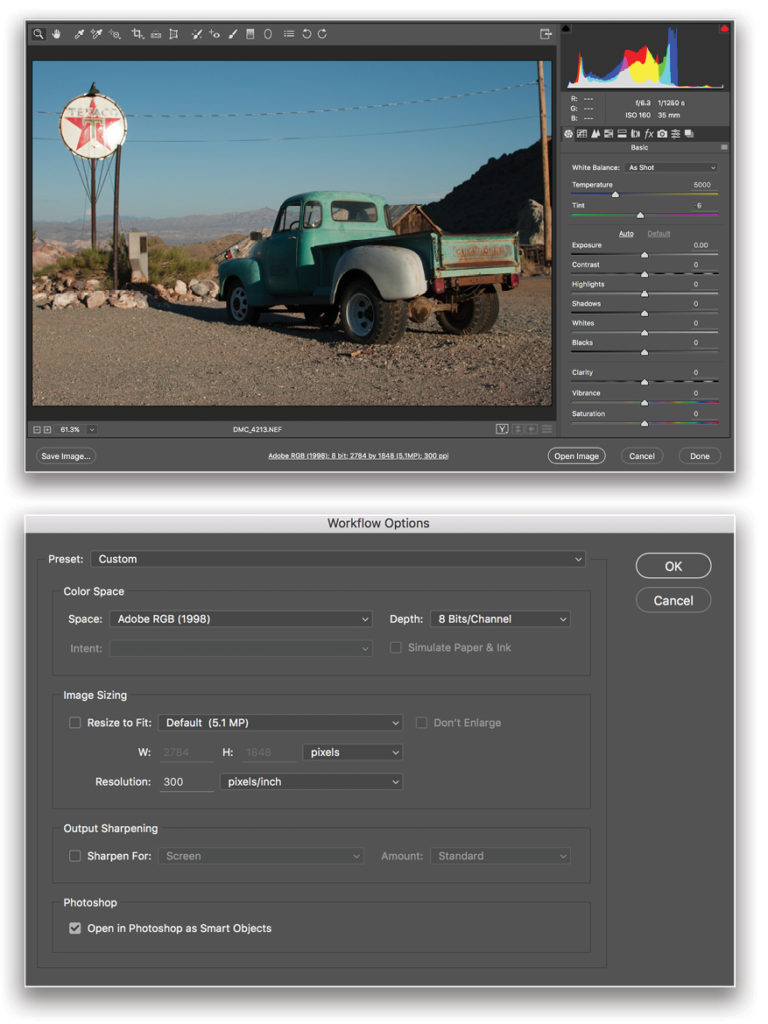
By default, the option to create Camera Raw smart objects is turned off, which means that when you finish applying settings in Camera Raw and click Open Image, the file is opened in Photoshop with a standard Background layer. There’s no further ability to work with Camera Raw (I like to think of it as a one-way street from Camera Raw to Photoshop). Although it’s nice to start in Camera Raw and continue in Photoshop, I’d much rather have a two-way street back and forth between Camera Raw and Photoshop.
To turn on the option to create Camera Raw smart objects, you have to open a RAW file in Camera Raw, then click on the Workflow Options (the “link” at the bottom of the Camera Raw window), and in the resulting dialog, check Open in Photoshop as Smart Objects. Imagine this option says, “From now on, open all RAW files in Photoshop as Smart Objects” since this is a preference that will affect all RAW files.
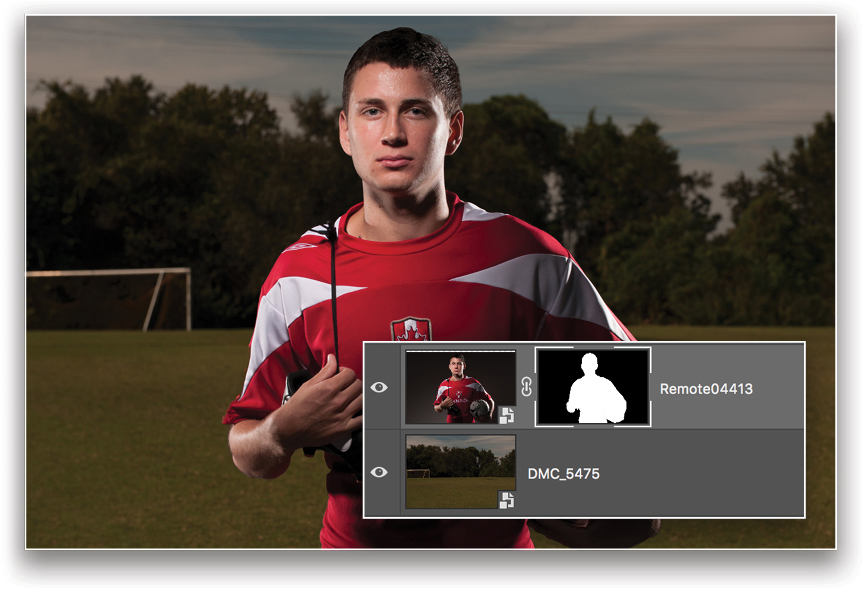
Here’s an example of how to take advantage of Camera Raw smart objects when compositing two files. I’ve shot a portrait of a soccer player, deliberately making it dramatically dark. I open it as a Camera Raw smart object and drag it onto a background image, which is also a Camera Raw smart object. It’s going to be difficult to select and mask the player because it’s hard to see where his hair ends and the background begins.
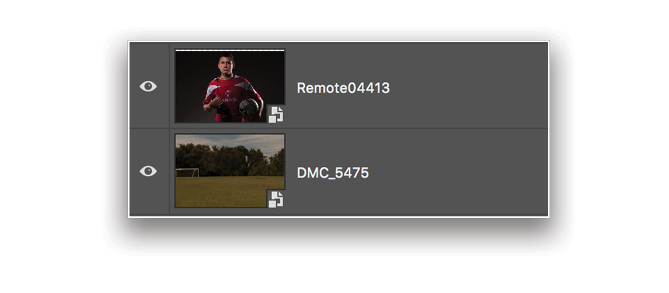
After sizing the soccer player, I double-click on the thumbnail to return to Camera Raw, where I make a temporary over-adjustment with one goal in mind: to make it easier to make the selection. After clicking OK, I use standard selection techniques and add a layer mask.
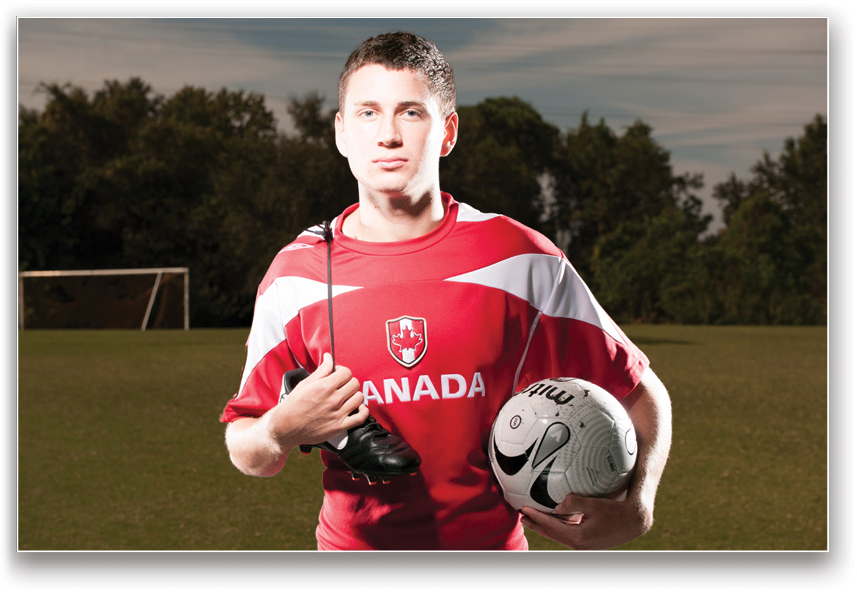
Once the layer mask looks good, I double-click on the Camera Raw smart object to return to Camera Raw and adjust the photo the way I want. After clicking OK, the photo updates. And since the photo of the soccer field is also a Camera Raw smart object, I can tweak it in Camera Raw as well.
One of my mantras when working with Photoshop is always to think, “end up with…,” as in “I want to end up with a subtle change in the red bridge.” This helps me to remember that it’s often much easier to overdo an adjustment at first to make my life easier, and then put the settings back at the end.
Creativity
I often hear people say that they’re reluctant to experiment in Photoshop in case they make a mistake that they can’t get out of. My response, “Then don’t paint yourself into a corner and feel like you can’t try things and see what happens. Use nondestructive methods such as smart filters and lots of layers to let you go down a path of experimentation, knowing that you can get back to square one without any worries.”
Efficiency
Here’s an often-overlooked advantage of working nondestructively: almost all these techniques can easily be reused and repurposed. Just drag-and-drop a smart filter or adjustment layer onto another layer or image and tweak the results. It’s much faster than starting from scratch every time.
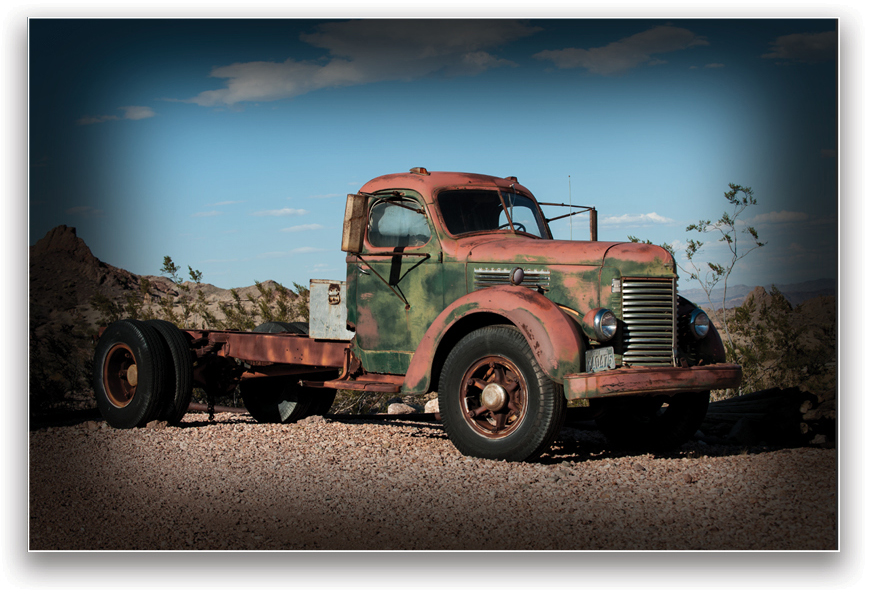
For instance, say I want to add a vignette effect to a photo in a way that can easily be applied to other photos. Here are the steps I’d take to create the effect, with repurposing in mind.
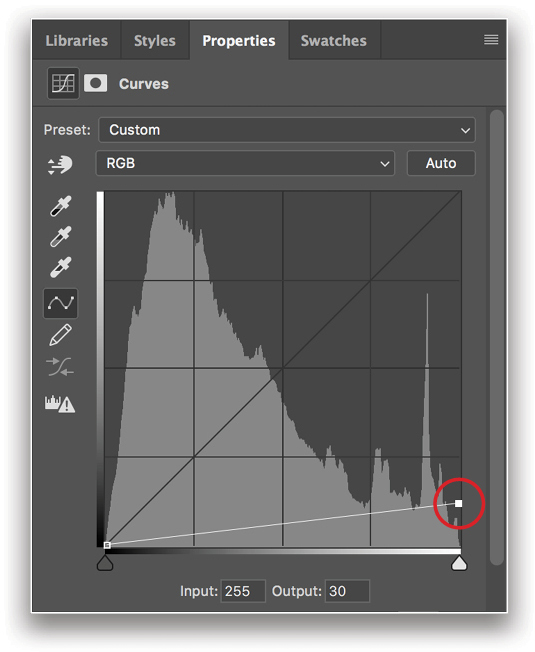
Step One: Add a Curves adjustment layer (Layer>New Adjustment Layer>Curves), and in the Properties panel, drag down the top-right anchor point (circled here) to darken the photo.
Step Two: Using the Rectangular Marquee tool (M), make a selection of the majority of the image. Press X until the Foreground color is black, and press Option-Delete (PC: Alt-Backspace) to fill the selection with black on the mask. What this does is mask the effects of the adjustment layer in the middle of the image, creating a dark frame around the outer edges. Press Command-D (PC: Ctrl-D) to deselect. The edge isn’t very soft yet, but we’ll fix that next.

Step Three: To create an editable soft edge on the mask, go to the Properties panel and click the second icon at the top to switch to the Masks settings. Drag the Feather slider to the right to make the edge softer, and since there’s no OK button, you can go back and edit this setting at any time. You can then click back on the first icon at the top of the Properties panel to change the Curve settings to make the vignette lighter or darker.

Step Four: To achieve the same look on another photo, it’s as easy as drag-and-drop: Hold the Shift key and drag the adjustment layer from the Layers panel to another open photo. Adding the Shift key centers the adjustment layer in the new photo. It’s quite possible that the settings won’t be perfect, but it’s a simple matter to edit any part of this effect. You can change the Curves setting to make the edge lighter or darker, adjust the Feather setting to change the softness of the edge, and you can use Free Transform (Command-T [PC: Ctrl-T]) to alter the size of the shape on the mask.
Flexibility
Yes, having the option to change your mind is important, but again, it’s not the only reason for working nondestructively. When people think of these techniques only as a way to ensure that they can change their minds at any time, they’re missing out on some great opportunities for productivity and creativity. Having said that, the flexibility you gain using nondestructive techniques is definitely an important reason to work in this way.
Bonus: Reverse Engineering
Have you ever achieved an end result that you loved—in large part through experimentation and “playing,” and then later you can’t remember how you did it? If you’d built the document using nondestructive methods—layers, adjustment layers, smart objects, and smart filters—you should be able to reverse-engineer the image to figure out how you achieved that result. This assumes that your document includes these editable methods and that you saved a version of the file in PSD format. And of course, you could repurpose adjustments and filters that were applied nondestructively.
KEY TECHNIQUES
Adjustment Layers
Whenever you decide to apply an adjustment in Photoshop, you can do so using either the Image>Adjustments menu, or Layer>New Adjustment Layer menu. The biggest difference between the two methods is the OK button. Say what? Here’s the problem with OK buttons, using Levels as an example:
First, go to the Image>Adjustments menu to access the Levels command. After moving the triangles to make an adjustment, you have to click OK to apply the adjustment.
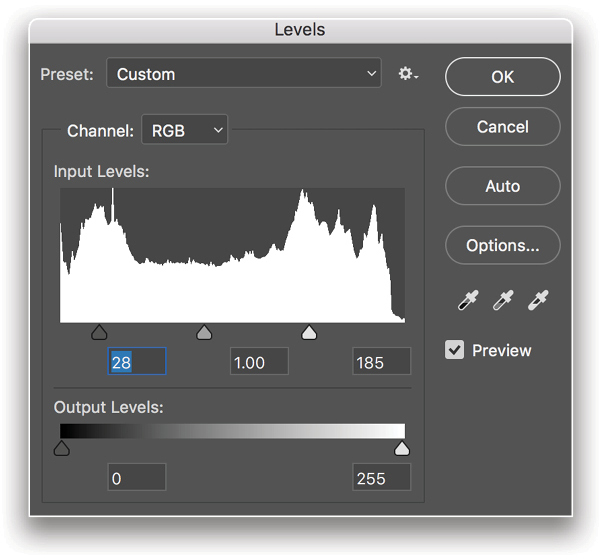
The problem here is, unless you undo the adjustment right away, if you attempt to make further adjustments (or correct a poor adjustment), the Levels dialog will look like this.
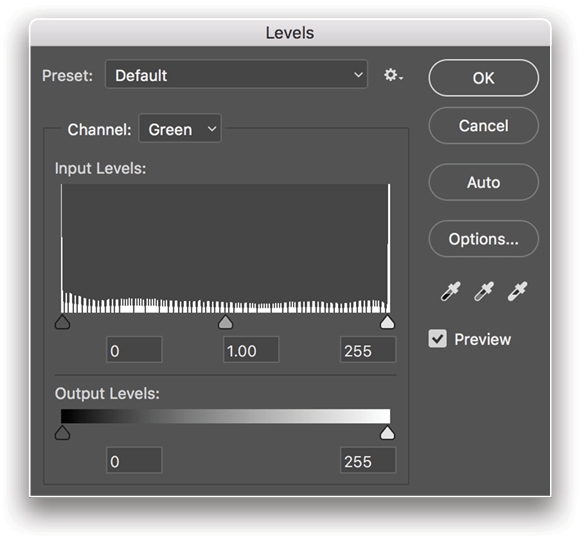
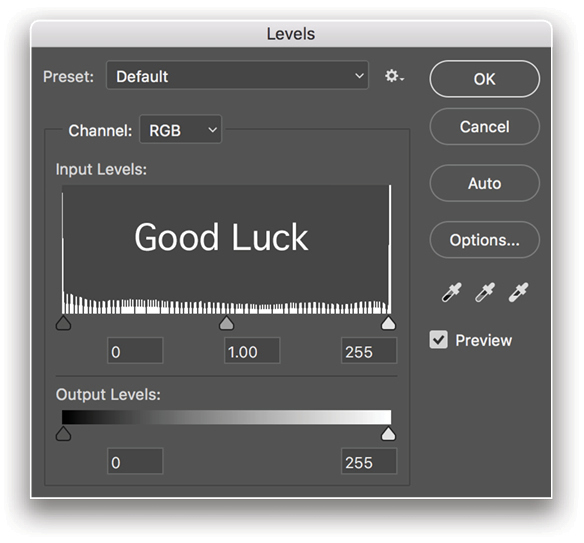
Perhaps Adobe could make it a little more obvious that it’s going to be extremely difficult to make any further adjustment to this kind of histogram by making the dialog look like this.
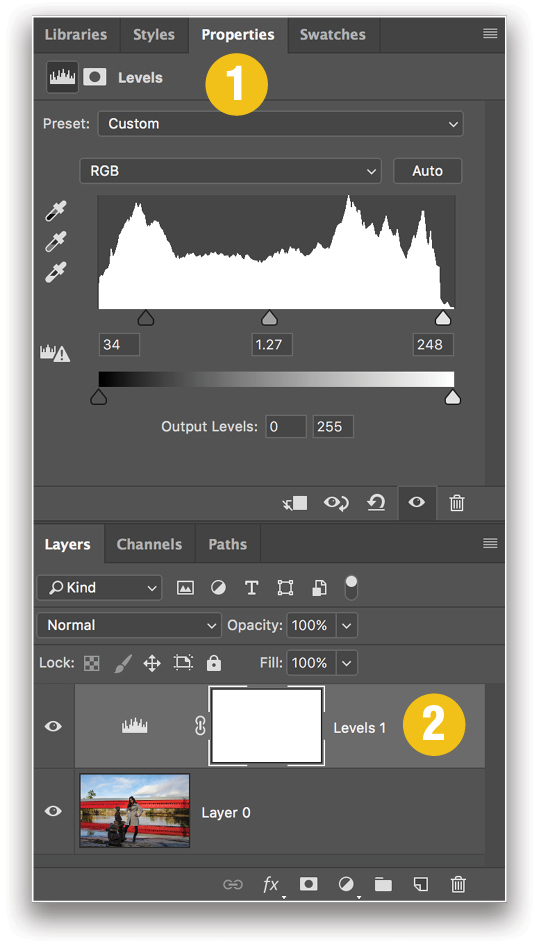
Instead, choose Levels from the Create New Adjustment Layer icon (half-black, half-white circle) at the bottom of the Layers panel (or using Layer>New Adjustment Layer>Levels, or the Adjustments panel). There are two important differences (and advantages) when using a Levels adjustment layer:
- Instead of a floating dialog that covers up part of your image, the settings appear in the Properties panel off to the side, typically above the Layers panel. Here, I’ve made an adjustment, but since I can’t click OK in the Properties panel, I just leave things where they are.
- The adjustment layer appears above the Background layer in the Layers panel, and as long as you save the file as a PSD you can always come back and edit the adjustment—the histogram never updates.
There are two other advantages of using adjustment layers: they automatically come with a layer mask (more on that next) and, as mentioned earlier, they can easily be applied to other photos.
Layer Masks
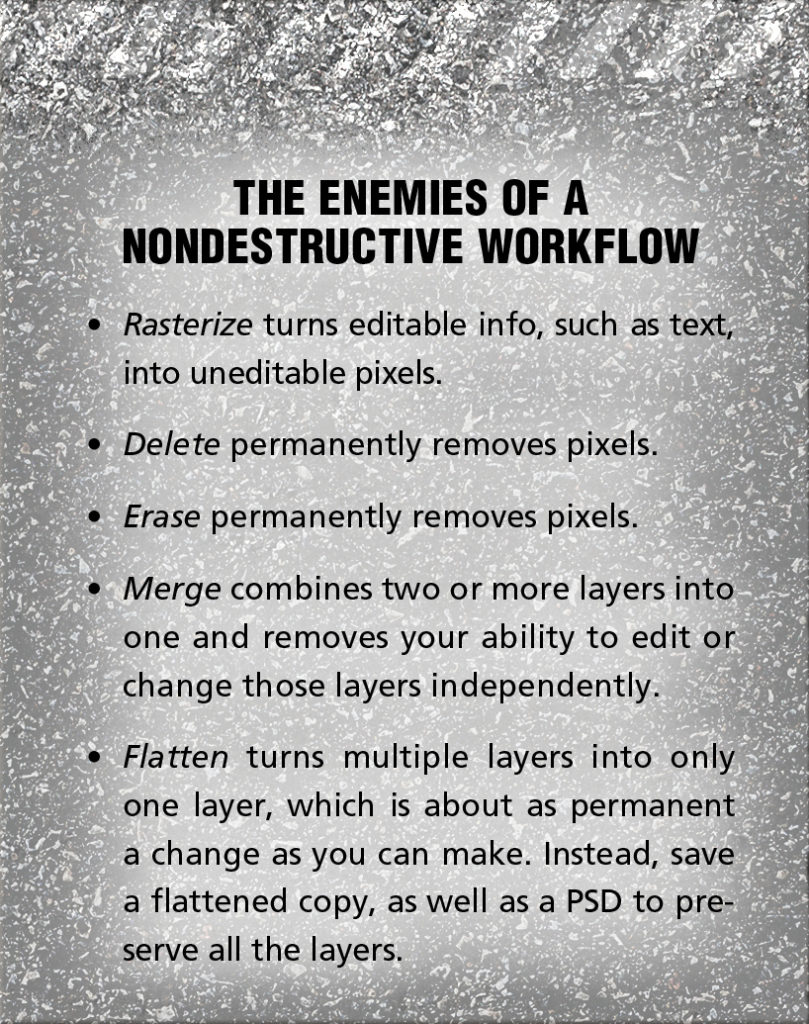
In my opinion, there are two bad words when it comes to working nondestructively: erase and delete. If you erase or delete pixels, they’re gone, unless you undo right away. A layer mask gives you the opportunity to hide pixels instead of deleting them and, because the pixels are hidden, they can always be shown again should you need them.
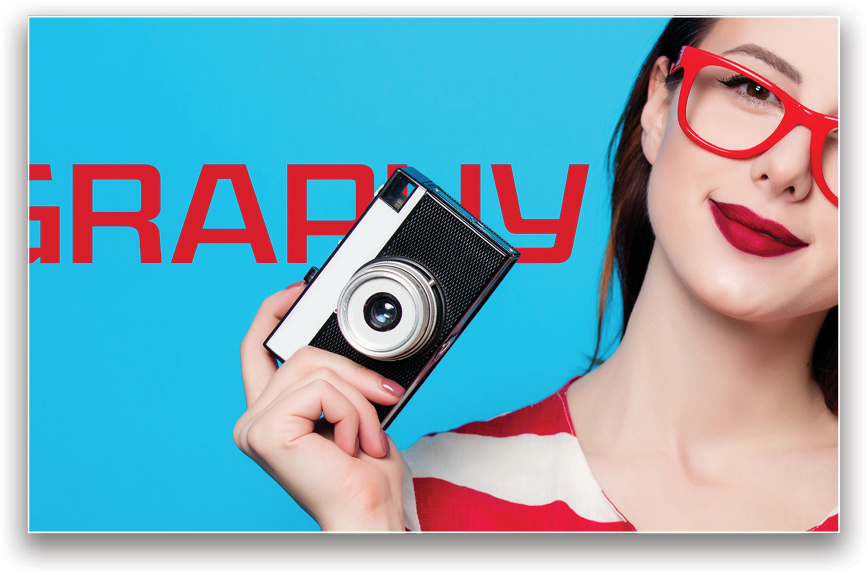
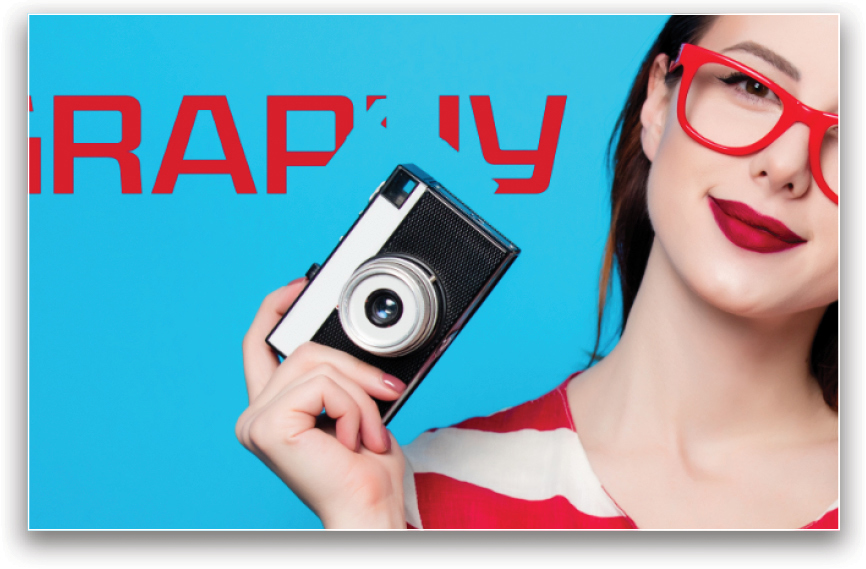
To compare the difference, we’ll start with a photo and a type layer.

In order to make it look like the type is behind the camera, one option would be to rasterize the type layer (Type>Rasterize Type Layer) and use the Eraser tool (E) to delete the unwanted pixels and create the effect you want.
But if you decide to do further edits, you can run into problems. Here I tried to move the text up, but because I erased some pixels, those pixels are gone.
The only option would be to start over again with a new type layer, unless you had enough Step Backwards available. And of course, if you’d saved and closed the document, the ability to Step Backward would be unavailable.
So this method used two techniques that are very destructive: rasterizing the type so it’s not editable, and erasing pixels.
Instead, let’s do this by using a layer mask. With the type layer active in the Layers panel, click on the Add Layer Mask icon (circle in a square) at the bottom of the Layers panel, or go to Layer>Layer Mask>Reveal All. The mask thumbnail appears beside the layer, initially filled with white.
When the mask is white, all the pixels on the layer are visible. In order to hide portions of the layer, you need to add black paint to the mask. You can do this either by painting with the Brush tool (B), or by making a selection and filling it with black. In this example, I made a selection of the camera, pressed X until my Foreground color was black, and pressed Option-Delete (PC: Alt-Backspace) to fill the selection with black, creating a result that looks pretty much the same as the erased example.
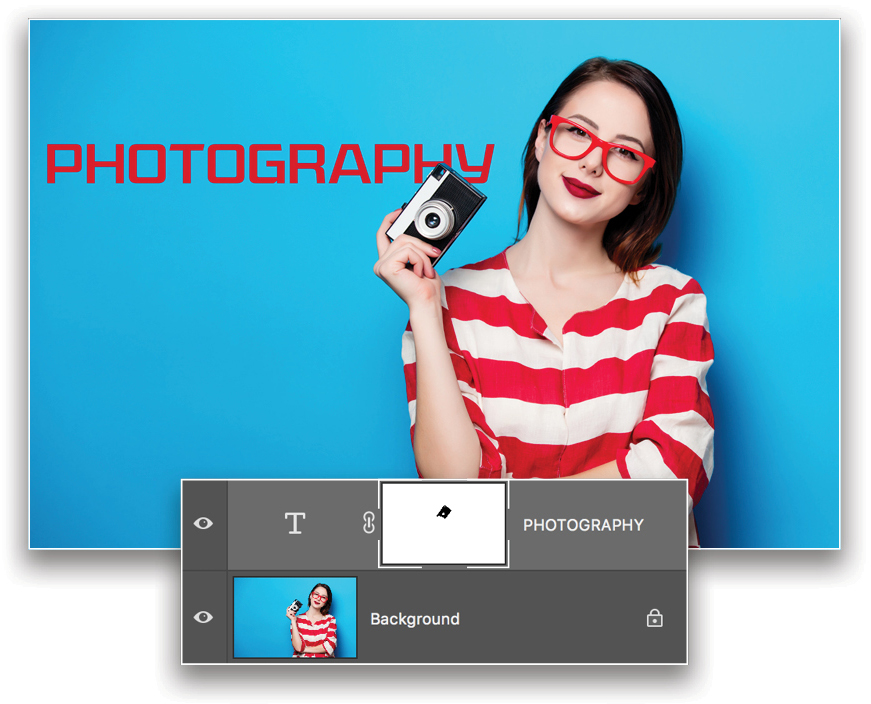
The advantage of this method is that we can continue to edit both the mask and the type layer. By default, the layer and the mask are linked together, as indicated by the chain symbol between the two thumbnails, which means that when you move the layer, the mask moves with it. Much of the time that makes sense, but sometimes you want the mask to stay in place while you move the layer. In this case, it wouldn’t make sense for the mask to move with the text so, in order to move them independently, the link needs to be turned off. Just click on the chain symbol to unlink the layer and its mask.
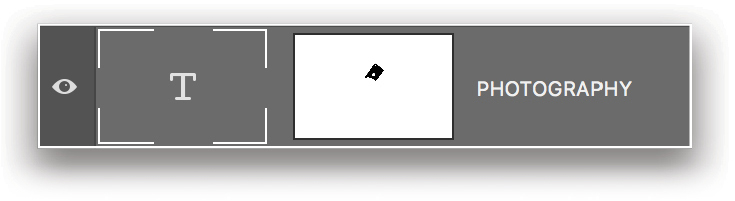
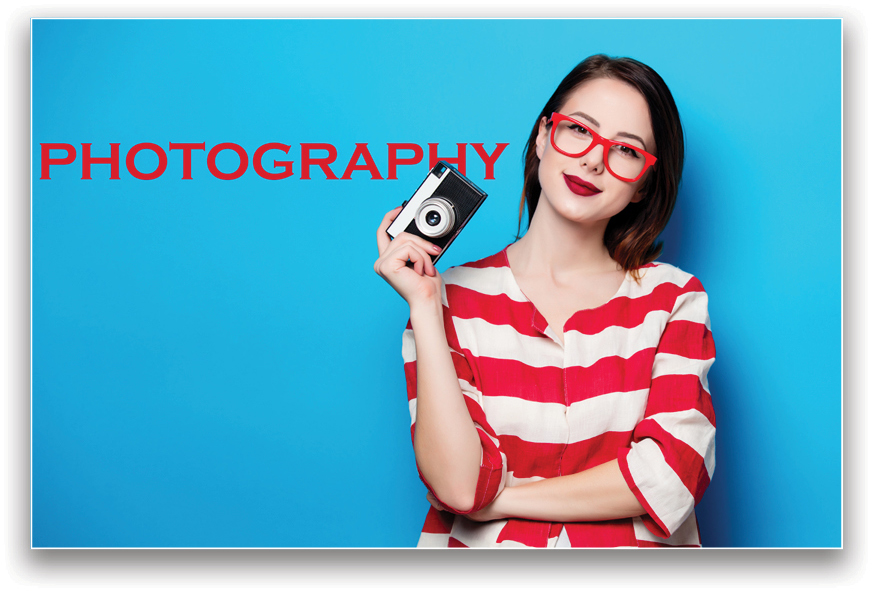
Now the text layer can be moved while the mask stays put. And the type can still be edited.
When it comes to masks, many people like to say, “black conceals, white reveals.” Personally, I don’t worry about the rhyming part and just think, “black hides, white shows.” Oh, and any shade of gray between black and white can be considered as “kinda,” as in kinda hidden, kinda visible.
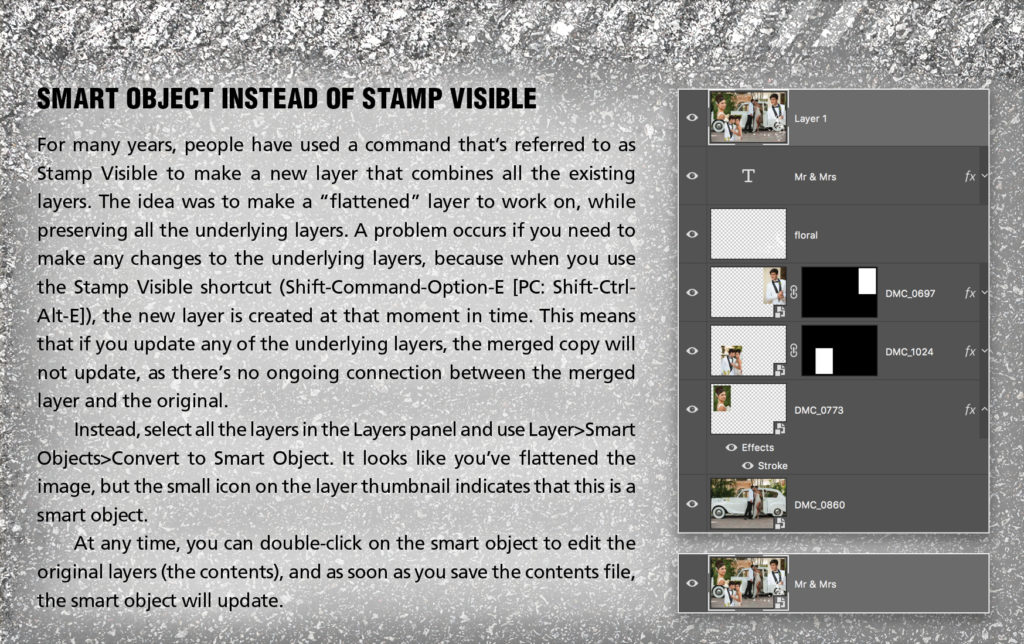
Smart Filters
Remember when we talked about making adjustments and the disadvantage of the OK button? The same thing applies with filters: using filters in the traditional way (i.e., not smart filters), you have to click OK at some point, making the results pretty permanent. Of course, you could undo the filter right away, but what happens if you’ve done eight more steps or closed the document and then want to change the filter settings?
Some people suggest duplicating the Background layer before applying a filter. Although that works because it protects the original image, it still doesn’t mean that you can edit the settings—or remind yourself later what settings you used. In contrast (as we’ll see), a smart filter appears in the Layers panel, allowing you to see and edit the settings.
It’s simple to create a smart filter: you just have to turn the layer into a smart object first. You can either choose Filter>Convert for Smart Filters or Right-click on the layer and choose Convert to Smart Object.
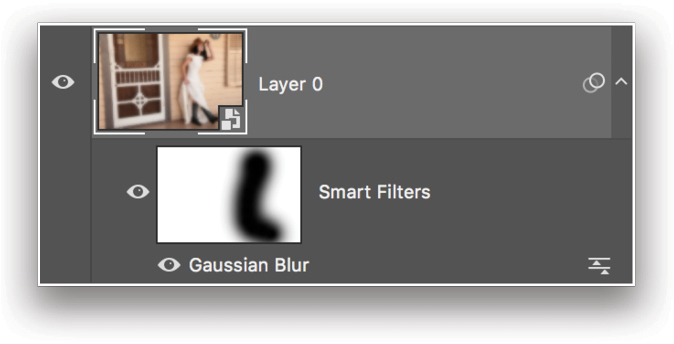
Apply one or more filters and they appear in the Layers panel and can easily be edited, changed, or removed completely.
After applying the filter as a smart filter, you can:
- Double-click its name in the Layers panel to edit the filter settings.
- Hide the effects of the filter by clicking off its Eye icon.
- Drag to change the order of multiple filters.
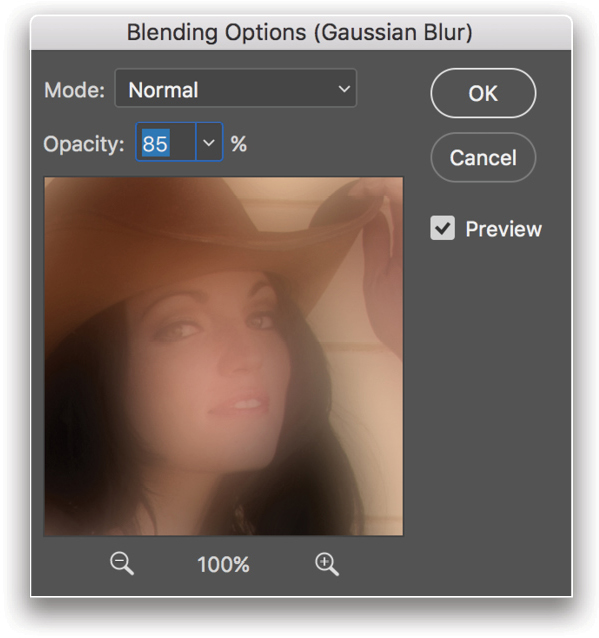
- Double-click on the Blending Options icon to the right of its name in the Layers panel to change the blend mode and Opacity of the filter.
- Delete a filter by Right-clicking on the filter in the Layers panel and choosing Delete Smart Filter.
- Paint on the Smart Filters mask to hide the effects of the filter in specific areas.
As long as you save the file as a PSD file, you’ll always be able to see and edit the settings for the smart filter(s) in the document.
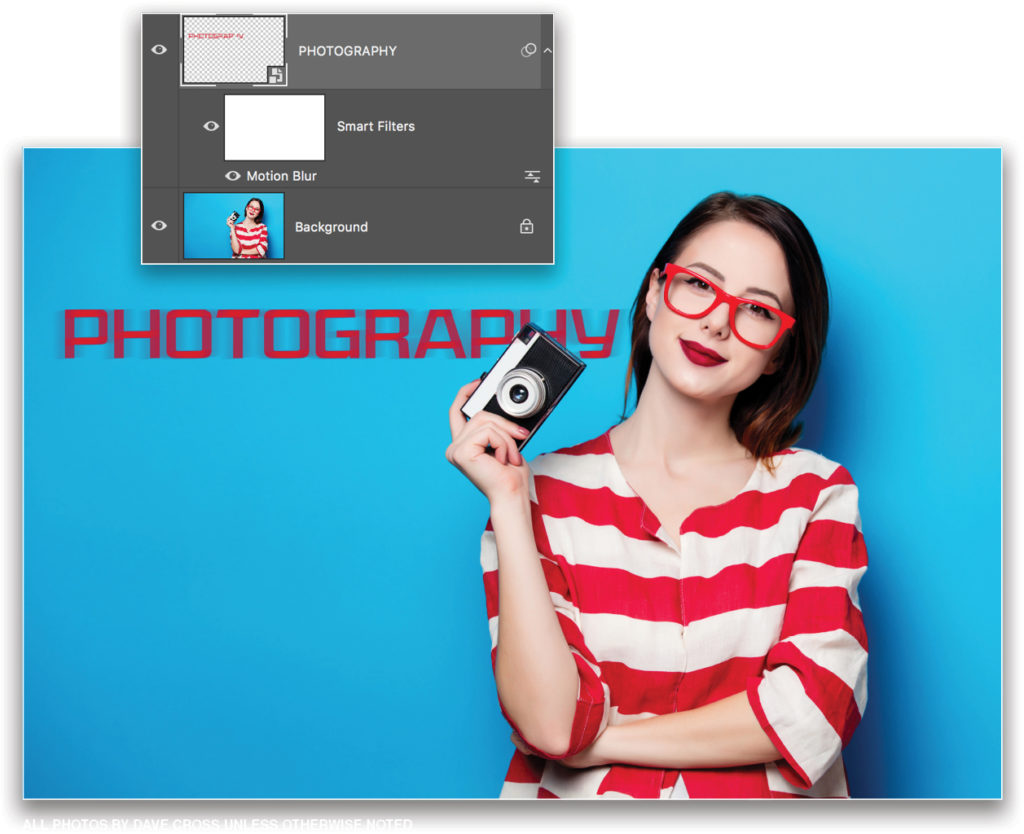
Another advantage of smart filters is when you’re working with text. Without smart filters, if you tried to apply a filter to a type layer, you’d get a warning dialog prompting you to rasterize the text. As we saw, the problem with rasterizing—and why you should avoid it—is that you can no longer edit the text. Fortunately, this very same warning dialog also has a button for converting the layer to a smart object.
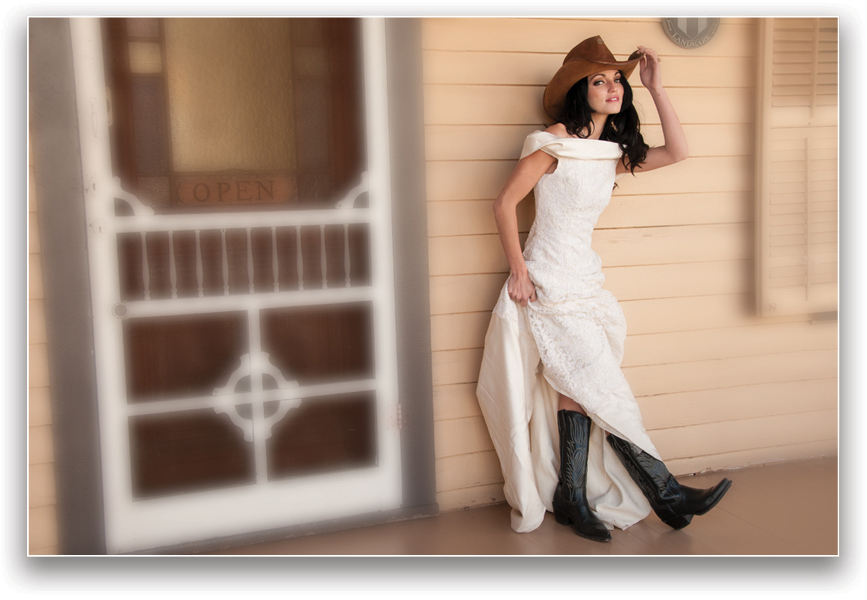
So convert the type layer(s) to a smart object and then apply the filter. In this example, a Filter>Blur>Motion Blur was applied and the filter Blending Options were used to lower the Opacity of the smart filter. If you need to edit the text, double-click the smart object thumbnail to open the text in a temporary document. Make your changes, and then save and close the document.
The final piece of the puzzle is to save your document in PSD format. This will preserve all the nondestructive techniques you’ve used including layers, masks, adjustment layers, type layers, smart objects, and smart filters. By preserving and using nondestructive techniques, you can improve your accuracy, creativity, efficiency, and flexibility.


