Bathing the subject of a photograph in colored studio lighting can completely change the mood and feel of the image. And, thanks to Photoshop, you don’t even need a real studio to get it done. In this column, you’ll learn how to use Gradient Fill layers to add diagonal pink and blue studio lighting to a portrait. This technique is easy, flexible, and full of creative potential. Let’s get started!
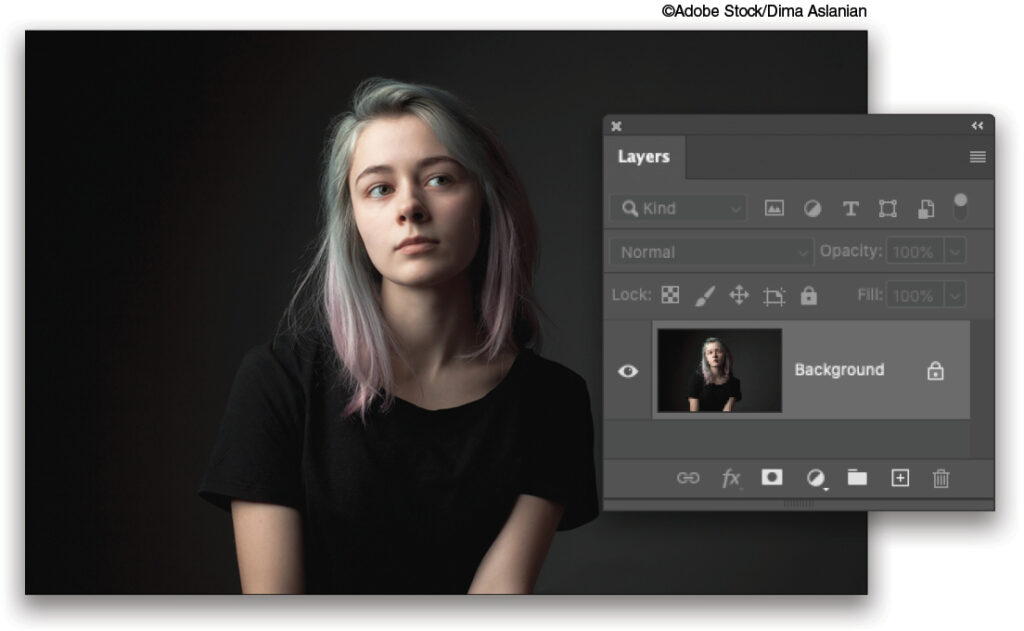
STEP ONE: Choose File>Open and navigate to a photo, such as this free one from Adobe Stock. (If you’re starting in Lightroom, select a thumbnail in the Library module and then choose Photo>Edit In>Edit In Adobe Photoshop 2022.) This technique looks especially good on portraits with a dark background, but feel free to try it on anything.
If you’d like to download this image to follow along, click this link, log in with your Adobe ID, and click the License for Free button. This will download the image to your computer as well as add it to your Libraries panel (Window>Libraries). Double-click the image in the Libraries panel to open it in Photoshop.
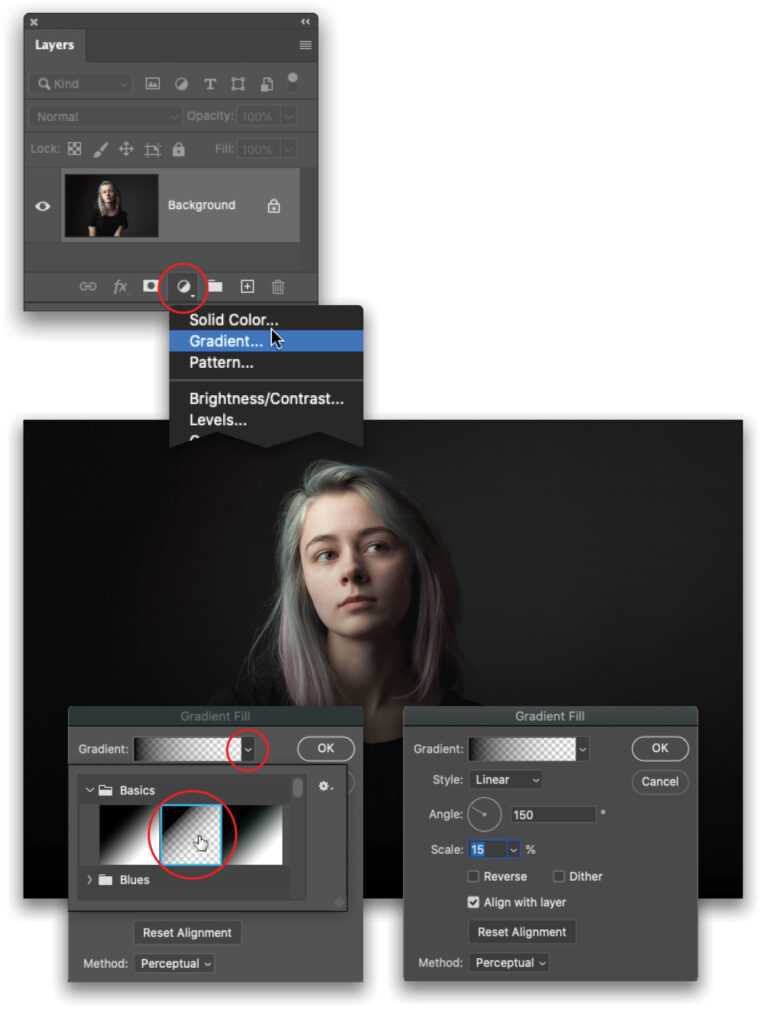
STEP TWO: Click the half-black/half-white icon at the bottom of the Layers panel and choose Gradient. This creates a Gradient Fill layer, which we’ll use to make one of the studio lights.
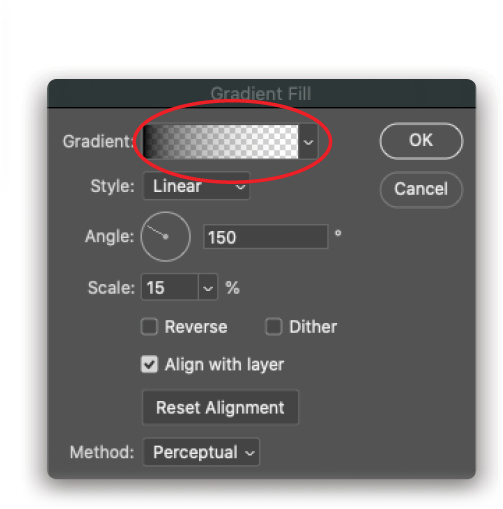
STEP THREE: In the Gradient Fill dialog that opens, click the down-pointing triangle to the right of the Gradient preview (circled). In the Gradient Picker panel that opens, click the triangle to the left of the Basics folder and then pick the second thumbnail (also circled), which is the Foreground to Transparent gradient (don’t worry about the color because we’ll change it in the next step). Click an empty spot inside the Gradient Fill dialog to close the Gradient Picker. Next, make sure the Style menu is set to Linear, change the Angle to around 150°, and then change the Scale to around 15% (for a harder transition edge). Keep the Gradient Fill dialog open.
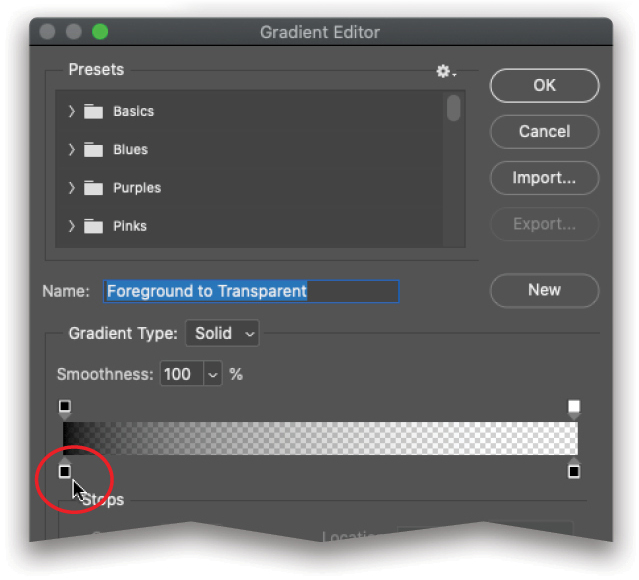
STEP FOUR: Now let’s change the gradient color. In the Gradient Fill dialog, click atop the Gradient preview (circled). In the Gradient Editor that opens, double-click the leftmost color stop below the horizontal gradient preview bar (also circled).
STEP FIVE: In the Color Picker that opens, drag the slider on the vertical rainbow bar into the light-blue range, and then click within the large square to choose a color (a hex value of #65b7e7 was used here, which is circled). Click OK to close the Color Picker and then OK again to close the Gradient Editor, but leave the Gradient Fill dialog open.

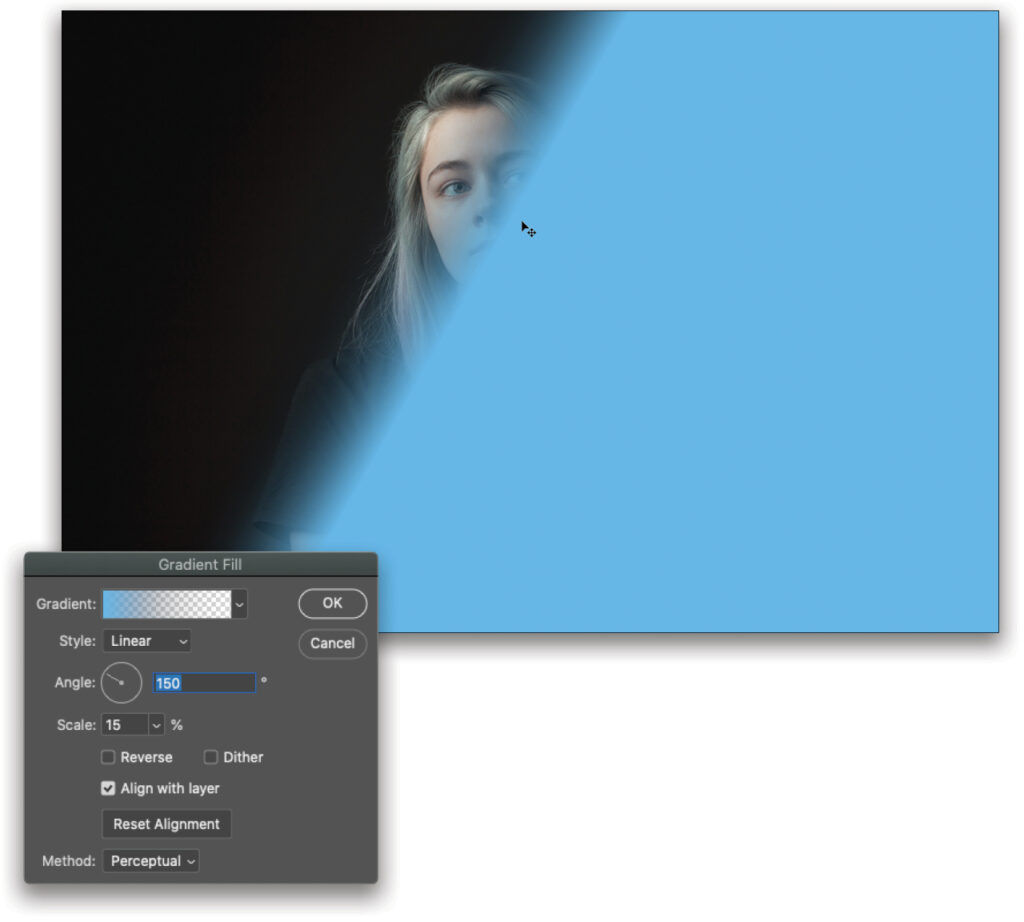
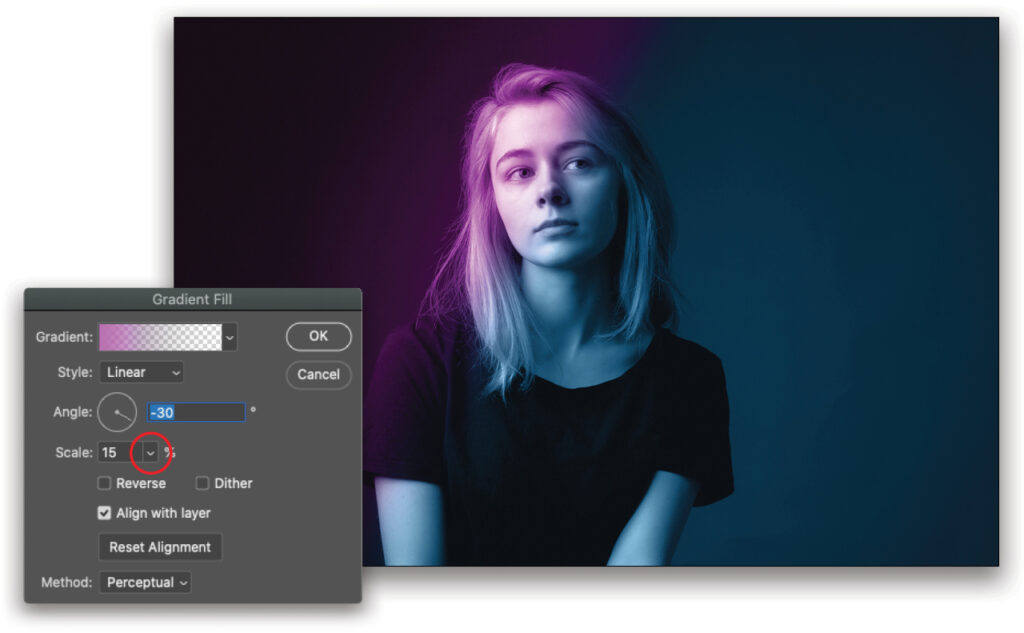
STEP SIX: Now we’ll reposition the gradient so it starts on one side of the subject’s face. With the Gradient Fill dialog open, click atop the image and drag leftward so the gradient starts just to the right of her nose. If the gradient refuses to move, just click the down-pointing triangle to the right of the Scale setting (circled) and then try dragging again. Click OK to close the Gradient Fill dialog.
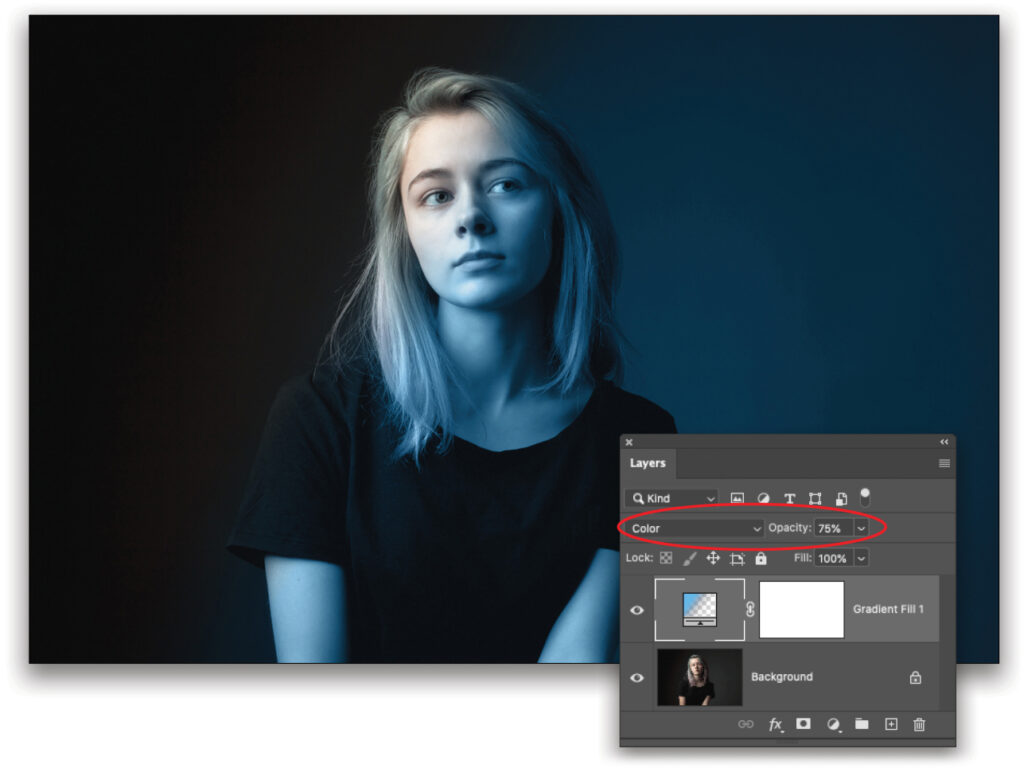
STEP SEVEN: Near the top left of the Layers panel, change the blend mode menu to Color, and then lower Opacity to around 75% (both settings are circled).
STEP EIGHT: Now repeat the previous steps to create a pink diagonal light. To save time, start by pressing Command-J (PC: Ctrl-J) to duplicate the Gradient Fill layer.

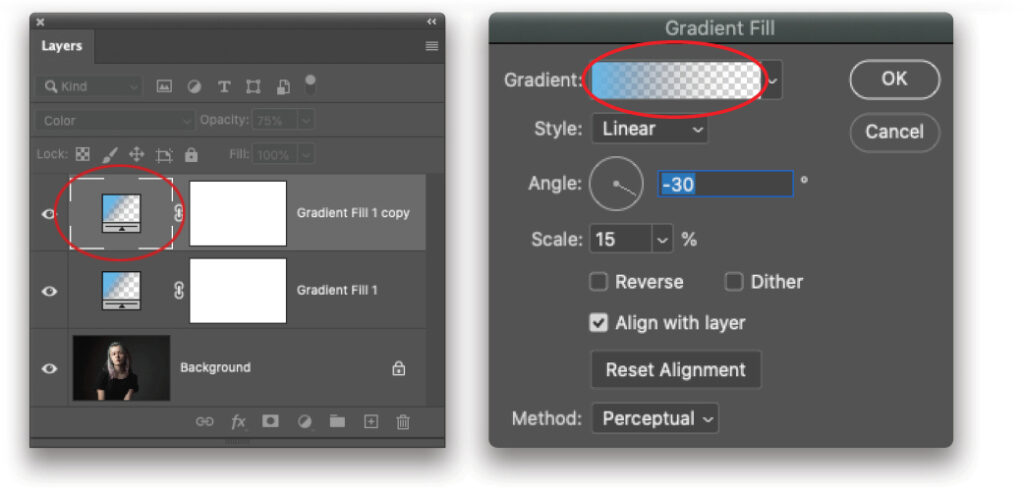
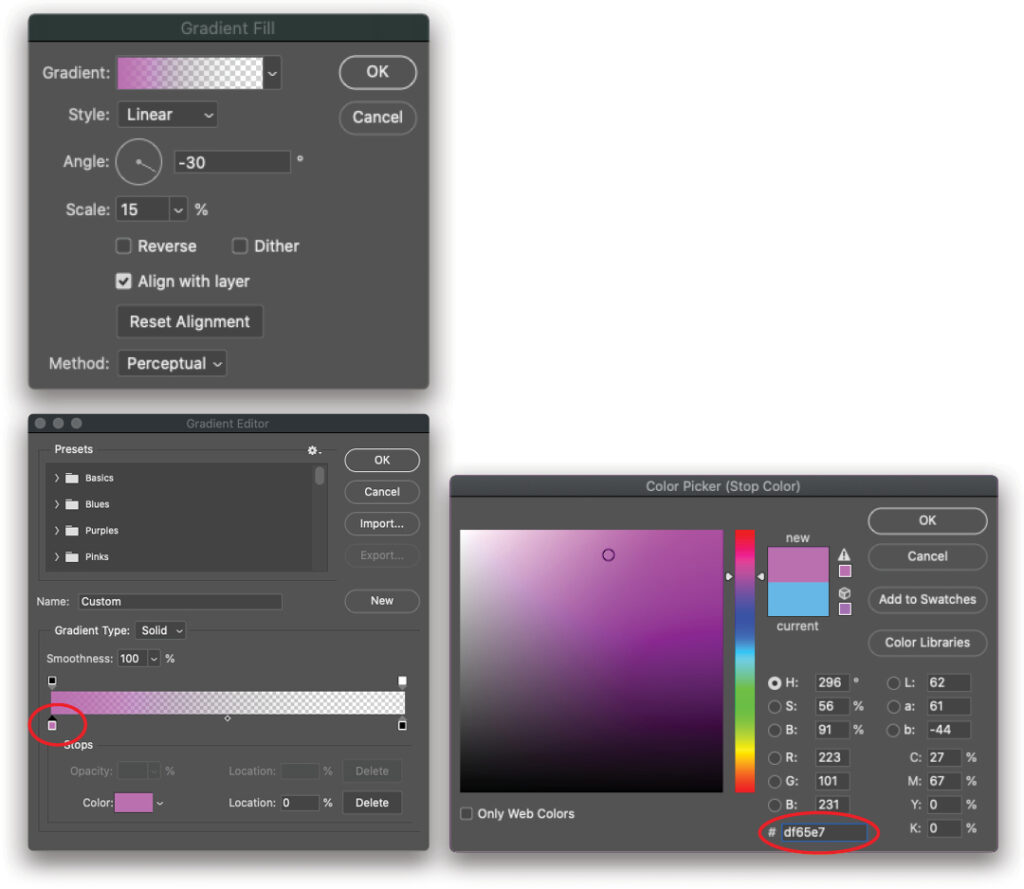
STEP NINE: Double-click the duplicate fill layer thumbnail (circled), which is named Gradient Fill 1 copy. In the resulting dialog, change the Angle to around –30° and then click atop the gradient preview (also circled) to open the Gradient Editor.
STEP 10: In the Gradient Editor, double-click the left-most color stop below the gradient preview bar (circled). In the Color Picker that opens, drag the slider on the vertical rainbow bar into the pink range, and then click within the large square to choose a color (a hex value of #df65e7 was used here, which is also circled). Click OK to close the Color Picker and then click OK again to close the Gradient Editor, but leave the Gradient Fill dialog open.
STEP 11: To reposition the pink gradient, click atop the image and then drag rightward so the gradient starts on the left side of her face. Here again, if the gradient refuses to move, click the down-pointing triangle to the right of the Scale setting (circled) and then try dragging atop the image again to move the gradient start point. Click OK to close the Gradient Fill dialog.
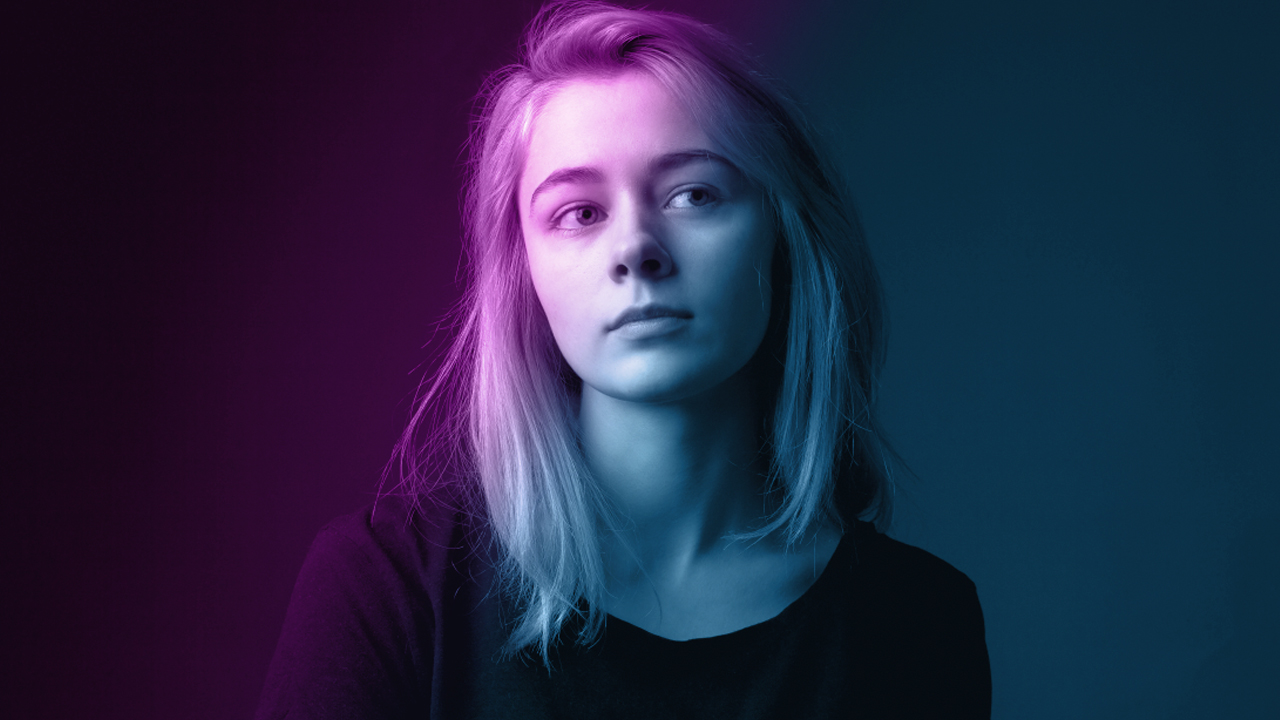
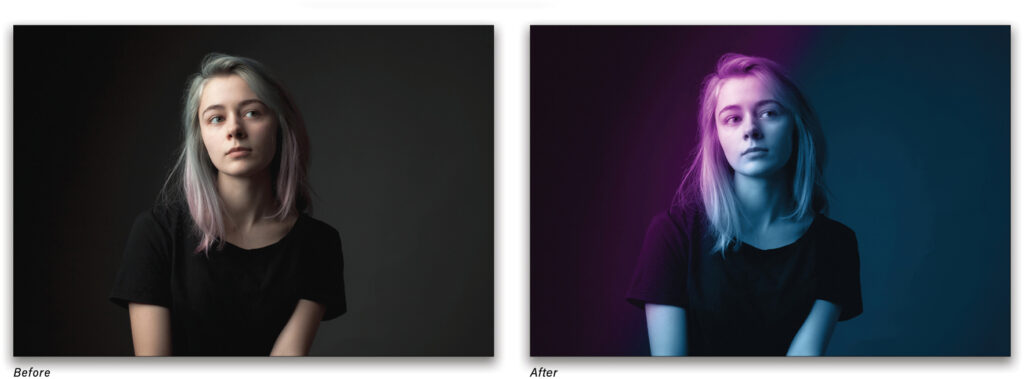
That’s all there is to it! Here’s the before and after version.
As mentioned earlier, this technique is incredibly flexible. You can fine-tune it by adjusting layer Opacity and/or by changing the color of the lights. To do the latter, simply double-click a fill layer thumbnail to reopen the Gradient Fill dialog, click the Gradient preview to reopen the Gradient Editor, and then edit the color stop.
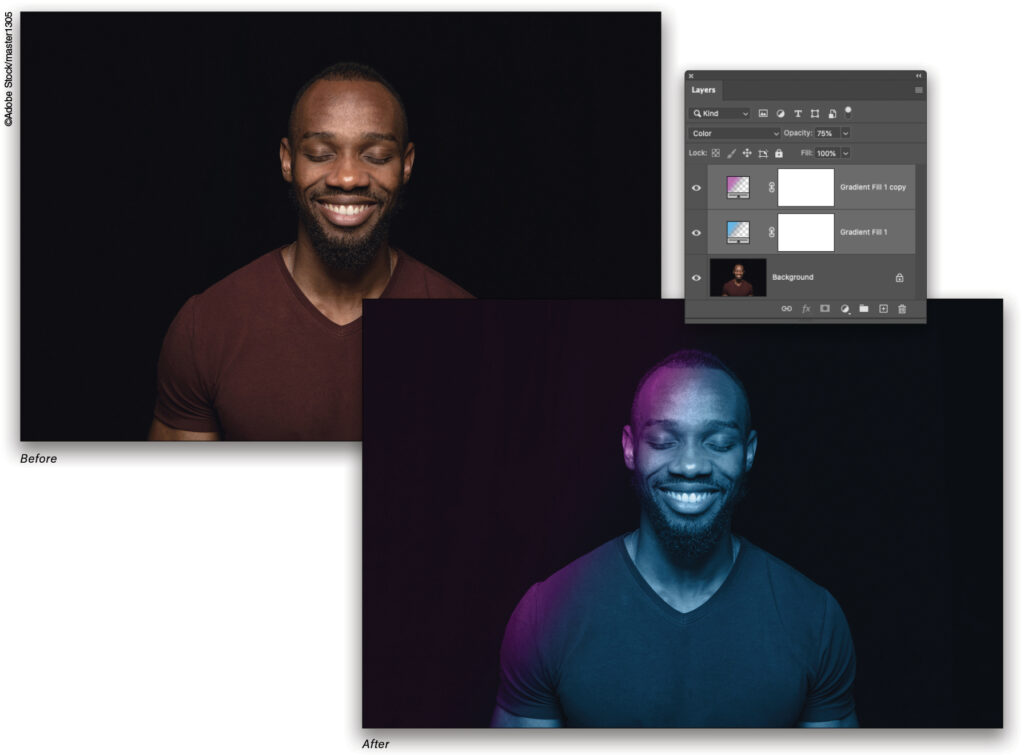
APPLY TECHNIQUE TO ANOTHER PHOTO
In addition, you can easily apply this technique to other photos (this one is also free from Adobe Stock, which you can find by clicking here). To do that, save the original document as a Photoshop file (choose File>Save As and pick Photoshop from the Format menu), and then Shift-click to activate both fill layers in the Layers panel. Next, open another photo in Photoshop and then drag the fill layers from the Layers panel from one document onto the filename tab of the other document (hold the cursor over the tab until the focus switches to that image, and then drop the layers directly into the image). Alternatively, you can press Command-C (PC: Ctrl-C) to copy the layers in one document, activate the other document, and then press Command-V (PC: Ctrl-V) to paste the layers.
If you apply this technique to another photo, you may need to adjust the positioning of the gradient starting point on one or both of the fill layers like you did earlier, but what a timesaver!
MASKING OUT THE LIGHTS
And last but not least, if you want to hide the colored lights from part of the photo, you can use the layer mask that came along with each fill layer. For example, to hide the lights from the background, you could select your subject (Select>Subject), inverse the selection to the background (Select>Inverse), activate each fill layer mask, press X until the Foreground color is black, and then press Option-Delete (PC: Alt-Backspace) to fill the selection with black (though that negates the look of real studio lights). The possibilities are many!
Until next time, may the creative force be with you all.
This article originally published in the April, 2022 issue of Photoshop User magazine.
About Photoshop User and KelbyOne
Photoshop User magazine comes out digitally 12 times a year and is part of KelbyOne, the leading educational resource for Photoshop, Lightroom, and photography. Pro members have access to more than 900 video courses and 100 back issues of Photoshop User. To learn more about KelbyOne, click here.


