The second you leave the studio, your portraits are no longer being created in a vacuum. This means that no matter what light source you choose to illuminate your subjects, you’ll also be contending with the ambient light out in the world.
In this article, we’re going to explore everything from using shade alone to yield better portraits to creating our own shade when there isn’t any readily available to adding our own light to the equation, using both reflectors and strobe lights. The quality of light that we work with as photographers falls into two categories: hard light and soft light. When you go outside at noon in direct sunlight and take a photo, you’ll get unflattering hard light. Hard light can be identified by the telltale harsh shadows it creates. These contrasty shadows call attention to blemishes and wrinkles. This is why we all learn to try to avoid shooting in midday direct sunlight early on in our photographic journeys.

Finding Shade
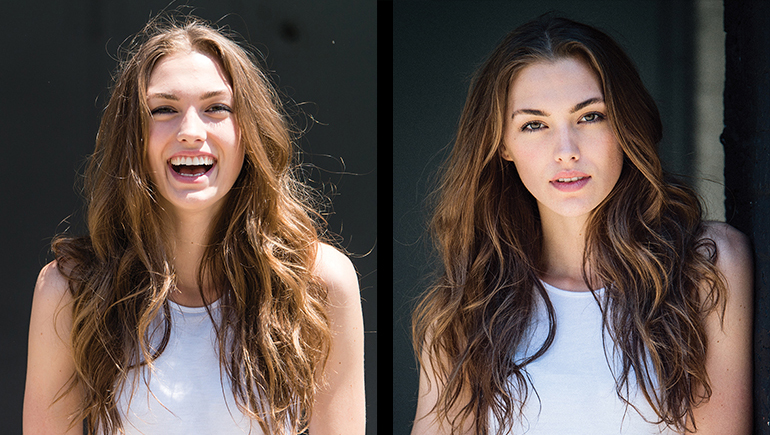
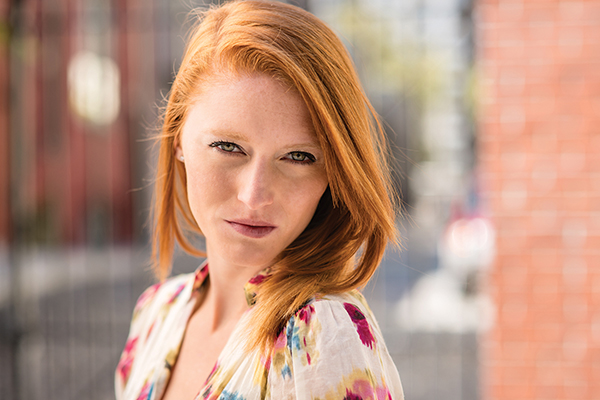
How do you get a better portrait during midday then? Simply look for soft light, which is produced by large light sources that are close to your subject. (This is where a softbox light modifier gets its name.) An easy way to find soft light without the need for softboxes and strobes is to simply find shade. Then that distant ball of light in the sky is no longer directly hitting your subject, but bouncing off of large nearby surfaces, which results in much softer, flattering light. Notice the difference in the light on the model’s face in the two photos on the left. The shot on this page is a great moment but is in horrible light; the photo on the opposite page is much more flattering now that she has stepped back a few feet into the shade.
Making Shade
There may come a time when shade isn’t readily available, like if you’re shooting in a field or out in a park. It’s times like these that you wish a giant cloud would blow through to diffuse and soften the sun for you. Fortunately, you can bring your own clouds to a shoot with you.
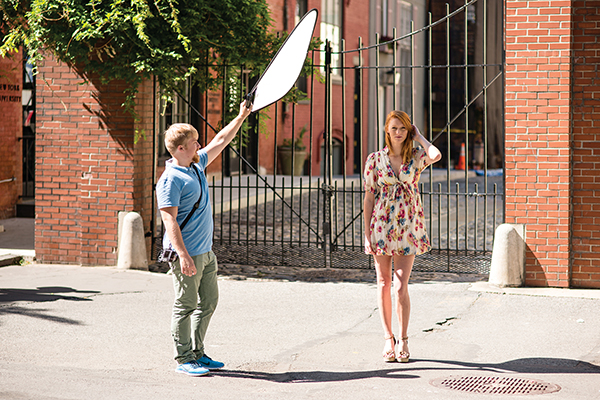
If you’ve ever examined one of those popular 5-in-1 reflectors, you would have seen the standard white and silver reflective fabrics that are used to bounce light, but they also include a translucent material that’s used to block or diffuse light, rather than bounce it back. Here’s another example of unflattering harsh side light. I asked an assistant to hold the reflector using only the diffusion material close to my model’s face, between her and the sun. In the next shot you’ll see how the light is less intense and much softer and flattering after being filtered through the diffusion panel of the reflector.
The 5-in-1 reflectors usually have a solid black fabric, as well. Rather than diffusing the light, this can be used to block the light altogether, giving you complete shade in which to place your model.
Adding Natural Light to Shade
With our subjects in the shade, they aren’t being hit by overexposed, contrasty light, but the light that’s hitting them usually doesn’t have much direction, causing features to look rather flat. Now that we have a grasp on controlling the ambient light in a scene, our next logical step is to start sculpting the light on our subjects. Because there’s already an abundance of natural light, the quickest and easiest thing to do is put it to use by redirecting it with a reflector. Here’s where the silver and white sides of the 5-in-1 come into play. By placing a reflector in the sun, you can catch the light and aim it back to sculpt your subject in light, just as if you were aiming a studio strobe at them.
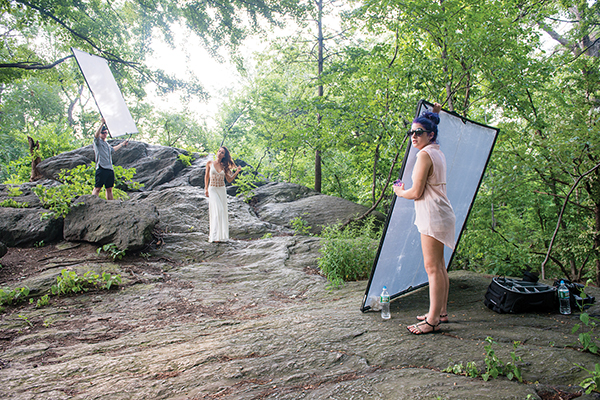
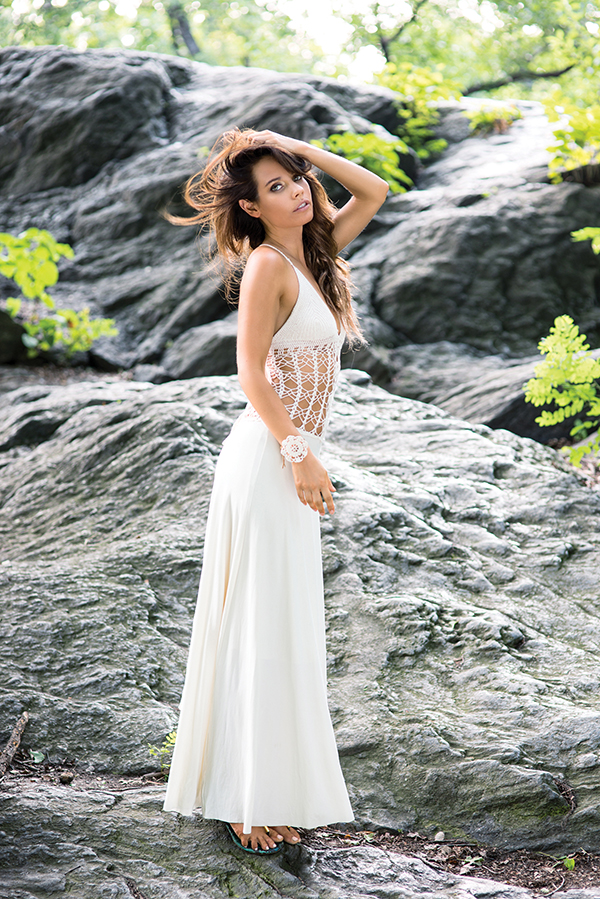
As a commercial photographer, I want my subjects and the clothes they wear to look crisp while still maintaining all of the fine detail. In the behind-the-scenes photo on the previous page from a shoot in Central Park, you can see an assistant using a large diffusion fabric to soften the light coming from behind the model. Without this, her hair and the edges of the dress would have been overexposed. You can also see a 6×6’ silver reflector being used to reflect some light back onto the model’s front side, illuminating her and the dress beautifully. The final image has nice, even lighting, flattering the model and maintaining a properly exposed dress, which was paramount to my client, the dress designer.
Adding Strobe Light to Shade
Now that we understand how shade, no matter how we found or created it, is key to controlling our scene, let’s look again at adding light. Previously, we bounced existing sunlight onto our subject, but another option we have is artificial light, in the form of a small flash or studio strobe. Remember that the sun is extremely powerful most of the day, so adding our own light to the equation is an uphill battle. This is another reason that shade is so important. You would need to buy some very powerful studio strobes to compete with the intensity of direct sunlight—strobes that most shooters don’t have lying around. When you place your subject in the shade, though, it’s as if you turned the power down on the sun by multiple stops. Now it’s much easier for less powerful flashes to add their light to the subject.
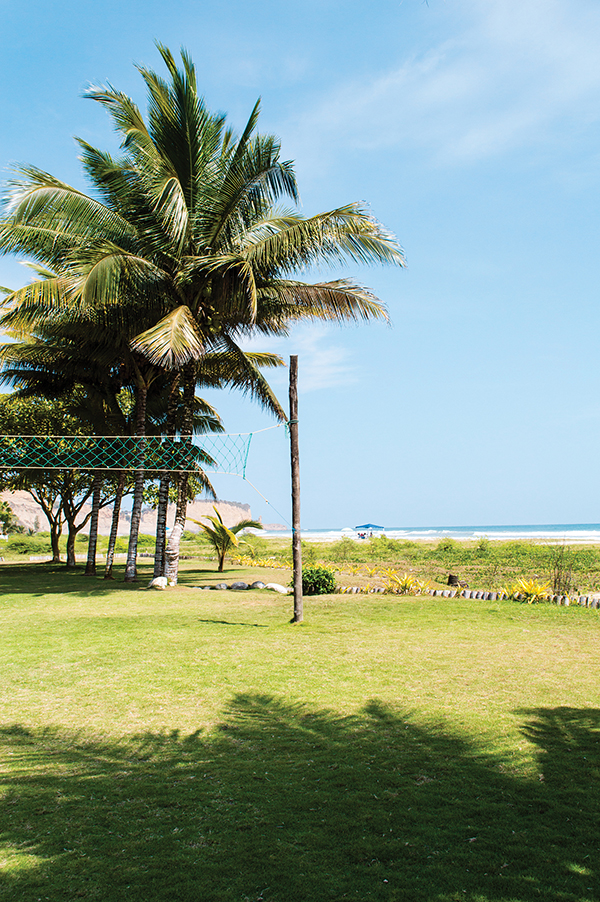
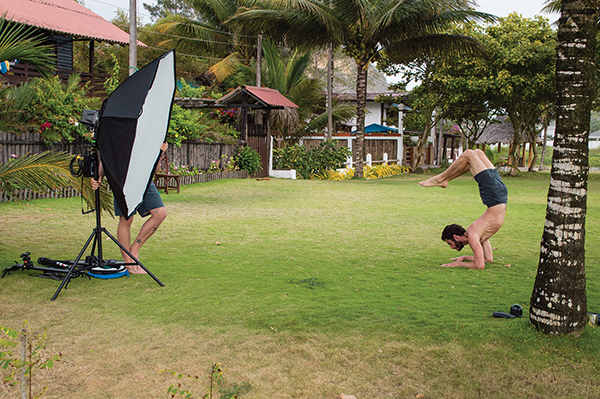
Take this photo of a beach in Ecuador, for example. It was taken around 1 p.m. when the sun is at its highest and brightest. You can tell this by the very distinct palm tree shadows on the ground.
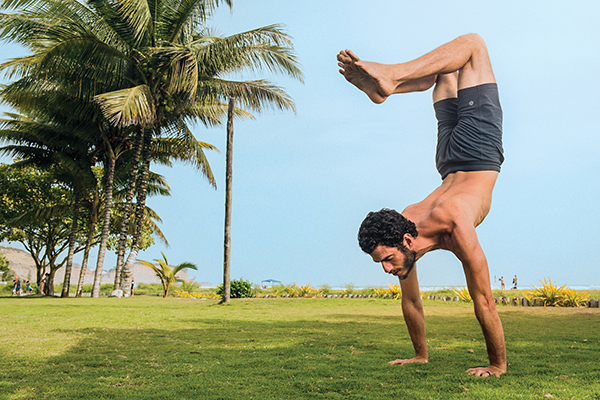
I wanted to create a portrait of a yogi doing various poses on the grass. Had I positioned him in the sunlight, it would have produced very unflattering harsh shadows. I needed to avoid that bad light, and I wanted to use a strobe light with a softbox to create my own more pleasing direction and quality of light. If he remained out in the direct sun, my light wouldn’t have had enough power to compete with the hard shadows from the sun. For both of these reasons, I asked him to pose in the shade. Now I had a blank canvas to work with while the existing light served to light up the beautiful background. All I had to do then was turn on my flash and light up my subject to match.
Camera Settings for Strobe Lights
Wait a minute, using strobes is easier said than done, right? Cameras and strobes don’t set themselves. When we were using only natural light, we could get a correct exposure using any one of the camera’s auto modes, such as Aperture Priority or Shutter Priority. There are certain restrictions to keep in mind when using strobes outdoors, though. The main one being the camera’s X-sync speed. This is the fastest shutter speed you can set your camera to while still synchronizing with your strobes.
Because of this, my shutter speed is the first thing I set. I was at 1/200, which was my camera’s max sync speed. Because it was so bright out, I set my ISO to a low 100. With all that daylight, I didn’t need my camera to be any more sensitive to light than that. The final step is the aperture. I adjusted my aperture and took test photos until the background was a proper exposure and I could still see details in the sky and leaves. At this point, the background is properly exposed, but my subject looked rather dark because he was in the shade.
Only then did I turn on my strobe light. I manually adjusted the power setting on the strobe up and down until it perfectly lit the yogi, as seen in the final photo on the previous page. Following this logic, you can quickly and easily dial in your camera settings when mixing strobes on location.
After calculating my base exposure of 1/200 at f/8, ISO 100, I could have input that info into a handheld light meter and used it to accurately measure the strobe’s output. Some people prefer to judge this exposure by eye, while others prefer the speed and precision of a light meter. Both approaches are equally valid if you walk away with a photograph that you like.
Making Your Own Shade and Light
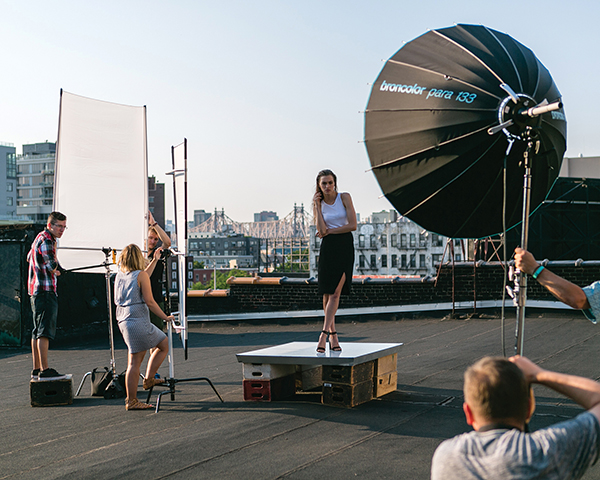
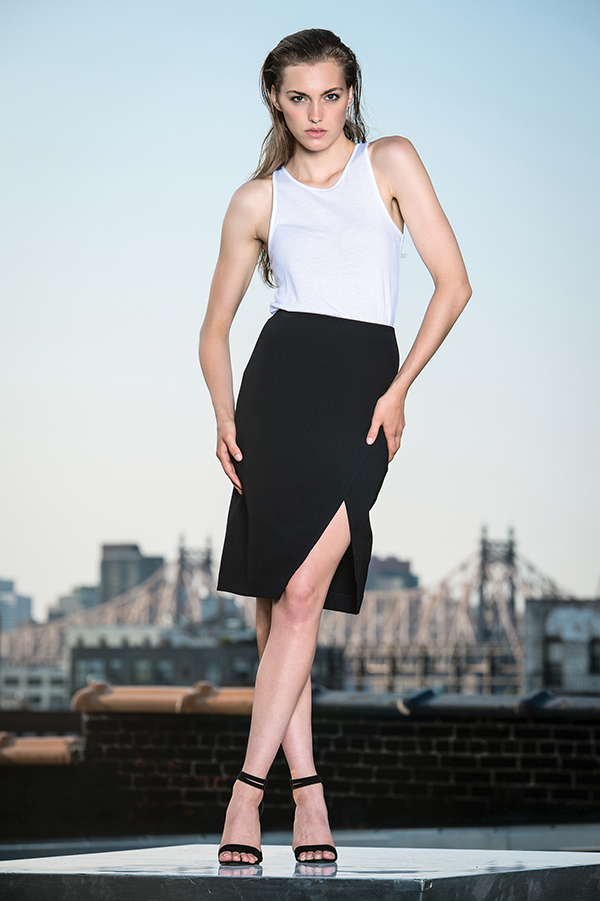
Now for a final example of taking complete control of the light on location. During a recent shoot on a rooftop in Brooklyn, I was faced with some very contrasty sunlight and had no shade to run to. I did have a few tools at my disposal, so I decided to combine all of the steps we just covered to conquer this tough situation.
The first thing I did was diffuse the sunlight that was overexposing my model’s hair from behind. I did this by placing a large scrim between her and the sun. Additionally, I placed a large black reflector toward her front to subtract more of that bright light. Then after I found my camera settings in the same way we just discussed, I turned on the flash. By dialing the power of the flash up until it perfectly exposed the model’s skin at our predefined camera settings, we walked away with this polished final image.
No matter your level of expertise or how much gear you have at your disposal, all you need to do is efficiently use shade, and you’ll be walking away with great photos no matter what time of day it is. Happy shooting!
All Images by Erik Valind. This article originally published in the Photoshop User magazine, October 2014.


