
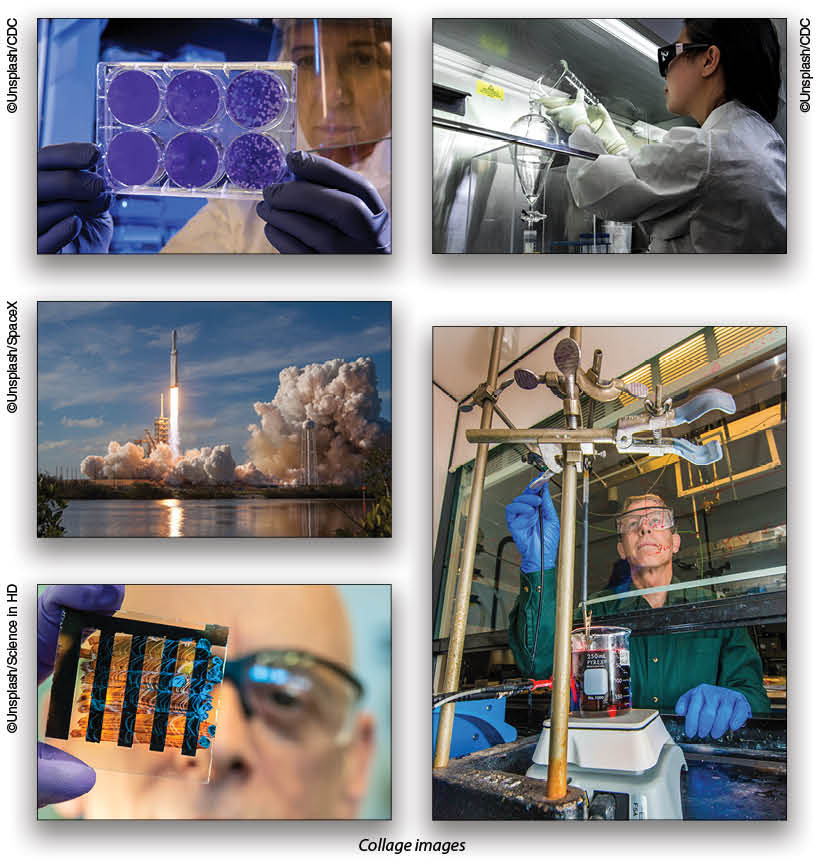
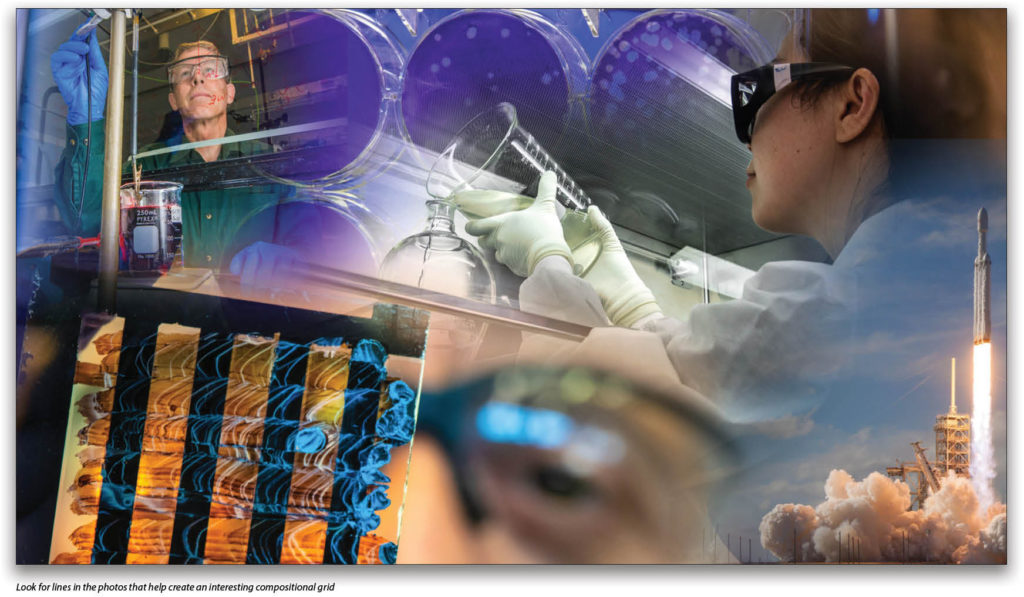
One thing that’s as old as Photoshop itself is the creation of digital collages. This type of photo asset is used for everything from poster backgrounds to the covers of corporate financial reports. It’s a classic storyteller technique that mixes and blends a variety of images to create a visual motif. Below is an example of a collage representing science and research.
While working at an event recently, my team was asked to make 10 collages to be placed in a presentation for a high-level executive who was going onstage in 90 minutes! This meant we had to find the right five or so images for each of the 10 themes, lay them out, and blend them together. This is where a little pre-thought about the engineering and process can really save you under pressure.
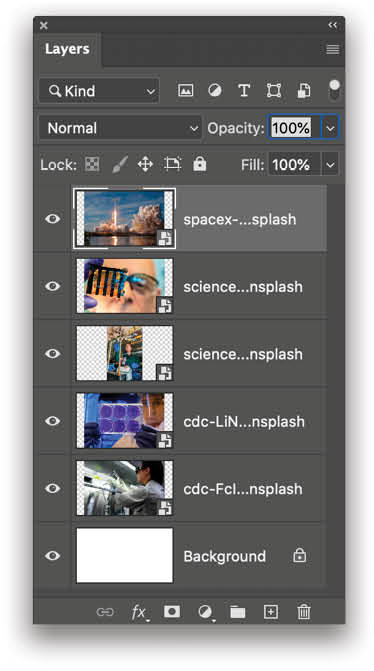
To speed up the process and create some visual consistency, there are some basic techniques you can use to build your own digital collages. First, you’ll need multiple images. It’s best to start with a good background image on which you can collage all the other images. This is less of a feature image, and more of an element that can fill in any gaps in your collage after you’ve blended together the other images in the Photoshop file. Having a base image that has similar colors to the other images helps with the overall quality where it fills in the gaps. On the previous page, you can see the images used for our collage example. Notice that you can’t really see much of the base image in the example, but it’s doing a nice job of filling the gaps.
Inserting Your Images
Building your collage obviously requires that you make a new file in Photoshop at the size that’s needed for the final project. Is this for a video, or a poster? After making your file size to spec for your project, you can start inserting all those images into your working file.
If you have all of the collage images in a folder on your computer, you can simply drag them all at the same time from the folder into the Photoshop file, which is faster than placing them one at a time. As each image appears in the document, press Enter on your keyboard to place it on its own layer as a smart object. This is invaluable for protecting the pixels of the images while you resize them for your collage. (If you’re new to smart objects, you can click here to learn more about them.)
Use Feather to Work Faster
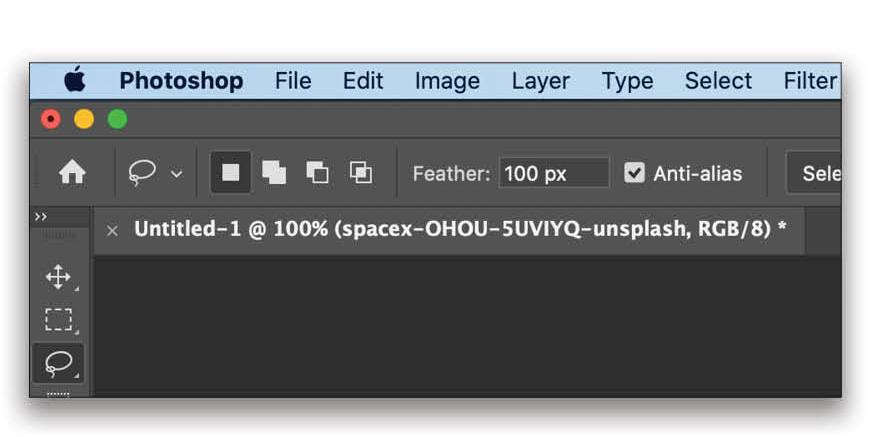
Now we’re going to use a selection technique that not only speeds up masking the images but also creates visual consistency. An option that we can use on nearly all of our selection tools is Feather, which you’ll find in the Options Bar at the top of Photoshop. For this example, we’ll look at the options for the Lasso tool (L).
For the Lasso tool settings, you’ll want to set a Feather value and check on Anti-alias, which helps blend all the little square pixels together so they look less “jagged.” Because we’re not going to have any sharp masked edges in this technique, it shouldn’t matter, but it’s always good to make sure to turn on Anti-alias just in case.
Feathering is the process in which the edge of a selection is split into a range. So instead of being masked with precision as a nice sharp edge, it will blend that edge over a range of pixels that you choose in the Options Bar. For this collage, we’re going to use a large number, say 100 px, which means the edge will blend from 100% visible to 0% visible over a span of 100 px. So, why is this important? Although you can create a collage by painting on layer masks with the Brush tool (B) set to a big soft brush, this often slows people down while they make artistic decisions about where they should paint. Using the feather selection technique allows you to focus and work faster.
Now that you’ve set the Feather option for your Lasso tool, any selected area will have a feathered edge. This will become apparent the first time you outline an interesting part of the image with the Lasso tool, and then click the Add Layer Mask icon (circle in a square) at the bottom of your Layers panel. You’ll immediately see that the masked area has a blended edge.
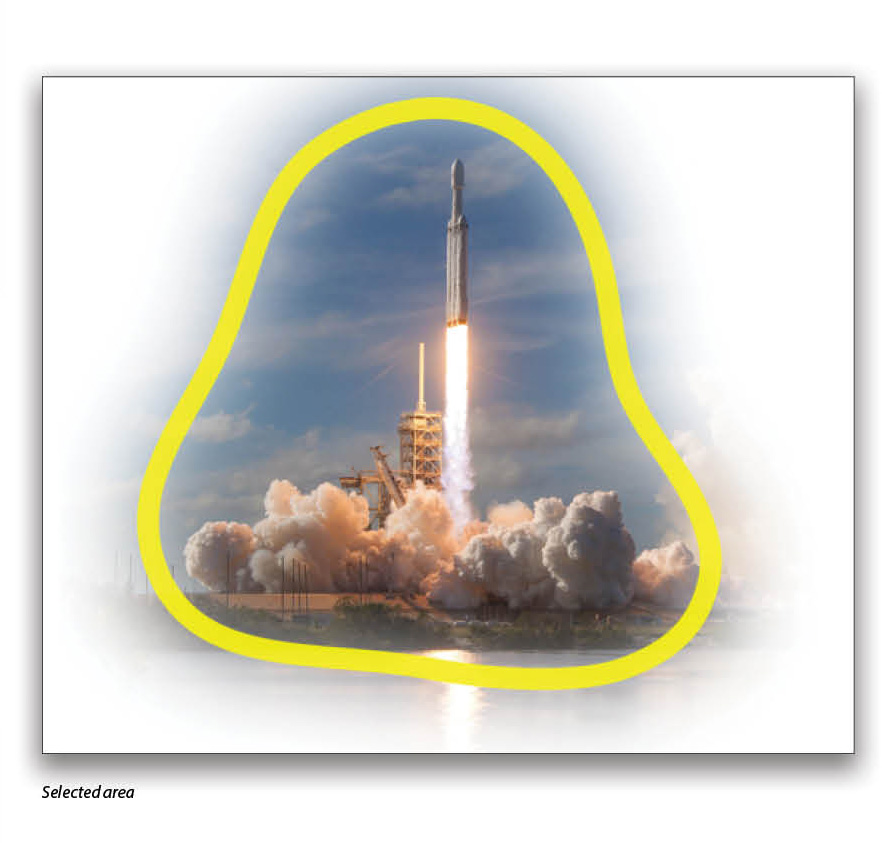
Here, the yellow line illustrates where the Lasso tool was used to draw a selection in the image. Once the layer mask is added (make sure you’re on the layer of the image you want to mask), you’ll see this lovely blended edge. Note: If your selection is too close to the edge of the image, you’ll get a sharp edge as a part of the blend, so be sure to select an area well within the image boundary.
If you like the amount of Feather for the blending, now you can simply go through each image layer, draw your selection around the area on which you believe is worth focusing, and then add a mask. Try to draw more organic shapes, not rigid triangles, circles, or rectangles, as this makes it harder for the audience to see the collage as a series of frames and more as a cohesive single visual. Do this for all your images except the bottom image layer, which is used to fill the gaps.
Now that all of your images have a nice big feathered mask, arrange them how you like over the base image. Use Edit>Free Transform to resize the various images. Press Enter to commit the transformations.

Switch the stacking order of the layers to change how the images blend with each other. If you’ll be adding text or titles, then move your blended elements to the outer parts of the collage. If you think there’s an image around which everything should be based, place it in the center, and have your various images scattered around it.
Final Adjustments
If you find a sharp edge along the boundary of a masked image, or some other element that’s distracting, you can refine your collage quickly by painting on the layer masks with a large soft round brush. Click on the layer mask thumbnail of the image layer you want to adjust, and then paint with black to hide more of the image, or paint with white to show more of it. Don’t forget that you can reduce the Opacity of your Brush tool in the Options Bar to give you an additional level of control in blending elements throughout your collage.
This article originally published in the June/July, 2020 issue of Photoshop User magazine.


