
We’re picking up where we left off last week, where we dipped our toe into the wild world of sharpening. We started with the classic Unsharp Mask filter, which has been in Photoshop since, well, version 1.0 some 30-something years ago, but we still use it today, so it was a perfect way to kick off our adventure using filters. In this issue, I want to take sharpening another step further.
The sharpening we’re going to learn about today is called High Pass sharpening (using the High Pass filter), which I use when I open an image that:
- Needs a ton of sharpening
- Is the type of image that can take a lot of sharpening and look great, such as an image with lots of detail (e.g., cityscapes, certain landscapes, automobile photography, architectural photography, or pretty much anything with lots of detail, metal, angles, etc.)
- Or an image that just seems to be a little bit out of focus.
That’s when it’s time for some mega-sharpening using the High Pass filter. I don’t believe this filter was created for sharpening, but when you use it in connection with a layer and layer blend modes, you can sharpen the living daylights out of a photo (and I mean that in a good way).
HERE’S HOW IT WORKS
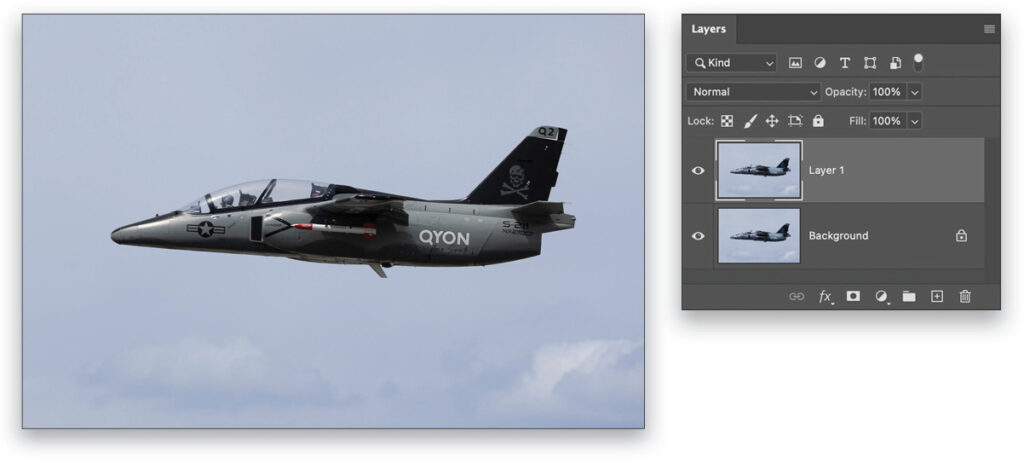
STEP ONE: Once your image is open in Photoshop, duplicate the Background layer (I’m hoping you remember the shortcut from earlier in this column but, just in case, it’s Command-J [PC: Ctrl-J]). We need this duplicate layer so we can apply the filter to it and then blend its effect with the original image on the Background layer.
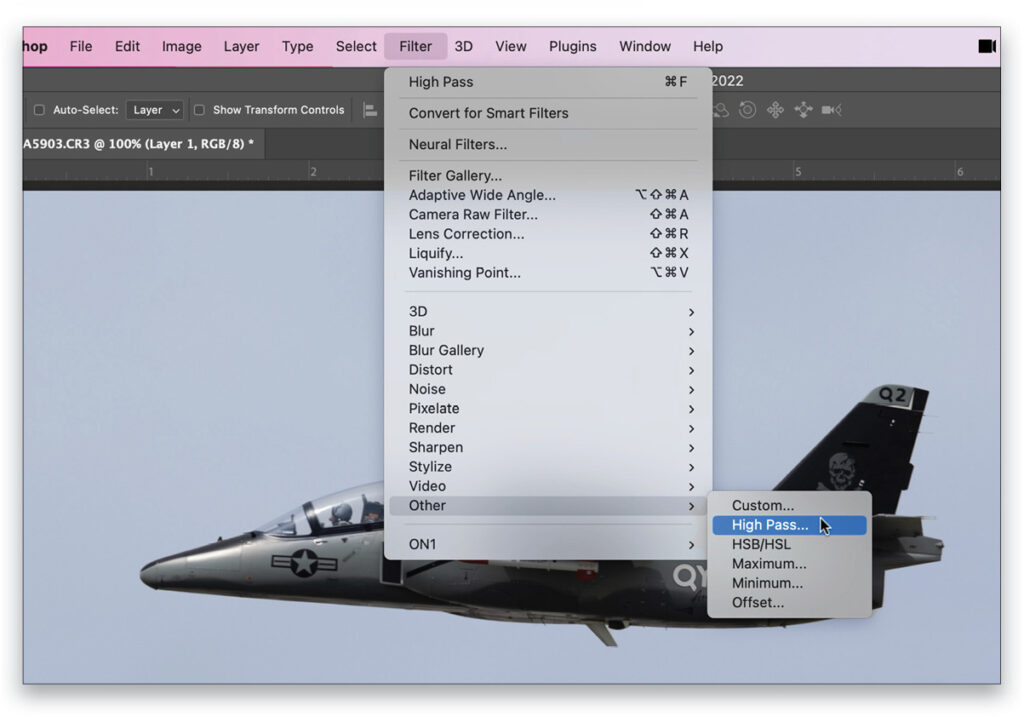
STEP TWO: Next, go under the Filter menu, down near the bottom to Other, and choose High Pass (as shown here).
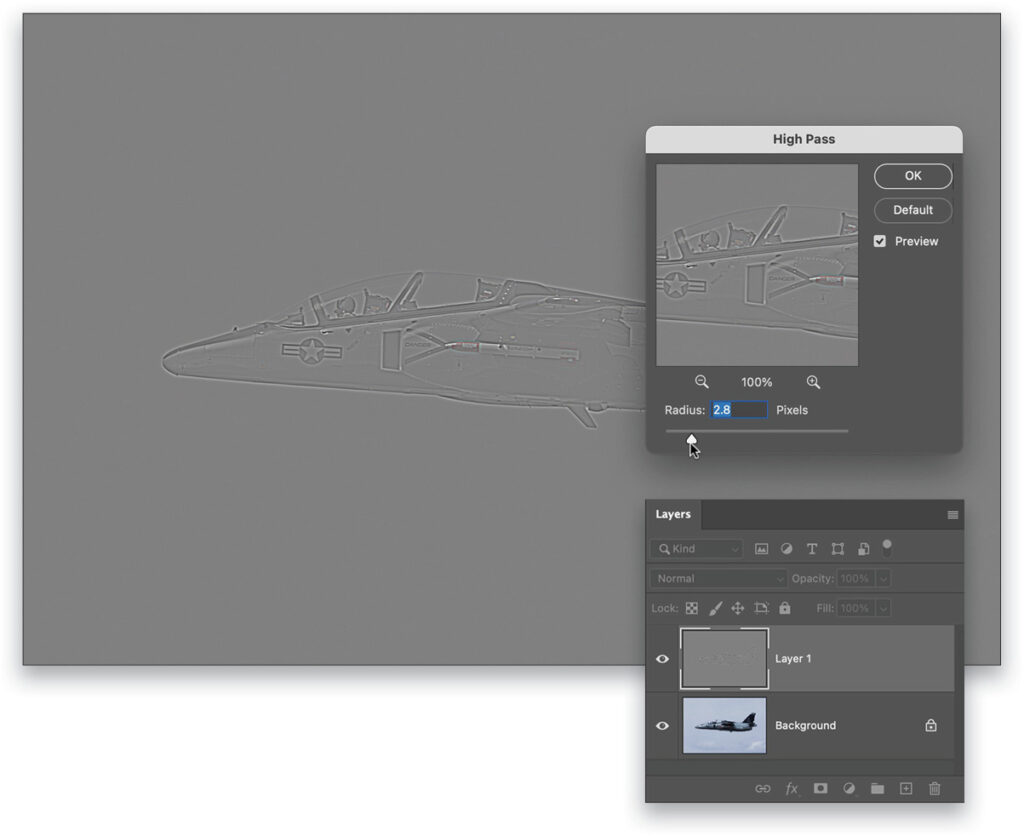
STEP THREE: When the High Pass filter dialog appears, your image will turn gray, but you’ll probably see somewhat of an outline of parts of your image onscreen. That’s okay; it’s doing what it’s supposed to do at this point. Drag the Radius slider all the way to the left until your image appears as a solid gray fill. Now, slowly drag the Radius slider to the right until you start to see the outline edges of your subject clearly appear (as shown here).
The farther you drag this slider, the more intense your sharpening will be, but don’t overdo it or you’ll get a glow around your image that looks kinda funky (in a bad way). I’m somewhere between 2.0 and 4.0 on most images but, of course (come on, everybody, say it with me now), it depends on the image. Sometimes you might move it to 4.0 and still not see enough outline, and you’ll have to go farther, so keep an open mind as you drag that slider. It’s a dance to find how far to drag it without creating those unwanted glows. Click OK to apply the High Pass filter.
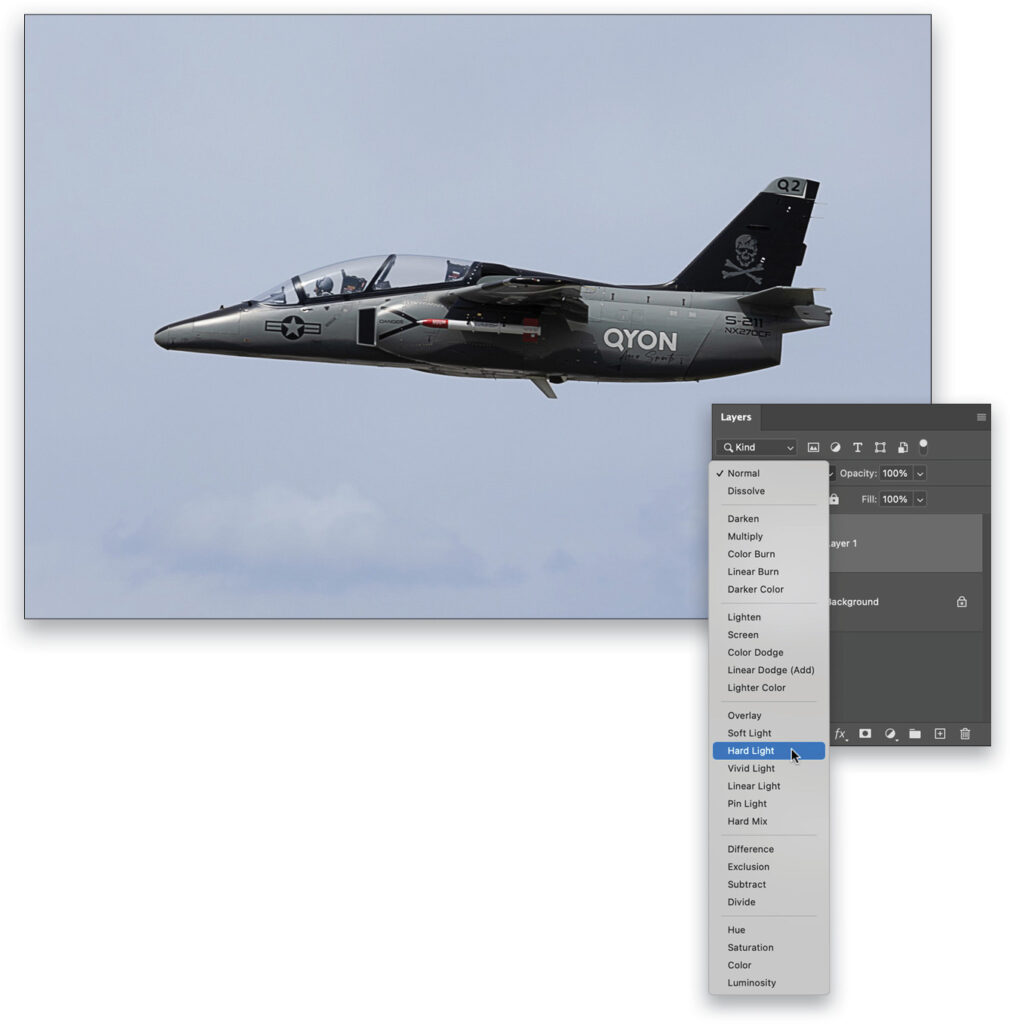
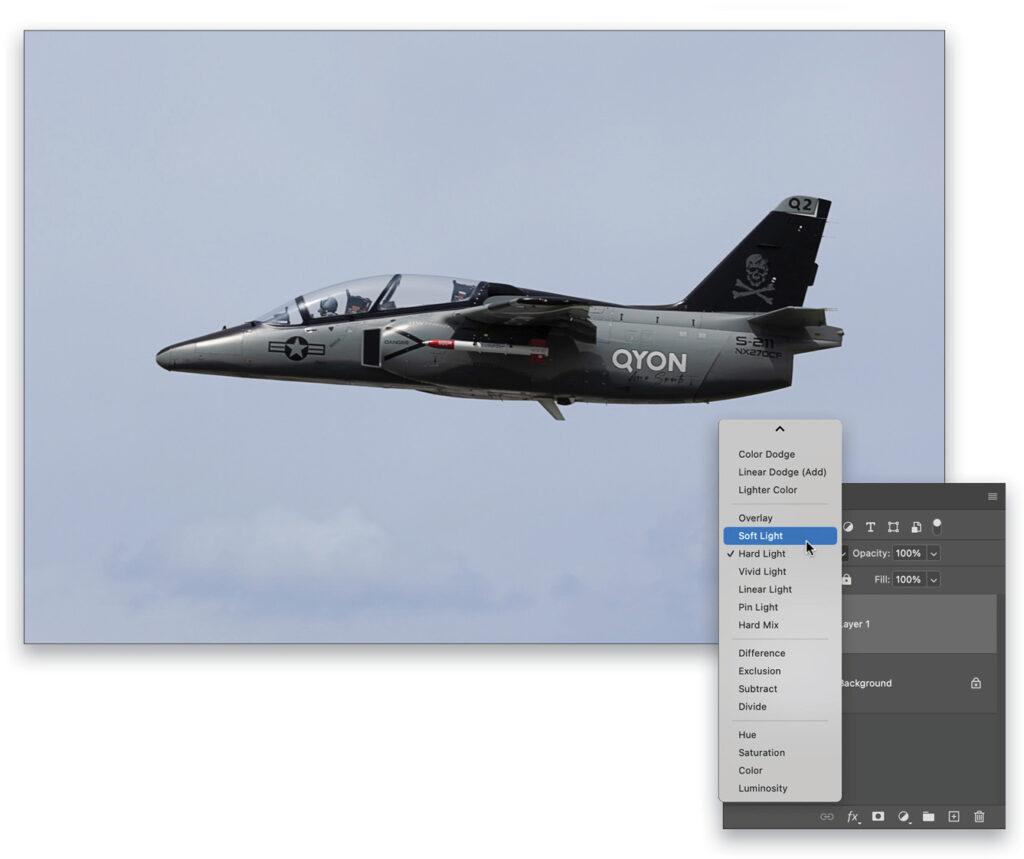
STEP FOUR: Now to blend what you’ve done on this layer with the original image on the Background layer, we’ll use layer blend modes. So, go up near the top left of the Layers panel, and from the layer blend mode pop-up menu, change the mode from Normal to Hard Light. This is my go-to blend mode when I’m applying High Pass sharpening. You’ll instantly see the entire image sharpened big time (as shown here).
STEP FIVE: If you think the sharpening is too intense for the image on which you’re working, there are two easy things to try. The first is to change the layer blend mode from Hard Light to Soft Light, which applies a less intense amount of sharpening (as shown here).
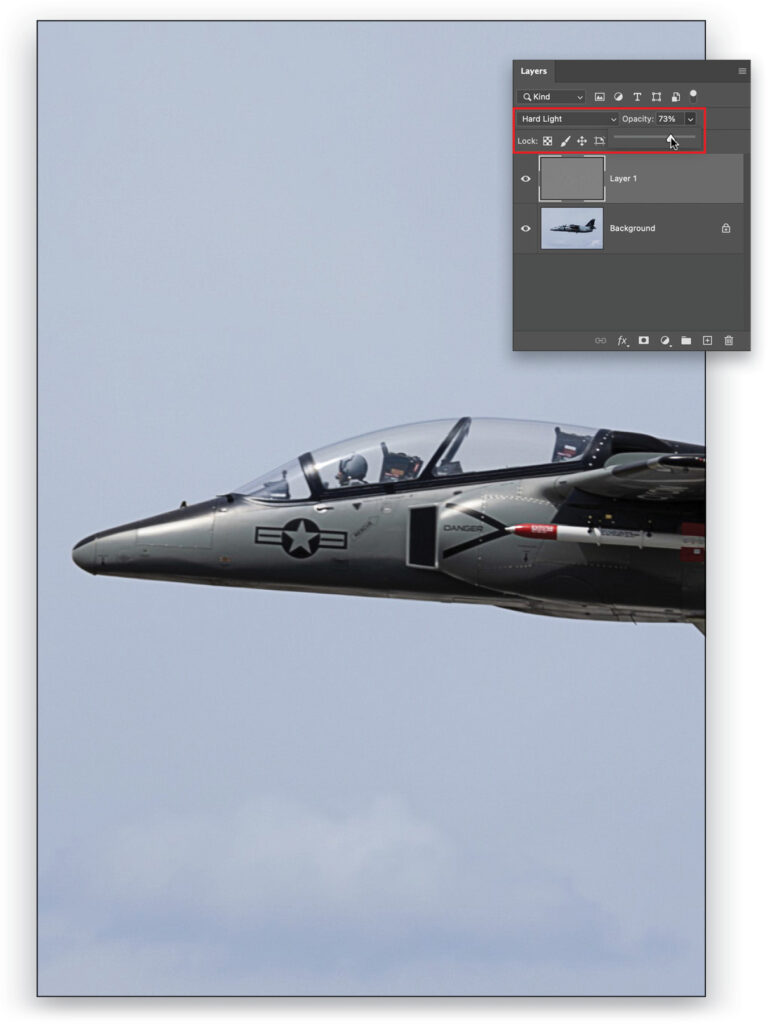
STEP SIX: Another method is to leave the layer blend mode set to the more intense Hard Light, but then lower the Opacity of this gray layer in the Layers panel (as shown here) to dial in just the right amount for the image on which you’re working. This works really well.
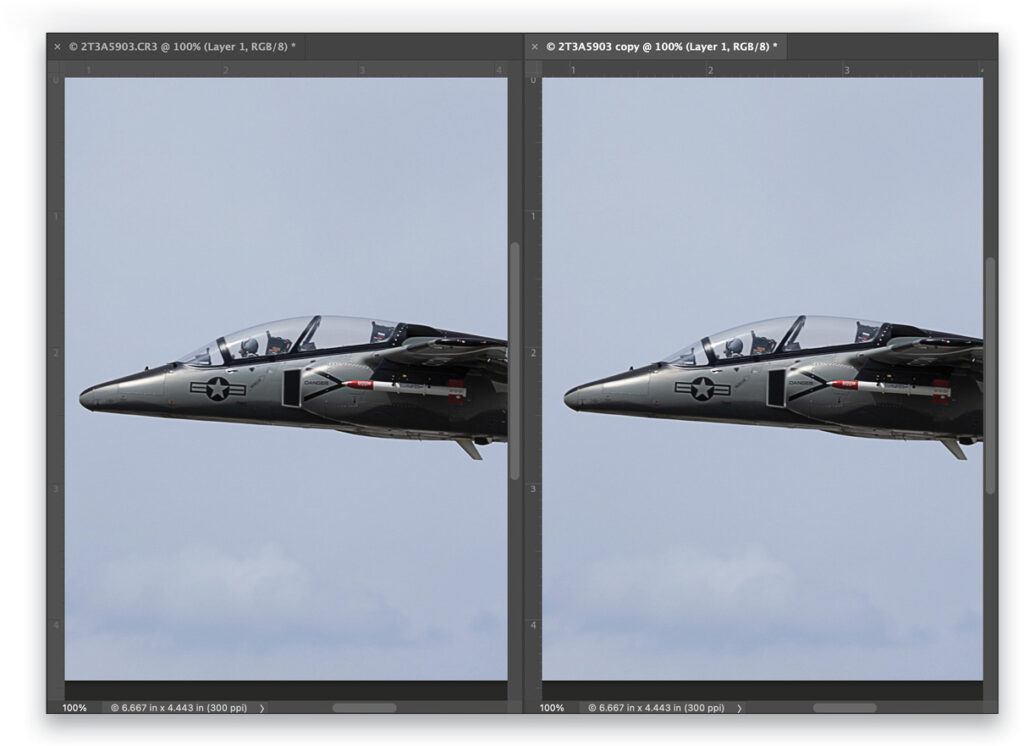
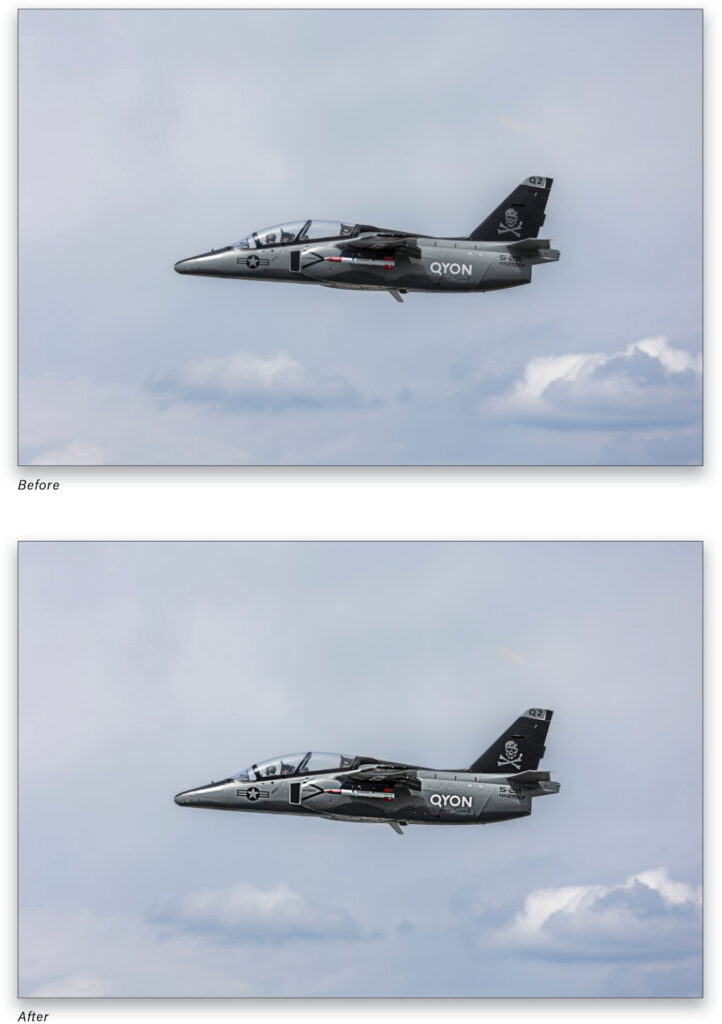
STEP SEVEN: This isn’t really a step, but below is a side-by-side before the sharpening (left) and after applying the High Pass filter sharpening (right). By the way, it’s not as easy to get this side-by-side view in Photoshop as it is in Lightroom where you just press the letter Y. Here’s what I did.
- I duplicated the image by going under the Image menu and choosing Duplicate.
- Then, I went back to the original image I was working on and hid the visibility of the High Pass filter layer by clicking on the Eye icon to the left of it in the Layers panel so we’re just seeing the original unsharpened image.
- Next, I pressed Command-1 (PC: Ctrl-1) to zoom in to 100%.
- Then I went under Photoshop’s Window menu, under Arrange, and chose 2-up Vertical to put the two open documents side-by-side.
- Go to the Window menu again, under Arrange, and select Match All. This will match the zoom and location of the two images.
- If you hold the Shift key and the Spacebar (which switches your cursor to the grabber hand), you can move both documents around onscreen at the same time, which is helpful to look at different parts of both images in the same spot, at the same time.
Whew! That’s a lot of work just to see a side-by-side before and after, right? Okay, back to sharpening.
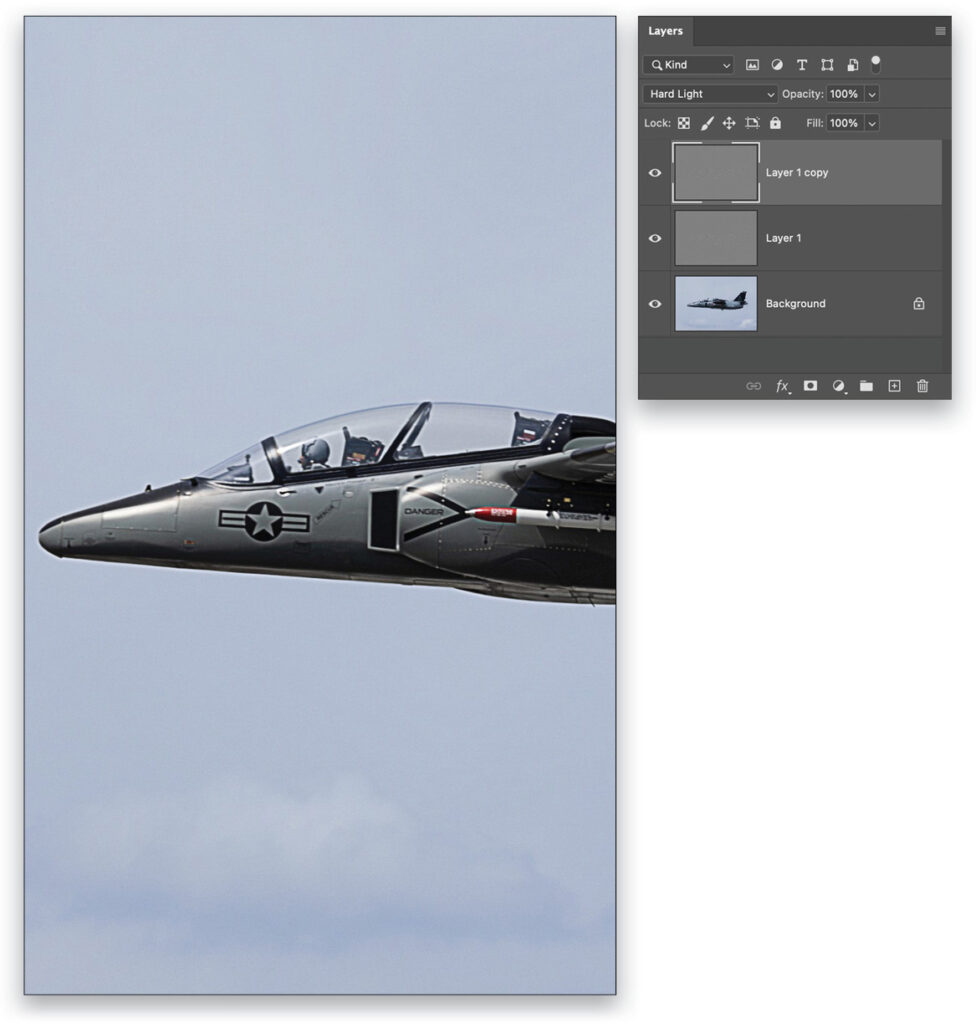
STEP EIGHT: If, instead of lowering the amount of sharpening, you think it needs a lot more, you can either (a) delete that layer and try again, but this time drag the Radius slider farther to the right, or (b) just simply duplicate that High Pass layer by clicking on it in the Layers panel and pressing Command-J (PC: Ctrl-J), and it doubles up the sharpening.
That’s what I did here, but an ugly side effect of too much sharpening is rearing its head in that you now see a white line appearing around the jet. That white glow is a sure sign of too much sharpening. Of course, one way to combat that is to lower the Opacity of this duplicate layer until the glow goes away, but there’s another method you might want to consider.
STEP NINE: You can use a layer mask and paint in the sharpening over the body of your subject, while avoiding painting over the outside edge. In this example, that keeps the sharpening really strong on the inside areas of the jet, including the cockpit and the lettering on the jet, without creating that glow along the outside edge where the jet meets the sky. To do this, hold the Option (PC: Alt) key, and then click the Add Layer Mask icon at the bottom of the Layers panel (it’s the third icon from the left; the one that looks like a rectangle with a black circle in the middle).
When you do this, it hides the duplicate layer’s High Pass sharpening behind a black mask. You can’t see the effect of the sharpening on that layer any longer because it’s hidden behind that black wall. Now, get the Brush tool (B), make sure white is your Foreground color by pressing D, and then paint over the parts of the subject you want sharpened. Those areas will be revealed as you paint, and appear much sharper. Remember, don’t paint over the outside edges of your subject.
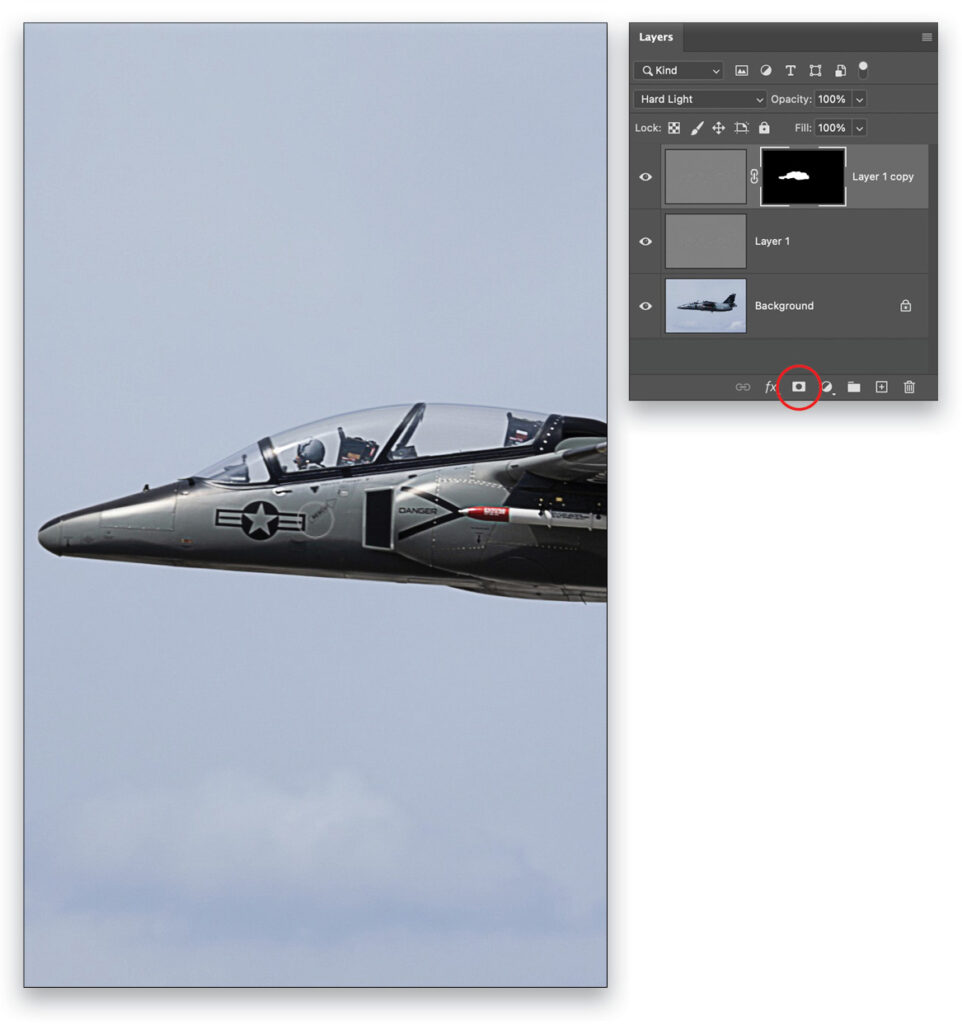
STEP 10: Another side effect of all this sharpening is that not only have I sharpened the jet, I’ve also hyper-sharpened the clouds, which
I don’t want. If that’s the case, you can copy the mask we just created in the previous step, over to your the original High Pass filter layer (Layer 1) by holding the Option (PC: Alt) key, clicking directly on the layer mask thumbnail on the top layer in the Layers panel (the thumbnail that’s black and white), and dragging-and-dropping it to the original High Pass filtered layer. Now, the sharpening only appears on the jet, not on the outside edges, and more importantly, not on the clouds. How cool is that (love me some layer masks)?
Well, there you have it. You’ve now used a new filter, and you have a new style of sharpening under your belt.
This article originally published in the February, 2022 issue of Photoshop User magazine.
About Photoshop User and KelbyOne
Photoshop User magazine comes out digitally 12 times a year and is part of KelbyOne, the leading educational resource for Photoshop, Lightroom, and photography. Pro members have access to more than 900 video courses and 100 back issues of Photoshop User. To learn more about KelbyOne, click here.


