Aside from using the shape tools to create art, you can use them to create an infinitely resizable layer mask. Layer masks can be raster (pixel-based) or vector (path-based) in nature. The latter are more flexible because vectors are infinitely resizable and editable without quality loss. In this column, you’ll use the Rectangle tool to create a round-edged mask that you can feather.
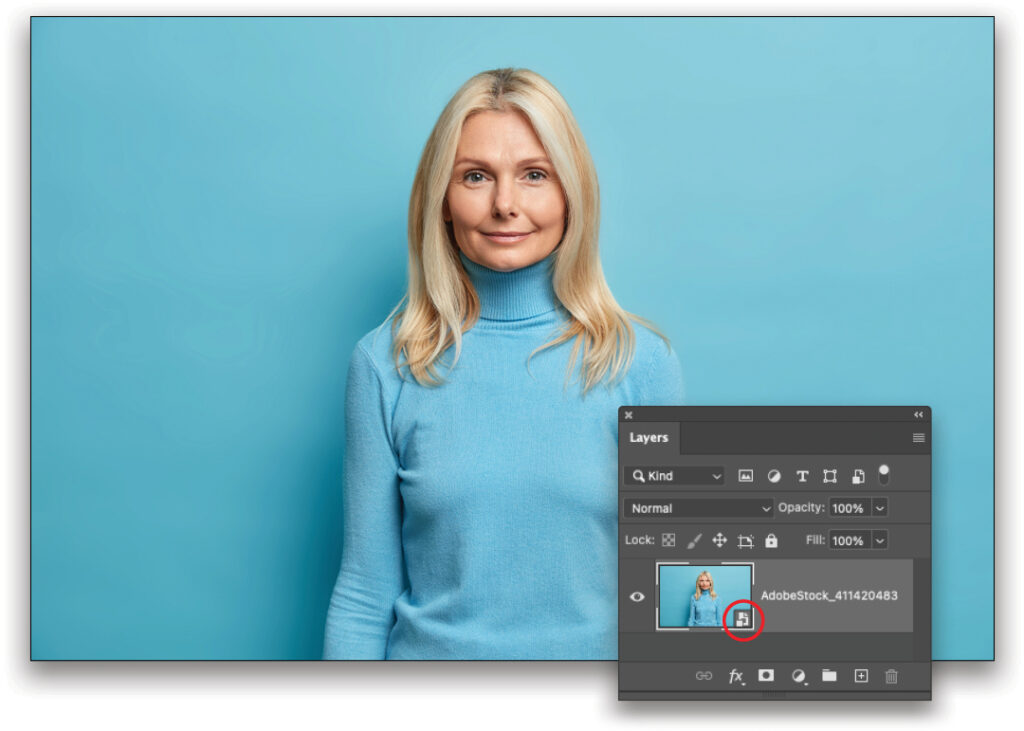
STEP ONE: Choose File>Open as Smart Object and then navigate to a photo, such as this headshot that’s free from Adobe Stock. Notice the special badge on the layer thumbnail (circled). If you’re starting in Lightroom, select the thumbnail in the Library module and choose Photo>Edit In>Open as Smart Object in Photoshop.
If you’d like to download this image to follow along, click this link, log in with your Adobe ID, and click the License for Free button. This will download the image to your computer as well as add it to your Libraries panel (Window>Libraries). Double-click the image in the Libraries panel to open it in Photoshop, and then go to Layer>Smart Objects>Convert to Smart Object.
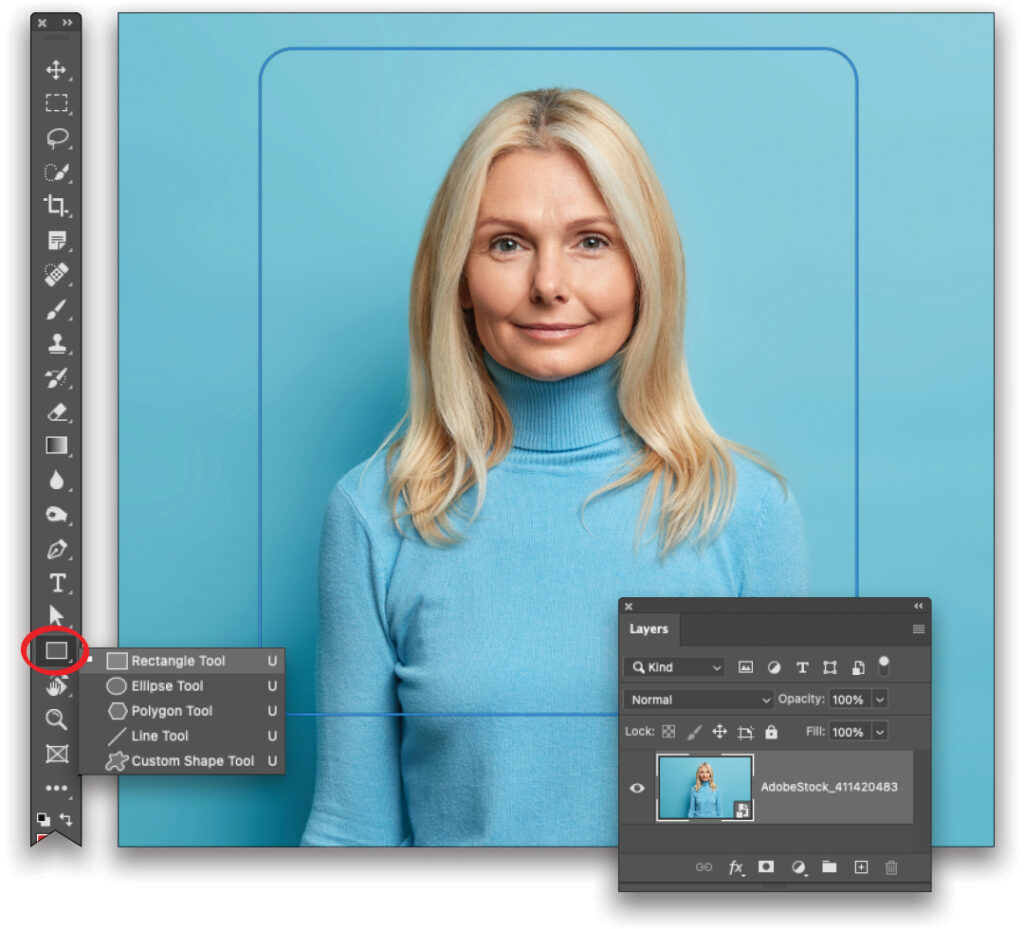
STEP TWO: In the Toolbar, grab one of the built-in shape tools. For this example, let’s use the Rectangle tool (you can press Shift-U to cycle through the shape tools). Happily, this technique works in exactly the same way with all the shape tools, except for the Line tool. In the Options Bar, choose Path from the Tool Mode menu (circled). Next, change the corner radius (also circled) to around 200 pixels to make the corners rounded on this high-resolution image (higher numbers make for more rounded edges). On a low-resolution image, you might try 30 pixels.

STEP THREE: Mouse over to the image and drag to draw a rectangle. Photoshop creates a path as you draw. You can press-and-hold the Spacebar to move the shape around while you’re drawing. Release your mouse button when you’re finished.
Tip: You can also Option-drag (PC: Alt-drag) to draw the shape from the center outward, or Shift-drag to draw a perfect square. To draw a perfect square from the center outward, Shift-Option-drag (PC: Shift-Alt-drag). In addition, if you know the exact dimensions of the shape you want to draw, you can single-click atop the document with the Rectangle tool, and enter the width and height in the dialog that opens. Sweet!
STEP FOUR: Choose Layer>Vector Mask>Current Path. Photoshop adds a vector mask (circled) to the currently active layer, hiding the parts of the image that are outside the path you drew.
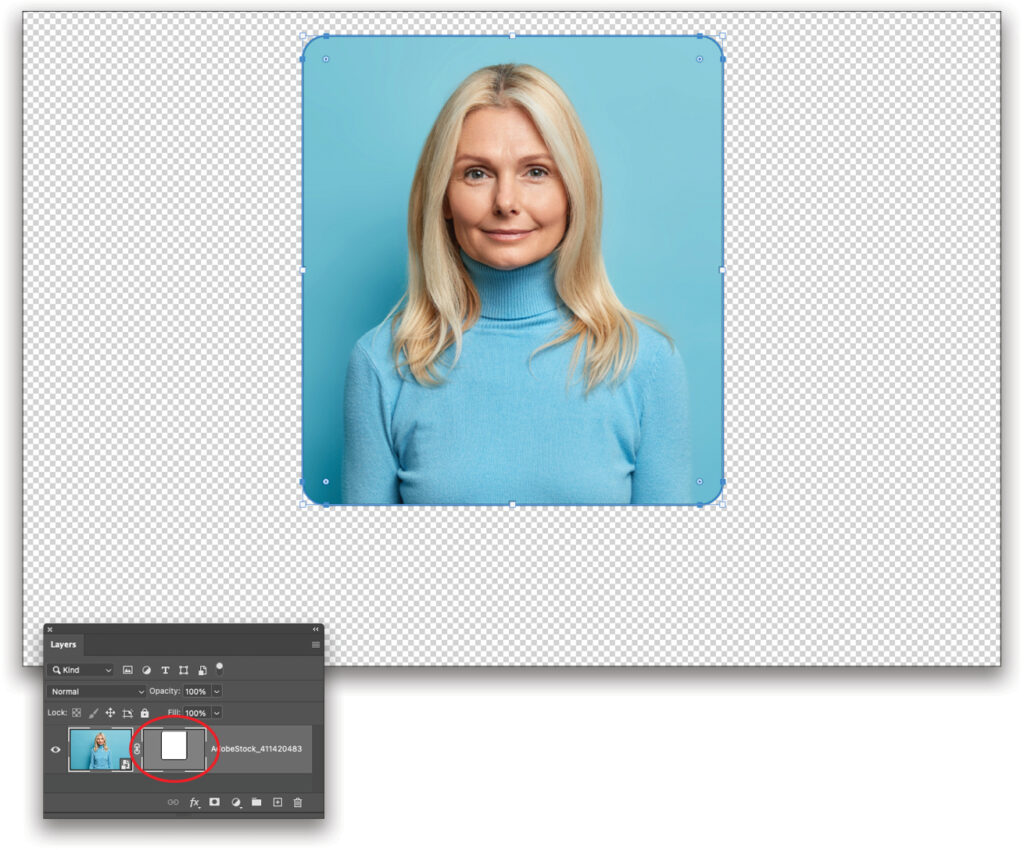
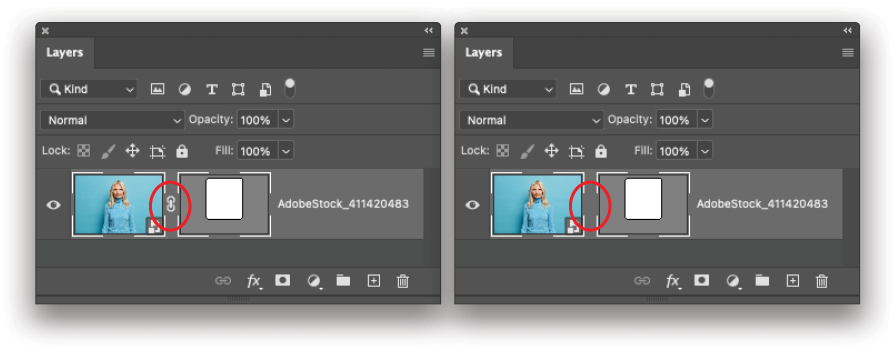
STEP FIVE: Now let’s unlink the photo from the mask so we can manipulate each one separately. In the Layers panel, click the tiny chain link icon (circled) between the layer thumbnail and the vector mask. When you do, the chain link icon disappears.
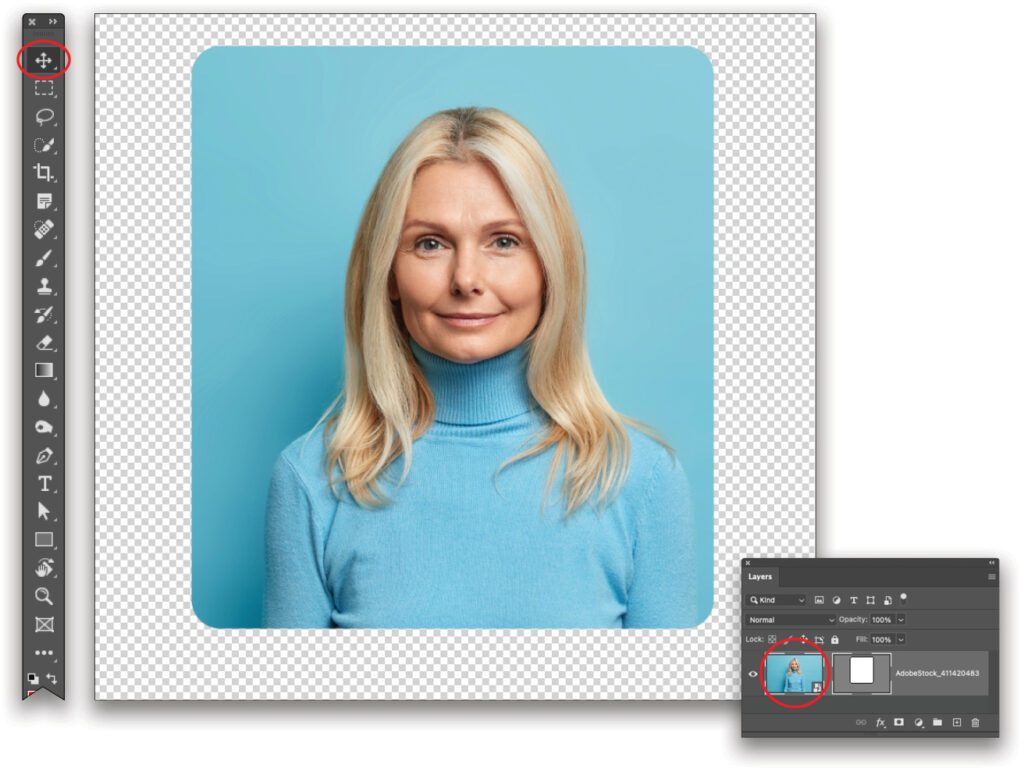
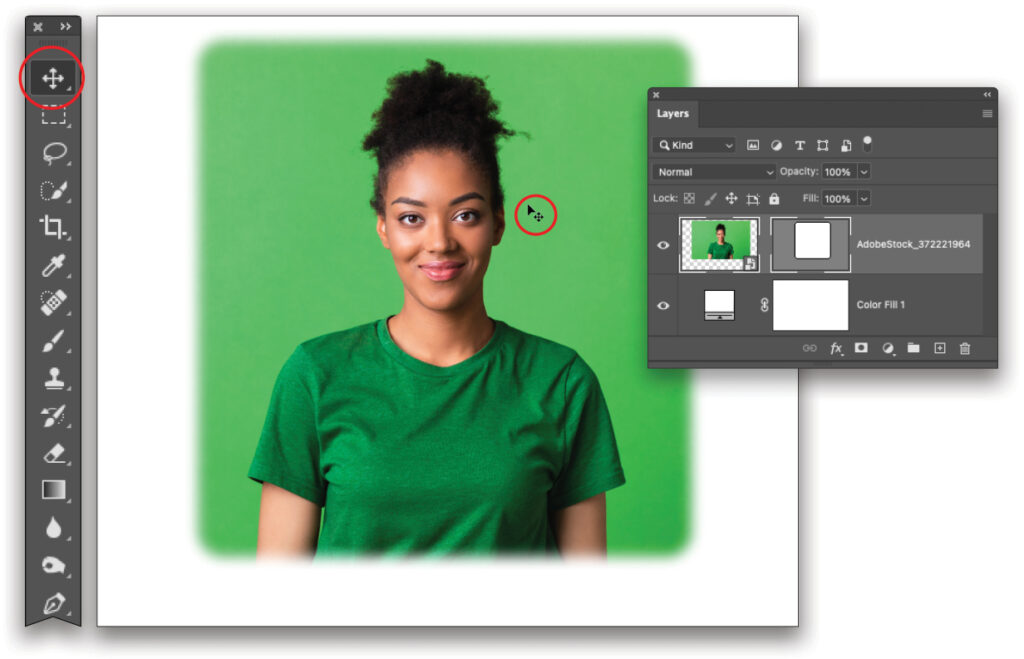
STEP SIX: To reposition the photo inside the mask, press V to grab the Move tool (circled). Over in the Layers panel, click the layer thumbnail (also circled) and then drag atop the image to reposition it.
STEP SEVEN: Before we do anything else, let’s add a colored background so you can see our subsequent changes more easily than on the existing transparent background. To do that, click the half-black/half-white circle at the bottom of the Layers panel (circled) and choose Solid Color. In the Color Picker that opens, choose a color (white was used here) and click OK. In the Layers panel, drag the Color Fill adjustment layer beneath the smart object.

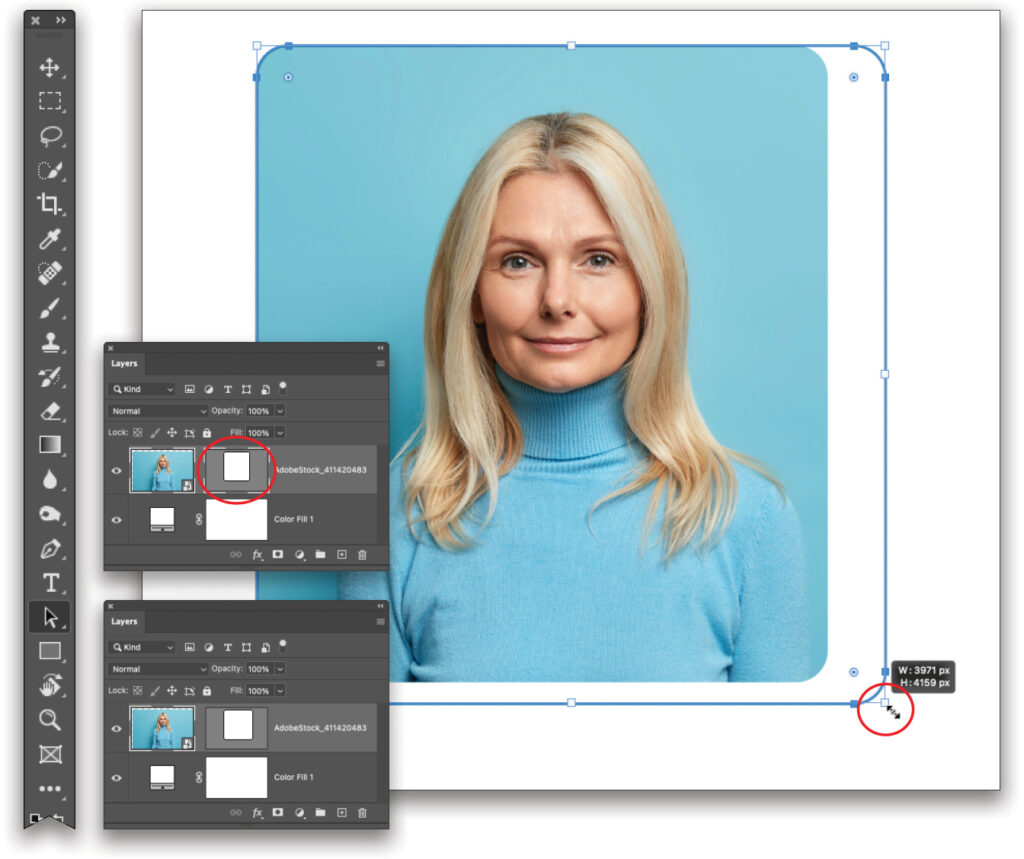
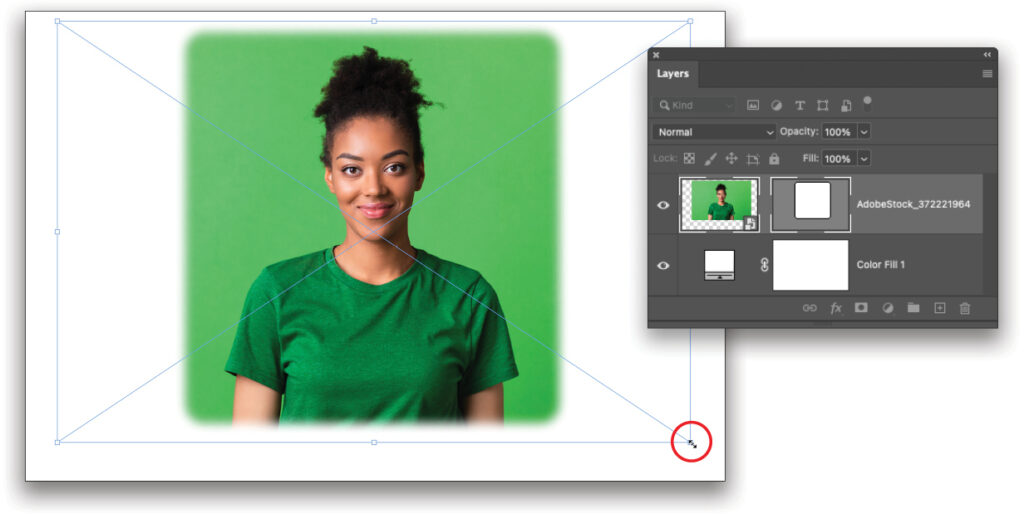
STEP EIGHT: Now let’s say you want to resize the vector mask. To do that, press A to grab the Path Selection tool (circled). You should see a bounding box with resizable handles appear around the path. If you don’t, go to the Layers panel and click the vector mask thumbnail (also circled)
to activate it. Back on the image, drag any white square handle to resize the mask. In this example, we dragged the bottom-right handle (circled) outward to increase the mask size so it’s more square. After you resize the vector mask, click-and-drag inside the path to reposition it. When you’re finished, press Enter on your keyboard and the bounding box disappears.
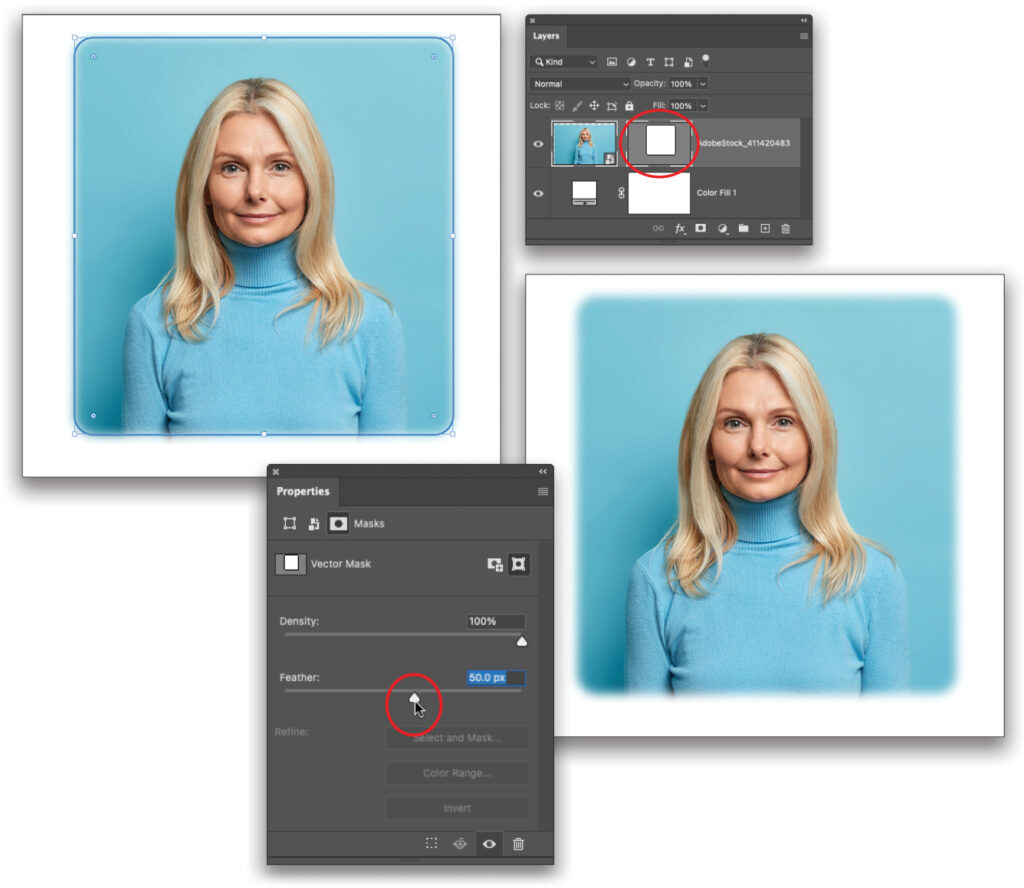
STEP NINE: Now let’s feather the edges of the mask. In the Layers panel, double-click the vector mask (circled). In the Properties panel that opens, drag the Feather slider (also circled) to the right to around 50 pixels. Because the Path Selection tool is still active in the Toolbar, Photoshop shows the path. To hide it, activate another tool or choose View>Extras.
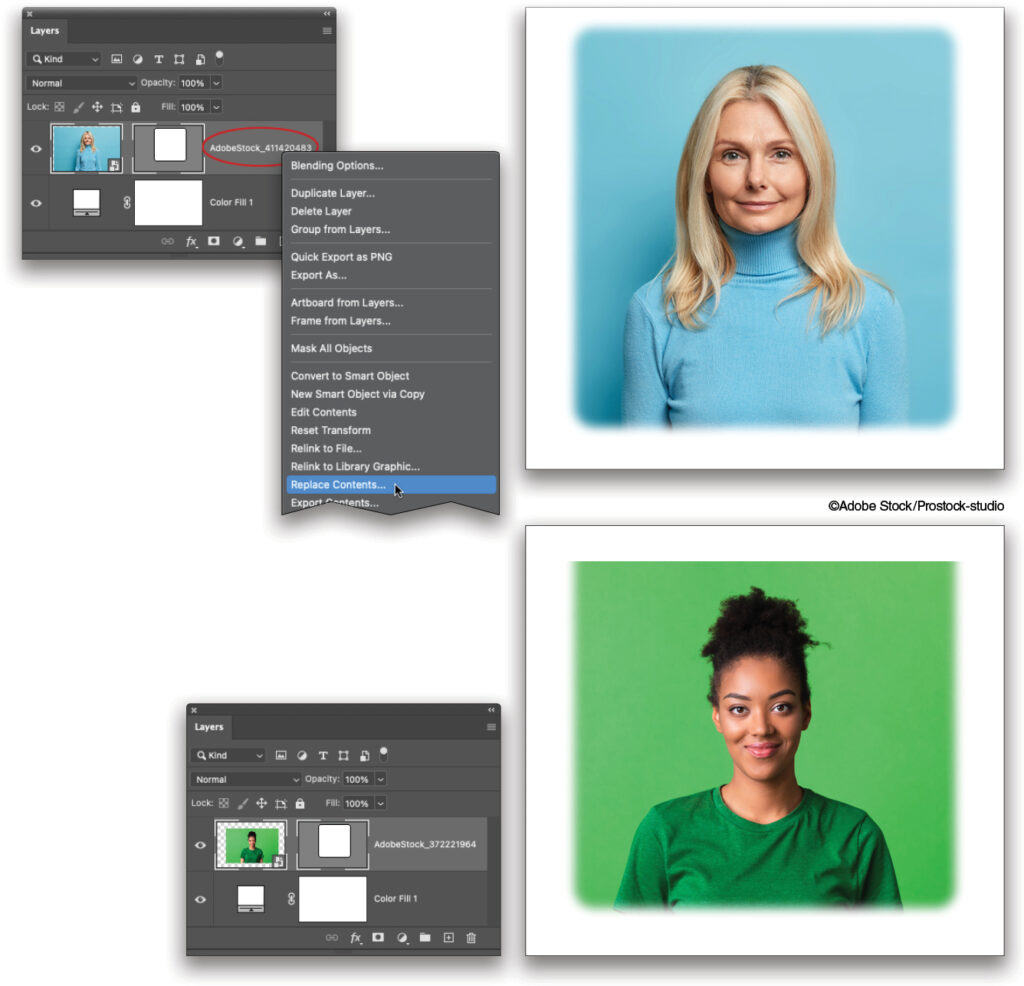
STEP 10: If you’re happy with the results, and you’re processing more than one photo, use File>Save As to save this photo, and then swap in another one. (If you want to use the image shown here, click here to find and download it from Adobe Stock.) To do that, Right-click near the smart object’s layer name (circled) in the Layers panel. From the menu that opens, choose Replace Contents. In the resulting dialog, navigate to another image and click Place (if you’re using the Adobe Stock image, navigate to where it downloaded on your computer). The new photo takes on the mask of the original.
STEP 11: The new photo doesn’t quite reach the top of the mask—that’s why it has a hard edge on top—so let’s repeat Step Six and use the Move tool to drag the photo upward inside the mask.
Tip: You can also Shift-drag to restrict the move to vertical or horizontal.
STEP 12: If necessary, re-size the photo inside the mask. To do that, press Command-T (PC: Ctrl-T) to summon Free Transform. Shift-drag any corner handle inward to reduce size, or outward to increase size. If you do the latter, don’t increase the size too much or you may introduce pixelization (increasing size a little is fine). Next, drag inside the bounding box to reposition the photo inside the mask once you’ve resized it. Press Enter when you’re finished.
Tip: You can actually resize a smart object’s contents multiple times without losing quality; that is, as long as you don’t make the content a lot bigger than it actually is. Each time you resize a smart object’s contents, Photoshop goes back and resizes the original content, not the current instance of it.
As you can see, this technique is very flexible and handy for processing staff headshots or product photos in the same way: Simply save the end result as a Photoshop document so you can reopen it, and swap in another photo whenever you need to. Until next time, may the creative force be with you all!

This article originally published in the January, 2023 issue of Photoshop User magazine.
About Photoshop User and KelbyOne
Photoshop User magazine comes out digitally 12 times a year and is part of KelbyOne, the leading educational resource for Photoshop, Lightroom, and photography. Pro members have access to more than 900 video courses and 100 back issues of Photoshop User. To learn more about KelbyOne, click here.


