
Whether you’re a professional family photographer, or you just take photos of your kids and grandkids for fun, there’s always a way to make your images more “epic” using Photoshop! What’s so bad about adding a tiny bit of embellishment to such a public photo—c’mon, everyone does it! (Wink, wink!) There’s quite a bit I’d like to cover on this, so I’m going to break it down into two parts. This means we’ll be working on this image over the next two issues.
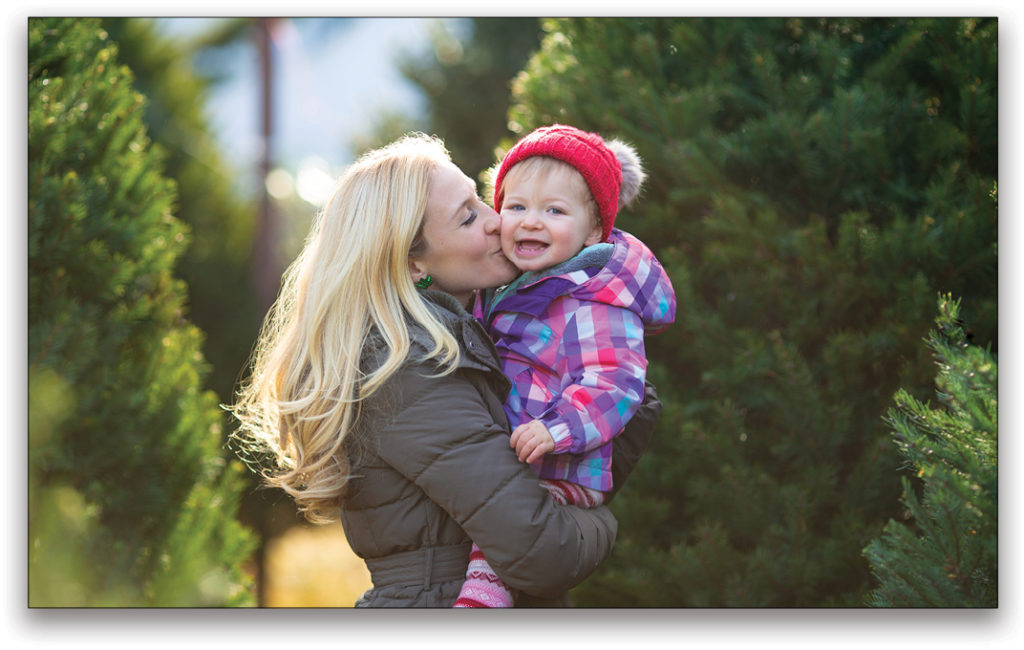
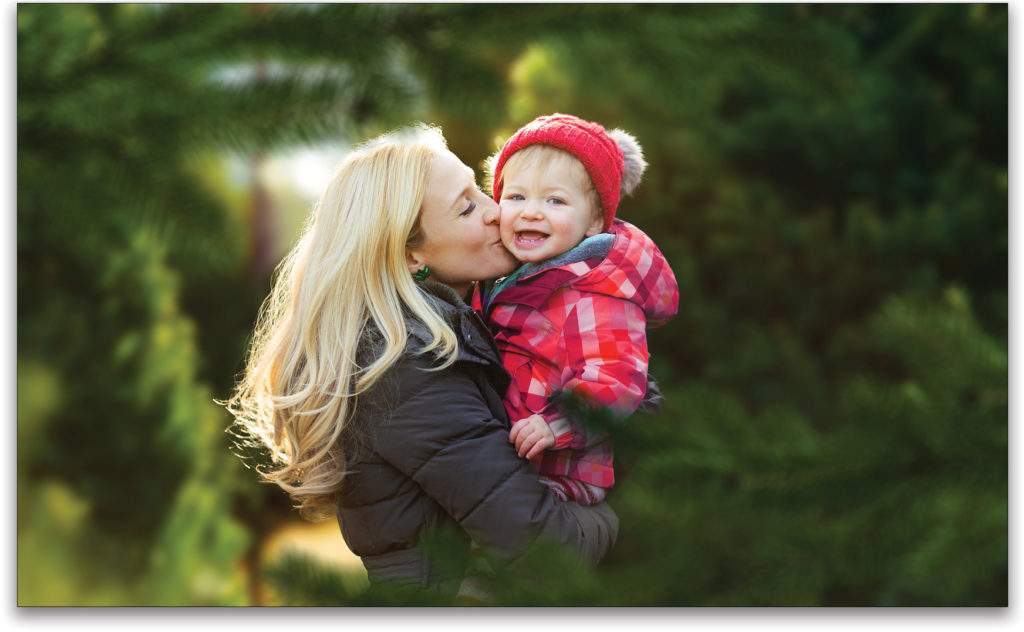
Here’s the shot we will be “epicizing.” It’s a photo of my one-year-old daughter and me that my mom took while Christmas tree shopping. It’s got good “bones” but needs some work.
As we retouch it, this image will slowly become an iconic shot that will live on in our household for years to come! In these articles, we’re going to do some really awesome modifications, such as colorizing the clothing to make it more festive, and separating the subjects from the background so we can blur it more. We’ll also add some warm light and foreground, as well as some out-of-focus elements to add depth and complexity to the image. So let’s get started!
[KelbyOne members may download the file used in this tutorial by clicking this link. All files are for personal use only.]
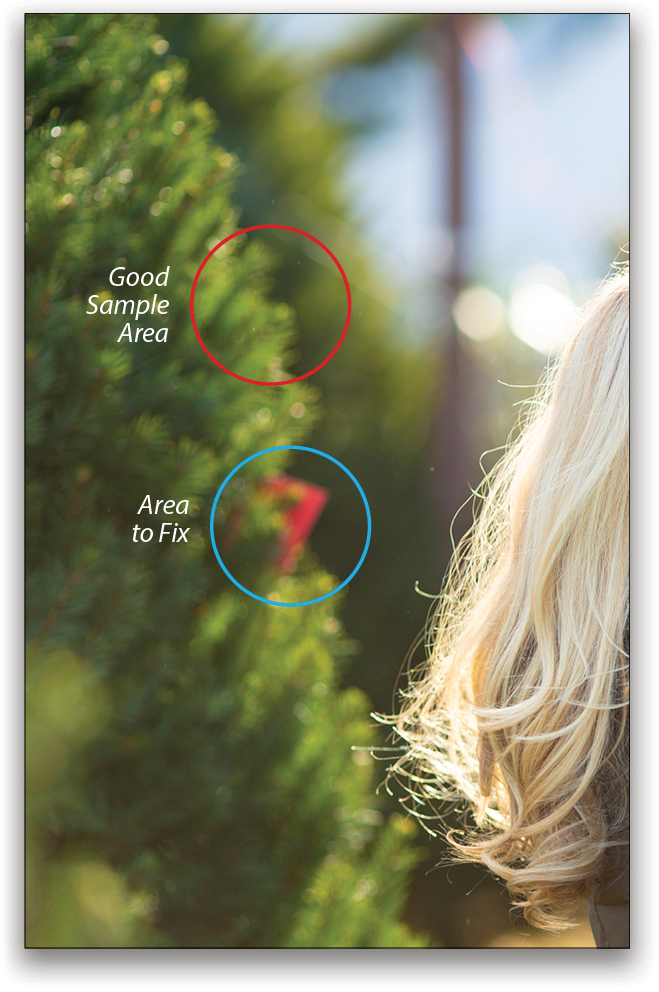
Step One: The first thing to do is always get rid of distracting elements. We’ll use the Healing Brush tool (nested below the Spot Healing Brush tool [J] in the Toolbar) on a new empty layer to remove the red tags on the trees that are for sale. Double-click the new layer’s name in the Layers panel, and rename it “Clean Up.”

The most important tip I give anyone using the Healing Brush tool is to think long and hard about the sample point you choose, because it can make the difference between a good healing job or a bad one. For the tree on the left, I want to sample an area that looks similar to what I want the fix to look like, so that means I need to sample along the edge of the tree line, directly above the area with the red tags. For the tree on the right, we’ll do the same, except we’ll sample the two branches that stick out right below the red tag. To sample a point, simply Option-click (PC: Alt-click) it.
Note: When using the Healing Brush tool on an empty layer, you must remember to set the Sample drop-down menu to Current & Below in the Options Bar, which is located at the top of the Photoshop interface. For the Spot Healing Brush tool, check the Sample All Layers box.
Step Two: Next, let’s tackle some of those flyaway hairs! We’ll keep most of them, but we can get rid of a few. My go-to tool for removing these pesky nuisances is the Spot Healing Brush tool (J). When removing flyaway hairs, I set my Spot Healing Brush tool to the following settings in the Options Bar: Mode: Replace and Type: Content Aware. These settings help tell Photoshop how to go about removing the distracting elements.

Step Three: When removing flyaways, I use a brush size that’s slightly larger than the width of the hair that I’m trying to remove. You can use the Bracket keys on your keyboard to quickly resize your brush. I also don’t stop the healing stroke right at the hairline. Instead, I extend it past the edge about an eighth of an inch so that Photoshop has an idea of how to fix the problem area. Here’s the shot once the distracting elements have
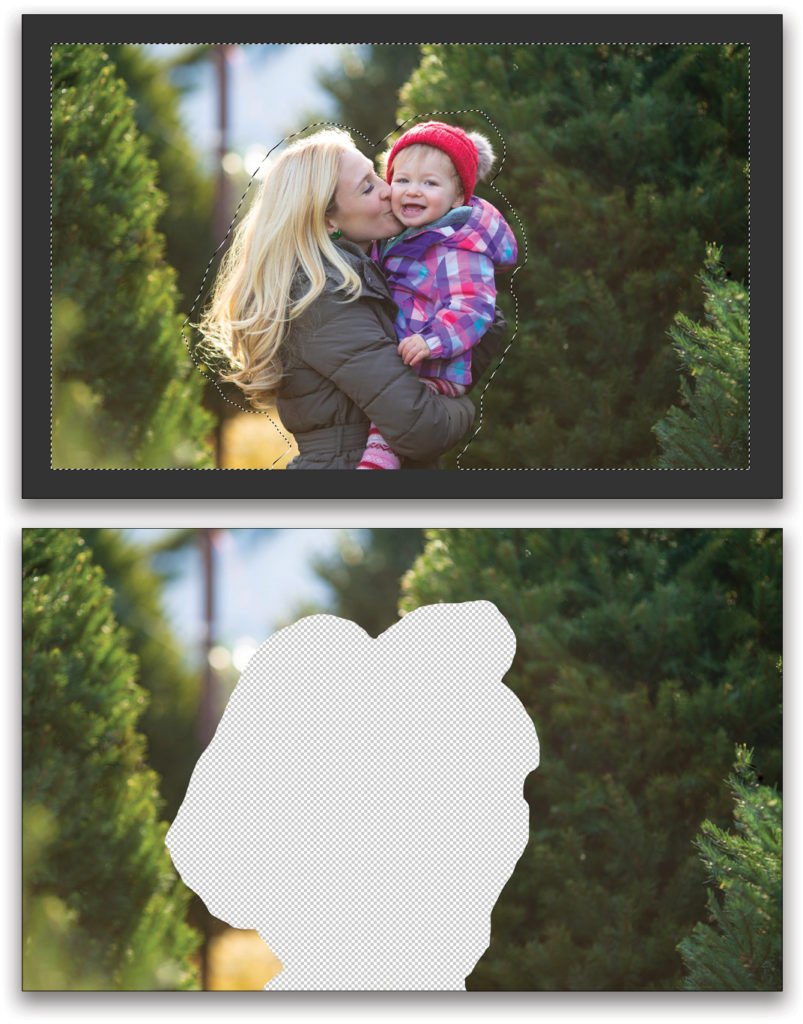
Step Four: Enough with the boring stuff; let’s start having some fun! I want to blur the trees so the subjects pop out more and appear clearer. Our first step is to loosely select the whole image minus the subjects using the Lasso tool (L). Press Shift-Command-C (PC: Shift-Ctrl-C) for Copy Merged. This will include both your Background layer and healing layer in the copy. Press Command-V (PC: Ctrl-V) to paste that onto its own layer. Name this layer “Blurred Background.” Here’s what the selection and pasted layer without any other layers visible look like.
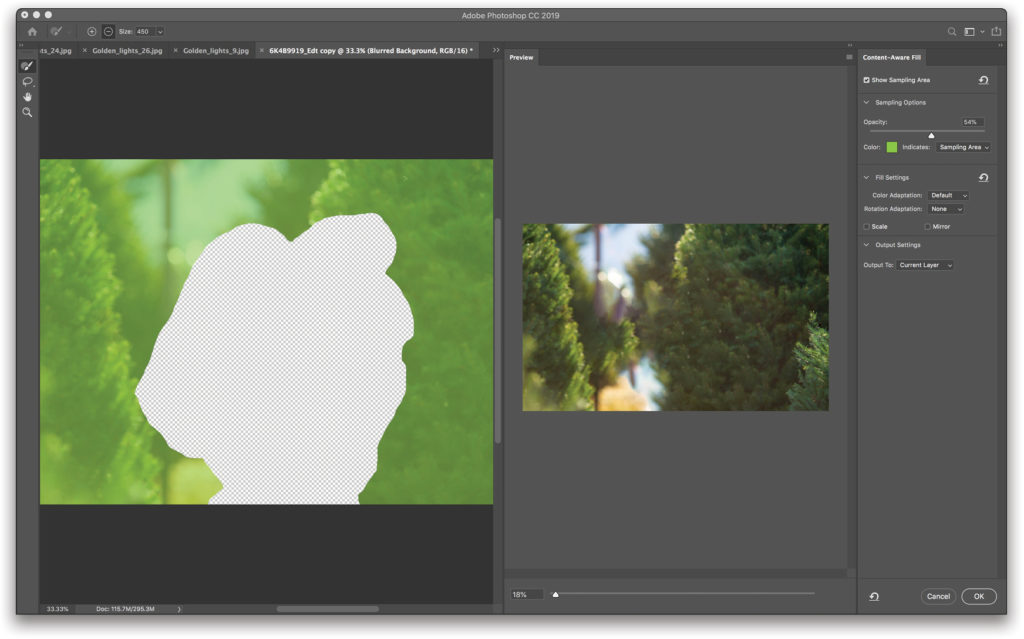
Step Five: Our next step is to fill the empty area using Content-Aware Fill. Use the Magic Wand tool (nested under the Quick Selection tool [W] in the Toolbar) to select the transparent area of this layer, and then choose Edit>Content-Aware Fill. This will open the Content-Aware Fill workspace with your original layer on the left and a preview of what the filled layer will look like on the right. The Fill Settings should be set to Color Adaption: Default and Rotation Adaption: None. Lastly, set the Output To drop-down menu in the Output Settings to Current Layer to keep your layers clean and tidy. Click OK, and press Command-D (PC: Ctrl-D) to deselect.
And voilà! You have a completely new automatically generated background ready to blur. Some of you might be thinking that this seems like a lot of work just to blur the background. Why wouldn’t you just copy the original background layer and blur that? Here’s the thing: If we were to blur the background as it is, the colors from the people would bleed into the blurred background. When you reveal the sharp people from the underlying layers, you’ll see those blurred colors around the subjects, almost like a halo effect. That’s definitely not what we want, so by doing this first, you’ll avoid any color contamination: bleed or halo.
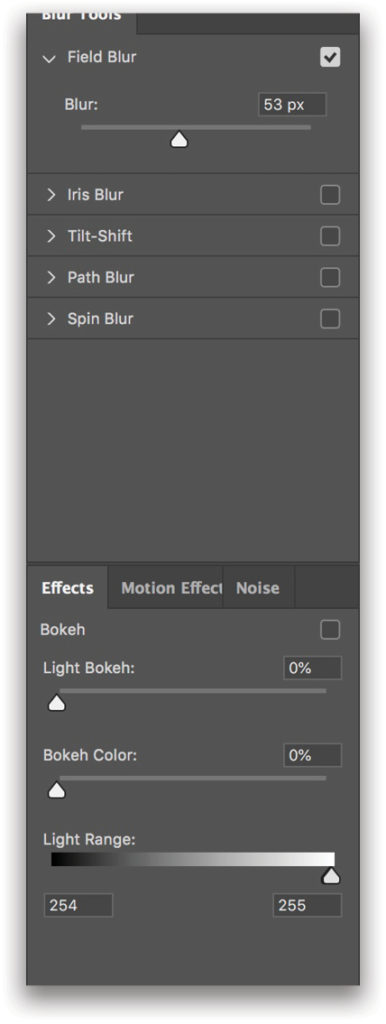
Step Six: We can now move on to adding a blur to the background. Right-click on the Blurred Background layer in the Layers panel and choose Convert to Smart Object. As a smart object, we can blur the layer nondestructively, so if we ever choose to revisit the background to lessen or increase the blur, it’ll be a snap. Next, choose Filter>Blur Gallery>Field Blur. In the Blur Tools panel, take the Blur radius to 53 px. Make sure that the checkbox next to the Field Blur option is the only one checked to avoid adding more than one blur type to the background. Click OK in the Options Bar at the top to commit to the changes. Now we have a nice blurry background to play with!
Step Seven: Click on the original Background layer in the Layers panel, and then Shift-click the Clean Up layer so they’re both selected. Duplicate them both by pressing Command-J (PC: Ctrl-J), and then merge them together by pressing Command-E (PC: Ctrl-E). Name this layer “Subjects,” and then click-and-drag it to the top of our Layers panel.
Step Eight: With the Subjects layer still active, use the Quick Selection tool (W) to select the subjects. This selection needs to be more intricate, so once you have a rough selection, you can fine-tune it by clicking the Select and Mask button in the Options Bar.
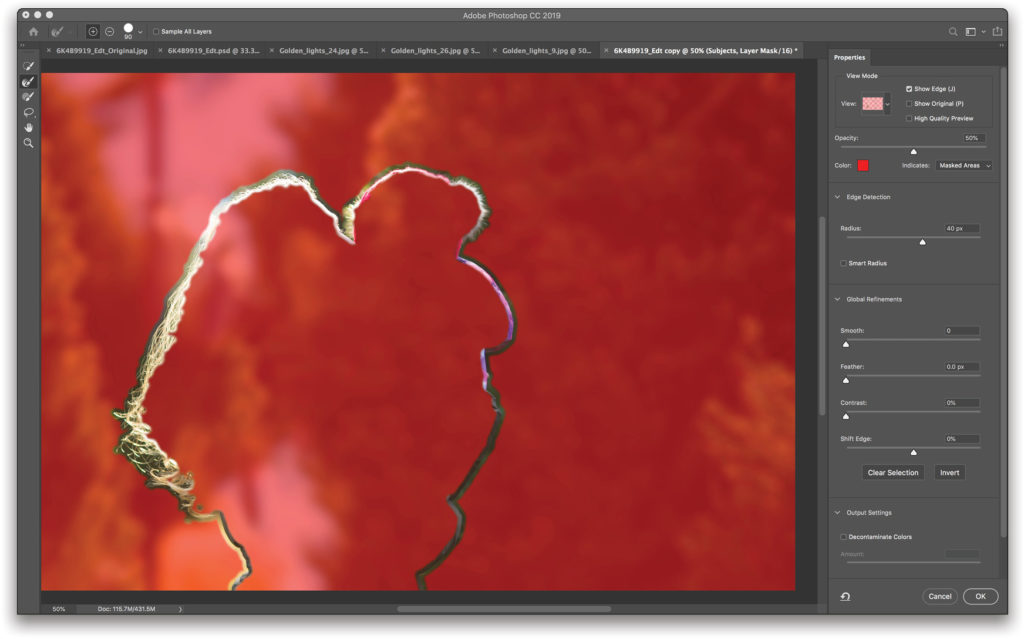
Step Nine: Inside the Select and Mask workspace, the first thing I like to do is preview my radius to make sure I have a wide enough radius around what I’m trying to extract, including all the small pieces of hair in the selection. To do this, turn on Show Edge in the View Mode section in the Properties panel, and set the View drop-down menu to Overlay (V). Increase the Radius slider until you’ve included all the edges in which you’re hoping to mask.
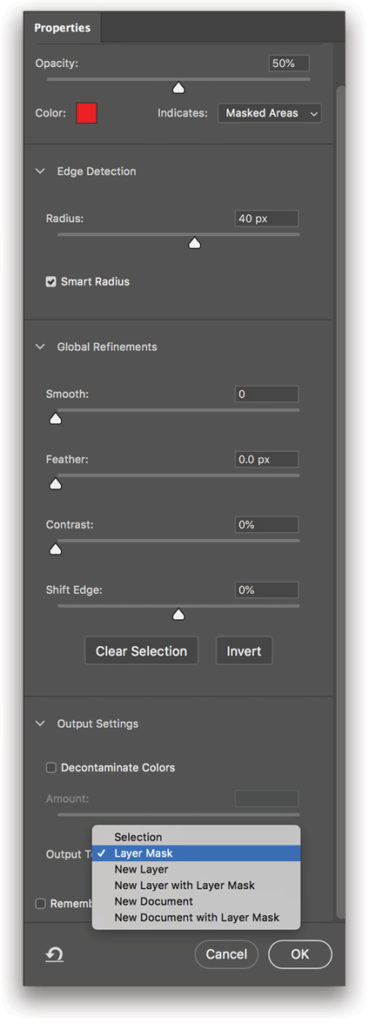
Step 10: Now we can get to work! Turn off Show Edge by pressing “J,” and then check the box next to Smart Radius. At this point, take the Refine Edge Brush tool (R) and paint around the edge of the subjects. I’ve turned off Sample All Layers for this since we’re only concerned with the pixels on this layer. If you find this tool isn’t giving you the results you like, try switching between the Expands Detection Area (plus icon) and Restores Original Edge (minus icon) modes in the Options Bar. I find it helps me get a better selection when I switch between these modes. Once the selection is complete, set the Output drop-down menu to Layer Mask, and click OK.
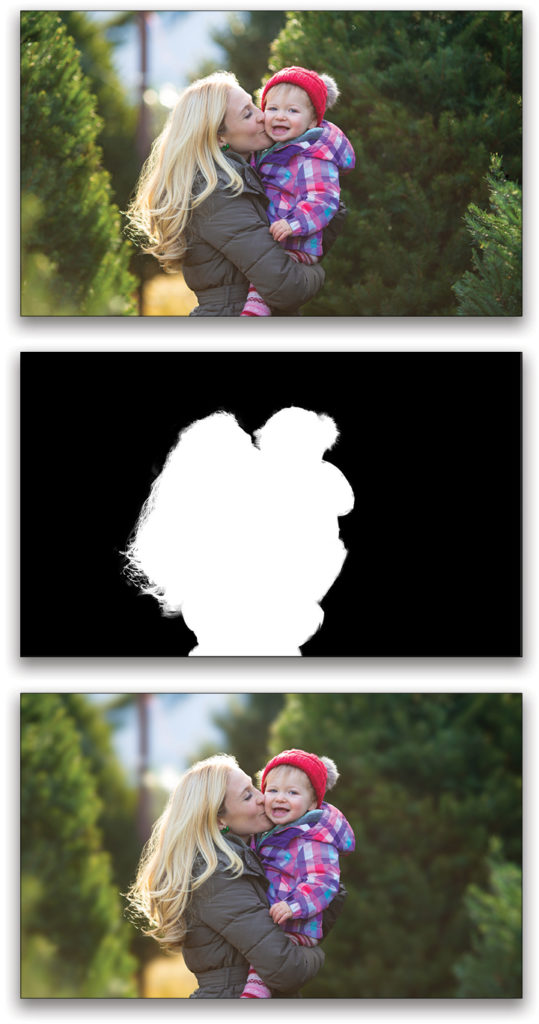
Here’s the original image, the mask that was created to extract the subjects, and the final image with the new smooth, silky background! I really love the look of this new background, and I hope you do too!
Step 11: Let’s quickly add some contrast to the background with a Curves adjustment layer (Layer>New Adjustment Layer>Curves). Name this layer “BG Darken.” This layer needs to sit below the Subjects layer. Here’s what my Curves adjustment looks like.
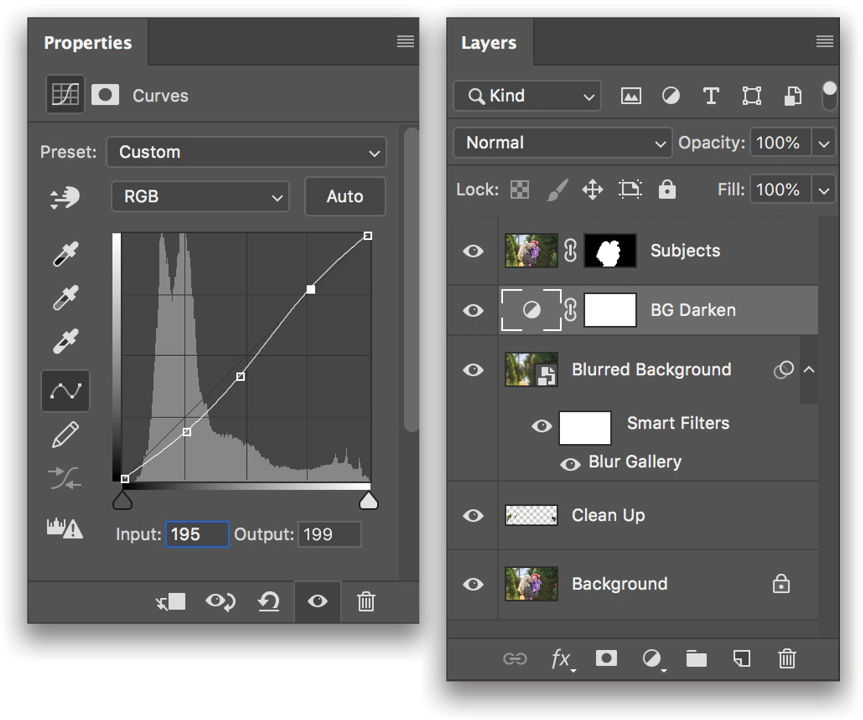
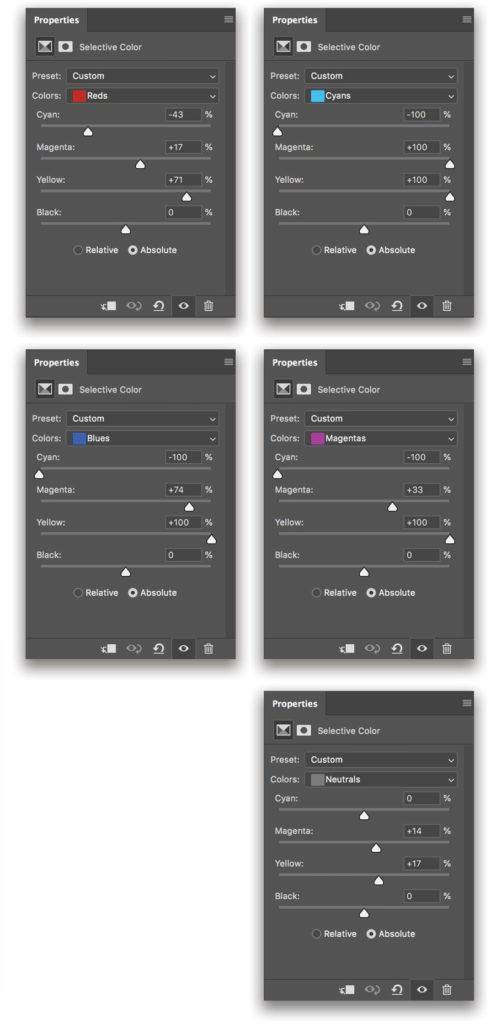
Step 12: The last adjustment we’re going to make for Part 1 of this article is to change the colors of the baby’s jacket to make it more festive. Let’s do this by using a Selective Color adjustment layer (Layer>New Adjustment Layer>Selective Color). Name this layer “Coat Color Change,” and drag it to the top of the layer stack. Then tweak the sliders for the following colors in the Properties panel: Reds, Cyans, Blues, Magentas, and Neutrals. You can leave the Yellows, Greens, Whites and Blacks alone. Also, select Absolute at the bottom of the Properties panel. Here are the settings we used for each of the colors.
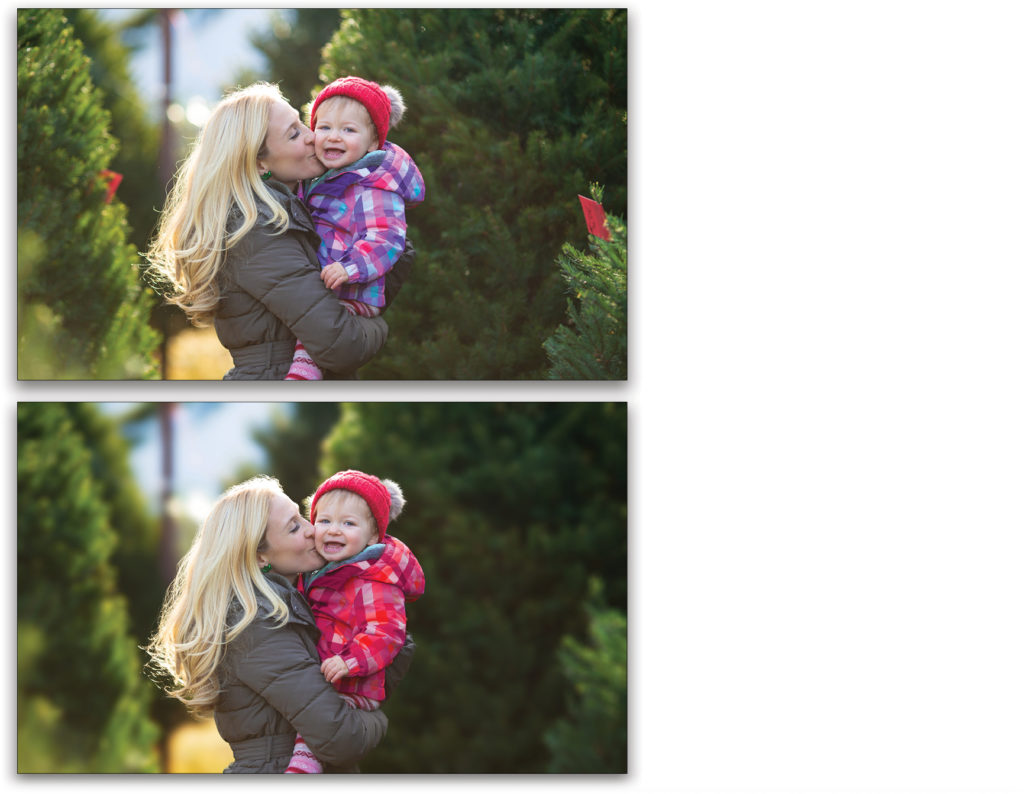
Step 13: The color changes should be visible on the coat and nowhere else, so click on the layer mask thumbnail for the Selective Color Adjustment layer and press Command-I (PC: Ctrl-I) to invert it from white to black. This will hide the effect on the entire layer. Switch to the Brush tool (B), press X until the Foreground color is white, and then paint to reveal the new color on the coat. And you’re done! Here’s all of the work we’ve done on this image so far!
Make sure you tune into next issue’s article to see how we make this image even more epic by adding more branches in the foreground, plus some lighting effects!
This article originally published in the January, 2019 issue of Photoshop User magazine.


