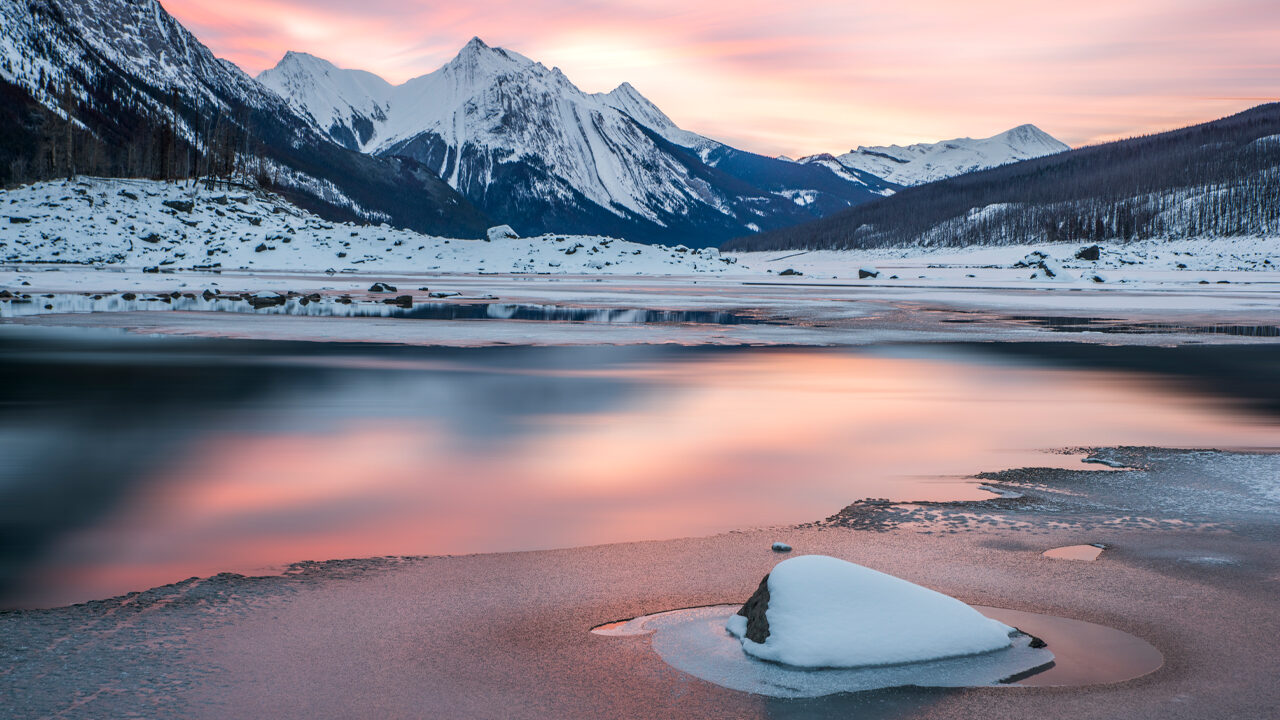
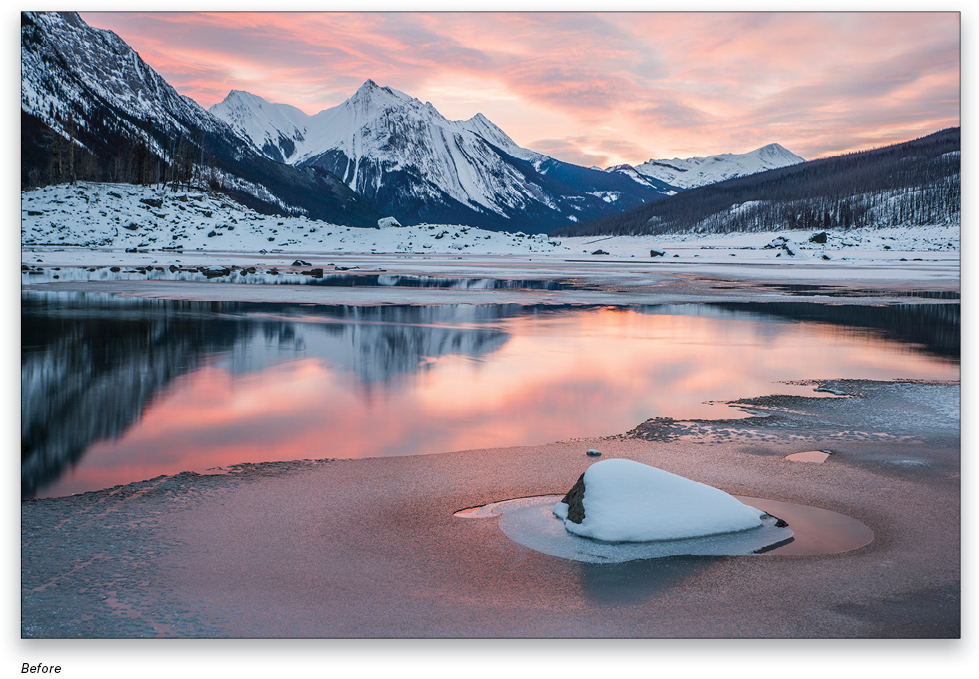
Long-exposure photography is used to achieve a variety of results, including capturing sharp images in low-light conditions. One of the most common, creative applications of long exposures is to create silky smooth water and streaked clouds. When we’re out in the wild with our cameras and we want to create a long-exposure image, it’s best to rely on additional gear such as a tripod or Platypod and optical filters. But sometimes we don’t have all our gear on us or perhaps we’re under time constraints, so then we can call on Photoshop to come to the rescue.
STREAKY CLOUDS
A true outdoor long exposure has streaky clouds with a level of detail that’s determined by the length of the exposure. The clouds travel in the direction of the wind and sometimes will move in different directions at different heights. This technique in Photoshop is straightforward, so let’s get to it:
STEP ONE: Make your base edits first, using any retouching methods you desire in either Lightroom or Photoshop. When you’re satisfied with your image, open it in Adobe Photoshop (if it isn’t there already).
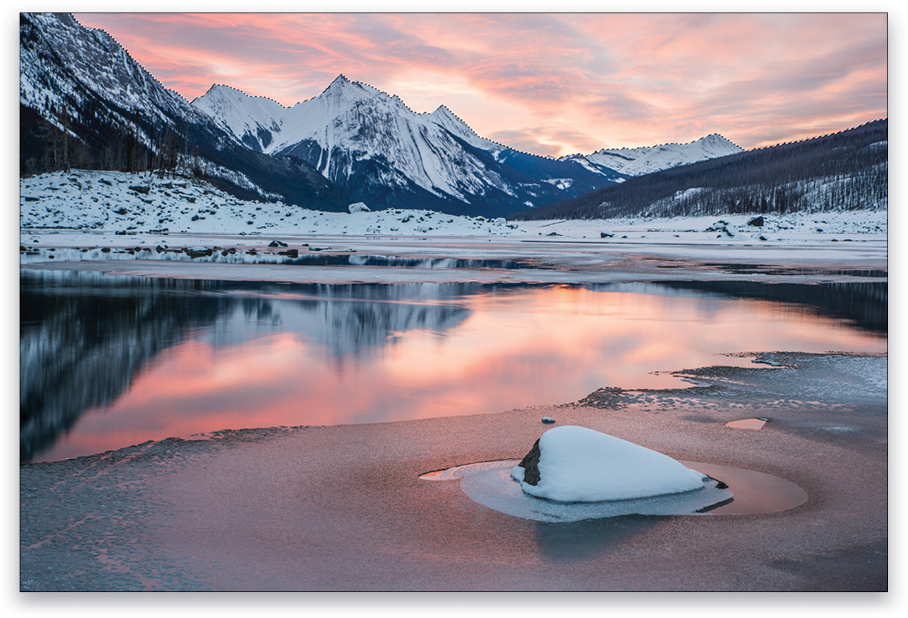
We now need to select the sky. The simplest method for this is the Quick Selection tool, so activate it by holding the Shift key and tapping W on the keyboard until it’s active in the Toolbar. Click-and-drag the tool over the sky area until it’s completely selected. In this image, there’s clear contrast where the sky meets the mountains, so the Quick Selection works well.
STEP TWO: With the basic selection made, we can fine-tune anything that should or shouldn’t be part of the selected area. In the Options Bar at the top, click Select and Mask to access options for refining your selection. Choose an option in the View menu at the top of the Properties panel to see different representations for your selection. The red mask shown here is the Overlay (V) option, which shows the areas that aren’t selected, but use whichever View mode works best for your image.
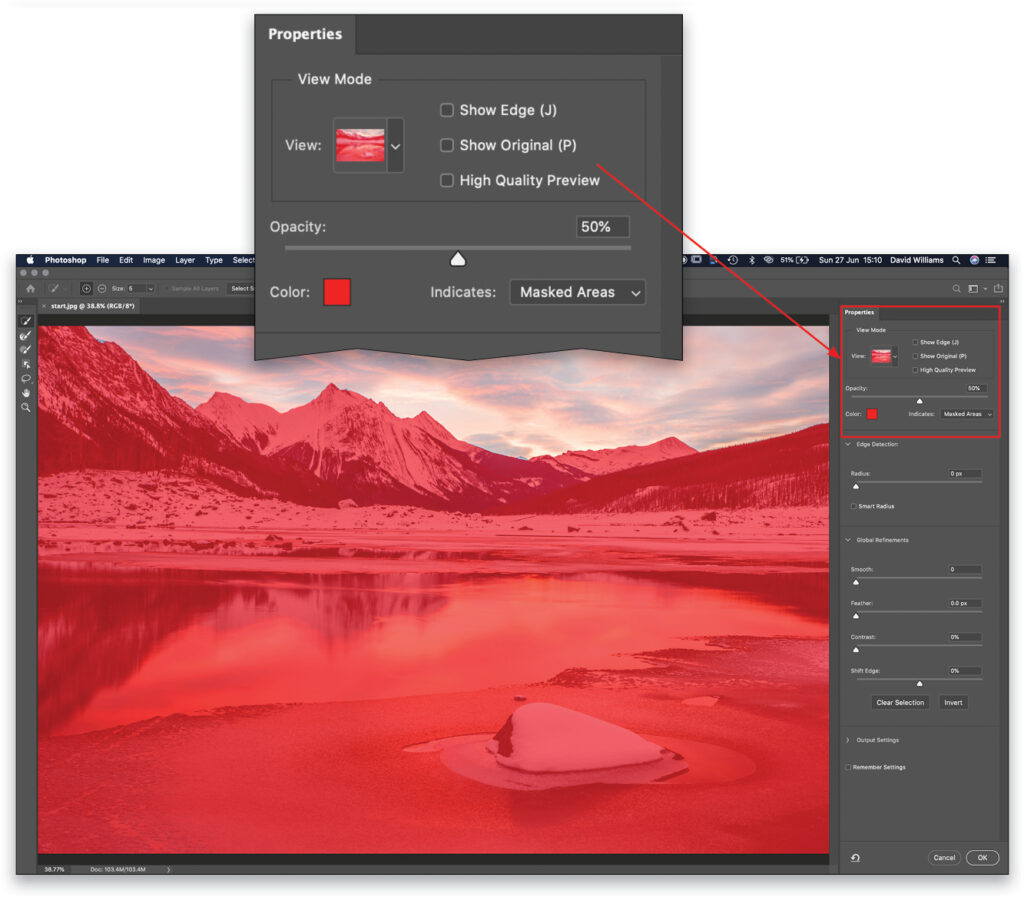
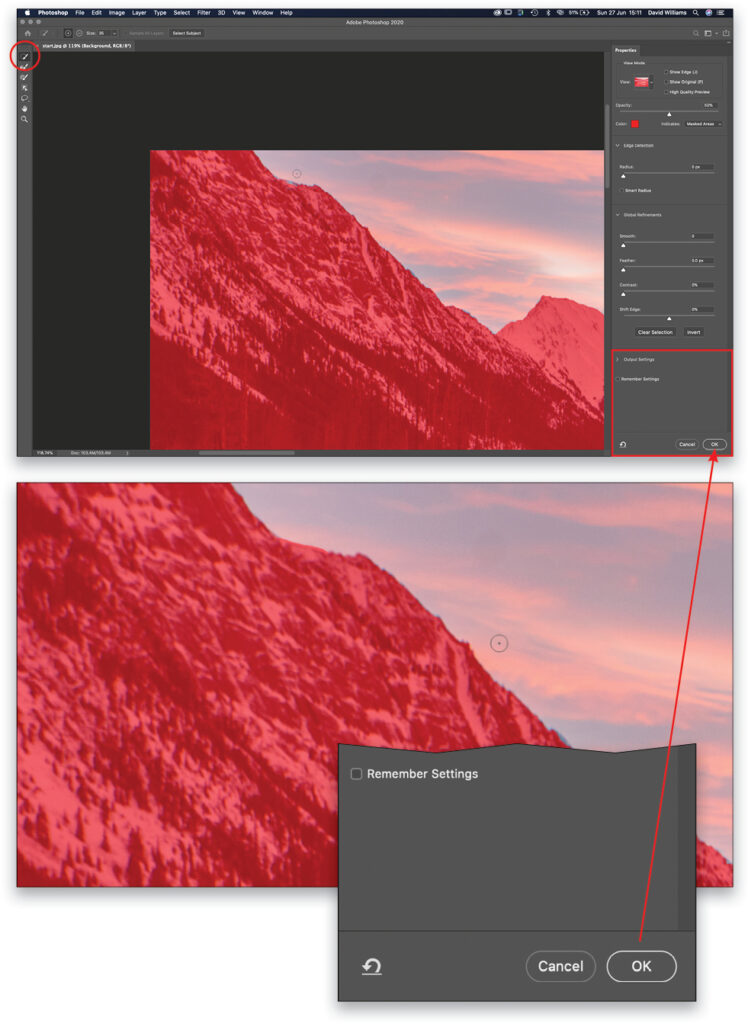
STEP THREE: The Select and Mask workspace has its own mini Toolbar at the top left, and the Quick Selection tool should automatically be active at the top of it. You can refine the selection by simply drawing over portions that you wish to add to the selection; in Overlay mode, this will remove the red overlay. For areas that you wish to remove from the selection, hold the Option (PC: Alt) key while painting over those areas, which will add the red overlay. Some of the layered mountain peaks in this image weren’t selected, so those are the areas we refined.
It’s worth noting that, because of the long-exposure effect that we’re going to create, your selection doesn’t have to be absolutely perfect; it’s good enough when you have a clear edge in the right place. Once your selection is ready, click OK at the bottom right of the Properties panel to exit out of Select and Mask.
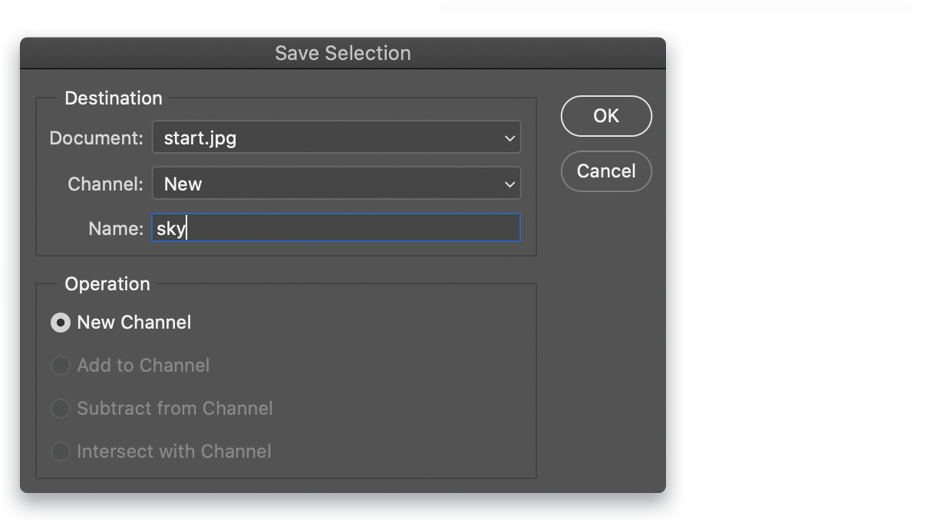
STEP FOUR: Whenever you work with selections that you think you may want to use again, you can store them safely by going to the Select menu and choosing Save Selection. You’ll be presented with a dialog that allows you to name and save your selection should you ever need to come back to it later. To reload it, just choose Load Selection in the Select menu.
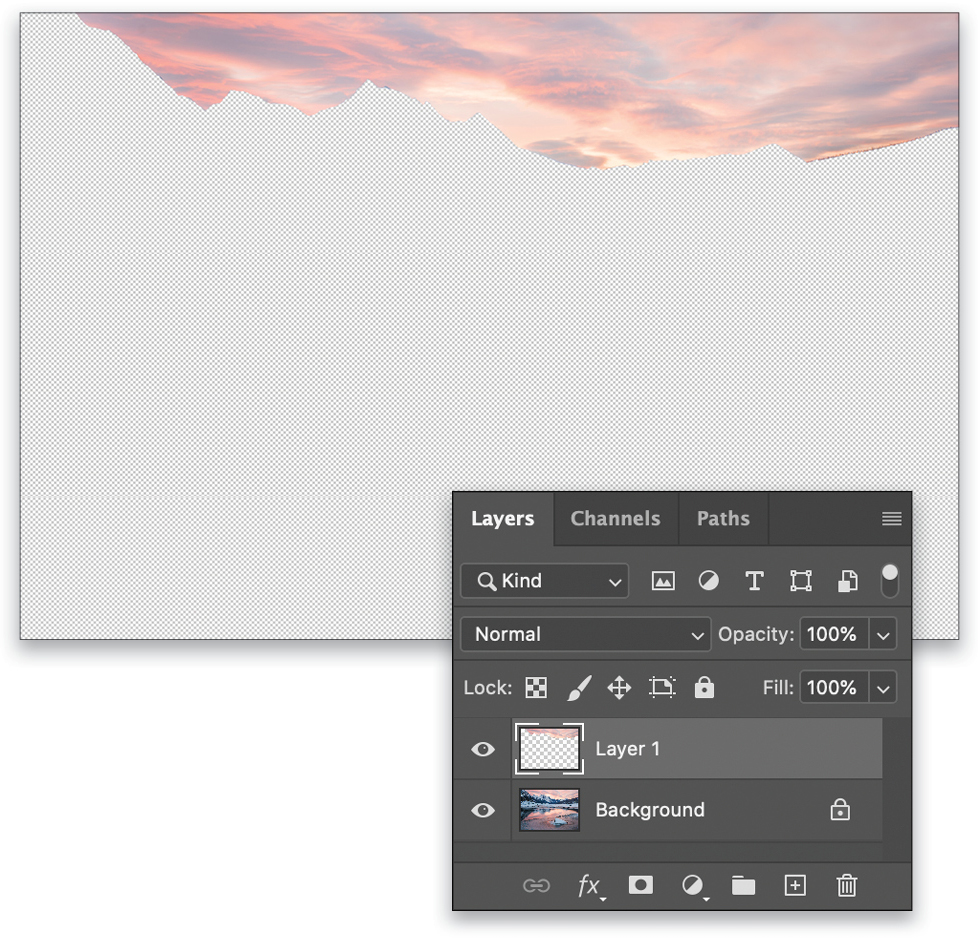
STEP FIVE: With the selection active, create a new layer from it by pressing Command-J (PC: Ctrl-J). Our new layer looks like the image shown here when it’s the only visible layer, as it only contains the sky. Even though this is the only portion of the image on which we’ll be working, we’re going to keep all the layers visible so we can see the overall changes as we move along.
STEP SIX: Next, go to Layer> Smart Objects>Convert to Smart Object. Converting this layer to a smart object ensures that its contents will be preserved, allowing nondestructive edits.
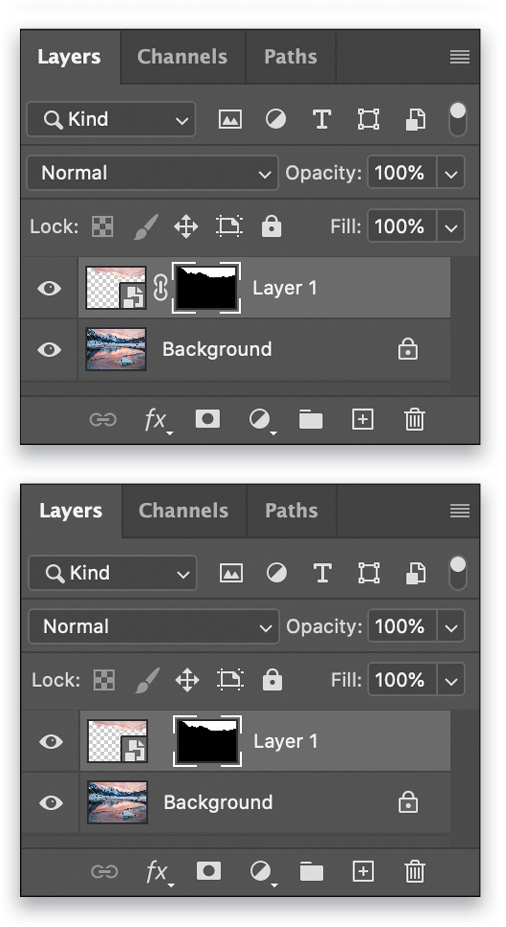
We then need to apply a layer mask to our sky layer so that when we blur the sky in the next steps, the blurred areas won’t be visible over the mountains in the Background layer. Hold the Command (PC: Alt) key, and click on the layer thumbnail of the sky layer. This will place a selection around the sky. Then, click the Add Layer Mask icon (circle in a square) at the bottom of the Layers panel. Photoshop will use the selection to create the mask.
We need to unlink the layer mask from the layer itself. To do this, click on the chain link icon between the layer thumbnail and the layer mask thumbnail in the Layers panel. Now any changes we make to the layer won’t affect the layer mask.
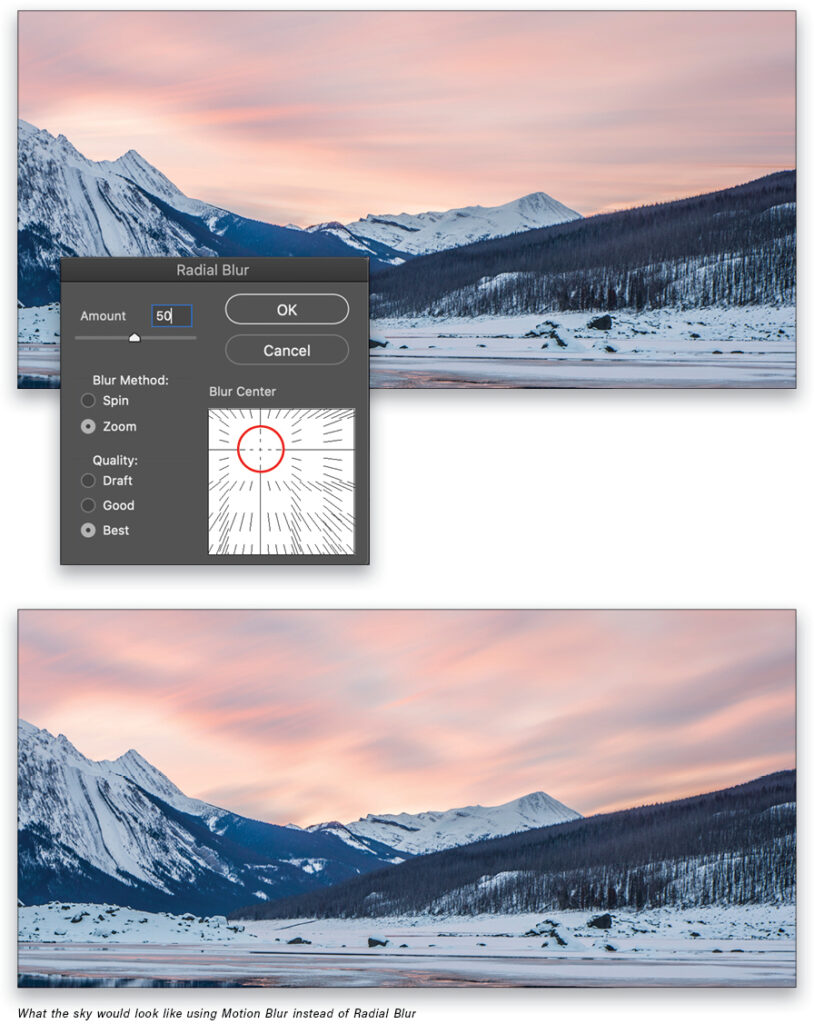
STEP SEVEN: Before we apply the blur effect, make sure the layer thumbnail for the sky layer is active by clicking on it in the Layers panel. Now let’s add a Radial Blur filter by going to Filter>Blur>Radial Blur.
A dialog will appear that gives you a few choices. The Amount will vary depending on the resolution of your image; in this case, we’ve selected 50. For the Blur Method, select Zoom to give the impression that the clouds are radiating out from a vanishing point in the image. You can determine this point by click-and-dragging in the Blur Center preview. Set the blur center so that it corresponds to the point within your image from where you want your cloud movement to emanate. For Quality, it goes without saying to select Best. With all the selections made, click OK. Our image now looks like this with streaked clouds.
If your image calls for a different style of blur, you could use the Motion Blur filter, which causes the streaking clouds to move in a single direction rather than outward from a vanishing point as we did.
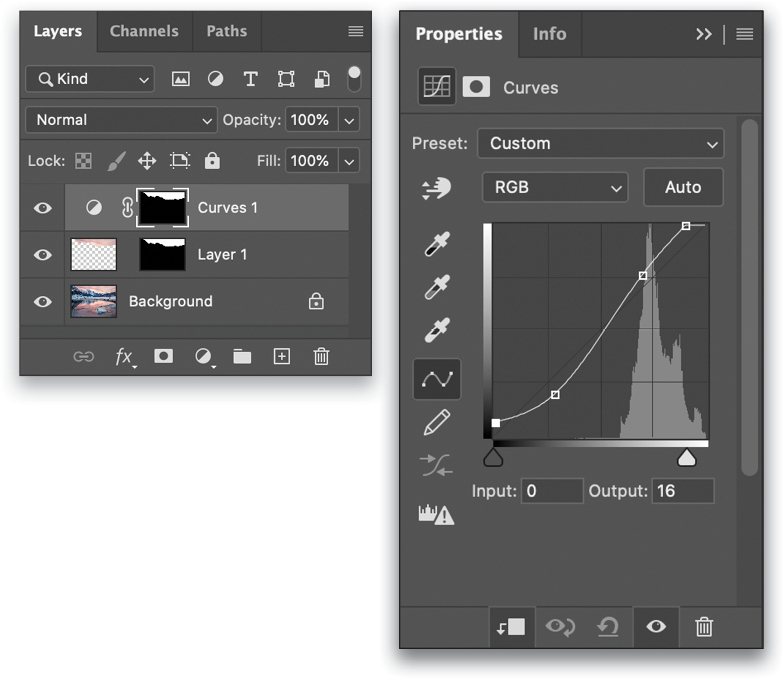
STEP EIGHT: Before we move on to blurring the water in this image, let’s fix the contrast of the sky. Command-click (PC: Alt-click) on the layer thumbnail for the sky to select it again. Then go to Layer>New Adjustment Layer>Curves. Again, Photoshop will use the selection to create the mask for the Curves layer. In the Properties panel (Window>Properties), you can quickly and easily change the brightness and contrast of the sky using the curve. We’ll apply an S curve as shown here, which will increase the contrast and give a more realistic look to our blur.
We can now tackle the water.
SILKY WATER
Silky smooth water is another common characteristic of long-exposure photography. In camera, the effect is achieved by allowing the motion of the water to be captured onto the sensor, and then the resulting frame contains all of that motion. Moving water captured with a long exposure loses any glass-like appearance, and its details are absorbed into the repetitive up and down, back and forth motion of the water.
STEP NINE: First we need to make a selection of the water using the Quick Selection tool. Before making the selection, make the Background layer the active layer by clicking on it in the Layers panel. In this image, we’ve selected portions of the water that would be free moving, which doesn’t include the thick ice or the rock in the water. Just like we did with the sky, you can use the Select and Mask feature to refine the selection, adding or removing any areas from the selection as necessary.
STEP 10: With the selection made, create a new layer from it using Command-J (PC: Ctrl-J). To reinstate the selection, click on the layer thumbnail while holding the Command (PC: Ctrl) key. Just as before, add a layer mask using the Add Layer Mask icon at the bottom of the Layers panel, and then click on the chain link between the layer thumbnail and the layer mask thumbnail to detach the layer mask. Click on the layer thumbnail to make it active and not the mask.
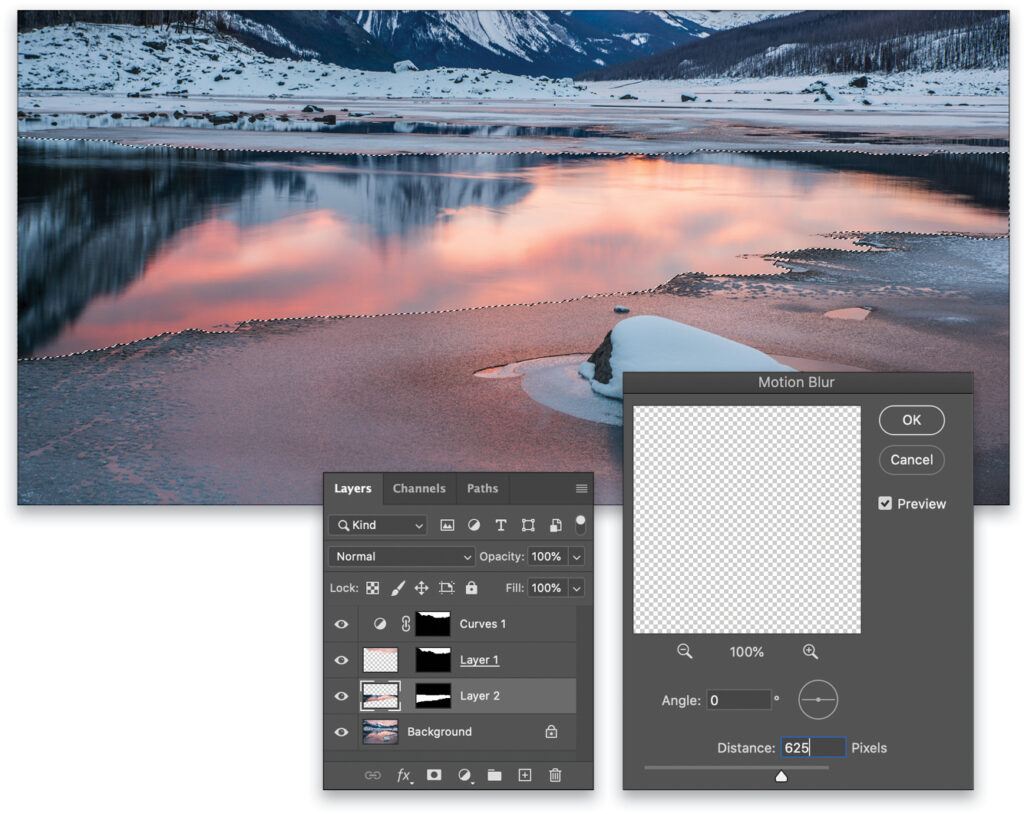
STEP 11: Go to Filter>Blur>Motion Blur. In the resulting dialog, the Angle determines the direction of the blur so, in this case, because we want the water to be quite flat as it has no obvious direction of flow, we’ll use 0°. If the water is clearly moving in a particular direction, use an Angle to suit the feel of your image. The Distance determines the spread of the pixels. We’ve chosen quite a long spread of 625 pixels to really dull the water and give it as much of a milky appearance as is reasonable to expect from a genuine long-exposure image. Click OK to close the dialog.
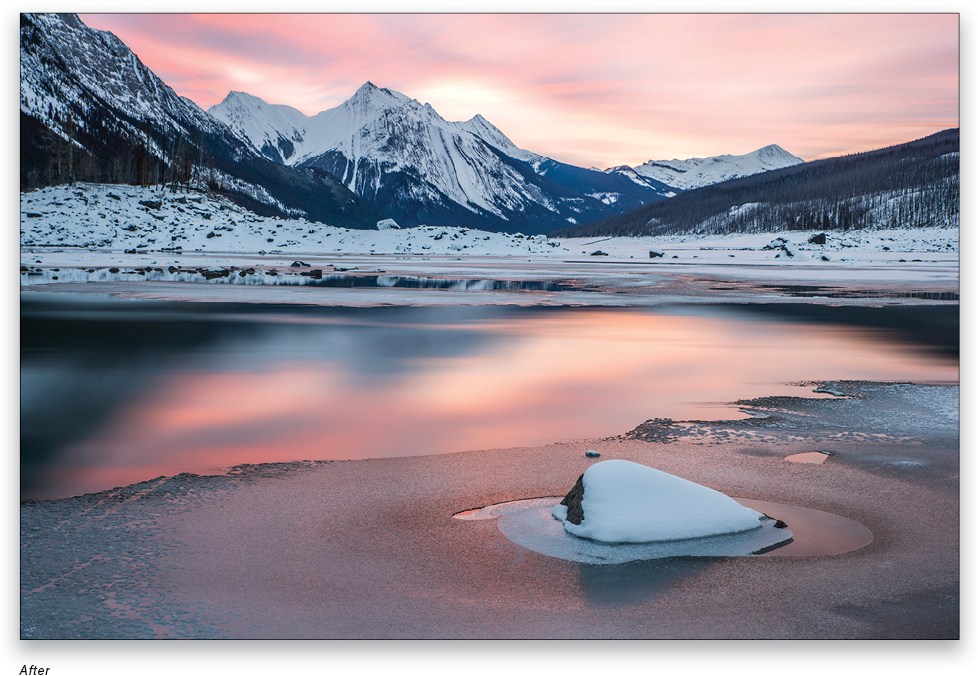
Now, we have the long-exposure effect applied to both the sky and the water, using similar techniques with effective results. And if you’d like, you’re ready to make any further adjustments to influence the overall look of the image with this look applied.
This article originally published in the July, 2021 issue of Photoshop User magazine.
About Photoshop User and KelbyOne
Photoshop User magazine comes out digitally 12 times a year and is part of KelbyOne, the leading educational resource for Photoshop, Lightroom, and photography. Pro members have access to more than 900 video courses and 100 back issues of Photoshop User. To learn more about KelbyOne, click here.


