By now you’re probably pretty familiar with Levels, but it’s worth digging into how this original Photoshop tool actually works, and looking at some hidden features for getting even more oomph in your work.
Levels has some basic controls in the form of two sets of sliders with text fields for input. At the very top of the Properties panel Window>Properties) is a histogram, showing a representation of each luminosity value’s relative “strength” in your image.
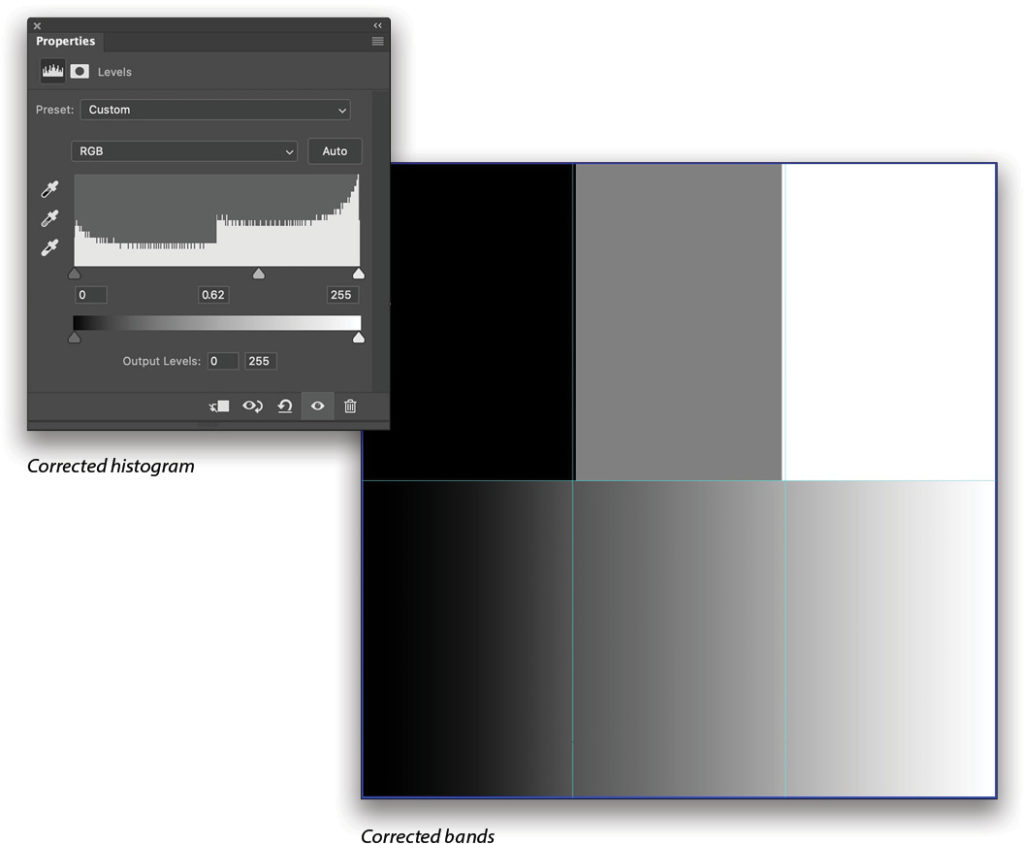
In the bottom half of this image, take a look at the gradient, which goes from 20% to 80% gray (as opposed to a pure black of 0% and pure white of 100%). I’ve treated the top half with a Posterize adjustment layer to make the distribution more clear. The guides are there to show even 1/3 divisions.
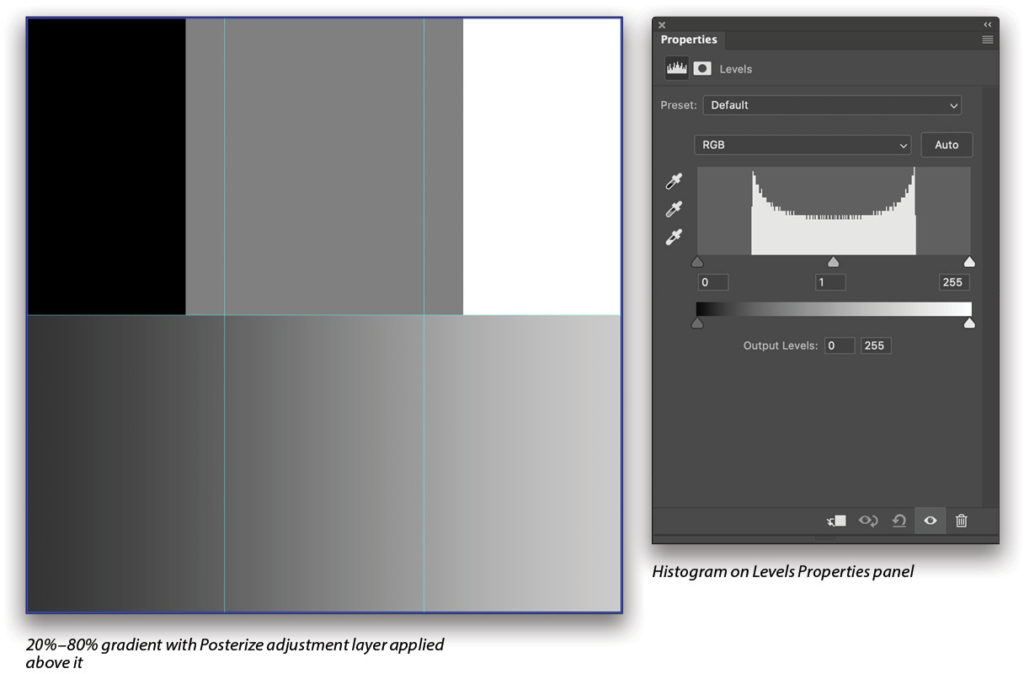
Note: The Posterize function here isn’t going to show 20% or 80% gray because of how it works. Just pay attention to the size and position of the bands and try to ignore the quirks of Posterize.
Dragging the Levels sliders beneath the histogram toward the edges of the graph balances out the columns. In this way, the shadows and highlights have been expanded, and the entire range of gray values is more balanced. What we’ve done is remapped the black and white points with the Input sliders, so that 20% gray becomes “black,” and 80% gray becomes “white.” I then ran Posterize again on the corrected gradient.
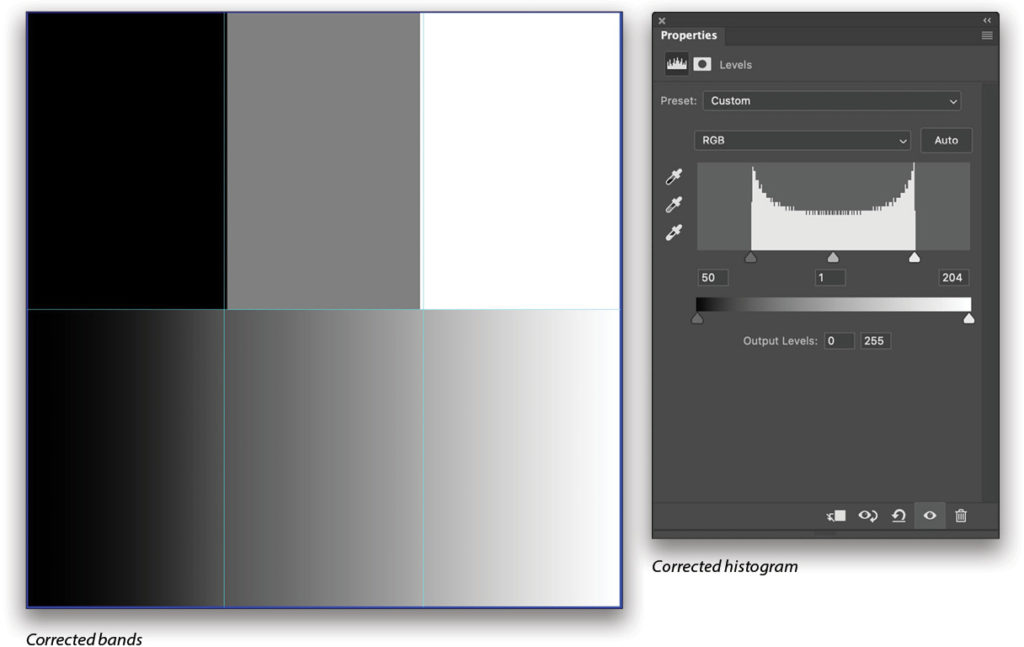
The Output sliders control the results of those endpoint mappings, and can be used for creative looks by limiting the amount of black or total brightness. The original intent of the Output sliders was to control ink density for printing. Moving the Output sliders redefines the total endpoints that the Input sliders map to on a range from 0 to 255.
Now let’s look at a gradient that’s squished to one side. Instead of the midpoint being exactly 50% gray, let’s move it toward the shadows.
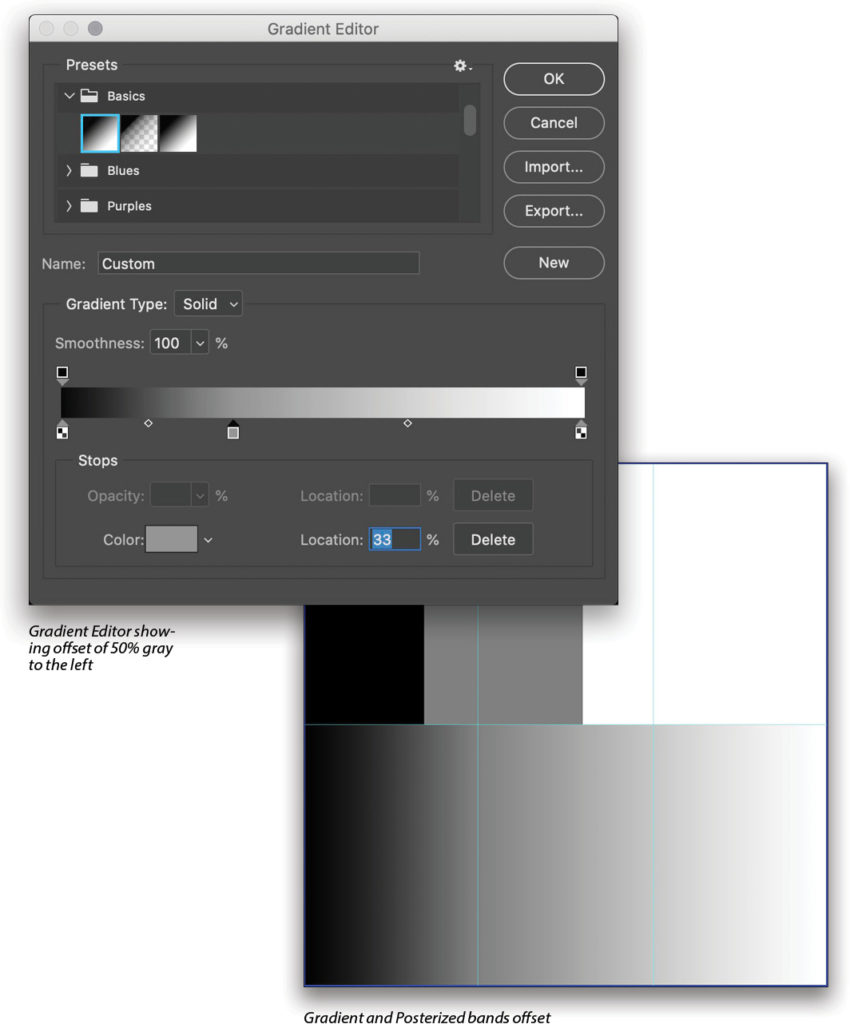
The bars are clearly no longer aligned, but because we already have pure black and white in the gradient, how do we even out the distribution? The midpoint slider! This important little fella is actually a gamma correction slider. While the endpoint sliders range in luminosity values from 0 to 255, the gamma slider ranges from 0.01 to 9.99, but the midpoint is 1.00 instead of 128. The reason for this is because this slider isn’t specifically remapping a luminosity value so much as controlling the midpoint (hence the name) of the transition from black to white. So the numeric value represents a relationship, not an absolute value.
Note: If you’re interested—and I know at least some of you are—the midpoint value is the exponent in the following equation:
V out=V in^gamma. V is luminosity here, so this reads: output luminosity is equal to the input luminosity raised to the power of the gamma value. This is why the middle value is 1.00, meaning the input value is exactly the same as the output value. Gamma is also nonlinear, and if you’re interested in the math, drop me a note on the KelbyOne Community forums. For now, just realize that 1.00 means “dead center” and that when you move either the shadows or highlights sliders, the midpoint slider moves to maintain its relative position between those two sliders.
Moving the midpoint slider to the right expands the shadows, while moving it to the left expands the highlights. In this case, we want to drag out the shadows, so we move the midpoint to the right to offset the unbalanced gradient.
In this way, Levels lets us redistribute the dynamic range with the gamma slider, expand the dynamic range with the Input sliders, and limit the dynamic range with the Output sliders.
Creative Effects
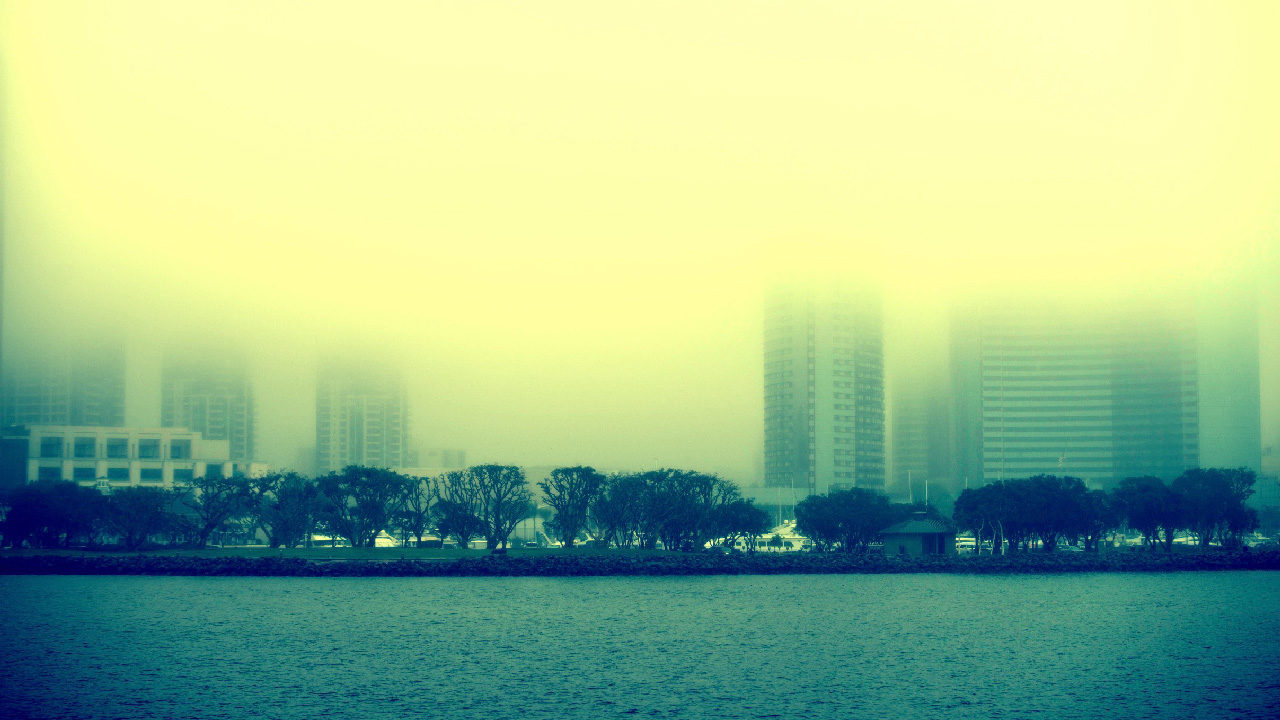
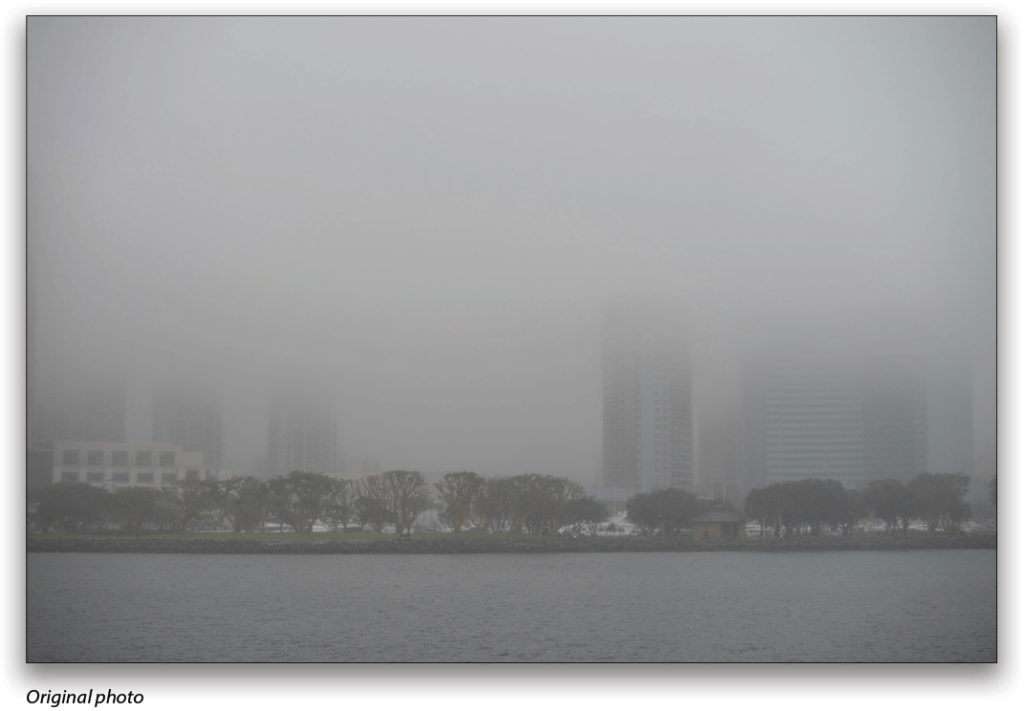
So much for theory, let’s have some fun. It turns out that Levels lets you address color channels directly from its drop-down menu in the Properties panel. At first glance, that means we can control per-channel contrast, but there are lots of easier ways to correct color. We can instead use this for some creative effects. This image across San Diego Bay is really hazy and low contrast, and could use some Levels magic.
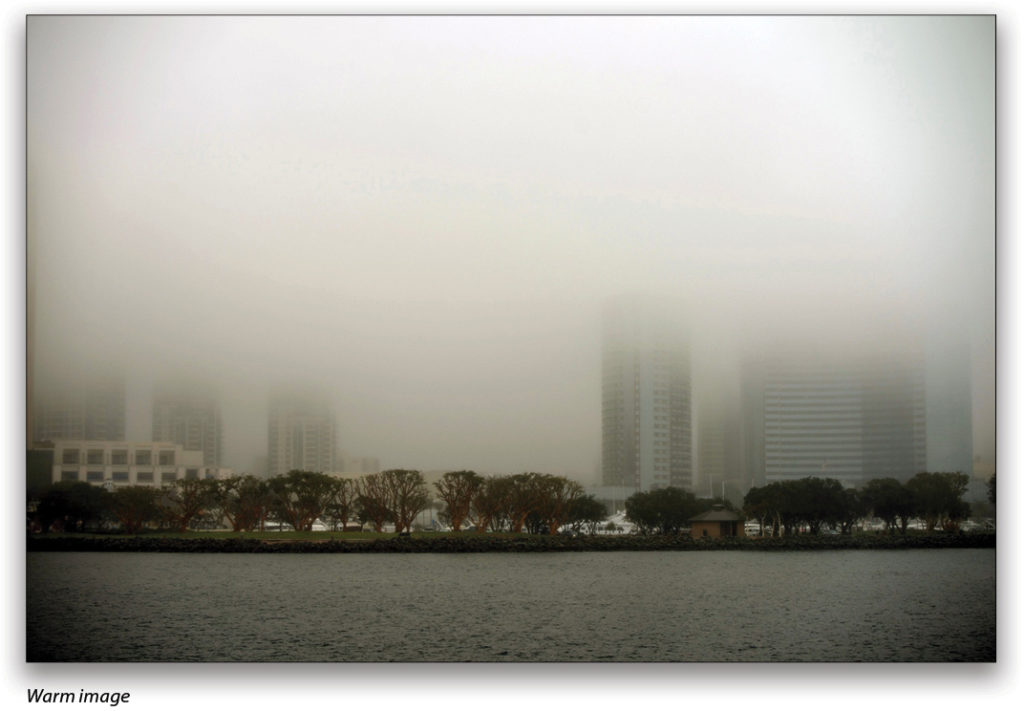
Instead of using the RGB sliders, I’m going to give this a warm tone by individually adjusting each of the channel values. It turns out that the midpoint slider behaves like a color balance slider for each channel. Moving it left increases the color associated with that channel, but moving it right increases the opposite color. So on the Red channel, moving the midpoint slider left makes the image red, and moving it right makes it cyan, just like the Color Balance adjustment sliders.
After working each channel individually by bringing in the end point sliders and manipulating the midpoint, here’s one stylized result.
Another option is to create a color mask by using a Levels adjustment layer set to Color blend mode. In this case, start with a Levels adjustment layer set to Normal and adjust for contrast, then add another Levels adjustment layer set to Color. For more contrast, change the Normal layer to Soft Light or Overlay blending mode.
You aren’t limited, however, to just stacking up Levels adjustment layers. You can also use Stamp Merge Visible (Command-Option-Shift-E [PC: Ctrl-Alt-Shift-E]) to create copies of adjustments and blend them selectively. This is a great way for working on individual image elements and compositing them together—kind of like making multiple exposures.
Tips & Tricks
Okay, are you ready for some cool tips and tricks? It turns out that Levels is also available as a “destructive” adjustment from the Image>Adjustments menu. There may not be much need for this particular feature these days, but there are some neat things you can do.
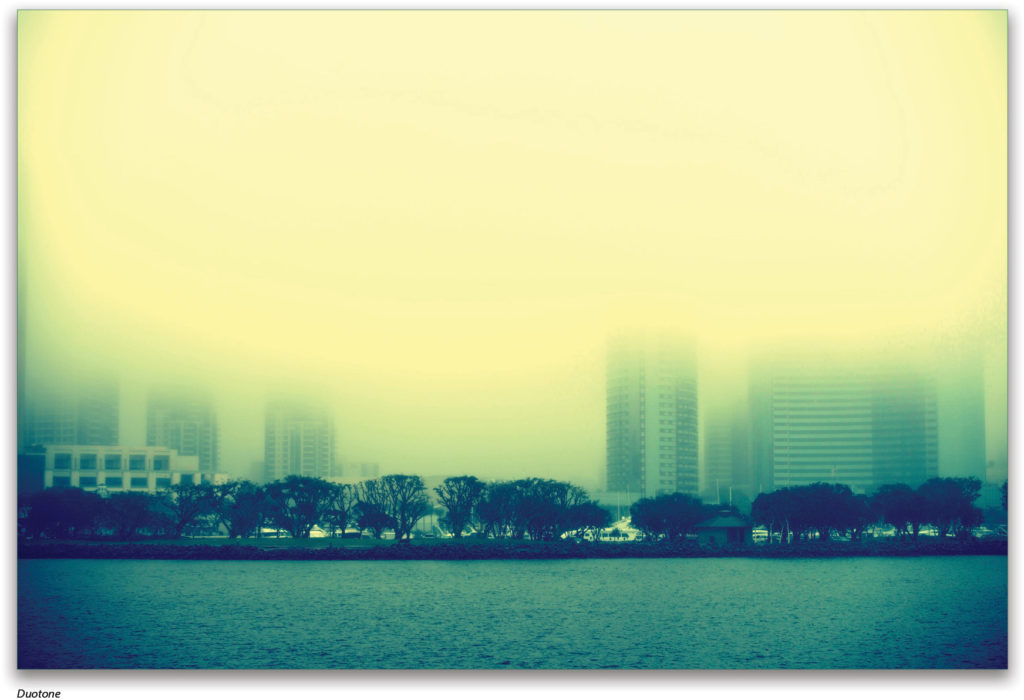
For a cool duotone effect, you can choose two channels from the Channels panel and then go to Image>Adjustments>Levels, and work on just those two channels. (Note:Don’t just turn off a channel in the Channels panel by clicking its Eye icon; you need to actually click on the first channel you want, and then Shift-click the other channel to select them both.)
The drop-down menu in the Properties panel now lets you work on the composite of those channels, as well as each one individually. When you get a look you like, click OK to commit. But there’s a problem: the third channel comes back when you choose the RGB composite in the Channels panel! To solve this problem, select the channel you didn’t adjust in the Channels panel and fill it with black. This trick is destructive, so make a flat copy of your image first.
A more practical use for the Adjustments menu version of Levels is applying it to smart objects. First, convert your layer, stack, or group to a smart object (Filter>Convert for Smart Filters), and then choose Image>Adjustments>Levels. This retains the flexibility of an adjustment layer, including the ability to change both opacity (but not fill) and blending mode, just like with other smart filters.
Now when you select channels individually up front for the above duotone effect, however, Levels will be grayed out under Adjustments, but there’s a workaround, of course. If you want to use only two channels for your effect, simply go to the third one in the Levels Properties panel and drag the Input sliders all the way to the right, then drag the Output sliders all the way to the left. This makes the channel effectively black, but it’s nondestructive. Continue working on the other two channels as you like.

This channel Levels control also works in CMYK and multichannel, where it’s more useful for preparing spot or plate output, where you need specific control over density.
Finally, Levels also has both presets and an Auto option. To be honest,
I don’t use either of them. The controls are so easy to get to that I just haven’t bothered with presets, and the Auto settings are identical to those mentioned in my previous article, “Color Grading with Curves.”
This article originally published in the February, 2020 issue of Photoshop User magazine.


Someday I May be able to understand all this stuff, until then I’ll keep reading.