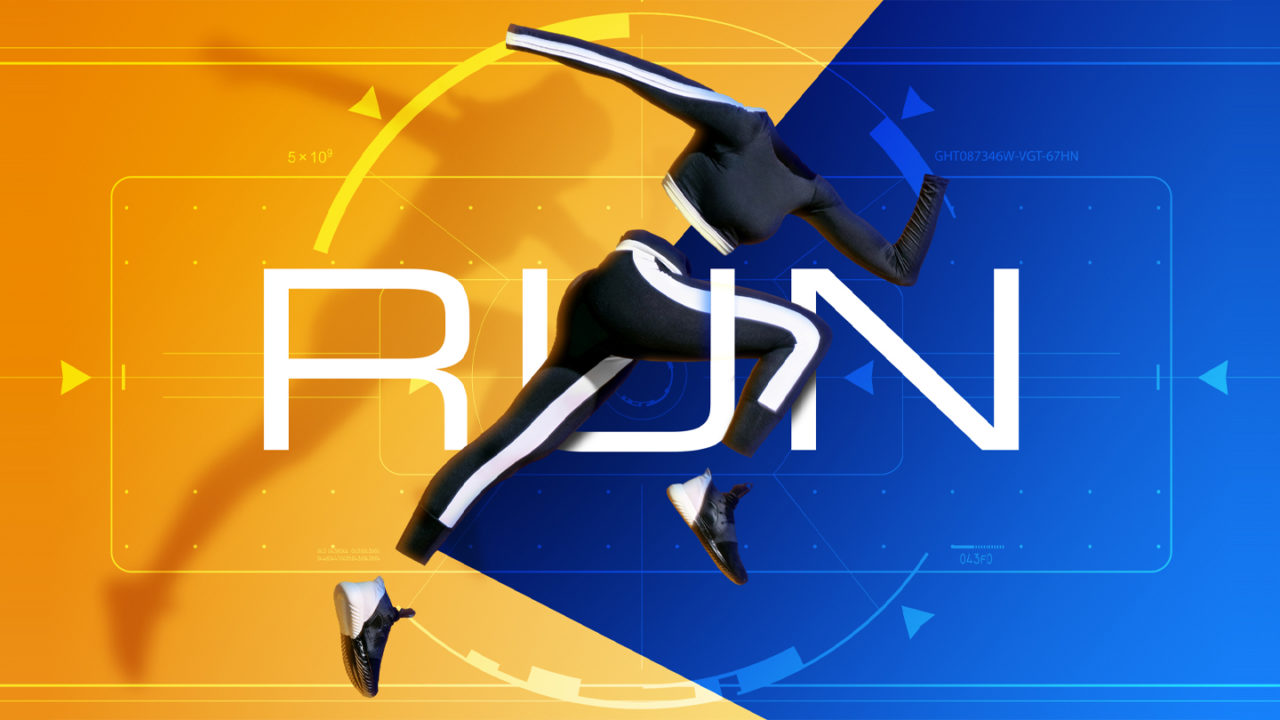
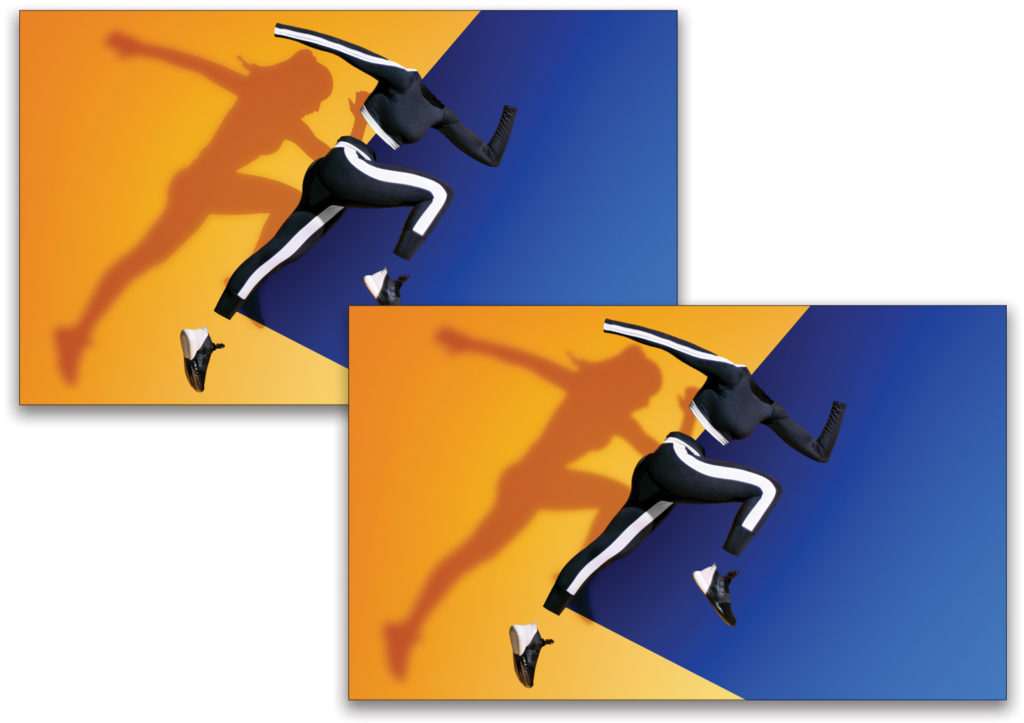
In this article, I have a lot of useful tricks that we’re going to use in combination to build a sports design based on an ad I saw for Under Armour sportswear. It highlights the clothes by showing them in action without people in them. It’s a cool result that’s easy to achieve with the right photo. Along the way, we’ll add some effects you might find useful in other projects. There’s even a bonus video at the end on finishing effects.
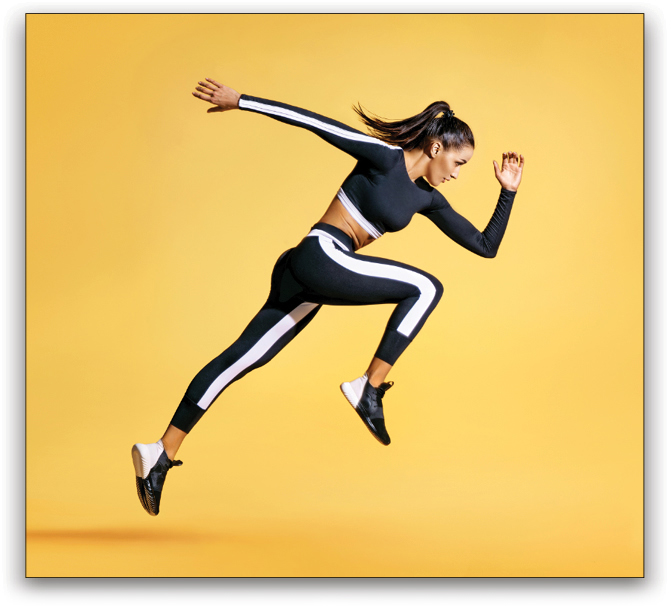
Step One: In this exercise, we’ll use a studio athlete shot I found on Adobe Stock. If you’d like to download the low-res watermarked version of this image to follow along, click this link, log in with your Adobe ID, and click the Save to Library button. Double-click the image in the Libraries panel (Window>Libraries) to open it in Photoshop. To make it easier to work with the image, increase the resolution of the practice file. (We normally don’t recommend enlarging images, but this is only for practice purposes.) Go to Image>Image Size, turn on the Resample checkbox, select Preserve Details 2.0 from the Resample drop-down menu, set the Width to 2,400 pixels, and click OK.
Because the subject is on a mostly solid background, it will be easy work for the Select Subject feature. Go under the Select menu and choose Subject. Done! Well, not completely, but you can see it did 99% of the work! This an impressive selection feature in Photoshop and is really effective on images with simple backgrounds, but it also works on a variety of backgrounds. This feature is definitely worth experimenting with.
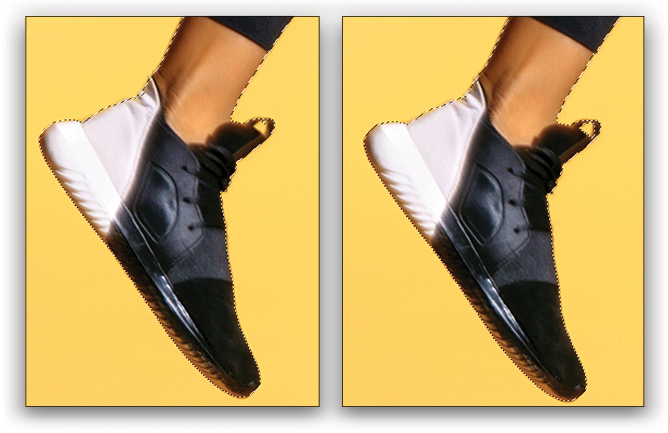
Step Two: Zoom in on the image to look for any areas that were missed or perhaps selected too much. Keep in mind that for our purposes, we don’t need to be precise with the selection around the subject’s exposed skin areas and hair since those areas are going to be eliminated anyway.
Just use the Lasso tool (L) to edit the selection: hold down Option (PC: Alt) to remove a selected area, and Shift to add to it. Work your way around the entire subject. Here I noticed the area inside the shoelace wasn’t fully selected. Since this is inside the original selection, hold down the Option (PC: Alt) key and click-and-drag around the area to remove it.
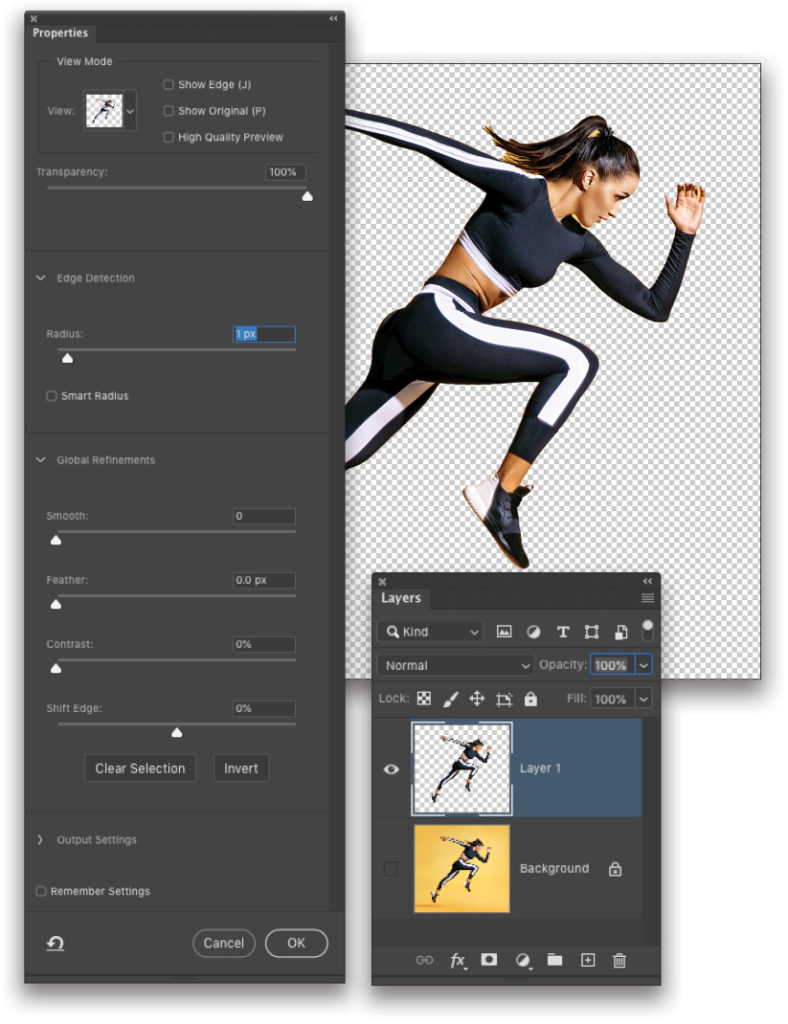
Step Three: To check the overall selection, click on the Select and Mask button in the Options Bar to open the Select and Mask workspace. By default, the View is set to Onion Skin with a Transparency slider below it in the Properties panel. Set the Transparency to 100% so you can see the image extracted from the background before you commit. Even though everything looks good, set the Edge Detection Radius to just 1 px to clean up the edges a bit more, and click OK. Press Command-J (PC: Ctrl-J) to copy the selected subject to a new layer. Also, turn off the Background layer for now by clicking its Eye icon in the Layers panel.
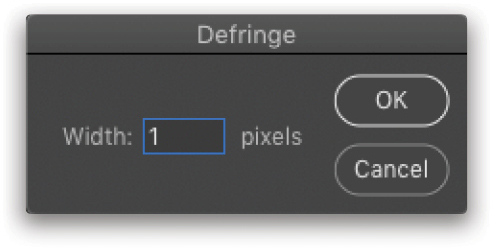
Step Four: Since we extracted the subject from a colored background, the edges will pick up some of the anti-alias fringe from the selection. Go under the Layer menu to Matting and choose Defringe. Set the Width to 1 pixel and click OK.
Step Five: Let’s make our subject invisible. Go into the Toolbar and select the Pen tool (P). Up in the Options Bar, set the Tool Mode to Path. Also, make sure the Path Operations (the overlapping squares) is set to Combine Shapes.
Step Six: The objective here is to remove every bit of the subject except the clothes and shoes. Starting with her left ankle, use the Pen tool to create a path around the exposed skin only. To avoid any aliasing issues, you can draw the path over the edge of the shoe just a little. Since the subject is already extracted, the path can be well outside any skin areas that aren’t touching any of the clothes. Proceed all the way around and click on the starting point to close the path. [Click here for some quick tips on using the Pen tool.—Ed.]
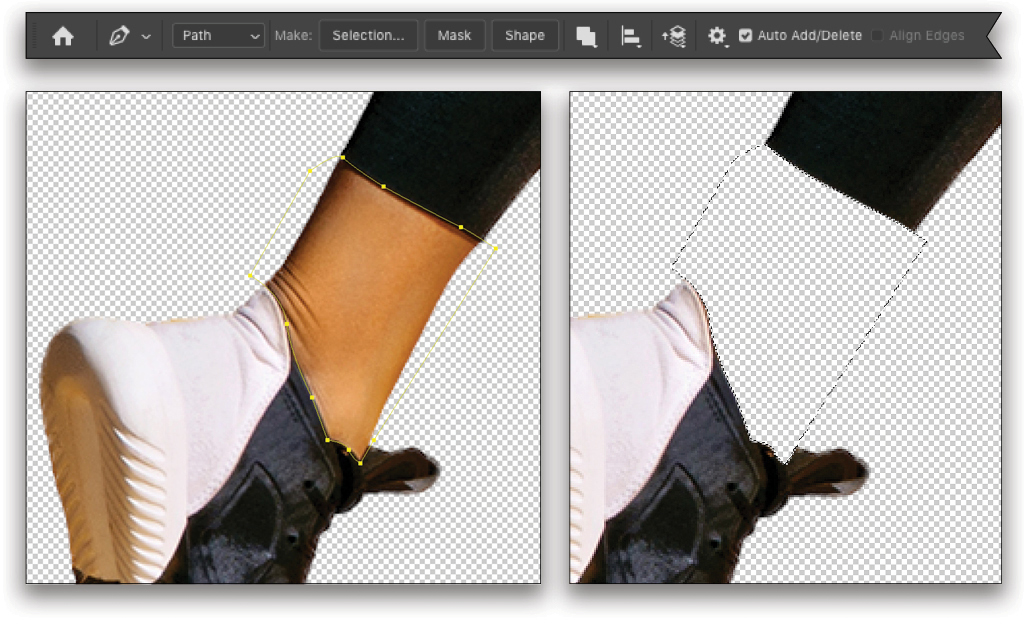
Step Seven: Press Command-Enter (PC: Ctrl-Enter) to convert the path into a selection. Press the Delete (PC: Backspace) key to clear the area, and press it a second time to tighten up the aliasing around the remaining edges. Press Command-D (PC: Ctrl-D) to turn off the selection.
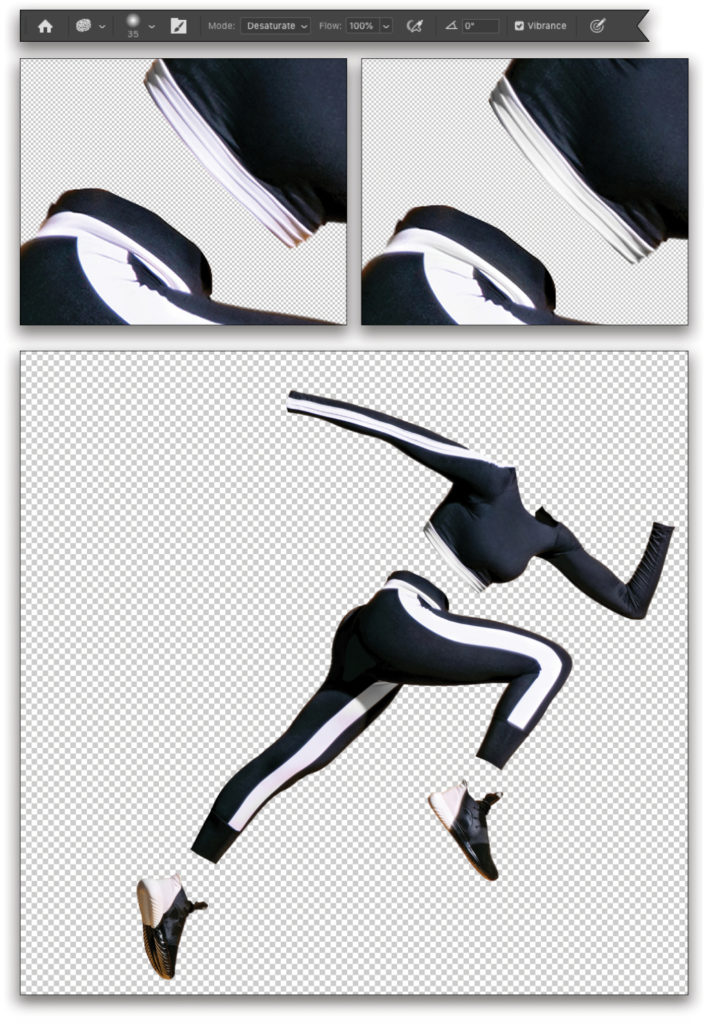
Step Eight: Repeat the last two steps on her right ankle: Draw a path, convert it to a selection, and press Delete (PC: Backspace) twice. Continue removing the rest of the subject in the midsection, hands, and head. In the end, you should have a ghosted athlete just like you see here.
Step Nine: One thing we need to address is that some of the background color is spilling onto some areas of the subject—mainly the white areas of the suit. Here’s a quick fix: Go to the Toolbar and choose the Sponge tool, which is grouped with the Dodge and Burn tools (O). Set the brush tip to a standard, round, soft tip around 35 px. Set the Mode in the Options Bar to Desaturate and increase the Flow to 100%. Now paint over the areas where you see spillover from the background. It’s mainly just along the edges, but I also made a quick pass over the shoes to remove most, but not all of the yellow.
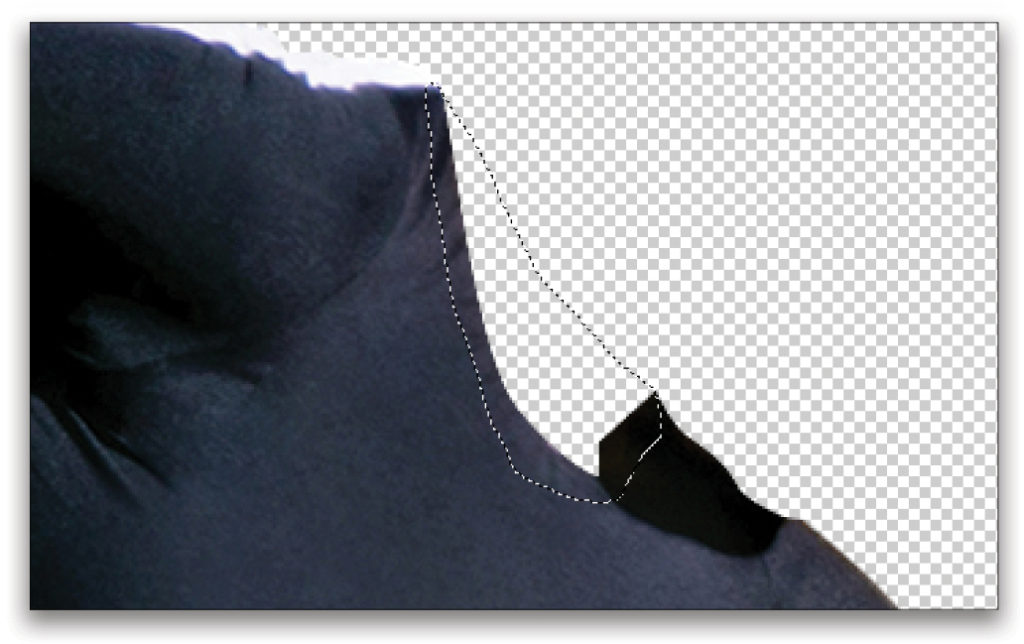
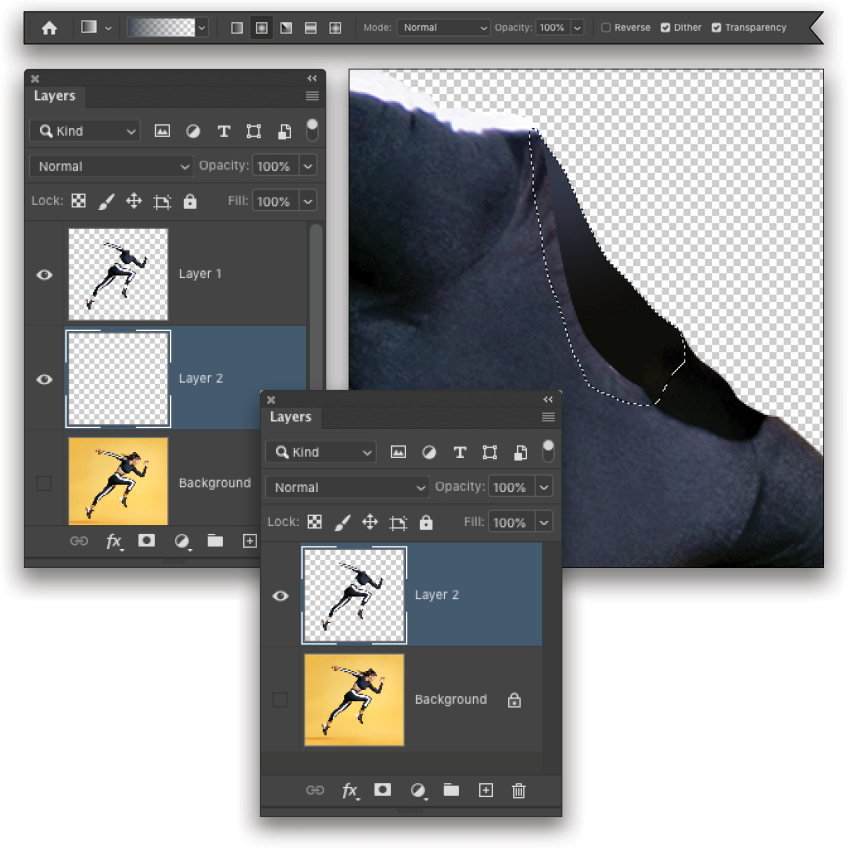
Step 10: Now let’s address the shirt around the neck area. We need to fill in the back of the shirt around the neckline because we should be able to see it now, because no one’s wearing the shirt. With the Lasso tool, draw a selection approximating the area the shirt would cover. Continue to draw the selection below the neckline and then release the mouse button to close the shape.
Step 11: Back in the Layers panel, hold down the Command (PC: Ctrl) key and click on the Create a New Layer icon at the bottom of the Layers panel. This will create a new layer below the current layer instead of above it. Using the Eyedropper tool (I), click to sample the dark shadow color to the right of the selection, and then press Option-Delete (PC: Alt-Backspace) to fill the selection with that color.
Your particular image may not need it, but here I added a dark-blue gradient coming in from the top to give the illusion that light is passing into the back area of the shirt. If you want to add a gradient, make sure the selection is still active, and switch to the Gradient tool (G). Click on the Foreground color swatch near the bottom of the Toolbar, set it to a dark blue, and click OK to close the Color Picker. Click on the gradient thumbnail in the Options Bar to open the Gradient Editor, select the Foreground to Transparent preset in the Basics set, and click OK. Starting just above the selection, drag the gradient down into the selection.
Press Command-D (PC: Ctrl-D) to deselect. Click on the top layer in the Layers panel, and press Command-E (PC: Ctrl-E) to merge the two layers into a single layer.
Step 12: We have a similar issue with the left sleeve as we did with the neck area. The edge curves downward so you’d expect to see at least a hint of the other side of the sleeve. To save time, we’ll use a workaround. Switch to the Rectangular Marquee tool (M), and draw a selection around the end of the sleeve.
Step 13: Go under the Filter menu and choose Liquify. Select the Forward Warp tool (W) at the top of the Liquify Toolbar. Go to the Brush Tool Options in the Properties panel, and set the Size to around 90, the Pressure to 15, and the Density to 20. Also, turn off Show Backdrop in the View Options section. Then, just click-and-drag in short strokes to warp the sleeve edge until it curves upward, essentially hiding the other side. Done! Click OK and deselect.
Go ahead and fix any other edges that might need it using either method described above.
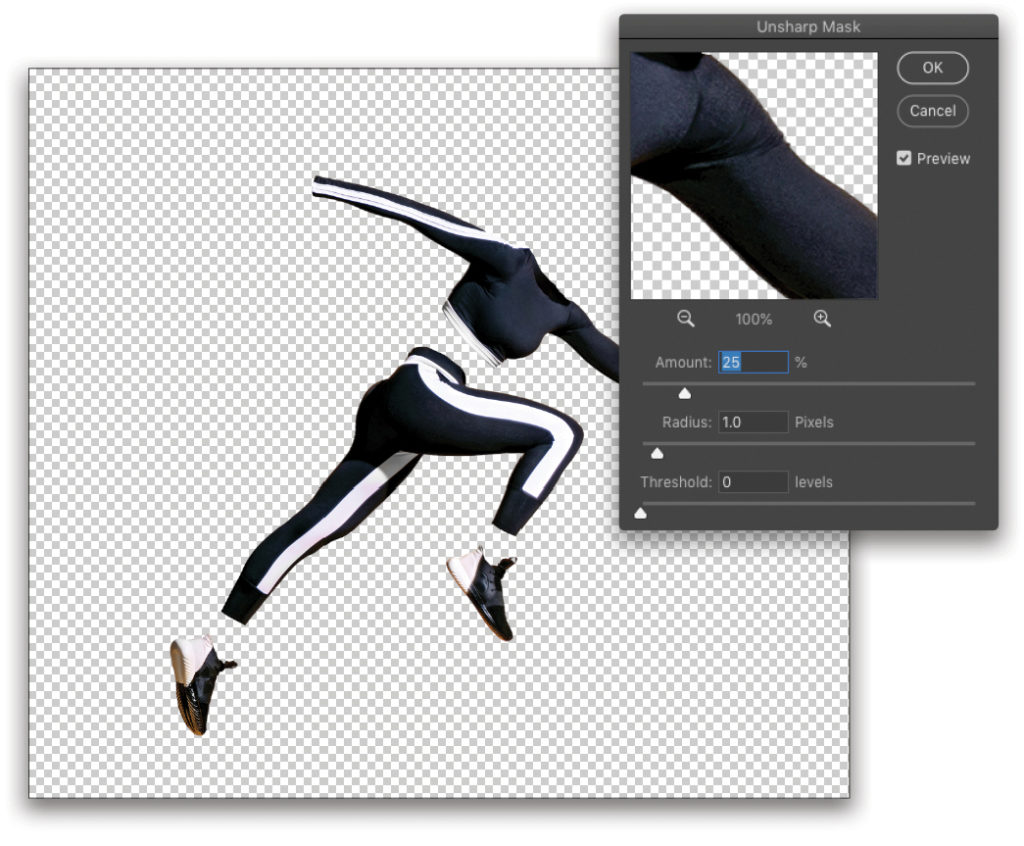
Step 14: Now, go under the Filter menu to Sharpen and choose Unsharp Mask. Set the Amount to 25%, Radius to 1.0 pixel, and the Threshold to 0 levels. Click OK. The subject is ready to be composited into the main design, which we’ll begin in the next step. Now is a good time to save what you’ve done so far.
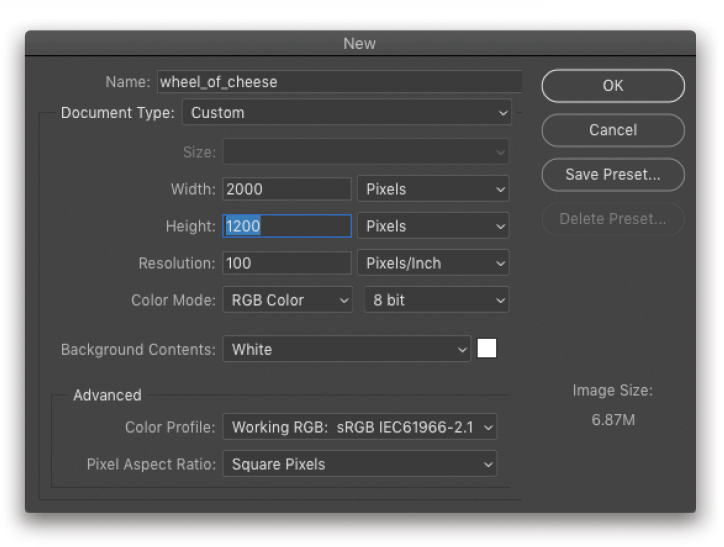
Step 15: Create a new Photoshop document (File>New), and set the Width to 2,000 px and the Height to 1,200 px. Just leave the Background Contents set to white for now, and click OK or Create.
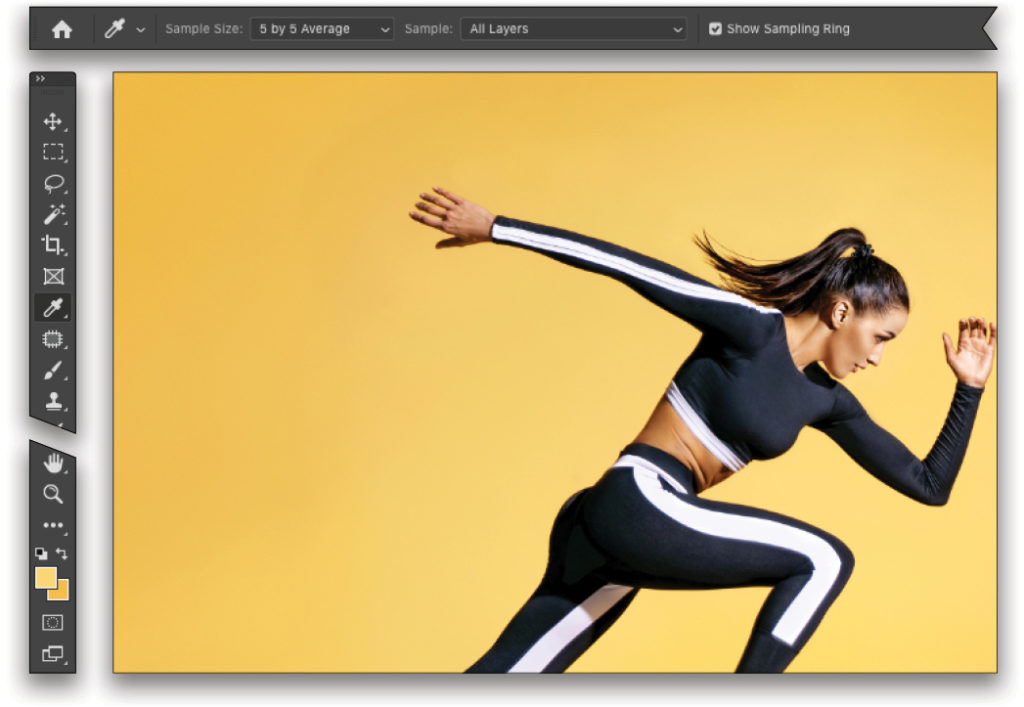
Step 16: Go back to the subject image with which we’ve been working. Turn the Background layer back on because we want to sample the background colors in the original image. Select the Eyedropper tool in the Toolbar, and in the Options Bar, set the Sample Size to 5 by 5 Average.
Click on the background near the center of the image next to the subject to sample the brighter yellow and set it as the Foreground color. To set the Background color, hold down the Option (PC: Alt) key and click in a darker area of the yellow closer to the edge of the image.
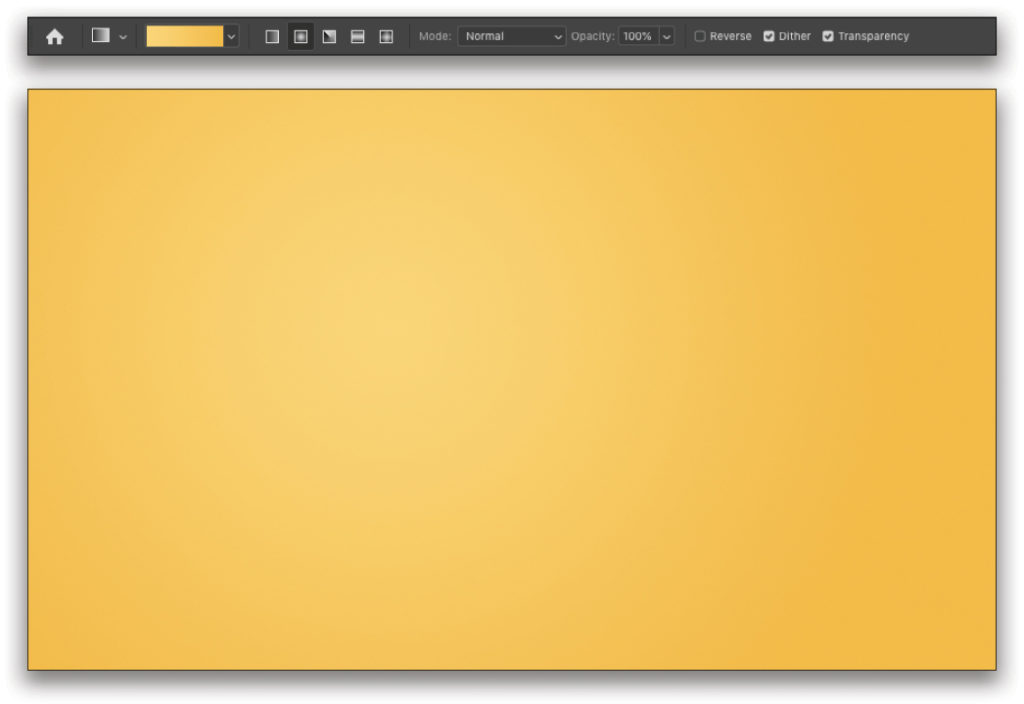
Step 17: Now switch to the Gradient tool (G). Up in the Options Bar, click on the preview strip to open the Gradient Editor, and select the Foreground to Background preset in the Basics set. Click OK to close the Gradient Editor. Also, choose the Radial Gradient type in the Options Bar.
Step 18: Back in the new document, create a new blank layer. Click somewhere in the middle-left area of the canvas and drag close to the right edge of the document to create a radial gradient that goes from the lighter yellow to the darker yellow. This creates a subtle light effect on the background.
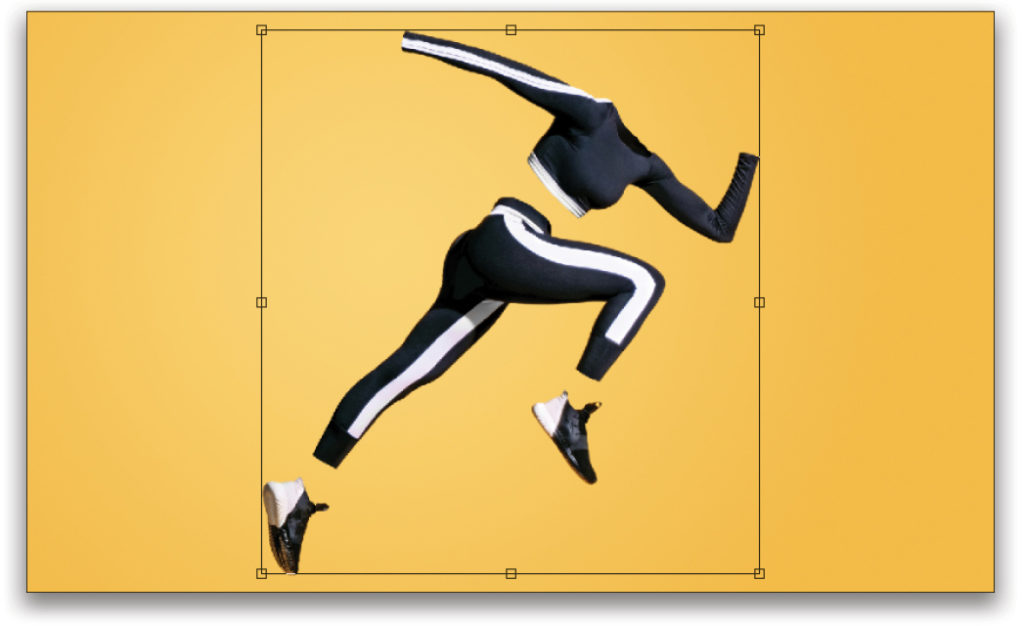
Step 19: Go back to the subject image, switch to the Move tool (V), and click-and-drag the ghosted layer of the extracted subject onto this background. Press Command-T (PC: Ctrl-T) for Free Transform, and scale and position the subject to fit in the composition as you see here. Press Enter when done.
Step 20: We want to fill part of the background with a different color. Using the Path tool again with the same settings we used earlier, select part of the background as shown here. I created the path along the long axis of the subject and clicked points outside the edge of the image and around to close the shape.
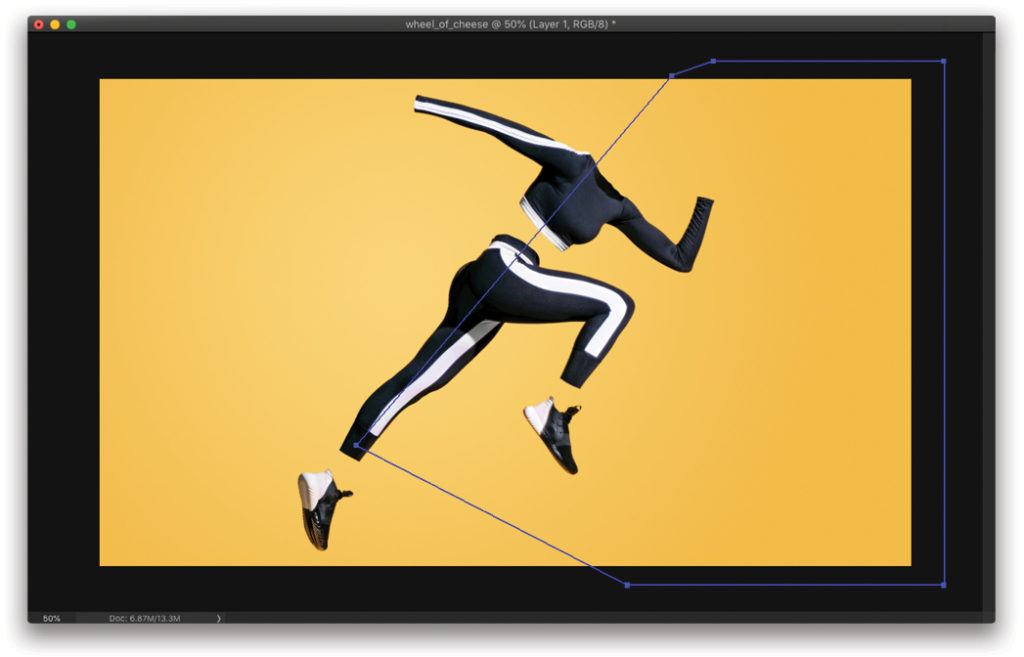
Note: My path color was set to yellow and it was hard to see on the yellow background, so I changed it to blue. Go to Photoshop (PC: Edit)>Preferences>Paths, Grids & Slices to change the path color if needed.
Step 21: As before, press Command-Enter (PC: Ctrl-Enter) to convert the path to a selection. Click on the gradient-filled layer (Layer 1) in the Layers panel to make it the active layer, and then press Command-J (PC: Ctrl-J) to copy the selected area to a new layer.
Step 22: We want this shape to be a blue color, so simply press Command-I (PC: Ctrl-I). This will invert the yellow into it’s direct complementary color of blue. Easy!
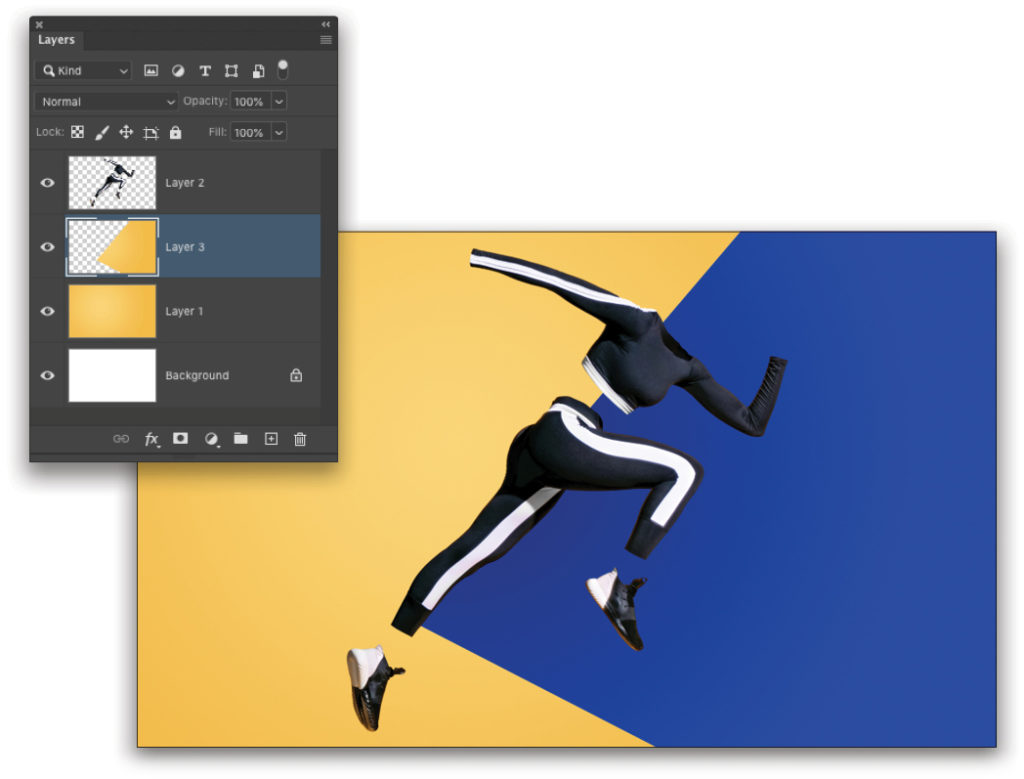
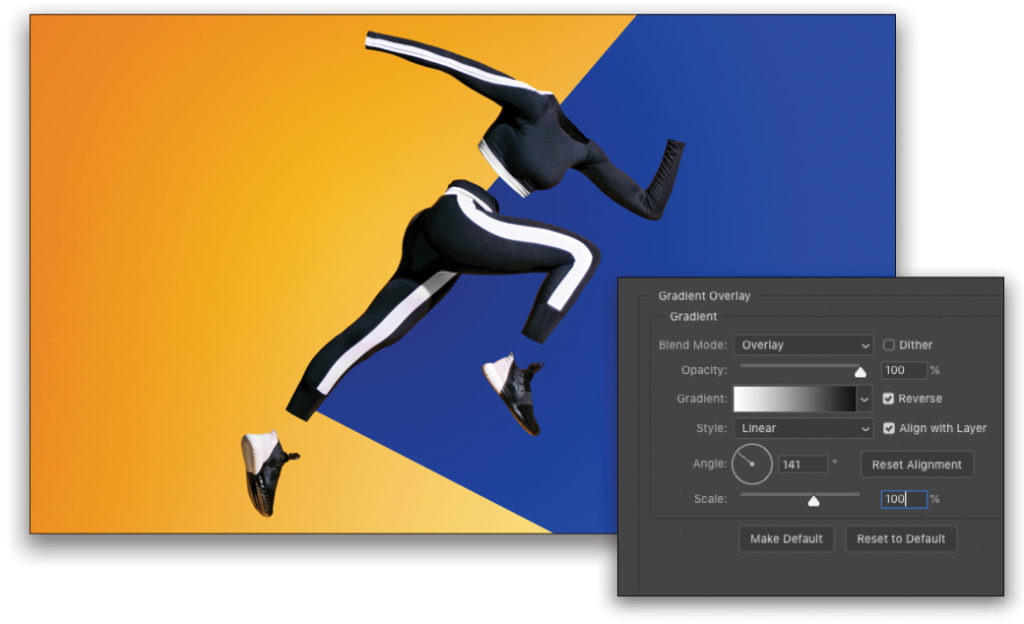
Step 23: Click back on the yellow-filled layer in the Layers panel to make it active. Click on the Add Layer Style icon (ƒx) at the bottom of the Layers panel, and choose Gradient Overlay. Click on the Gradient thumbnail; select the Black,White preset in the Basics set; and click OK to close the Gradient Editor. Set the Blend Mode to Overlay, Opacity to 100%, and Style to Linear. Check on Reverse, and set the Scale to 100%. You can change the Angle of the gradient by turning the dial, and you can click right on the image and manually drag around the position of the gradient. Position the gradient so the darker area is in the upper-left corner to give the background a little more depth. Click OK to close the Layer Style dialog.
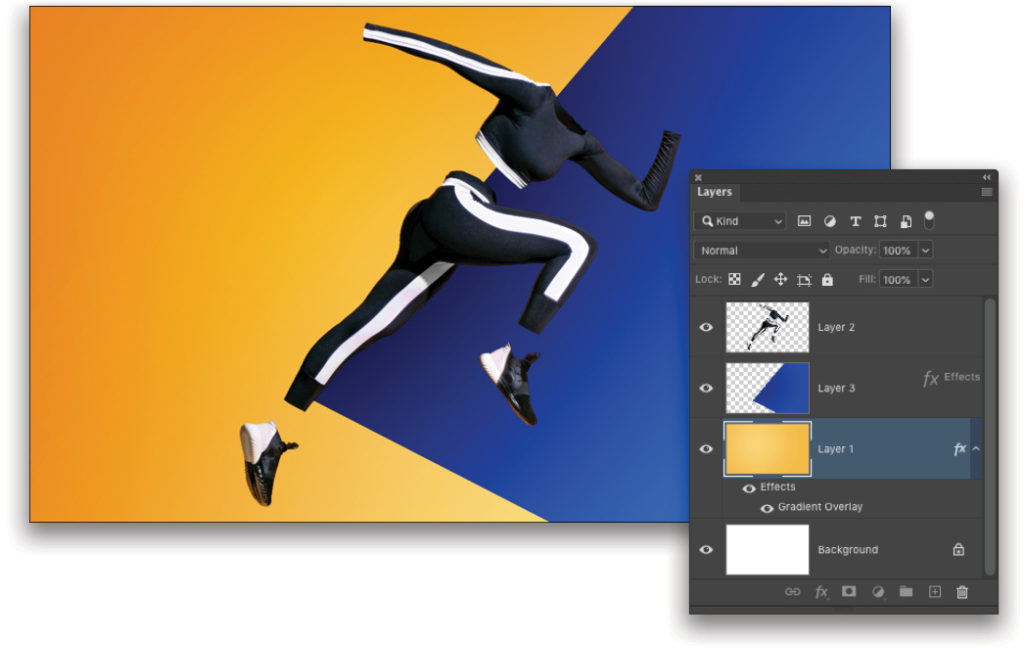
Step 24: Let’s add the same effect to the blue portion, as well. Hold down the Option (PC: Alt) key as you click-and-drag the ƒx icon from the yellow background layer in the Layers panel to the blue background shape layer. This will copy-and-paste the layer style in one step.
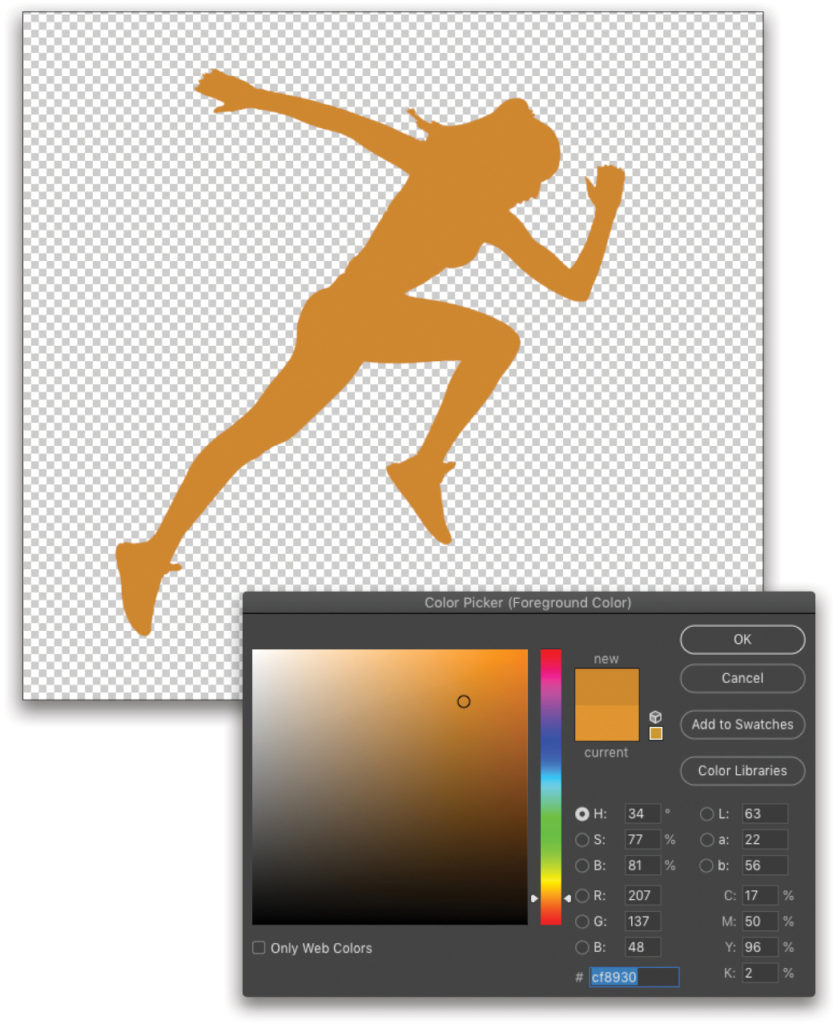
Step 25: Next, we want to add a shadow of the full subject, so we need to go back to the original image for this. With the original Background layer active, go under the Select menu and choose Subject again. We don’t need to refine the selection this time, so create a new blank layer, and then click on the Foreground color swatch to open the Color Picker. Set the RGB numbers to R: 207, G: 137, and B: 48. Click OK. Press Option-Delete (PC: Alt-Backspace) to fill the selected subject with the solid yellow color on the new layer, and deselect. In the image shown here, I’ve hidden the other layers so you can see what it looks like.
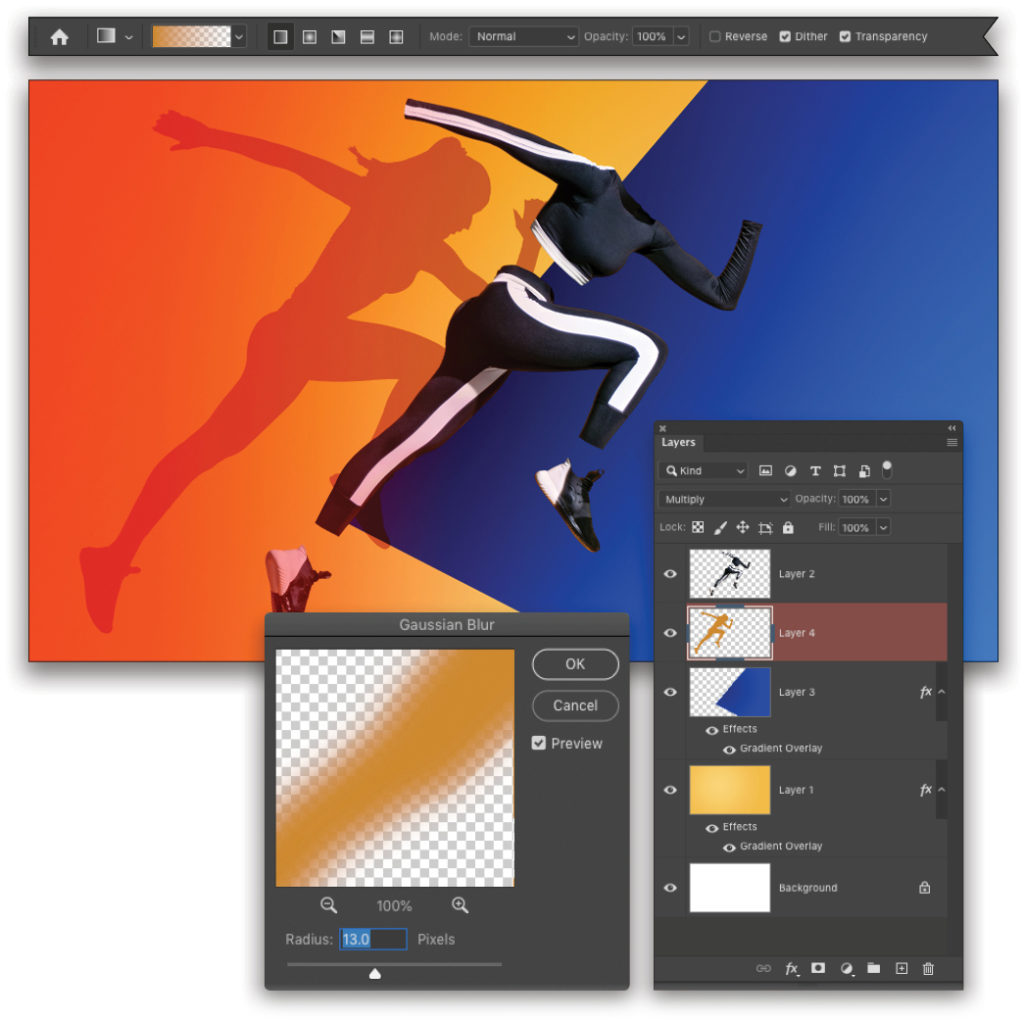
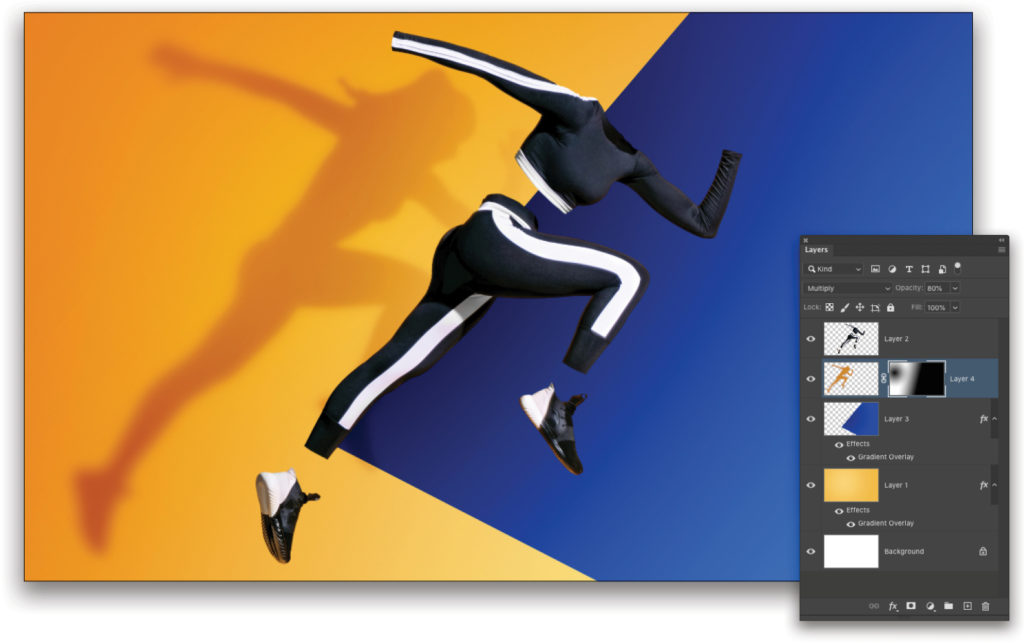
Step 26: Use the Move tool to drag this layer into the main design. Use Free Transform again to scale and position this shadow layer over the yellow area, as you see here. Press Enter when you’re done. In the Layers panel, position the shadow layer just under the ghosted subject layer in the Layers panel. Also, change the layer blend mode to Multiply.

Step 27: Select the Gradient tool in the Toolbar once again. Change it to a Foreground to Transparent gradient, and make sure you have the Linear Gradient type selected in the Options Bar.
Step 28: Press Q to activate Quick Mask mode. Holding the Shift key, start the gradient on the left edge of the canvas area and drag it to the halfway point. The Shift key will keep the gradient perfectly horizontal. When in Quick Mask mode, the gradient will appear in red, and you’ll notice the layer in the Layers panel is also highlighted in red. Press Q again to switch back to normal view mode. Now we have a gradient selection. Note: If the right side of your image is selected, go to Select>Inverse so the left side is selected instead.
Go under the Filter menu to Blur and choose Gaussian Blur. Set the Radius to 13 pixels, and click OK. You can see the blur effect fades as it goes across the shadow based on the gradient selection you created. Press Command-D (PC: Ctrl-D) to deselect.
Step 29: Go to Gaussian Blur once again, but this time set it to just 5 pixels. This will soften the sharp edges on the right side of the shadow.
Step 30: Lower the layer Opacity to around 80%, and click on the Add Layer Mask icon (circle in a square) at the bottom of the Layers panel. Using the Gradient tool set to the Foreground to Transparent preset and the Linear Gradient type in the Options Bar, draw a gradient from the right side of the ghosted subject to the left side of the shadow at a slightly upward angle to make it look as if the shadow is fading the closer it gets to the subject. Add any other fades you might want depending on how much of the shadow you want to see. For example, I added a radial gradient to slightly fade the shadow’s hand on the left.
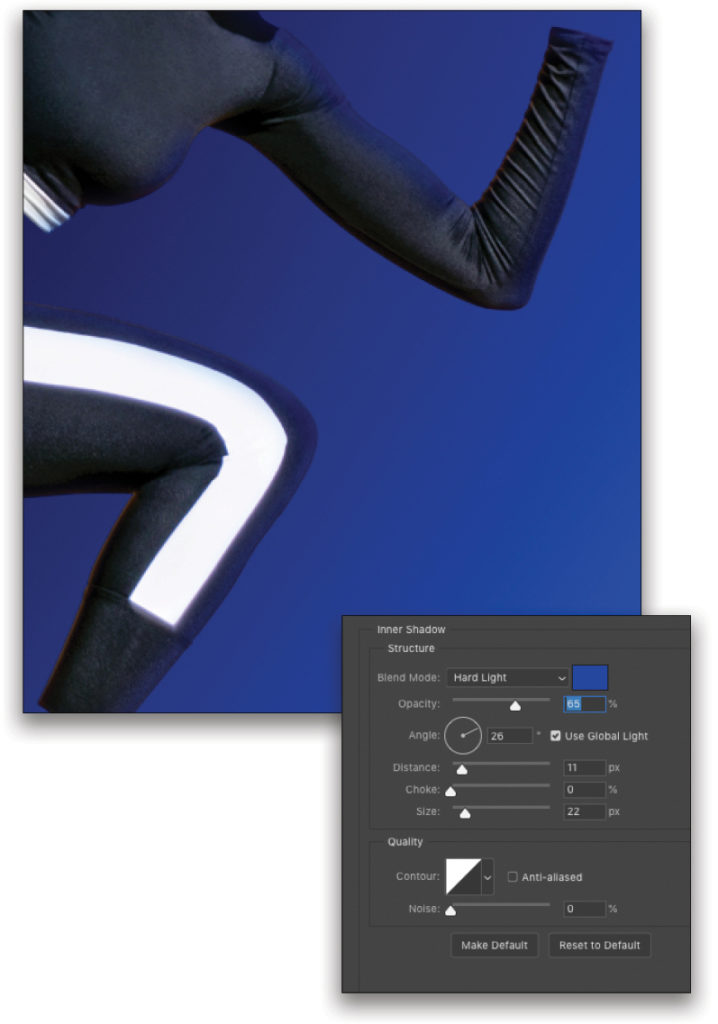
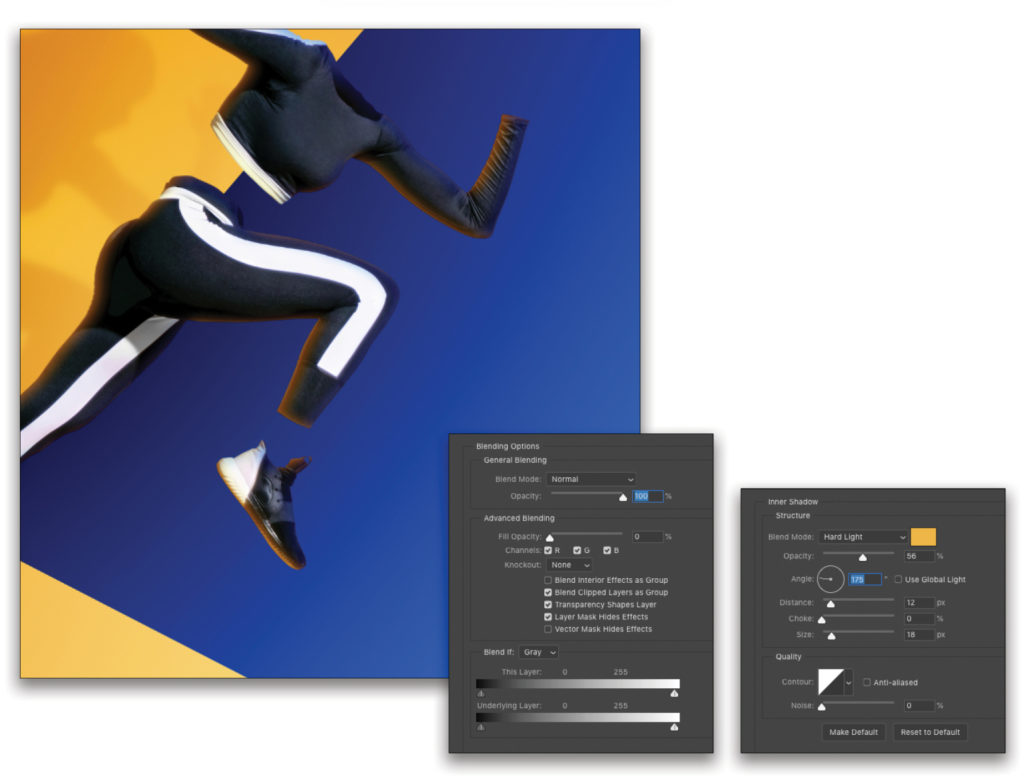
Step 31: This last part is a pretty cool edge lighting trick that uses layer styles. Start by making the ghosted subject layer active in the Layers panel. Go to the Add a Layer Style menu (the fx icon) and choose Inner Shadow. Start by clicking on the color swatch, and when the Color Picker opens, click to sample the blue background near the subject in the image. Click OK to close the Color Picker.
Next, change the blend mode to Hard Light and adjust the other settings as shown here. We want it to appear as if a blue light is spilling from the background onto the edges of the ghosted subject. Just like the Gradient Overlay layer style, you can manually position this effect by clicking-and-dragging in the image, and then adjust the Angle as needed. Click OK when done.
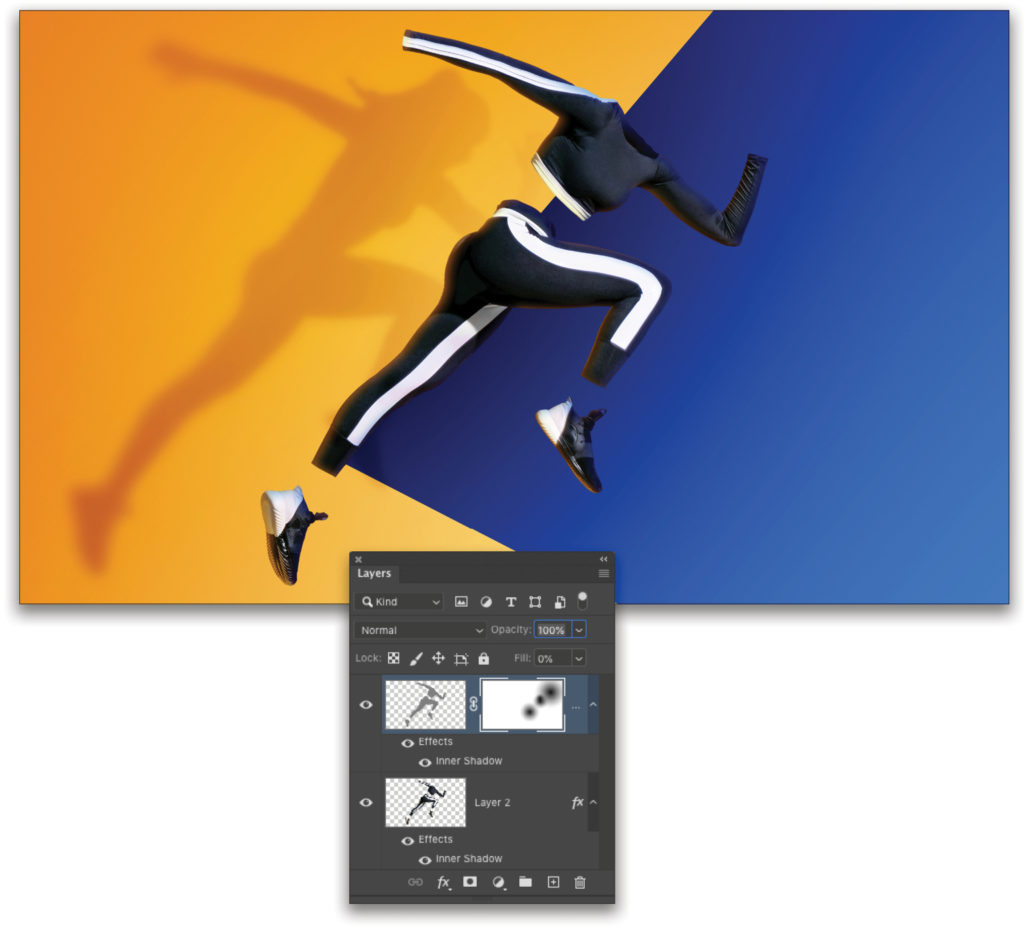
Step 32: We want to create the same edge effect for the other side but this time using the yellow. We could just add another instance of the Inner shadow but we need to be able to mask it separately, so we’ll create it on a separate layer.
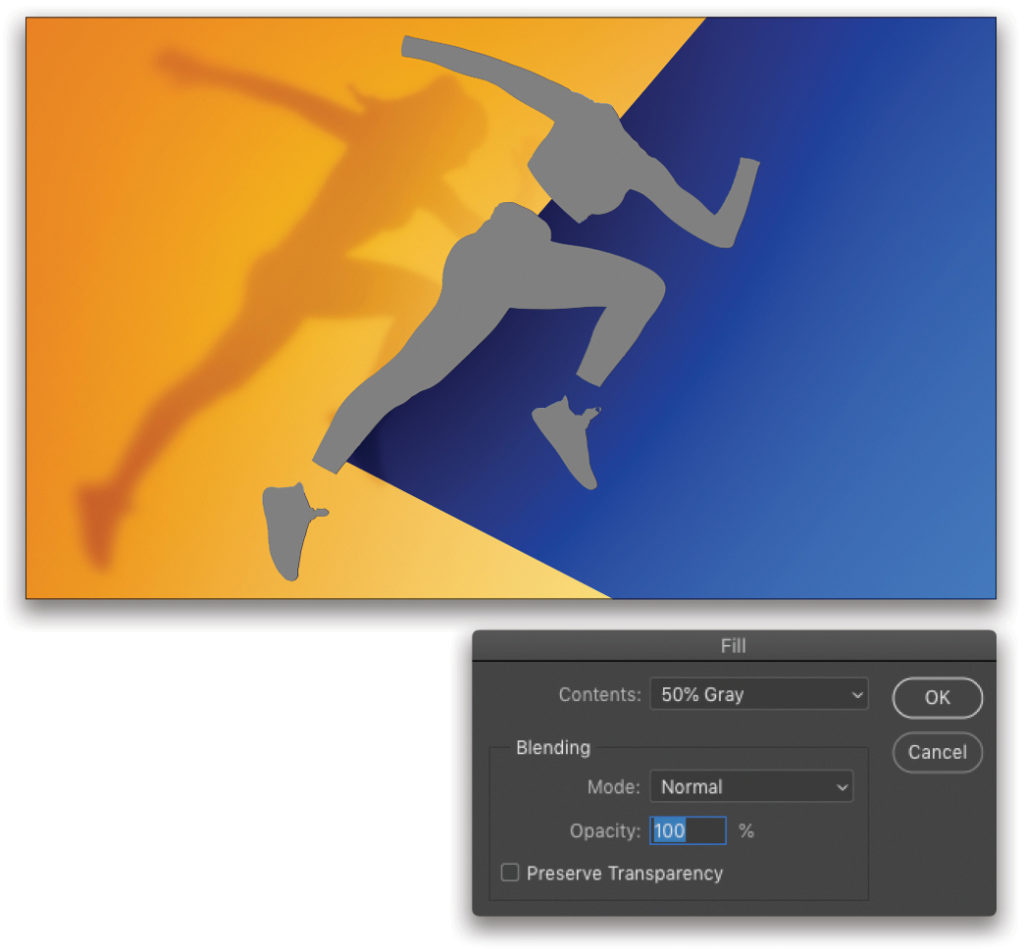
Hold down the Command (PC: Ctrl) key as you click on the thumbnail of the ghosted subject layer to load it as a selection. Create a new blank layer above the subject layer, and press Shift-Delete (PC: Shift-Backspace) to open the Fill dialog. Select 50% Gray in the Contents drop-down menu, and click OK to fill the selection with gray (or any other color will do). Press Command-D (PC: Ctrl-D) to deselect.
Step 33: Choose Inner Shadow in the layer style menu again. Click on Blending Options at the top of the list of Styles on the left side of the dialog. Under Advanced Blending, set the Fill Opacity to 0% to hide the gray fill in the ghosted subject. Also, turn on Layer Masks Hides Effects. Back in the Inner Shadow settings, change the color to a sampled version of the yellow background, and then adjust the settings and Angle to match the lighting in the scene.
Step 34: Finally, add a layer mask to this layer, and using the Foreground to Transparent Radial gradient, add a few small gradients to the left arm and right leg areas to lessen the yellow edge as it gets further away from the yellow background.
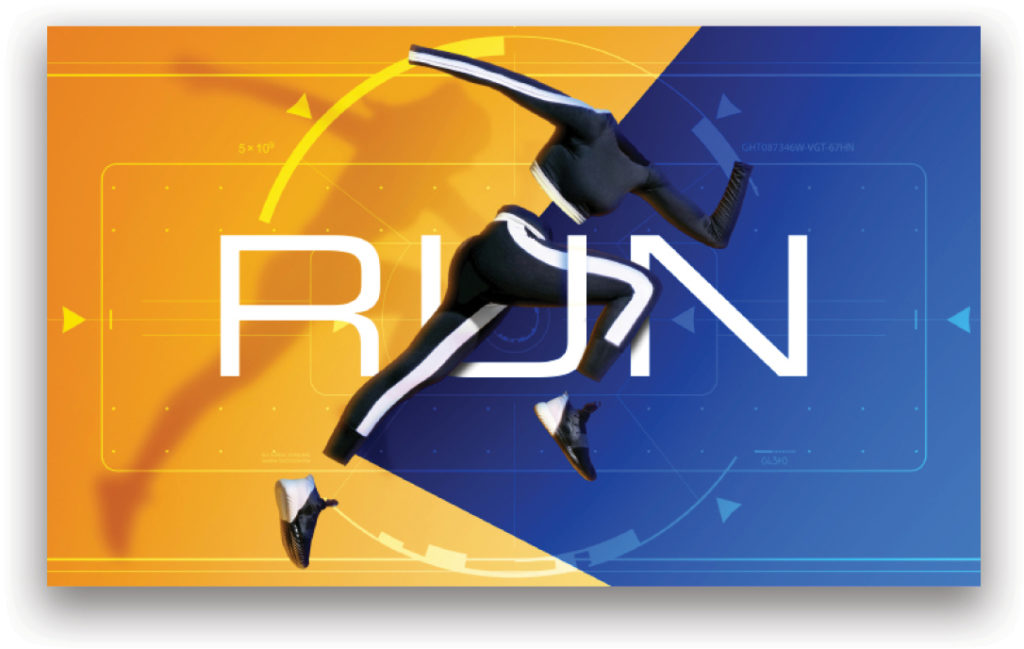
At this point, the composite effect is pretty much done. Feel free to tweak any settings or go back and practice any of the techniques we’ve learned in this tutorial. Click here for a short video where we’ll add some design elements along with some text masking effects to give it a finished look as shown here. Be sure to check it out!
This article originally published in the March, 2020 issue of Photoshop User magazine.


