I usually take photos at sunset and sunrise, so I often find myself clueless as to what to shoot during the day. Making a long exposure with my iPhone forces me to be creative during these times, as well as letting me rediscover boring landscapes.
Example #1: Black-and-White
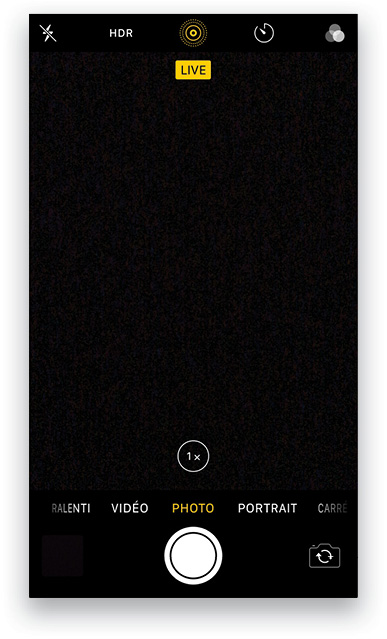
Step One: The first thing you need to do when you open the photo app on your iPhone is to make sure that Live photo is turned on. It’s the middle circular icon at the top of the screen.
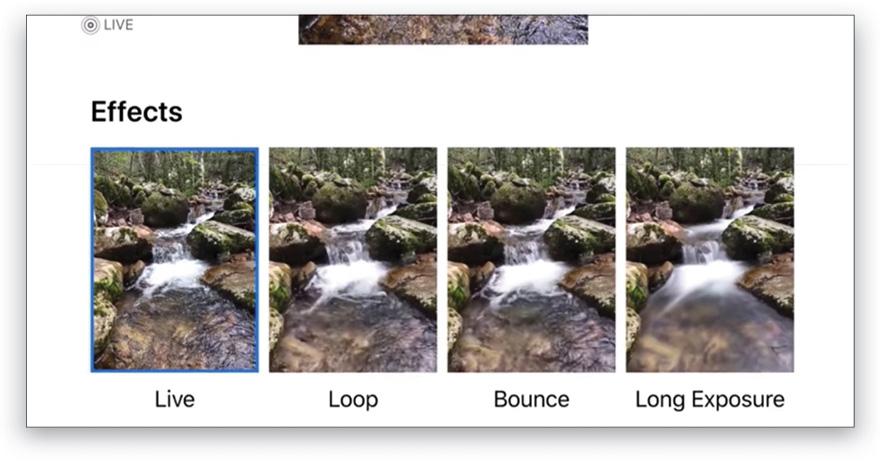
Step Two: The iPhone will take a few photos when you click to capture your image. Once you take your photo, all you have to do is view it on your iPhone and swipe up. You’ll see different Effects from which you can choose, and the last option is Long Exposure. Because Live mode is a mini video, it can create those kinds of effects. You can use this anytime you have something that’s moving in the image, such as the sky, water, or if you want to remove people who are in motion. It’s very practical!
Step Three: Now let’s get to the fun part: development! Here I have a photo that I liked, and it has the Long Exposure effect, so I imported it into Lightroom Classic CC.
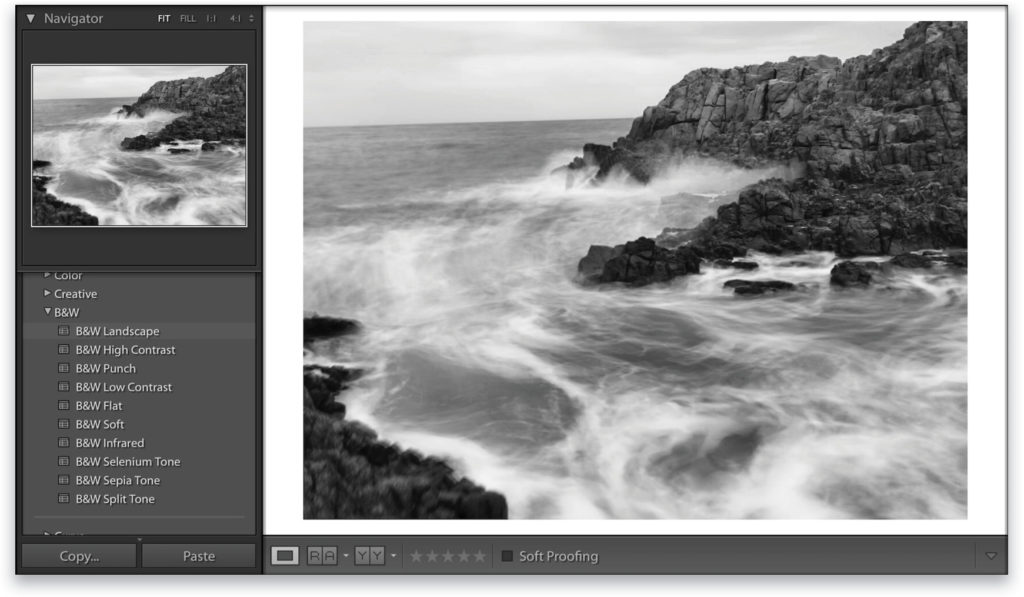
Step Four: When you have only a few colors in the sky or water, you’re safe to go black-and-white. To speed up your workflow, you can use the B&W presets in the Presets panel as a starting point. Here I used the B&W Landscape preset.
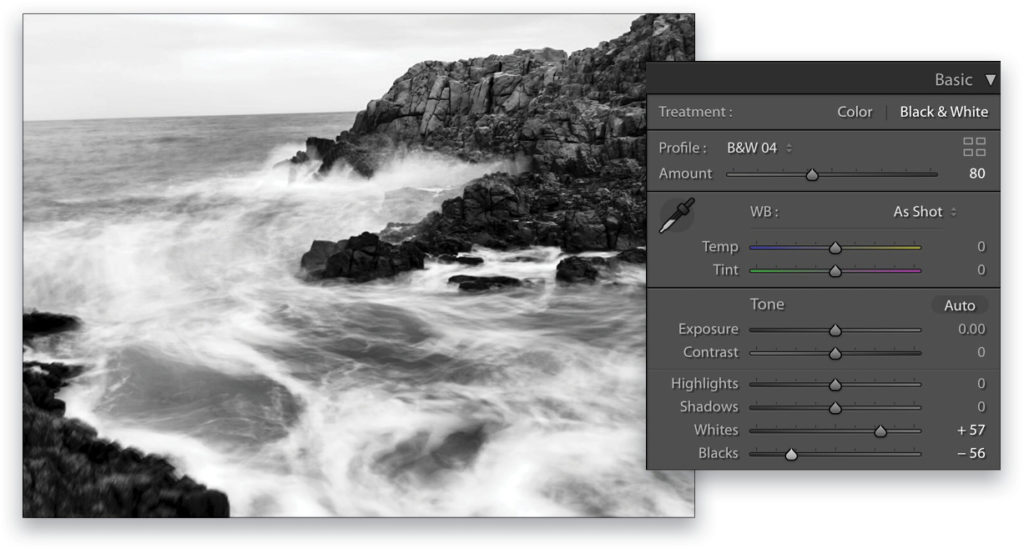
Step Five: Now you can have fun tweaking your black and white points using the Whites and Blacks sliders in the Basic panel. Tip: Hold the Shift key and double-click the Whites and Blacks sliders to auto-set the black and white points.
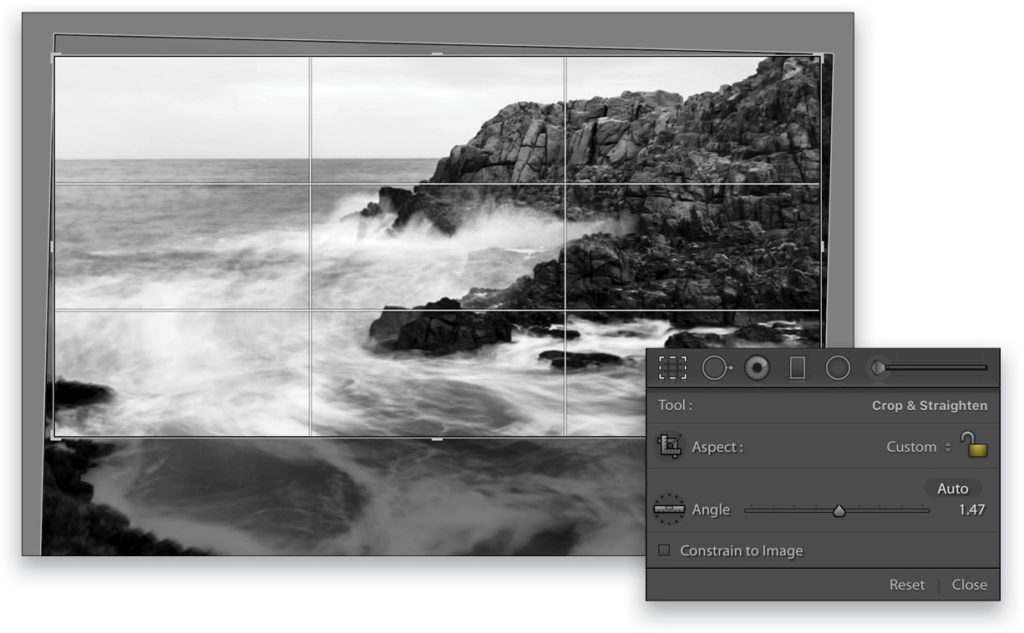
Step Six: To make your photo more dynamic, use the Crop Overlay tool (R) and crop the image and make it more panoramic. Use the Angle slider to straighten the horizon. Press Enter to commit the crop.
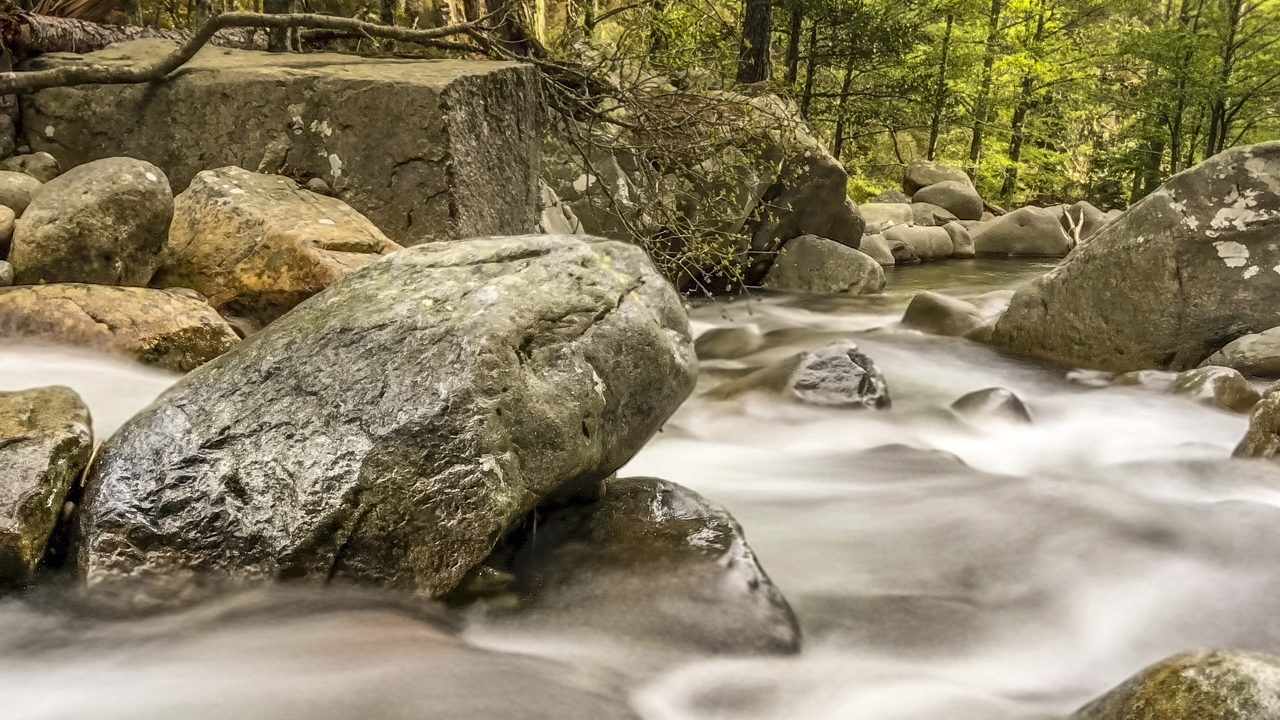
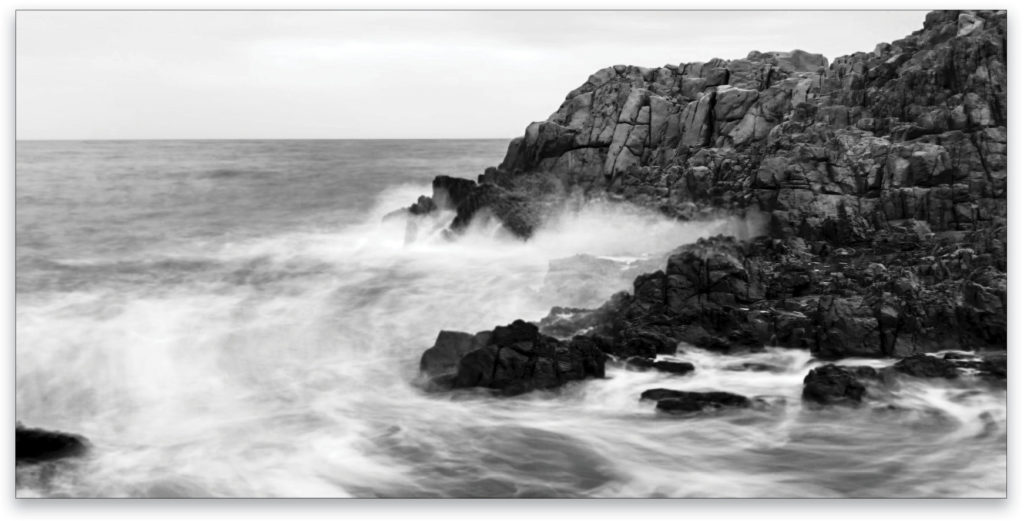
Here’s the final result. It has the effect of a long exposure that’s kind of high key. Pretty cool for an iPhone photo!
Example #2: Color
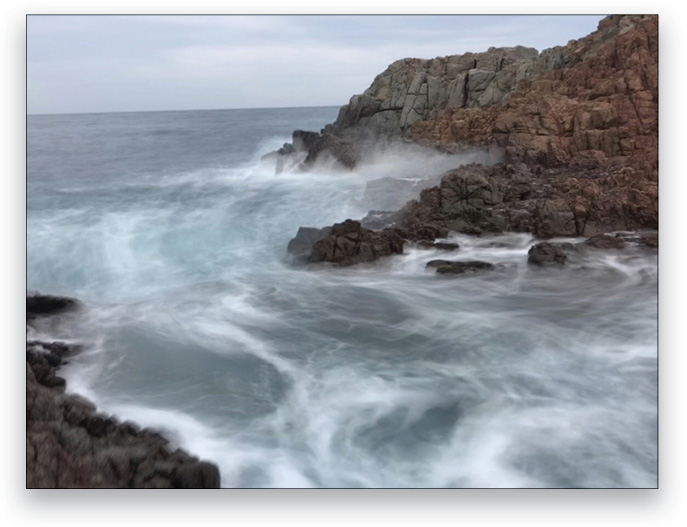
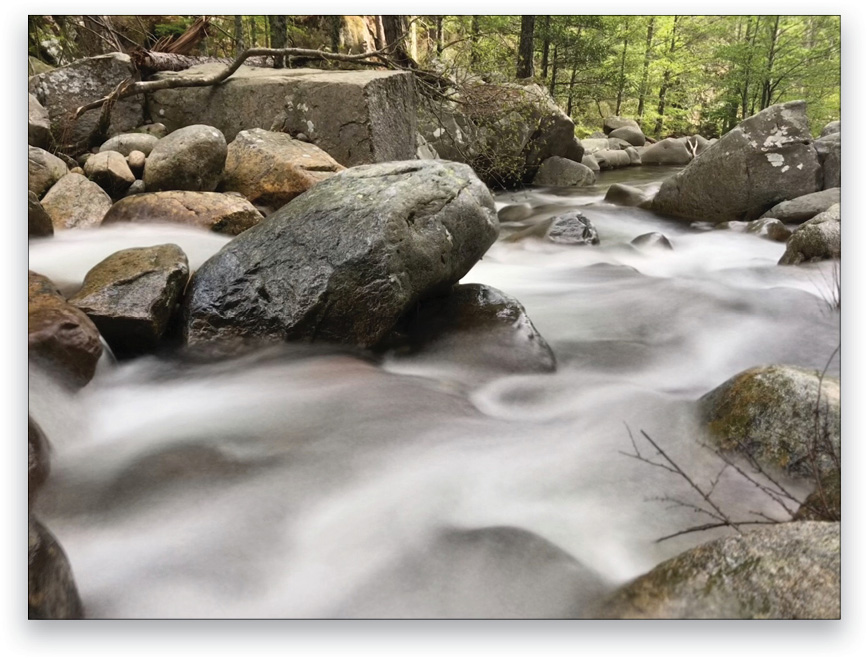
Let’s try it with another photo. This image is already pretty sharp for an iPhone photo. Again, this is the Long Exposure version from the Effects section on the iPhone.
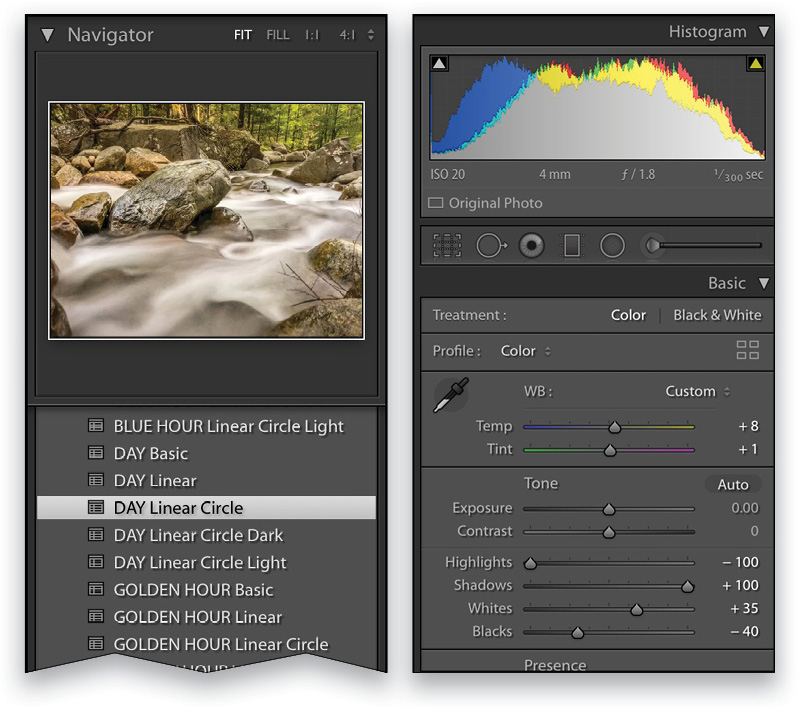
Step One: You can use presets or create your own style. For this shot, I used a custom preset that I created called “DAY Linear Circle.” After applying the preset, I made some adjustments in the Basic panel.
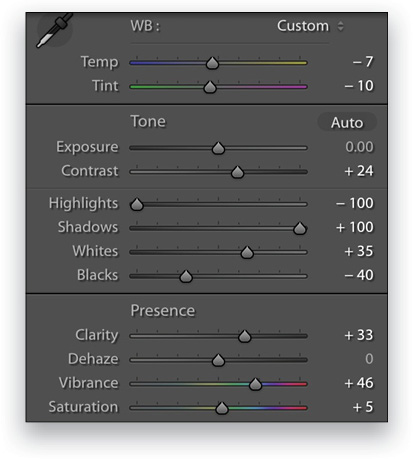
Step Two: I changed the mood of the entire photo just by changing the Temp to –7 and the Tint to –10. I also boosted the Contrast a little to +24 and made it more vibrant by dragging the Vibrance slider to +47.
Step Three: Here’s the final result after cropping the image.
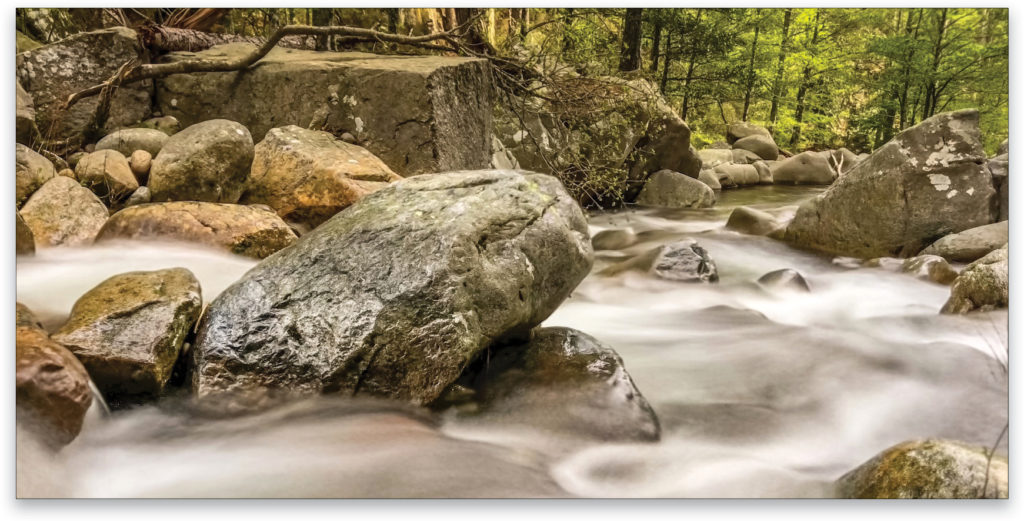
It’s amazing what you can create with today’s tools. These photos were taken with a phone! It’s a great way to create no matter what camera you have with you! No more excuses—you can produce art!
This article originally published in Issue 47 of Lightroom Magazine.


