
What better way to dramatically draw the attention of the viewer to the subject than a spotlight? From theatrical performances, to music concerts, to the largest award shows on TV, everyone uses a spotlight! So why should we in the Photoshop community be left behind?
In this article, we’ll learn how to simulate a spotlight with filters in Photoshop. Creating a spotlight is one of the easiest and most fun things to do. The real challenge is in creating the shadow that forms as a result of the spotlight. Whether you’re creating the exact effect as shown here, or simply playing with light in your composites, this article will help you with several tricks to nail lighting and shadows.
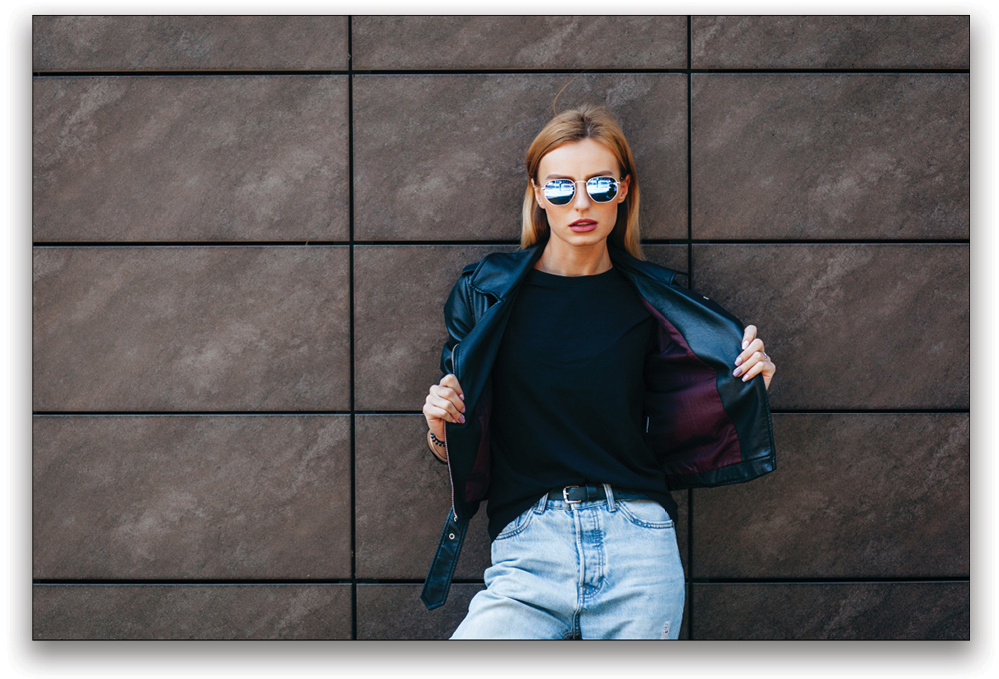
STEP ONE: OPEN THE IMAGE
First, let’s open the image of our subject in Photoshop. She’s standing against a wall, which is perfect for creating a spotlight and shadows. If you want to follow along with the photo we used, you may download the JPEG preview for free or license the full-resolution version from Adobe Stock and save it to your Libraries panel by clicking the Save to Library button here.
If you’re using your own image, go to File> Open, locate your image, and then click Open, or if you’re working in Application Frame, go to Finder (PC: File Explorer), locate your image, and drag-and-drop it into Photoshop. If you downloaded the image from Adobe Stock, you can load it from your Libraries panel by double-clicking it.
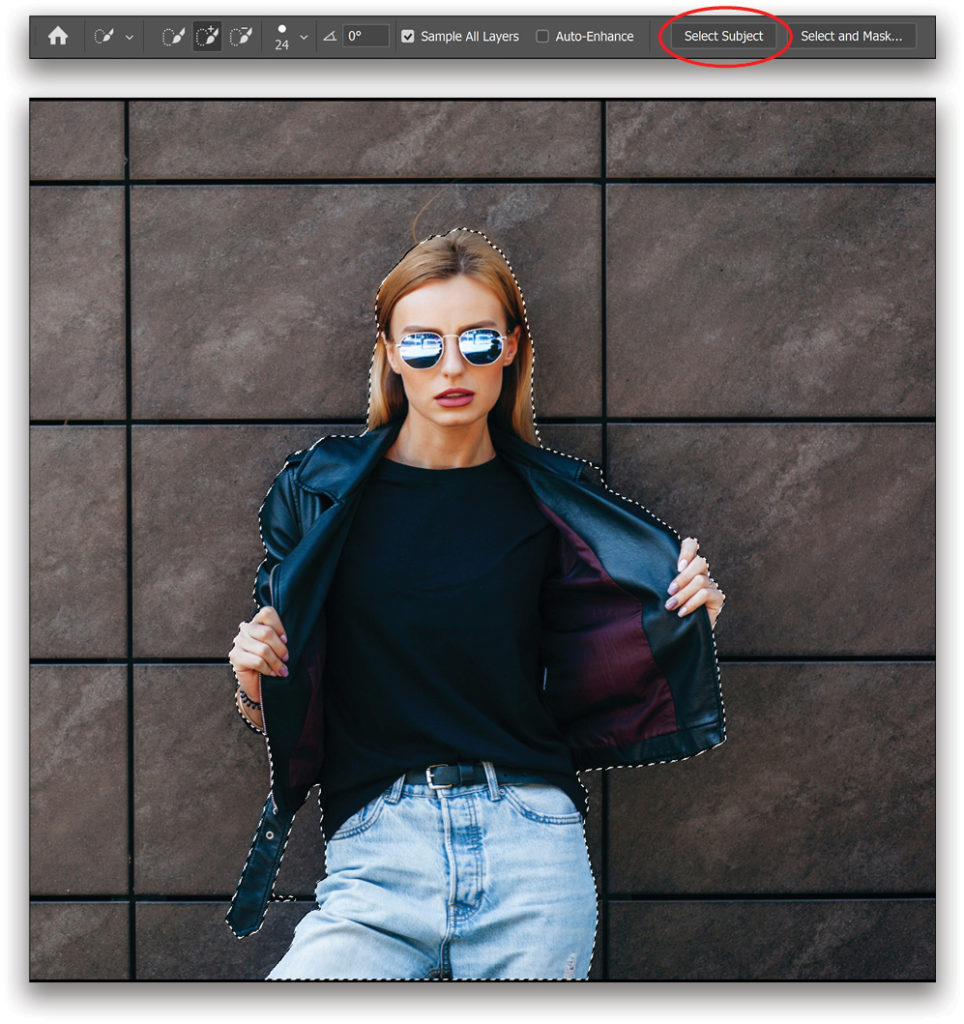
STEP TWO: CREATE A SELECTION OF THE SUBJECT
At this point, we just need a selection of the subject to be used later for the shadows. You can use the Quick Selection tool (W) to easily make a selection; however, if you’re using the latest version of Photoshop, you can do this with just one click.
Select the Quick Selection tool or the Magic Wand tool. In the Options Bar, click the Select Subject button. Photoshop will auto-select the subject in the scene, and you can always add or subtract from the selection, as needed, using any of the selection tools.
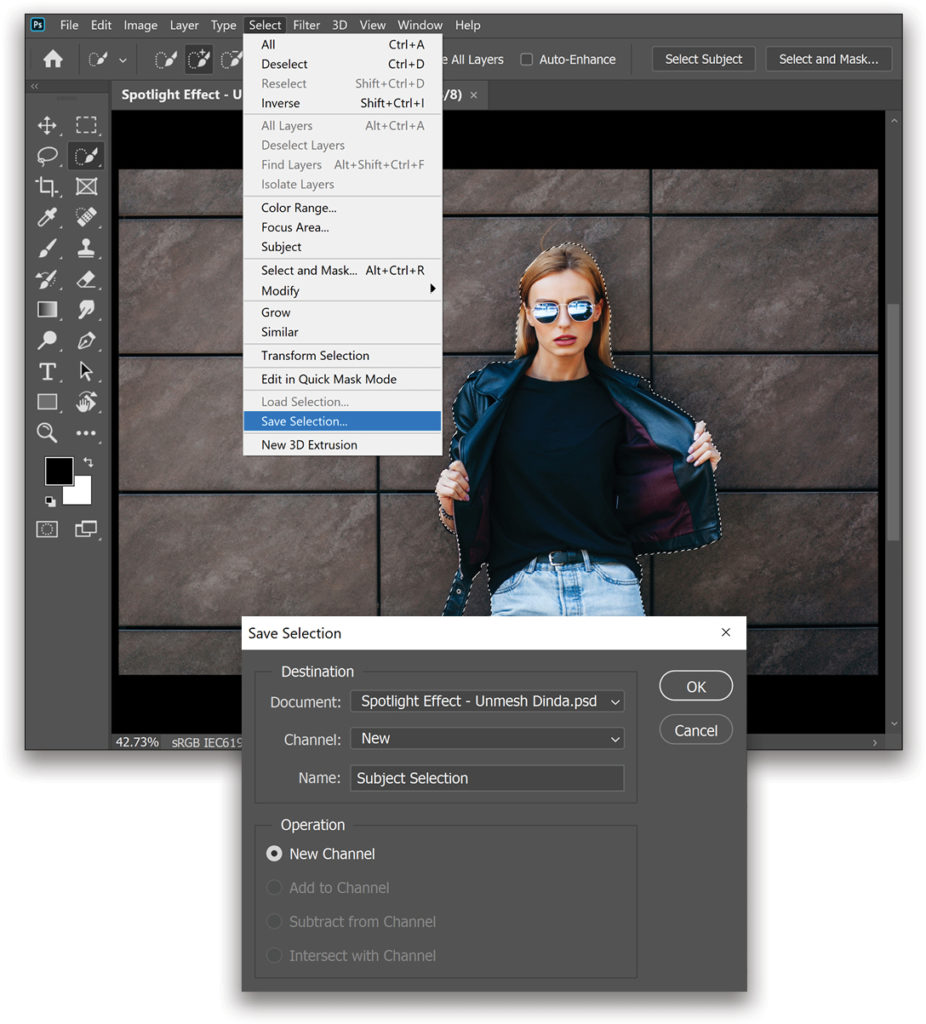
STEP THREE: SAVE THE SELECTION
With the selection active, go to Select>Save Selection. Let’s name this “Subject Selection” as shown, and click OK. Press Command-D (PC: Ctrl-D) to deselect.
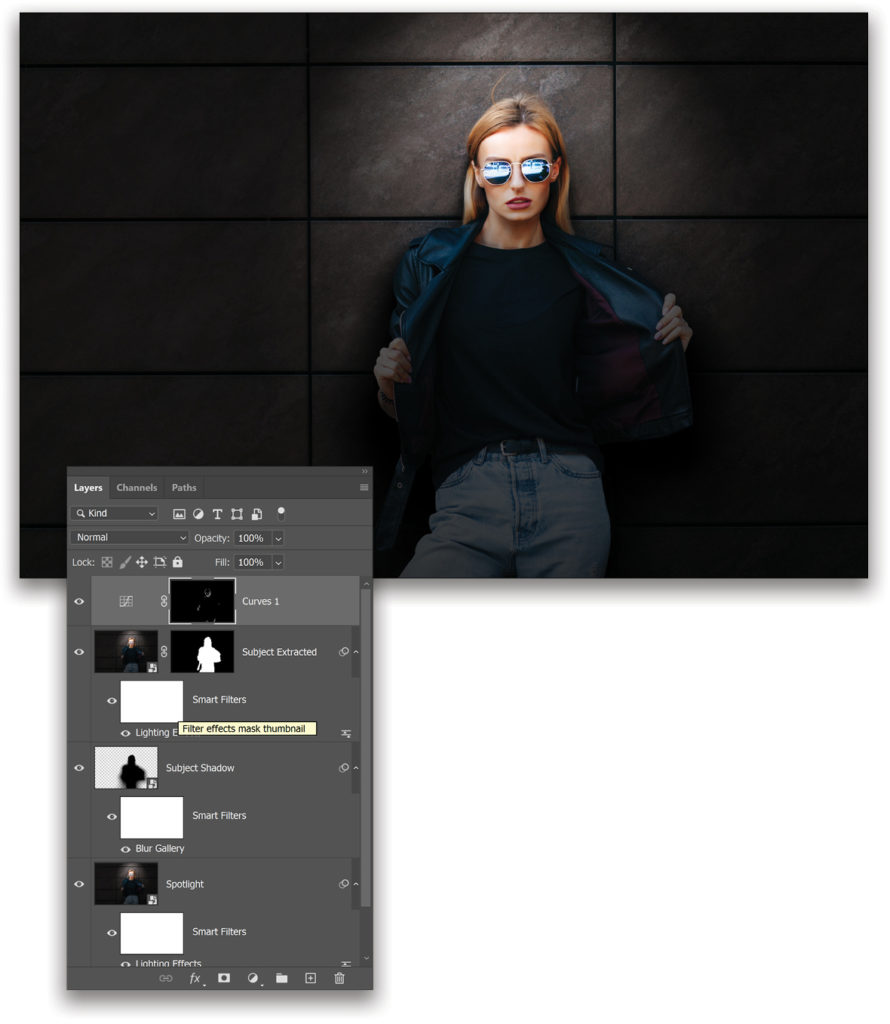
STEP FOUR: CREATE A DUPLICATE OF THE BACKGROUND LAYER
With the Background layer selected, press Command-J (PC: Ctrl-J) to create a duplicate layer. Double-click on the duplicate layer’s name, and rename it “Spotlight.”
STEP FIVE: CONVERT TO SMART OBJECT
Right-click on the Spotlight layer and choose Convert to Smart Object.
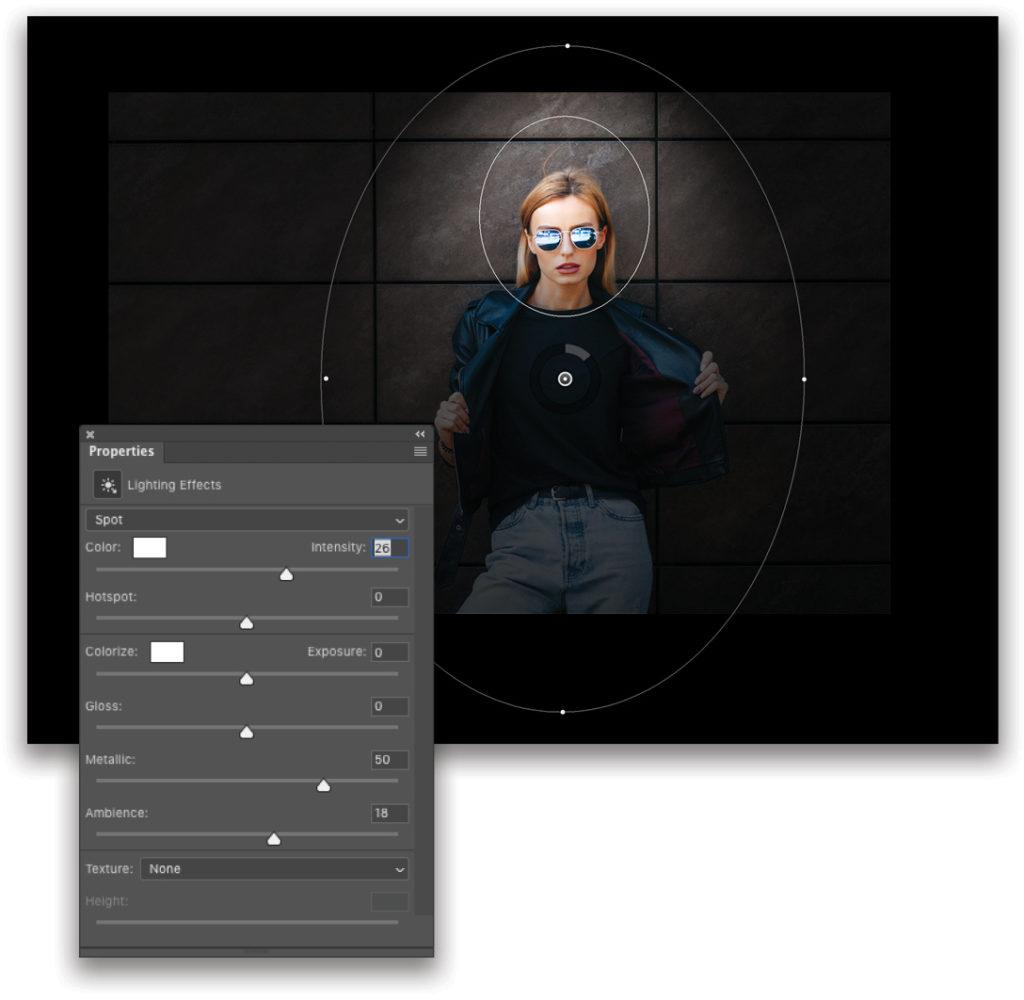
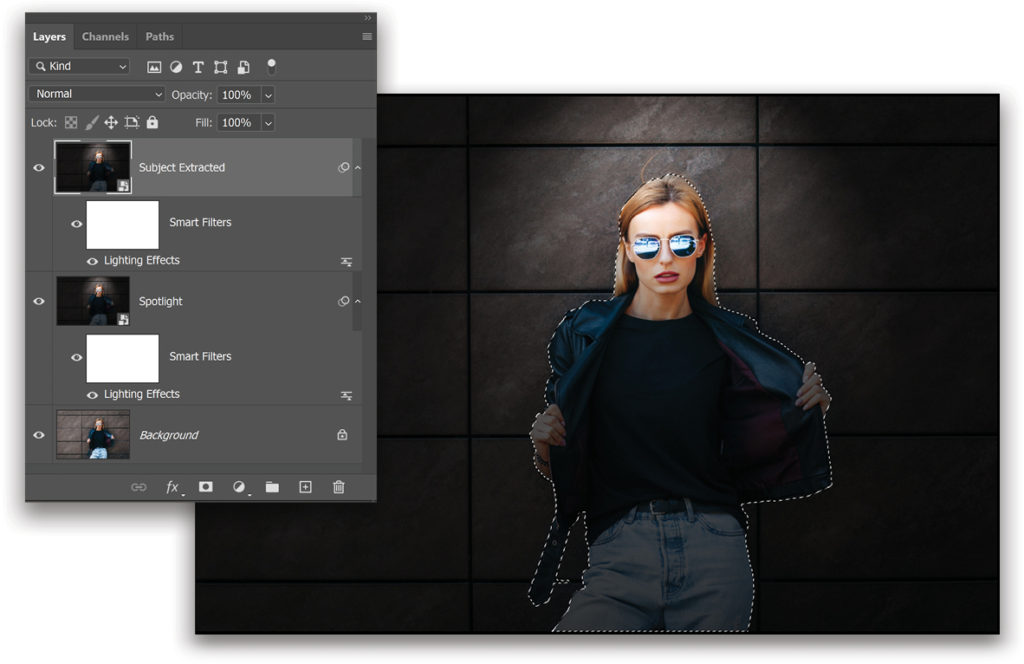
STEP SIX: APPLY LIGHTING EFFECTS
Go to Filter>Render>Lighting Effects. In the Properties panel, choose Spot from the menu at the top. (You can add multiple spotlights by clicking on the Add New Spot Light icon in the Lights section of the Options Bar.) Adjust the rotation and the size of the spotlight as shown. For this example, we’ve used the following settings in the Properties panel: Color White; Intensity 26; Hotspot 0; Exposure 0; Gloss 0; Metallic 50; and Ambiance 18. Click OK.
Note: If you change your mind, you can always change the values of the Lighting Effects filter because we converted the Spotlight layer into a smart object. To do so, simply double-click on Lighting Effects below the Spotlight layer.
STEP SEVEN: MAKE A DUPLICATE
Create a duplicate of this Spotlight layer and name it “Subject Extracted.”
STEP EIGHT: LOAD THE SUBJECT SELECTION
Next, go to Select>Load Selection and from the Channel menu, choose Subject Selection (we saved this in Step Three). Click OK.
STEP NINE: SEPARATE THE SUBJECT
With the selection active, click on the Add Layer Mask icon (to the right of the fx icon) at the bottom of the Layers panel.
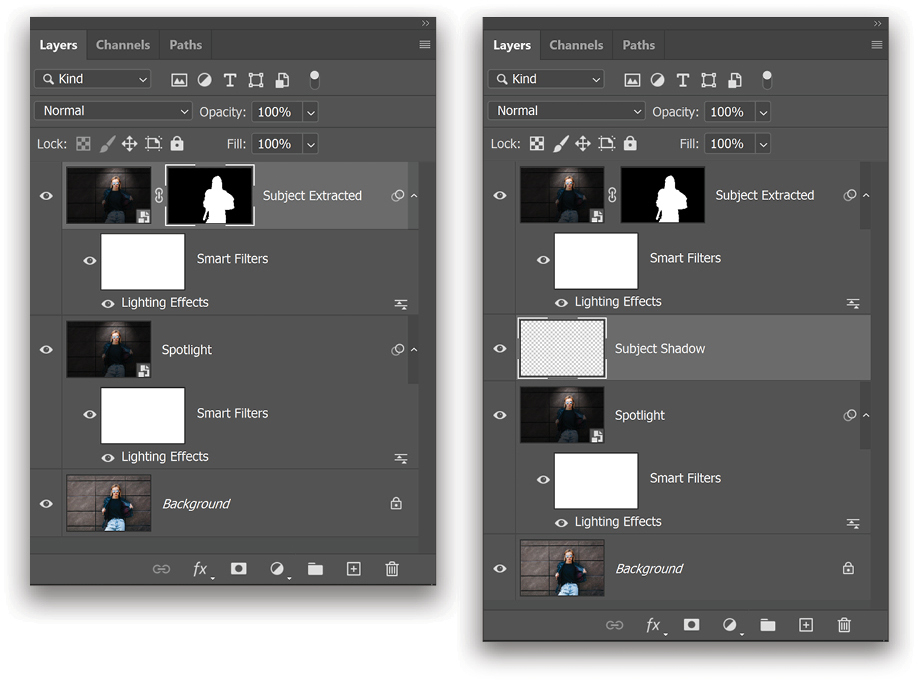
STEP 10: CREATE A LAYER BELOW THE SUBJECT EXTRACTED LAYER
Now, hold down the Command (PC: Ctrl) key and click on the Create a New Layer icon to add a new layer below the Subject Extracted layer. Let’s name this “Subject Shadow.”
STEP 11: LOAD THE SUBJECT SELECTION AGAIN
As we did in Step Eight, load the Subject Selection channel.
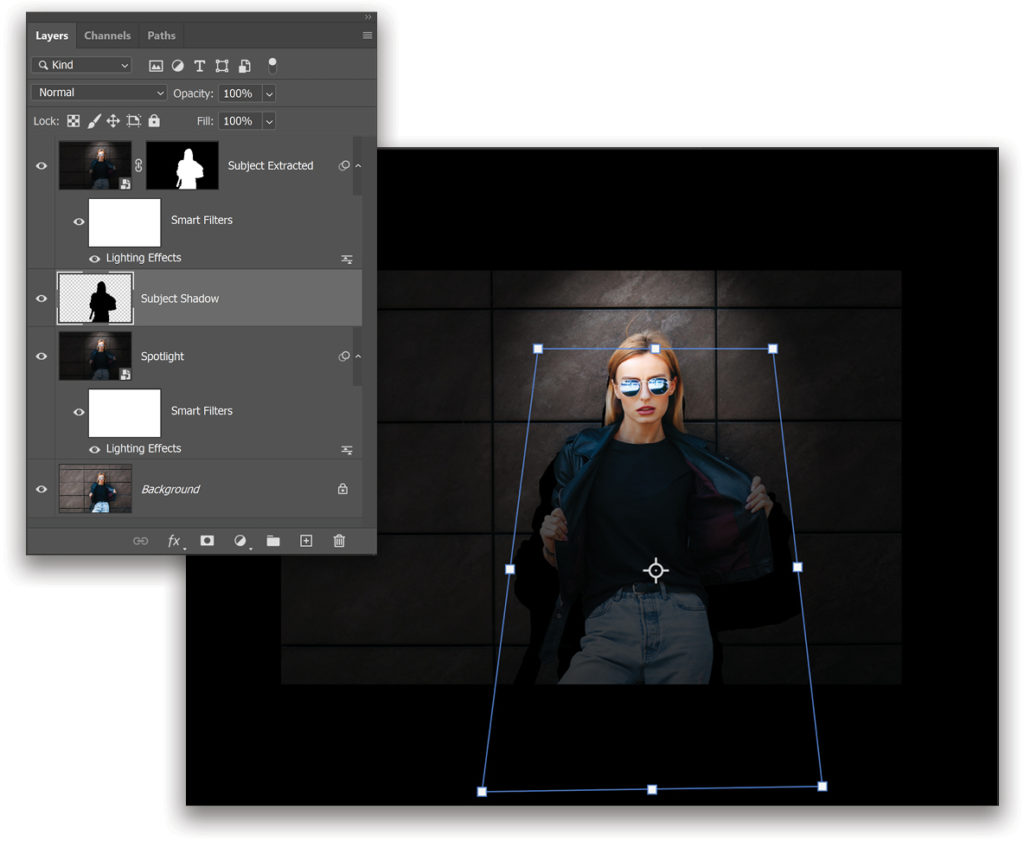
STEP 12: CREATE THE SHADOW
Make sure that your Foreground Color is black and the selection is active, then press Option-Delete (PC: Alt-Backspace) to fill the selection with black. Press Command-D (PC: Ctrl-D) to deselect it.
Go to Edit>Transform>Distort, and adjust the shadow (as shown) based on your spotlight. Press Return (PC: Enter).
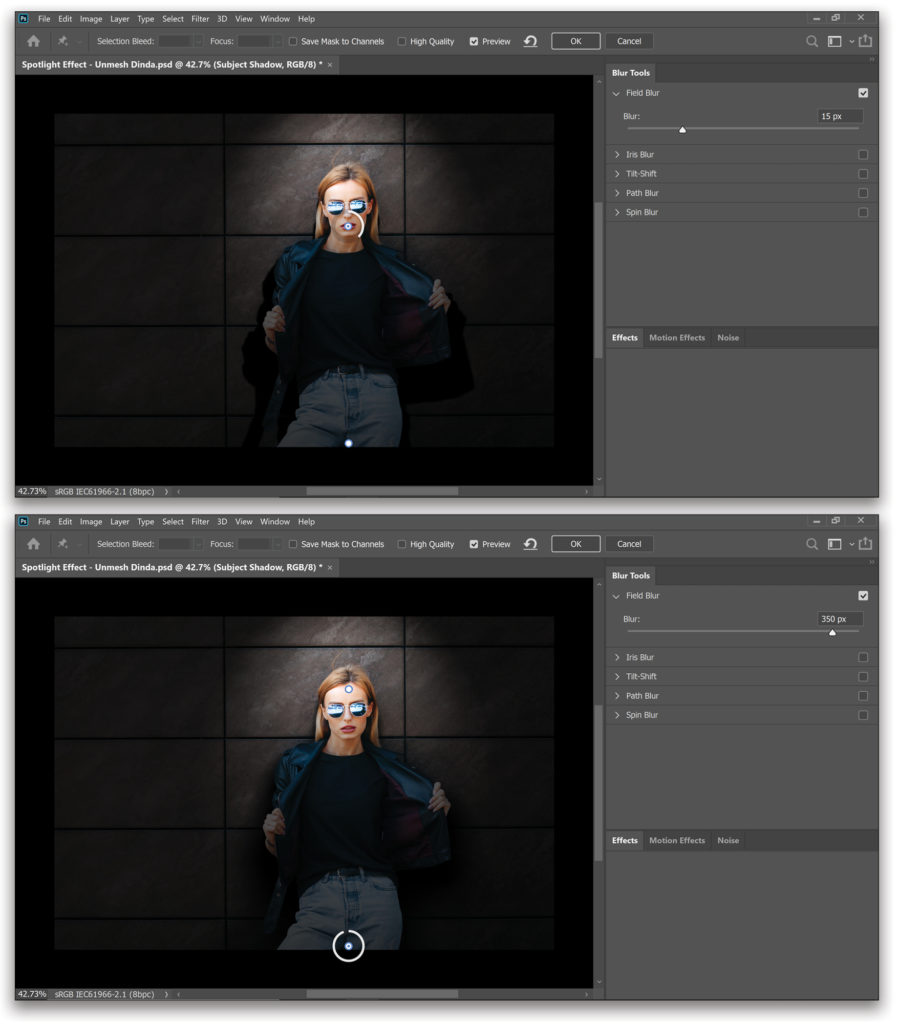
STEP 13: BLUR THE SHADOW
Before applying any filter, let’s first convert the Subject Shadow layer into a smart object. Then, go to Filter>Blur Gallery>Field Blur. Create two Blur Points, one at the top and one at the bottom of the shadow, to create a gradual increase in Blur.
Set the top point to a lower Blur value and the bottom one to a higher value. For this full-resolution image, we set the top point to 15 px, and the bottom one to 350 px. Click OK in the Options Bar once you’re satisfied.
Note: I minutely adjusted the mask of the Subject Extracted layer to make the edges around the hair not appear as harsh.
STEP 14: CREATE SHADOWS ON THE SUBJECT USING CURVES
Click on the Subject Extracted layer to select it, then click on the Create New Adjustment Layer icon (half-black/half-white circle) at the bottom of the Layers panel, and choose Curves. If the Properties panel didn’t open automatically, double-click on the Curves icon in the Curves adjustment layer to open it. Click in the middle of the curve to create a point, and drag it down and to the right, as shown.
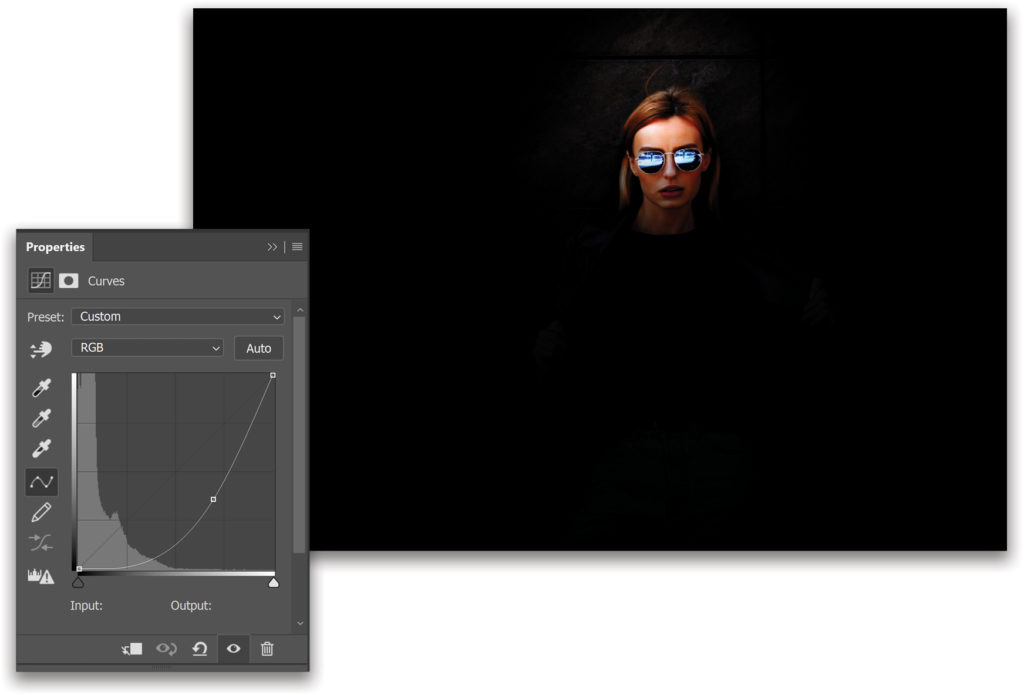
Back in the Layers panel, click on the Curves layer’s mask to select it and press Command-I (PC: Ctrl-I) to invert it (make it black). Then, get the Brush tool (B), set your Foreground color to white, and select a soft, round brush. Up in the Options Bar, set your Brush’s Opacity to 100% and Flow to 5%, and then start creating shadows by painting gradually on the mask areas that are facing away from the spotlight.
STEP 15: ADD SOME DODGING AND BURNING [OPTIONAL]
You could stop right now; however, if you want to add some additional shine and dimension, you might consider performing some dodging and burning. There are dozens of ways to dodge and burn, but you can try this automatic technique that I explained in “Lesson 3: Automatic Dodge and Burn” from my KelbyOne class, Jaw-Dropping, Heart-Stopping, Eye-Popping Photoshop Effects.
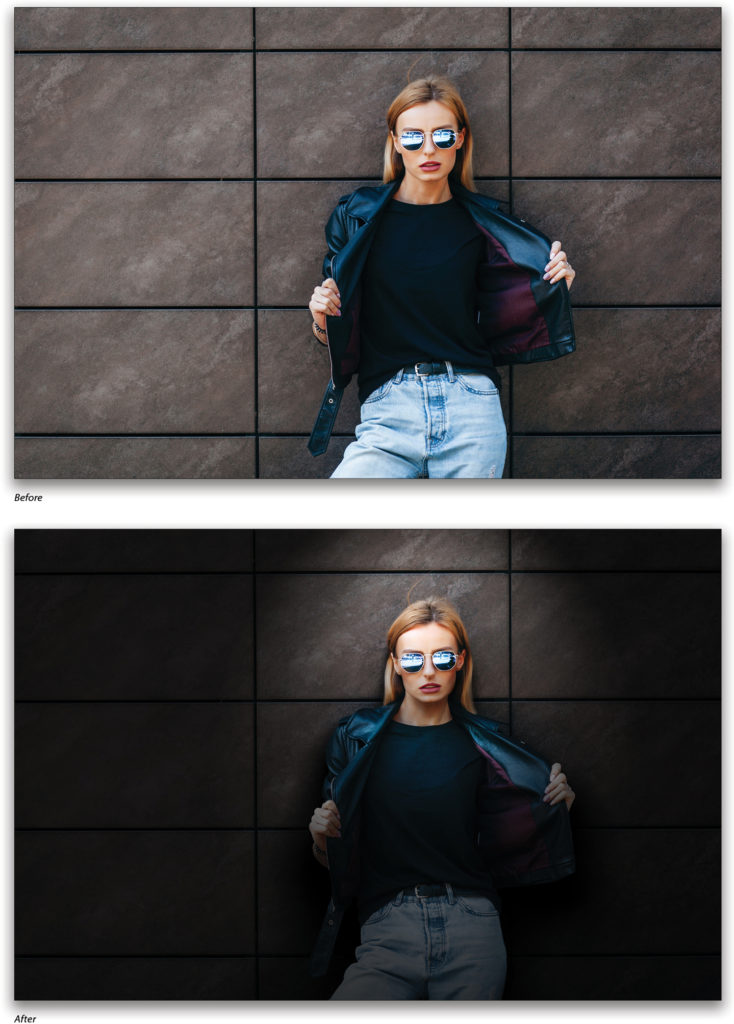
This article is just one example of how you can use the Lighting Effects filter in Photoshop. I’d encourage you to experiment also with multiple lights. Just playing with the presets inside the Lighting Effects filter will give you a glimpse of what it can do, and the possibilities are limitless. As fun as creating lights is, it’s indeed challenging to create the shadows to complement the light. So keep in mind that you have to make every area darker that isn’t facing the light.
This article originally published in the February, 2020 issue of Photoshop User magazine.


I didn’t see where you created your circle and oval. I have done these and I used the elliptical and held shift for the circle and I would use free transform for the elliptical but I haven’t used both together. I like your effect but I missed seeing that step.
Missed seeing you create the circle and elliptical