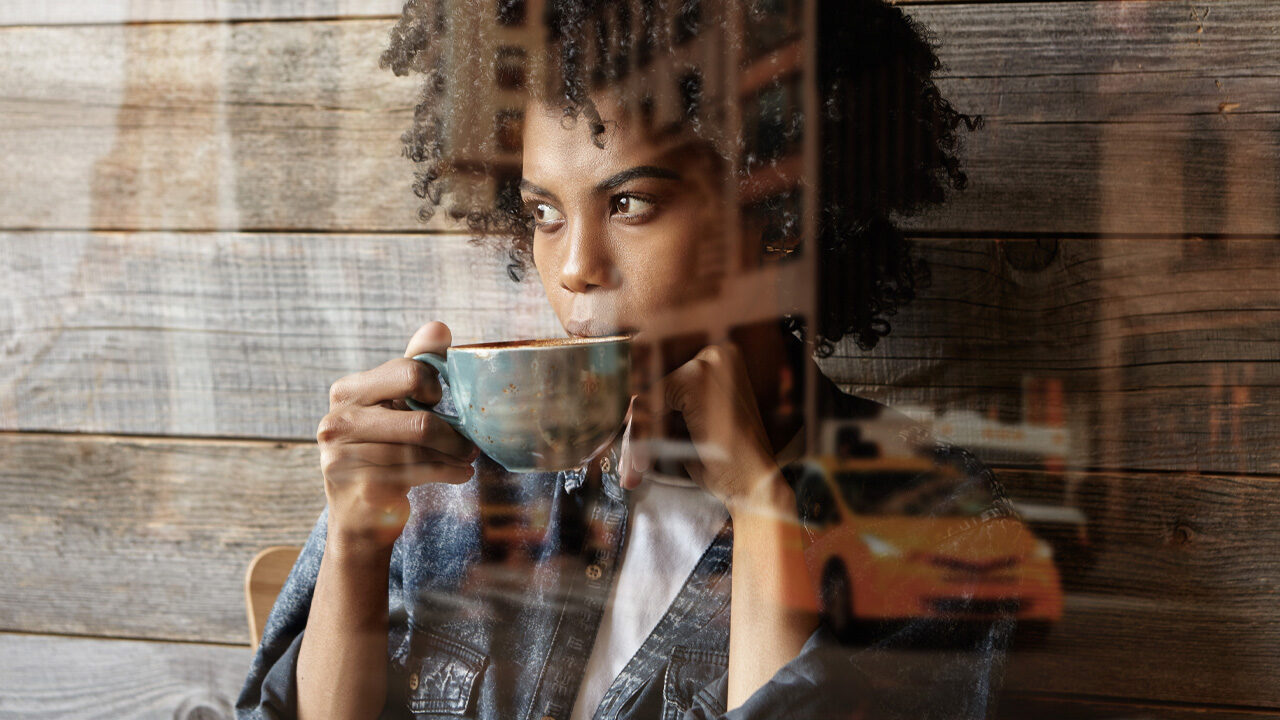
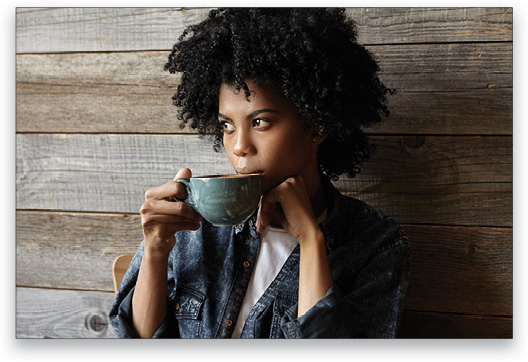
In this tutorial, you’ll learn how to combine two photos to create a fake window reflection. It’s a great way to add a moody vibe, as well as increased depth and interest to your image. All you need is a portrait that looks like it was taken indoors and a street scene that was taken in a similar lighting condition. Let’s get started!
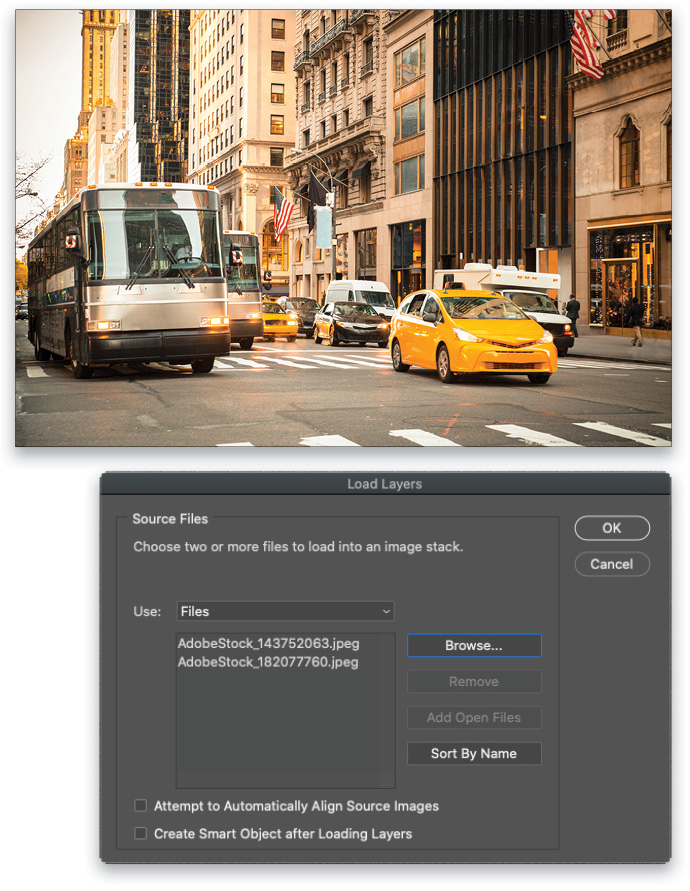
Step One: Open two photos on two different layers within a single Photoshop document. You can open both images and then copy-and-paste one image into the other Photoshop document, or you can choose File>Scripts>Load Files Into Stack. In the dialog that opens (see next page), click Browse and then navigate to the two photos you want to use. Click one photo to select it, Shift-click the other, and then click Open. Make sure both checkboxes at the bottom of the dialog are turned off and then click OK. Photoshop puts each photo on its own layer within the same Photoshop document.
TIP: If you’re starting in Lightroom, select two thumbnails in the Library module and then choose Photo>Edit In>Open as Layers in Photoshop.
If you’d like to download the low-res watermarked versions of these images to follow along, click this link, log in with your Adobe ID, and click the Save to Library button. Right-click the image in the Libraries panel (Window>Libraries) and choose Edit to open it in Photoshop. Then click this link to download the city scene to your Libraries panel. Drag it from the Libraries panel into the image of the woman, position and resize it so it fills the image, and press Enter. You’ll now have both images in one document.
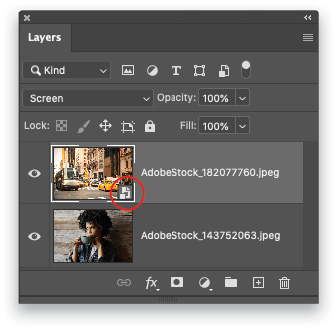
Step Two: In your Layers panel, with the city street image layer above the portrait layer, click on it to make it active (note the white brackets around the corners of the layer thumbnail). Set the layer blending mode menu (circled) near the top left of the Layers panel to Screen. Alternatively, you can press Shift-Option-S (PC: Shift-Alt-S).
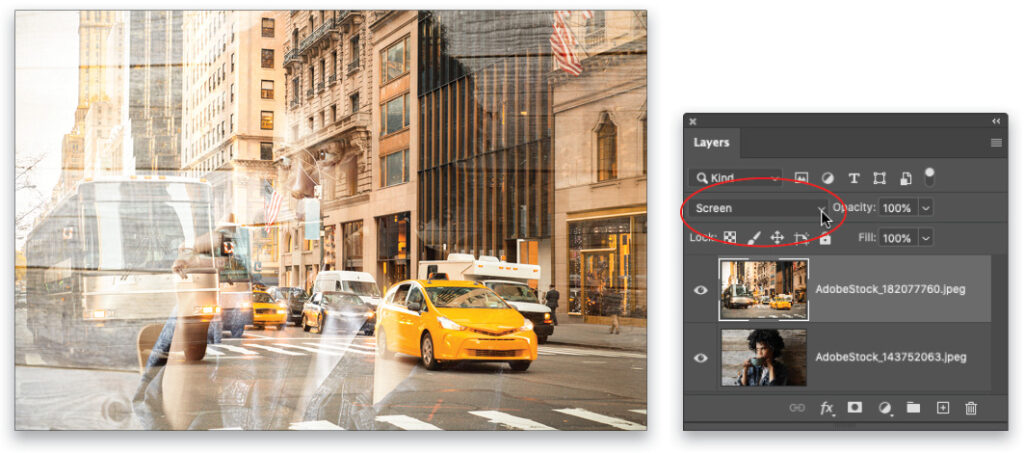
Note: All the modes in the Lighten section of the blending mode drop-down menu produce a lighter result than you started out with. Screen mode, in particular, causes Photoshop to analyze each color channel (red, green, and blue) and then multiplies the opposite of the blend colors (in the city street layer) and base colors (in the portrait layer), making everything a lot lighter, almost as though a bottle of bleach was spilled on it!
Step Three: With the city street layer active in your Layers panel, choose Filter>Convert for Smart Filters to convert it into a smart object. This puts a protective wrapper around the image layer so the filter you’re about to run happens to the wrapper and not what’s inside it. Notice the smart object badge on the layer thumbnail (circled).
Note: If you downloaded the low-res images and dragged the street scene from the Libraries panel into the image, it automatically came in as a smart object, so Convert for Smart Filters will be grayed out. The only difference is that the smart object badge on the layer thumbnail will be a cloud since you downloaded it from Adobe Stock.
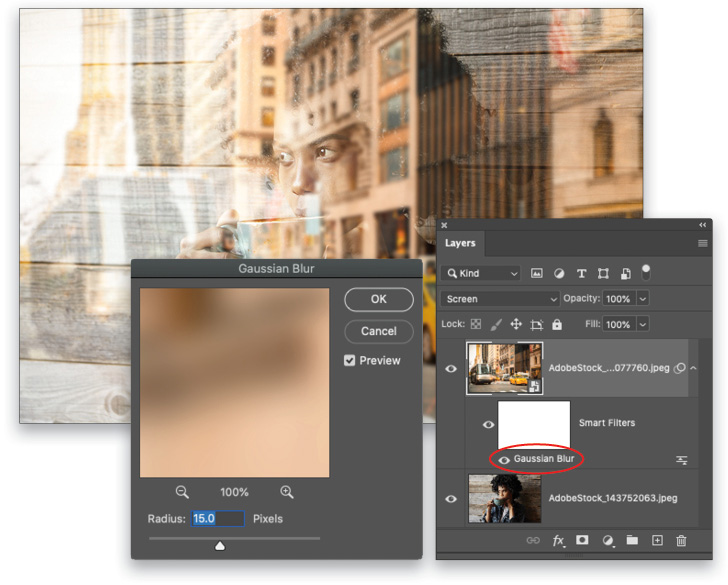
Step Four: To make the city street image look more like a real reflection, we need to blur it. To do that, choose Filter>Blur>Gaussian Blur. In the dialog that opens, enter a Radius of 15 pixels for a high-resolution image (this one is 5169×3446 pixels); but try 4 pixels on the low-res Adobe Stock preview image. Click OK. In your Layers panel, notice the new filter effect named “Gaussian Blur” (circled).
Tip: To adjust the blur settings, simply double-click the Gaussian Blur filter in your Layers panel and enter a new Radius. If a dialog opens warning that smart filters will be temporarily disabled, click OK.
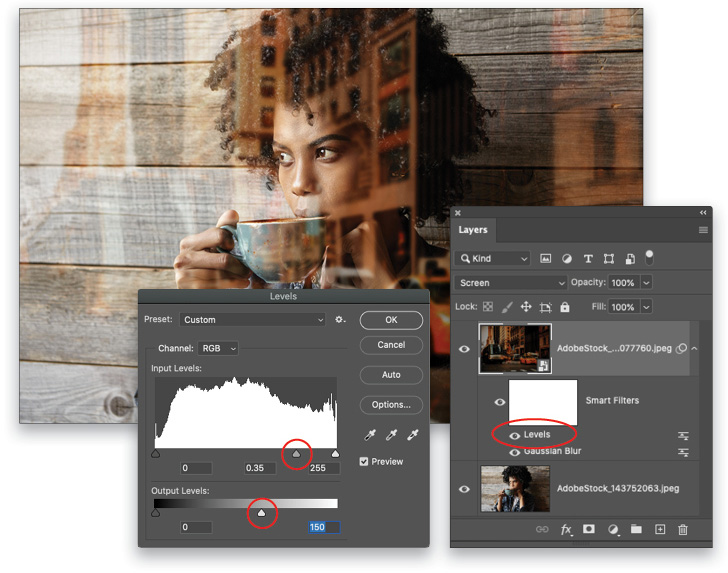
Step Five: With the city street layer active, choose Image>Adjustments>Levels. In the resulting dialog, increase contrast by dragging the gray midtone slider (circled) rightward to around 0.35. (Alternatively, you can simply enter that number into the midtone field.)
Now drag the white slider below the Output Levels bar leftward to around 150, which darkens all the tones in the image. (These same values should work on the Adobe Stock preview image.) When you’re finished, click OK, and notice the new filter effect named “Levels” in your Layers panel (circled). Here again, you can double-click it to reopen the Levels adjustment for more tweaking.
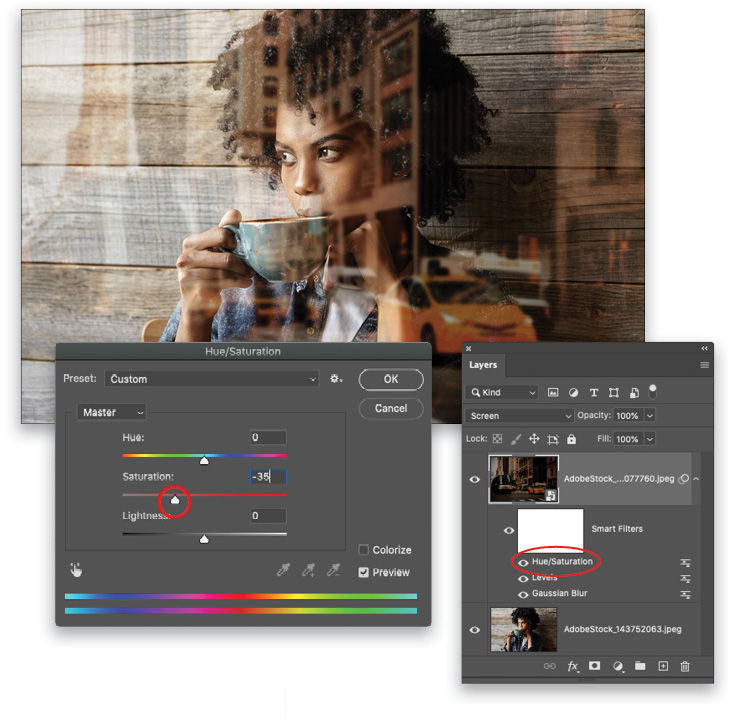
Step Six: Now let’s tone down the saturation so the yellow taxi isn’t the first thing you notice in the image. To do that, choose Image>Adjustments>Hue/Saturation. In the dialog that opens, drag the Saturation slider (circled) leftward to around –35. (This same value should work on the Adobe Stock preview image, too.) Click OK. Notice the new filter effect named—you guessed it!—”Hue/Saturation” in the Layers panel (circled), which you can double-click to reopen at any time.
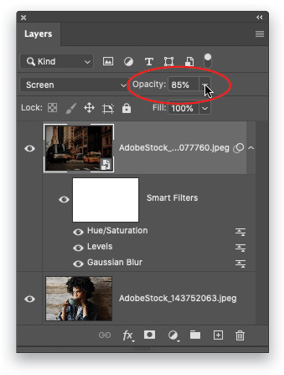
Step Seven: The reflection is a little too strong and conceals too much of the portrait. So, with the city street layer active in the Layers panel, lower the Opacity setting at the top of the Layers panel (circled) to around 85%.
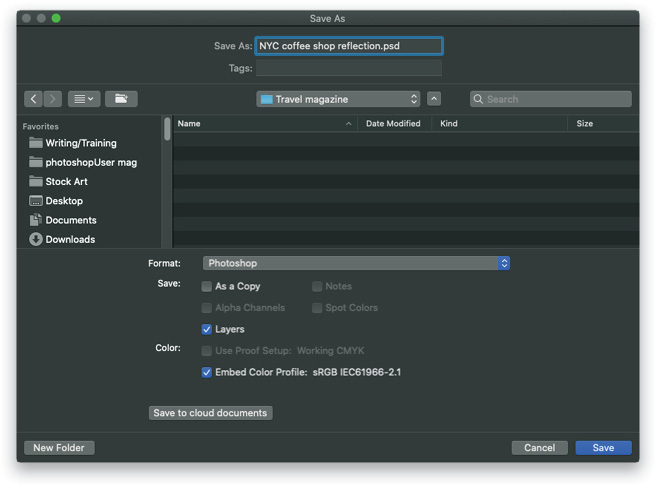
Step Eight: Save your document with all of the layers intact so you can adjust everything later. If you began in Photoshop, choose File>Save As, and from the Format drop-down menu, choose Photoshop. If you began in Lightroom and you don’t want to rename this file, choose File>Save instead. That way, the Photoshop document will appear next to one of the image thumbnails with which you started (which one depends on your Lightroom filenaming scheme).
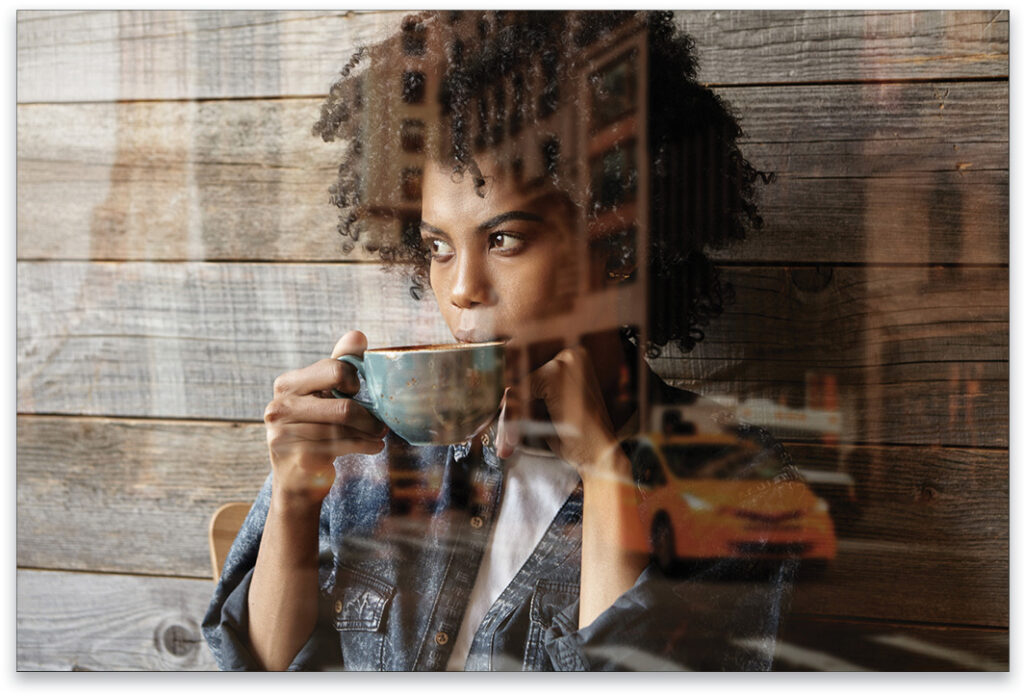
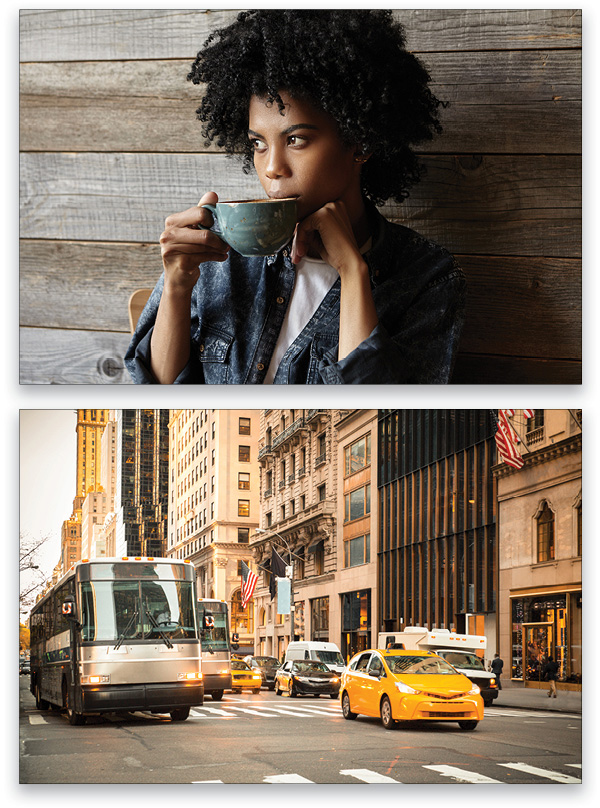
Here’s the final result, with the two original images.
As you can see, this method produces an extremely organized and tidy Layers panel. Not only did you protect the city street image by turning it into a smart object, each filter and adjustment you run on that layer afterward produces an individual filter effect. If you decide you don’t like an effect, simply drag it to the trash icon at the bottom right of the Layers panel. If you decide to tweak settings instead, simply double-click the filter effect to reopen it. Until next time, may the creative force be with you all!
About Photoshop User and KelbyOne
Photoshop User magazine comes out digitally 12 times a year and is part of KelbyOne, the leading educational resource for Photoshop, Lightroom, and photography. Pro members have access to more than 900 video courses and 100 back issues of Photoshop User. To learn more about KelbyOne, click here.


