“I hate HDR.” Do a Google search on that topic and you’ll find tons of examples of poorly processed HDR (high-dynamic range) images—images with haloes, images that look oversaturated with exaggerated details, and images that look grotesquely grungy. Do a Google search on “I love HDR,” and you’ll find images that don’t look like HDR images—images with a natural look.
The key to a good HDR image, especially one with a person in it, is to make it look as if it weren’t several exposures processed in an HDR program. Before we get going, this isn’t a detailed article about processing HDR images; it’s about how to get a set of exposures for environmental people images (pictures that show a person in his or her environment) to be processed in an HDR program, with a few processing tips included.
Keep in mind that as new versions of Photoshop and Lightroom are released, and as the dynamic range of image sensors increases, there will be less need for HDR, because so much detail can be pulled out of the shadow and highlight areas of a single file. HDR is needed, however, when shooting in a very high-contrast situation: the higher the contrast range, the more images you need to capture the dynamic range of the scene.
One more thing before we begin: HDR isn’t recommended (or needed) for headshots and studio shots where the contrast range can be controlled, and perhaps more importantly, where HDR can, if used incorrectly, make the subject look worse.
Okay, let’s take a look at the process!
Getting Natural Skin Tones
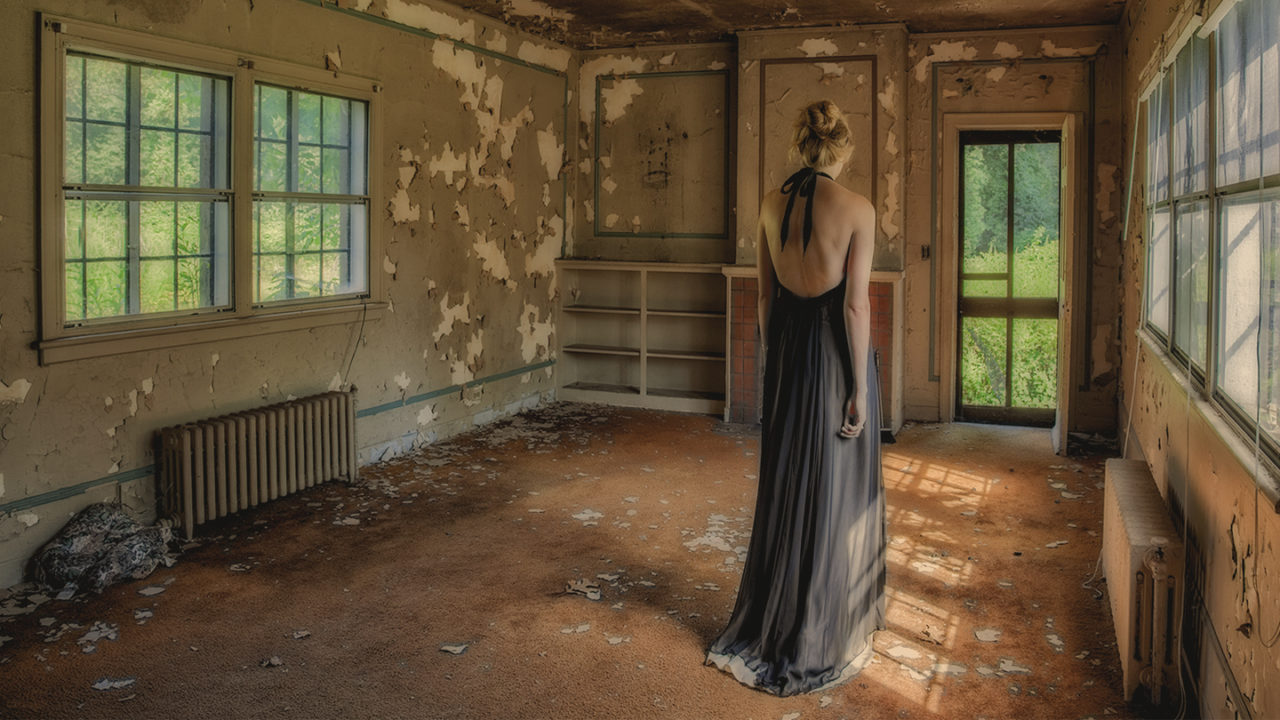
The image that opens this article is one of my favorite HDR environmental people images, mostly because the skin tones look natural. HDR was needed to capture the outside scene as well as all the details of the room.
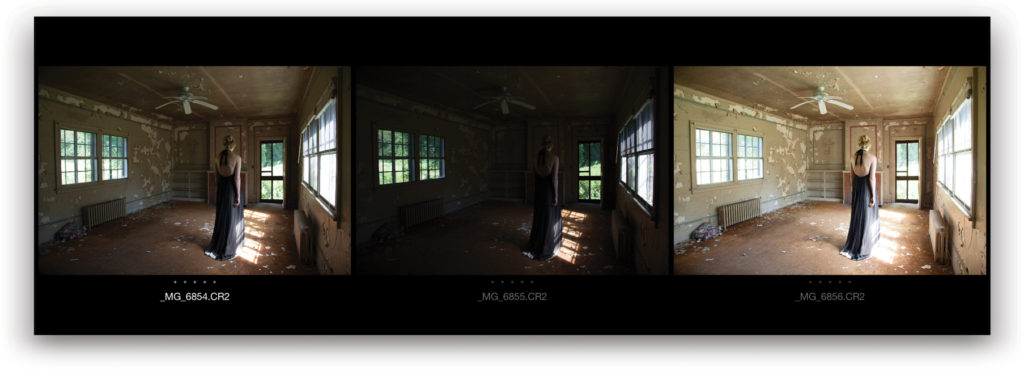
Here are the three RAW files I used to create my HDR image. The exposure settings were: EV 0, EV –2, and EV +2. My camera was on a tripod and I used the camera’s self-timer to release the shutter. Before I took the set of images, I asked the model to hold very still.
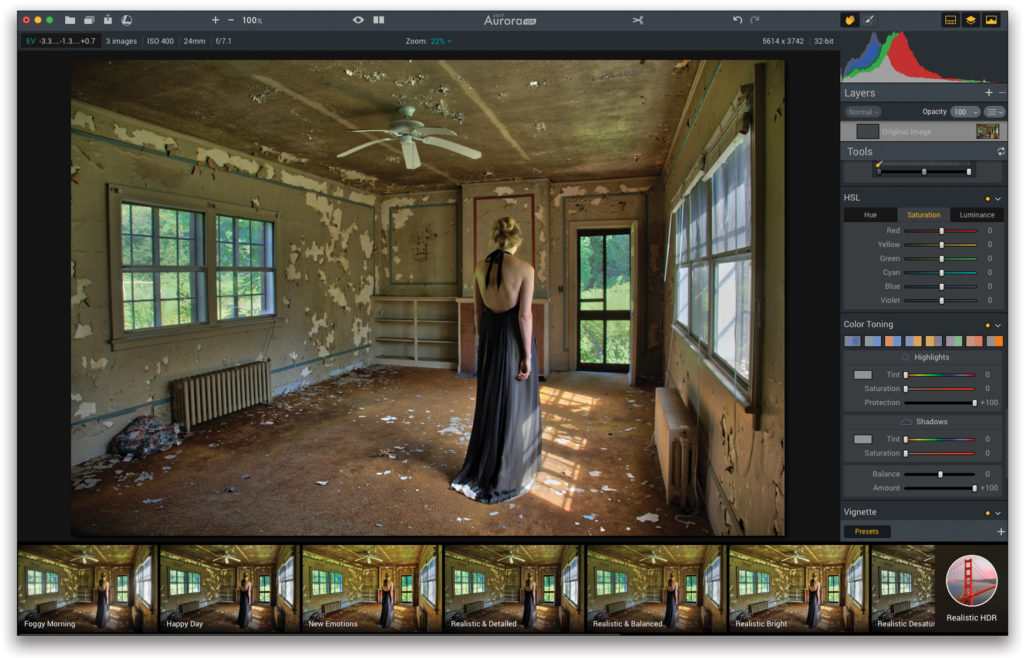
I used Aurora HDR 2018 from Skylum (formerly Macphun) to process the set of images. This screen grab reveals an important piece of information: I’m using a Realistic HDR preset in Aurora. The idea here is that no matter which HDR program you use, you want to choose a Realistic preset so you get natural skin tones in people pictures.
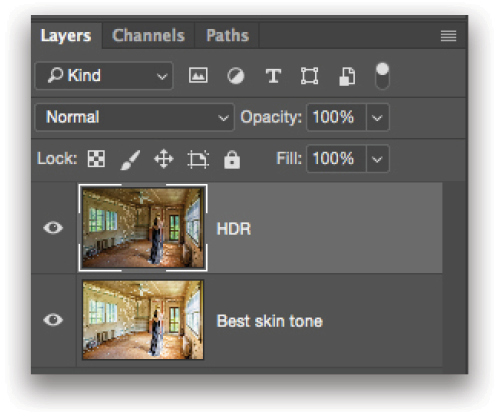
If you still get “funky” skin tones, there’s still hope for natural-looking skin. After you create your HDR image, open it in Photoshop. Then open the original exposure that has the most natural-looking skin tones, and use the Move tool (V) with the Shift key held down to drag it into the HDR image. With the HDR-processed image as the top layer, use the Eraser tool (E) set to Brush in the Options Bar to erase the skin area so you can “see through” to that area of the image below. When you’re finished erasing, flatten the file for your final image.
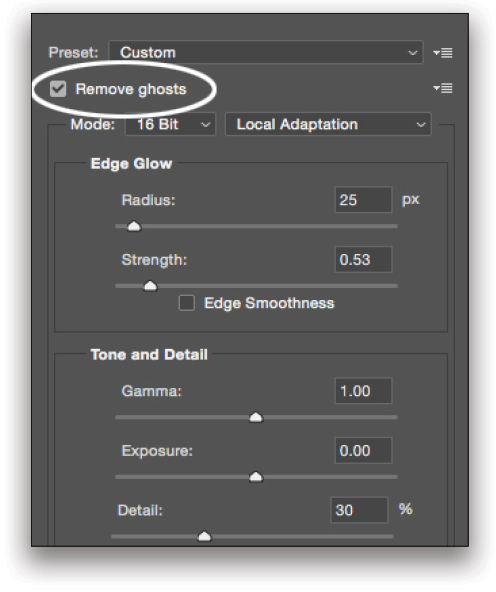
HDR programs, and the HDR features of Photoshop and Lightroom, offer Remove Ghosts or De-Ghosting features. Before you set your HDR processing in motion, be sure to select this feature, as it will help to avoid ghosts, which look as though you’re seeing double.
As a final processing step, I added a warm glow to my image by applying the Duplex filter in Nik Color Efex Pro.
In-Camera HDR
Some cameras, including the Canon EOS 5D Mark IV, offer in-camera HDR. Some of these cameras save all the RAW files and produce a JPEG HDR, while others, usually less-expensive models, only produce a JPEG HDR from three files.
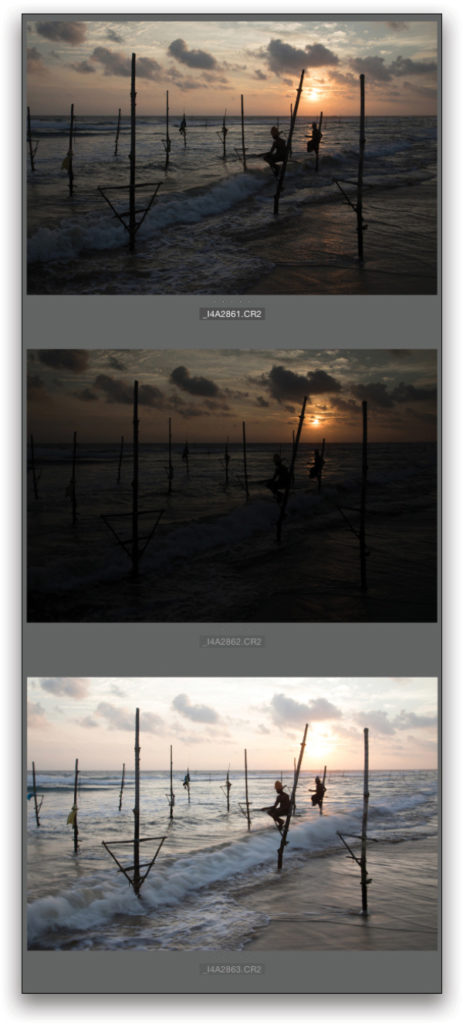
This image of stick fishermen in Sri Lanka is a Canon 5D Mark IV in-camera HDR. I needed HDR to capture detail in the area surrounding the sun and in the waves.
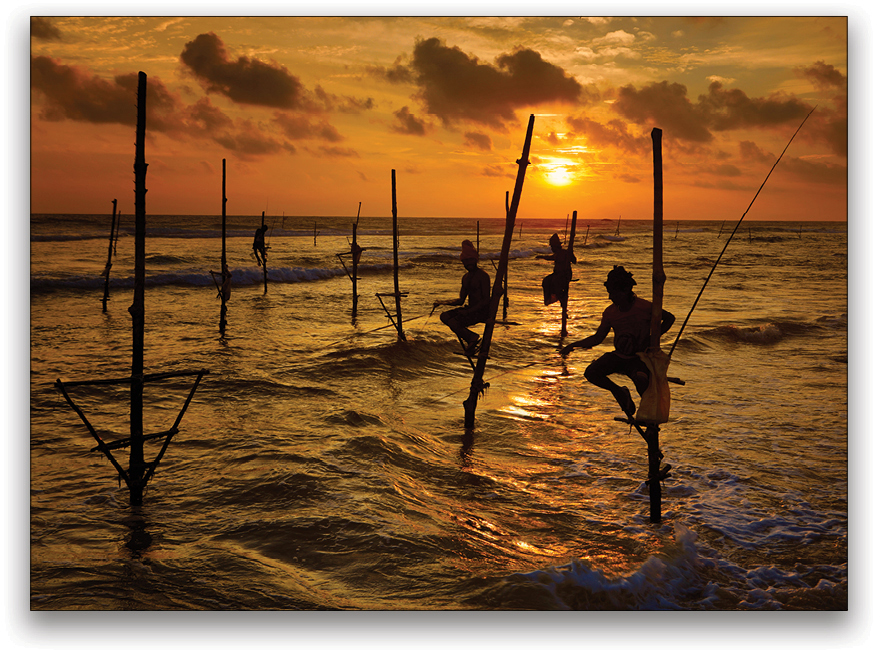
To create the file, I set the exposure compensation to EV 0, EV –2, and EV +2, and I chose the Art Vivid mode to enhance the color in the scene. I’ve found that using EV 0, EV –1, and EV +1 isn’t much of an advantage, as you can already pull out that much information from a RAW file. In addition, when using EV 0, EV –3, and EV +3, some data can be missing from the in-camera HDR files, because of the range between 0 and 3.
In-camera HDR is good and cool, but you can usually pull out more information, and be a bit more creative, when using HDR programs such as Aurora, Photomatix, or HDR Efex Pro. That said, my Sri Lanka in-camera HDR image is one of my favorite HDR images. In fact, I used it on the cover of my 37th book, Exploring Photographic Exposure.
Using More Exposures
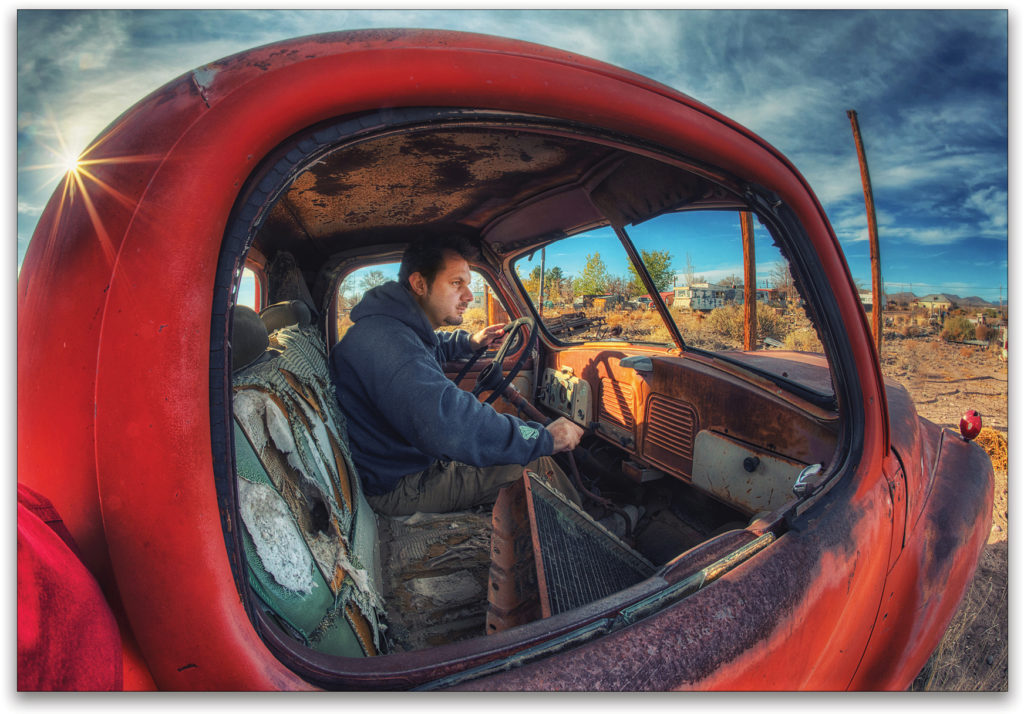
As the contrast range of a scene increases, so does the number of shots needed to capture the dynamic range. Here’s an HDR image I took of my friend, Spike, in San Antonio, New Mexico, not too far from Bosque del Apache, New Mexico, where we shot some of my bird photography class for KelbyOne.
![]()
To capture the dynamic range of the scene, I set my camera for a 7 f/stop automatic exposure bracketing sequence. The result is that you can see inside and outside of the car—even though I was shooting into the sun.
I used my Canon 15mm lens for the handheld image. Note that the wider the lens, the better chance you have of your HDR program aliening the images, because there’s less apparent camera movement between the exposures. My Sri Lanka image is also a handheld shot.
It’s also important to watch (and listen to) your shutter speed when taking hand-held shots for an HDR sequence. The slower the shutter speeds between exposures, the more camera movement there is between the exposures. As a general guideline, when taking a handheld HDR sequence, check the EXIF info on your camera’s LCD to make sure the shutter speed on the most underexposed image isn’t below 1/125.
Here’s a shot of Robert Randazzo in his Absolutely Neon shop in Albuquerque, New Mexico. Again, HDR was needed to capture the detail in the signs and the walls—and on Robert.
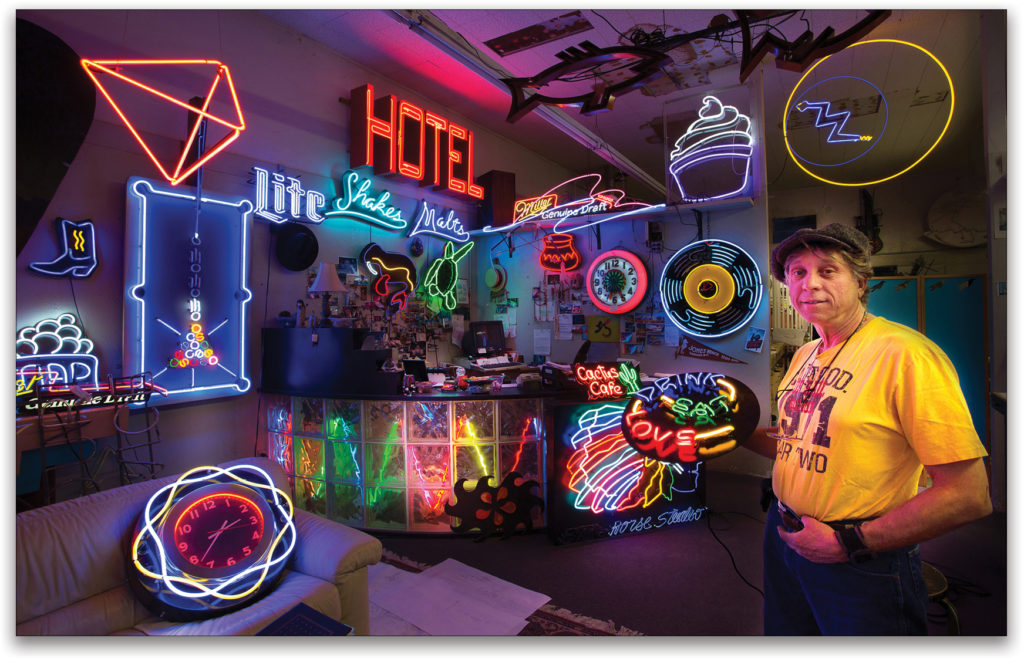
After doing some tests, to see how much over and under the average exposure was needed to capture the details in the scene, I set my camera on a tripod for an 8-f/stop exposure sequence. I set my lens at 17mm. I processed the files in Photomatix for one of my favorite images from Route 66.
Other Color Issues
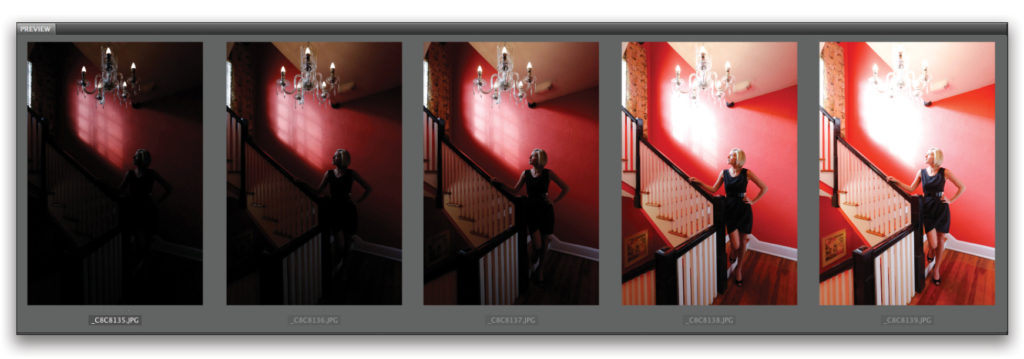
Here’s a favorite image from one of my South Florida photo workshops. It was taken in the Colony Hotel in Delray Beach—one of the coolest hotels I’ve stayed in, by the way.
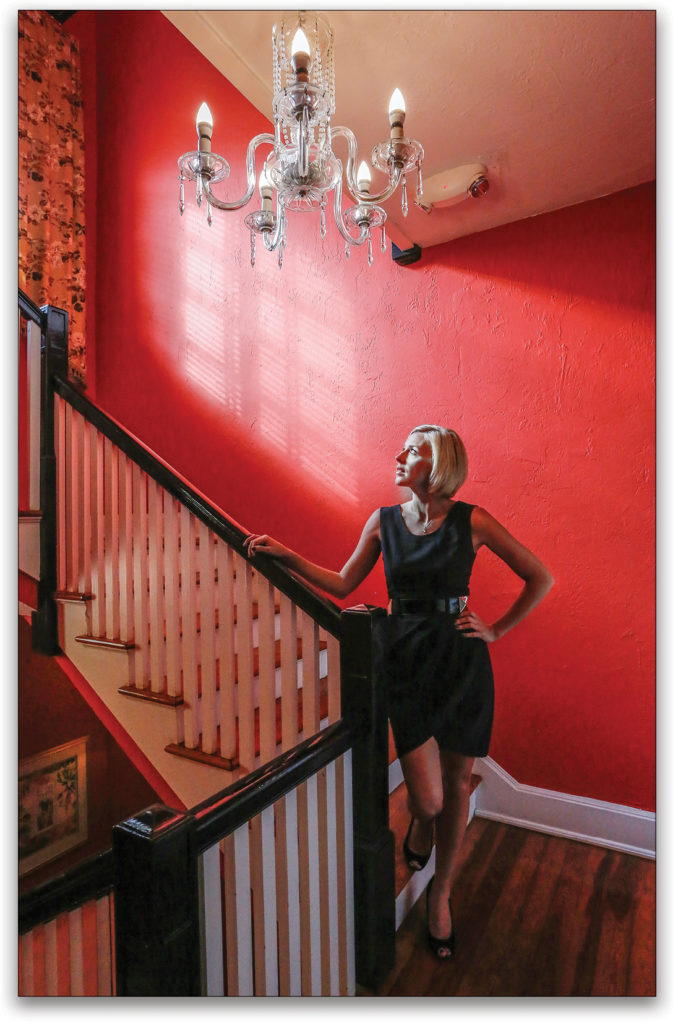
To capture the detail on the walls and the model, five exposures were needed. After processing the image in Photomatix, I noticed that the model’s face was too red, the result of the red wall reflecting color at her. To reduce that effect, I used the Sponge tool (nested with the Dodge and Burn tools [O] in the Toolbar) in Photoshop, selected Desaturate in the Mode menu in the Options Bar, and painted over her face.
Speaking of color, chromatic aberrations can creep into HDR images. As the number of images increases, so do the chromatic aberrations—usually. Same with noise: as the number of images increases, so can noise in an image. Before you share or post an HDR image, check for chromatic aberrations and noise, and reduce them accordingly in Photoshop or Lightroom.
Well my friends, I hope this article has inspired you to say, “I love HDR.” If it’s used properly, it can be an artistic tool when making environmental people pictures.
This article originally published in Issue 38 of Lightroom Magazine.


