
Let’s take a look at using the local adjustment tools in Lightroom Classic CC
to apply a hand-coloring, or color-tinting effect to photographs. This type of effect is typically used with black-and-white images, or photos where the natural colors in the scene have been significantly desaturated. Along the way, we’ll check out a few other useful Lightroom tips.
CHECK FOR CURRENT PROCESS VERSION
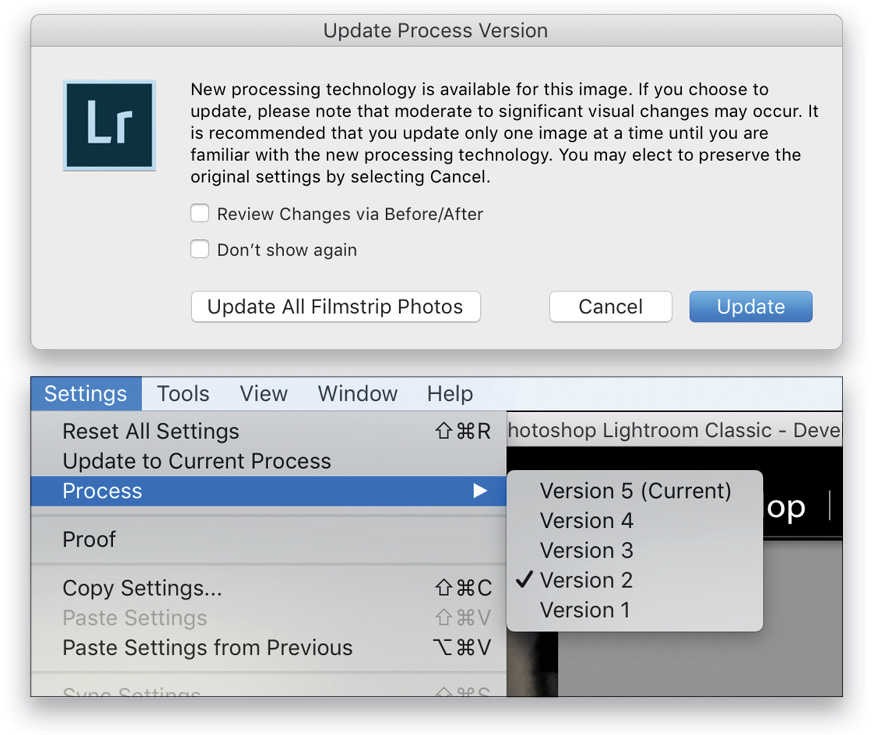
Before we get to the tinting effect, if you’re working with an image that’s been in your Lightroom catalog for a while, it’s always good to double-check if the current process version is applied. The easiest way to see this is to look for the lightning symbol under the Histogram, which means the image currently has an older process version applied. This is sometimes obvious if you notice that the controls in the Develop module panels aren’t the same as you’re used to. For instance, in the image here, the options for the Adjustment Brush with Process Version 2 are greatly reduced from what’s available in the current process version (Version 5).

in Process Version 2; Right: Adjustment Brush options
in Process Version 5
Click the lightning symbol to update the image. A dialog will appear to clarify what changes you may see, along with options for applying the current process to the active image, or all of the images in the Filmstrip. You can also display a before-and-after view immediately after updating to the current process version. Another way to check the process version is via the main menu in the Develop module: Settings>Process.
THE HAND-TINTING EFFECT: LIGHTROOM OR PHOTOSHOP?
Whether you’d use Lightroom or Photoshop for this type of tinting treatment all depends on how complicated the coloring/tinting needs to be. If there are lots of different parts of the image that require a different tint, or if those areas have intricate or complex shapes, then Photoshop will offer you much more control and flexibility. But for simple color tinting, you can create some interesting looks in Lightroom. [For more on colorizing black-and-white images in Photoshop, see “Photo Restoration and Colorization” in the January 2019 issue of Photoshop User magazine.—Ed.]
BEGIN WITH A BLACK & WHITE PROFILE
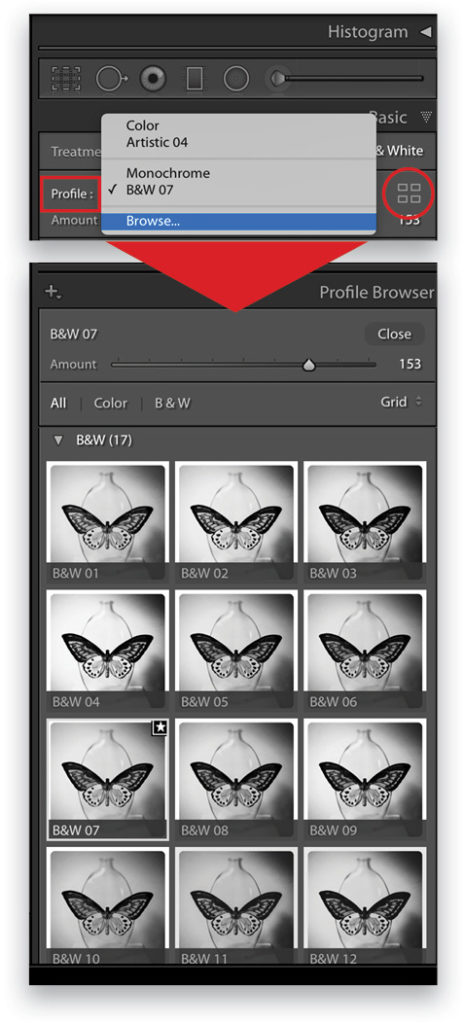
To create the look of color that has been added to an image (as opposed to just desaturating a color photo), begin by applying a B&W profile. Open the Profile drop-down menu at the top of the Basic panel and choose Browse, or click the grid icon on the right side of the panel. Expand the B&W profiles, and select a profile that looks good for your image. Click Close at the top right of the Profile Browser.
QUICKLY CLEAR PREVIOUS SETTINGS FROM LOCAL ADJUSTMENT TOOLS
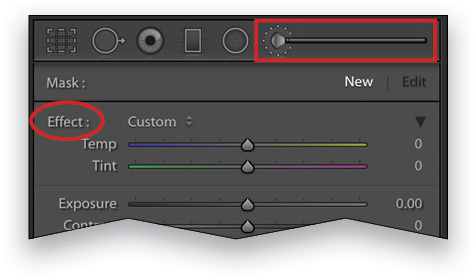
When you activate the Graduated Filter, Radial Filter, or the Adjustment Brush, some settings may already be active from the last time you used the tool. It’s always good to check for this before you begin using the tool. To quickly clear all settings, double-click on the word Effect at the top of the panel.
ADD A SPLIT-TONING EFFECT
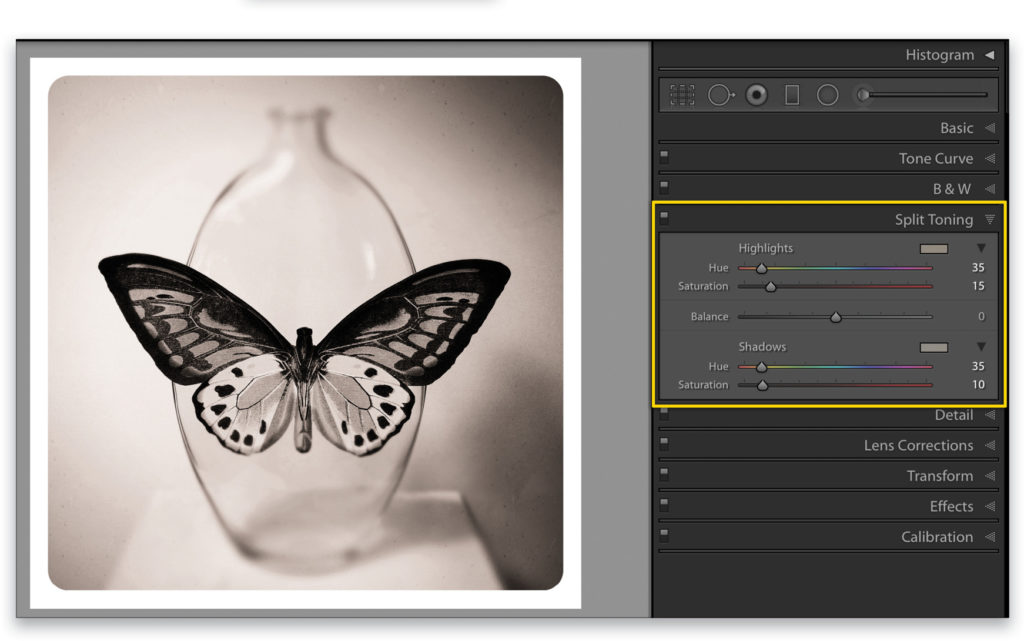
Sometimes a warm or sepia split-toning effect can work well for images that will have hand tinting added to them. Open the Split Toning panel and choose a Hue value for both the Highlights and the Shadows (in this example, I used 35 for both), then set the Saturation for each to a level that looks good to you.
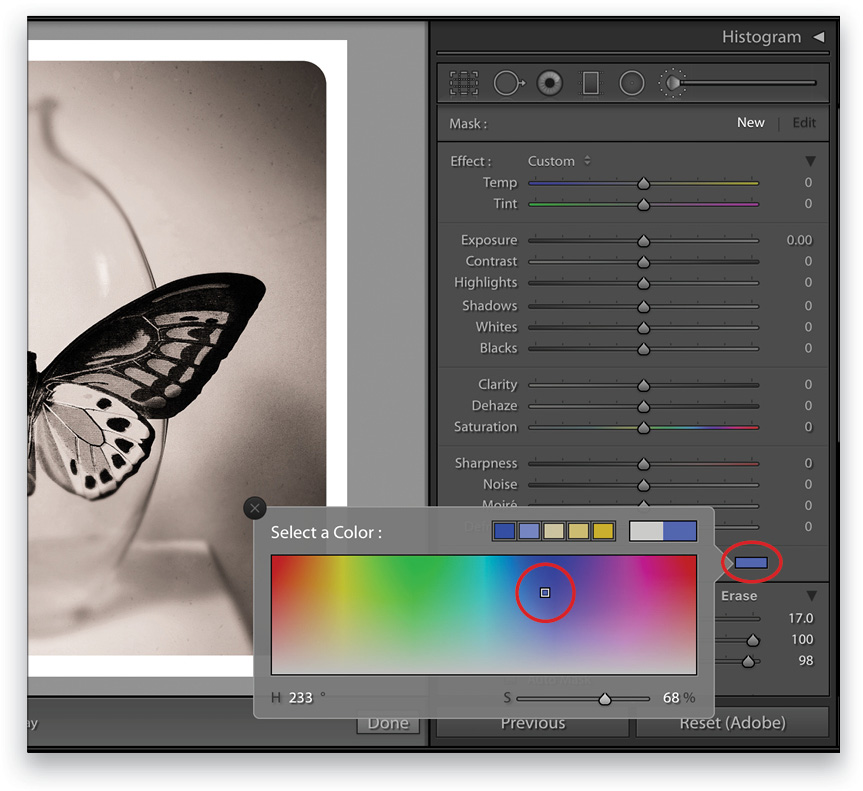
CHOOSE A COLOR TINT FOR THE ADJUSTMENT BRUSH
With the Adjustment Brush (K) active, and all settings cleared as described in the previous tip, click the Color box near the bottom of the Adjustment Brush panel. Use the color picker to select a color. Moving the eyedropper horizontally over the colors will change the hue and moving it vertically will change the saturation. Fully saturated colors are at the top, and totally desaturated colors are at the bottom.
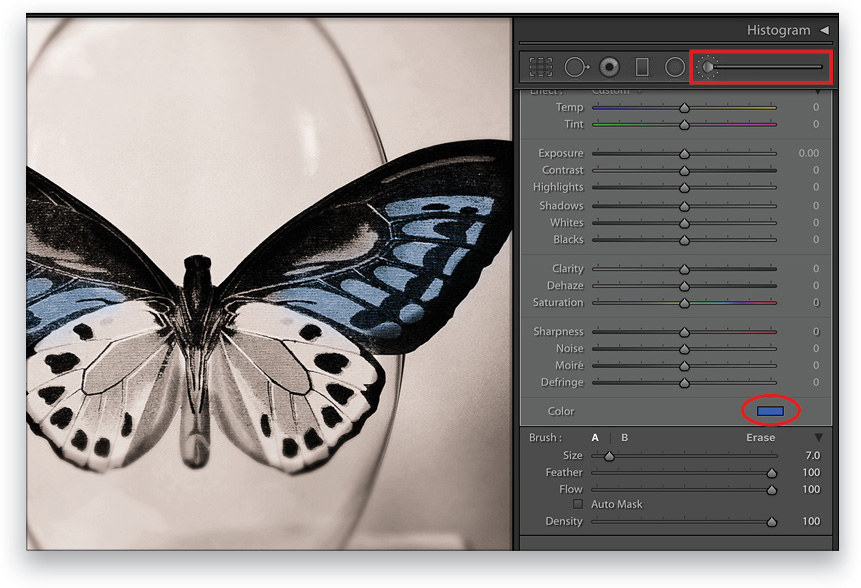
APPLY TINTING WITH THE ADJUSTMENT BRUSH
Adjust the brush Feather, Flow, and Density as desired. I typically start out with Flow and Density set to 100, and then lower these if needed. You can use the Left and Right Bracket keys on your keyboard to change the brush size, and adding Shift to the Bracket keys will adjust the brush Feather value. Now click on an area of the image where you want to add a tint of the selected color, and paint with the Adjustment Brush to cover all of the area.
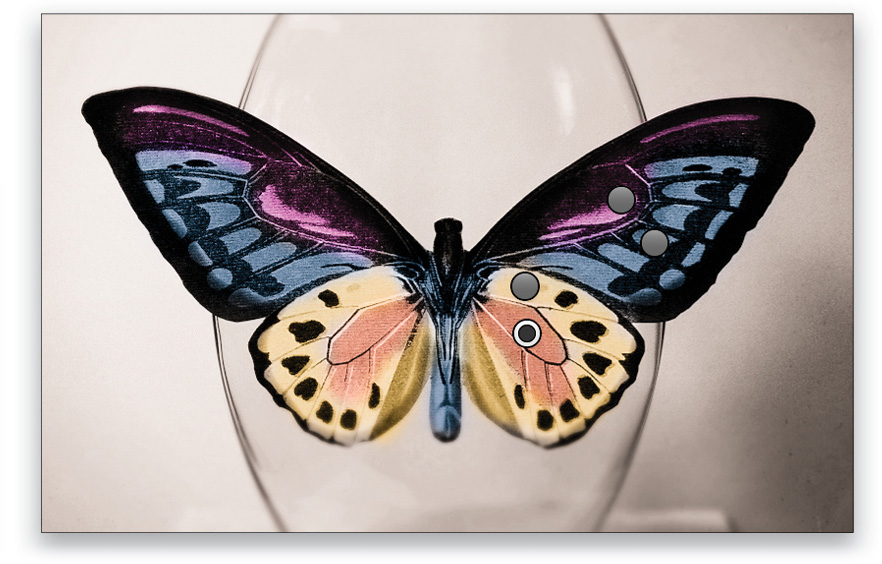
ADD A NEW BRUSH FOR A DIFFERENT COLOR
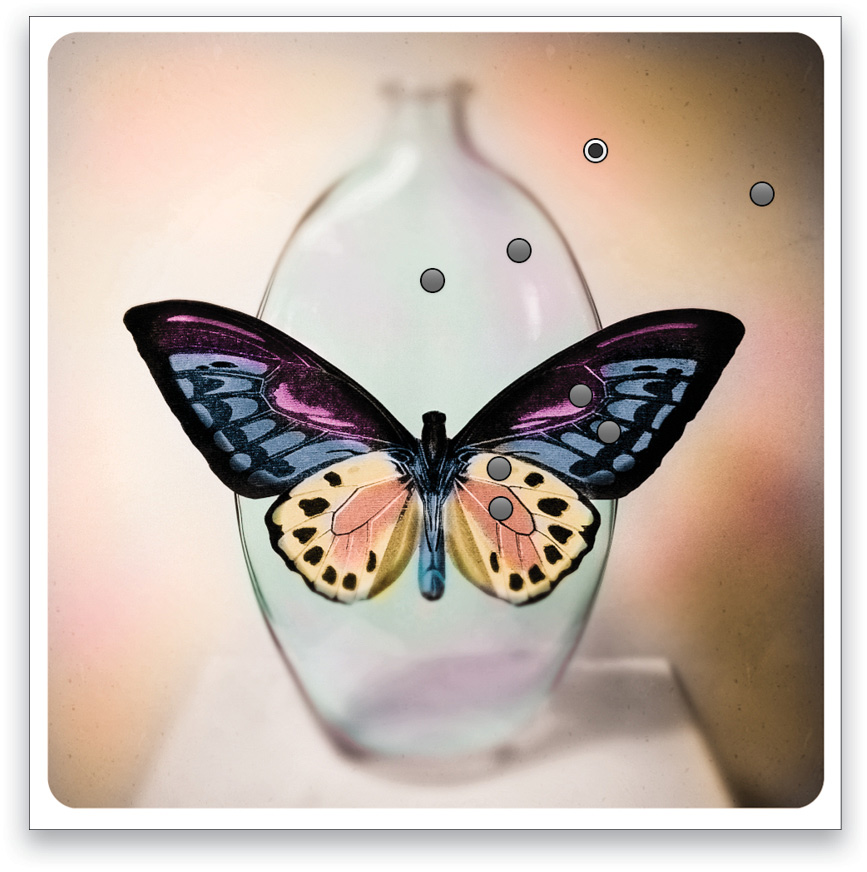
Click New at the top of the Adjustment Brush panel and then click on the Color box to choose a new color. In the example here, four brush pins are being used to add blue, purple, orange, and yellow to the butterfly wings.
USE OTHER ADJUSTMENT SLIDERS
Depending on the image, you can try to use some of the other Adjustment Brush sliders in addition to the color tint you’re adding. If you’re working with an image that has a B&W profile applied to it, keep in mind that you can only affect luminance and contrast via the Exposure, Contrast, Highlights, Shadows, Whites, Blacks, and Clarity sliders. The Saturation slider will have no effect on the color tints you’ve added because the image has a B&W profile. The saturation for the color tint is controlled by the color picker, which is accessed by clicking the Color box.
USE OPTION (PC: ALT) TO SUBTRACT COLOR TINT
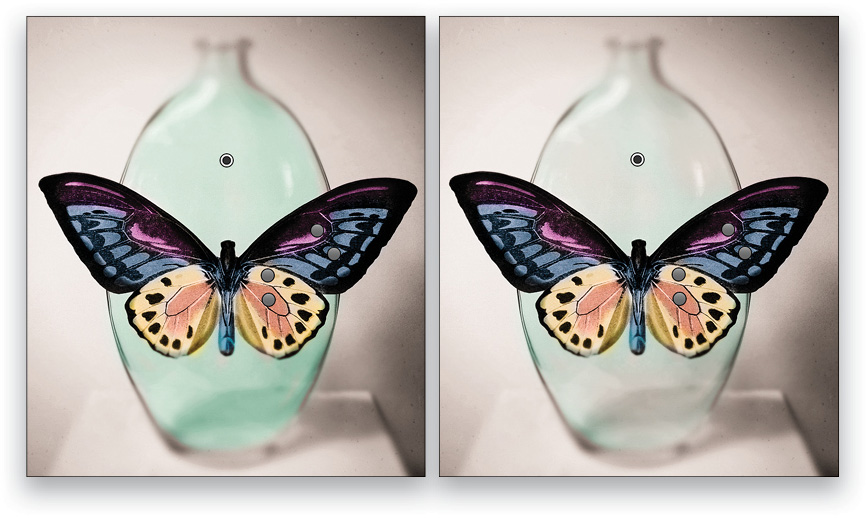
To modify the color tint, you can press-and-hold the Option (PC: Alt) key to switch the Adjustment Brush into subtract or erase mode. If you want to subtract or erase only part of the color tint and still leave a trace of it, lower the Flow setting for the subtract/erase brush. This approach allowed me to vary the intensity of the blue/green tint on the bottle so the application of the color was a bit uneven and less uniform.
COLOR TINTS HAVE NO EFFECT ON WHITE OR BLACK
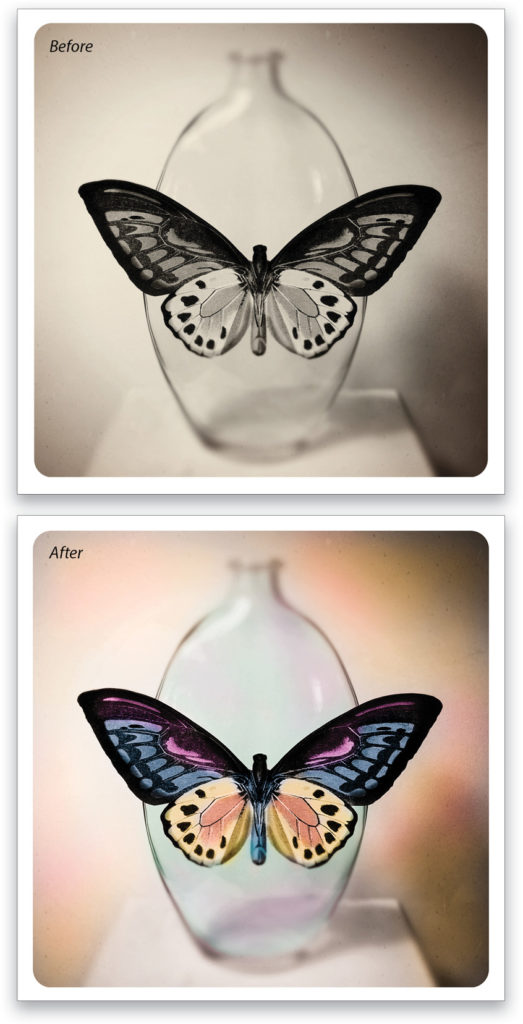
If you try brushing a color tint over image tones that are pure white or black, there’ll be no effect. With a color tint, the luminance (brightness) always comes from the image itself. So, if a tone is completely black or white, the color has no effect. You’ll only see the color in areas with a gray luminance (i.e., neither black nor white). The lighter a tone, the more pale and unsaturated the color will appear (see the yellow color on the butterfly wings); while the color tint will appear darker and more saturated on darker tones, as can be seen in the purple and blue colors on the butterfly.
MIX TINTS TO CREATE A COLOR WASH
To create a more natural and organic look for your color tinting, try mixing colors in the same area. For instance, with the butterfly image, I used two different colors for the bottle (blue/green and light purple), and two colors for the background (yellow and magenta). These were applied in a somewhat random pattern to suggest the colors flowing and blending into each other. I used the subtract/erase function with different Flow settings to vary the application and intensity of all the colors on the bottle and the background.
THE BIG PICTURE
For this project I used a total of eight Adjustment Brush pins: Four to color the butterfly, and two each for the bottle and the background. This image is a good illustration of how you can use Lightroom Classic CC to apply simple color-tinting effects. The same basic approach also works in Lightroom CC.
For images where significantly more colors are required, or for where you have to add color very precisely to specific and intricately shaped areas, then Lightroom is probably not the ideal choice. For projects like that, you’ll have more control applying the hand-tinting effect in Photoshop using adjustment layers and layer masks, or applying color directly to a layer set to the Color blending mode.
ALL IMAGES BY SEÁN DUGGAN
This article originally published in Lightroom Magazine, issue 47.


