
In this issue, we’ll discover the power of color targeting to easily manipulate any color in Photoshop. We’ll learn how to use a Hue/Saturation adjustment layer to manually edit a specific color range to fix a color cast; however, you can use the same technique to repair any color issues, such as removing color stains, fixing tanned skin, equalizing uneven skin tones—the applications are limitless. This is also an incredible technique for changing colors.
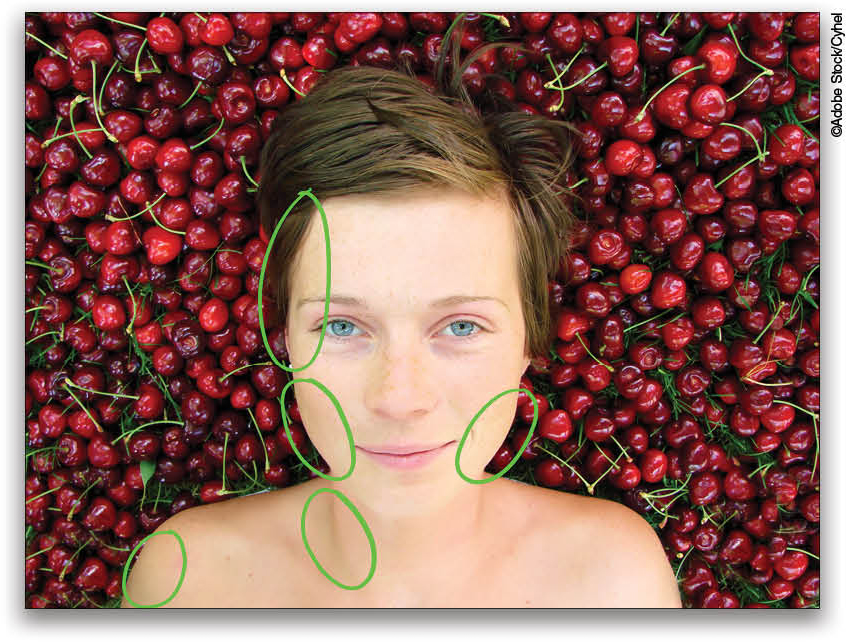
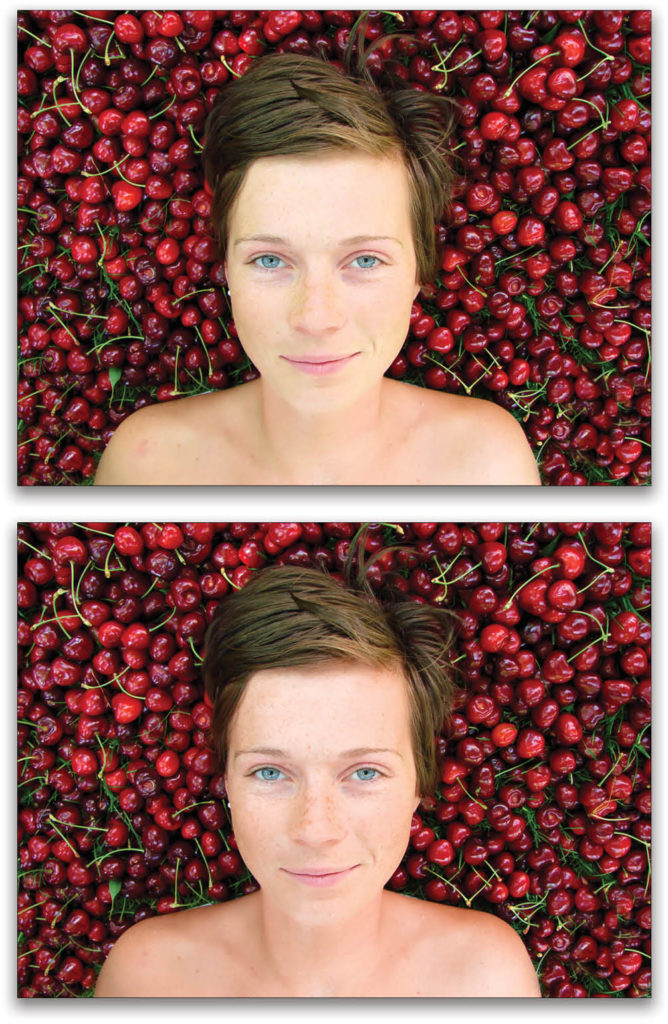
In this example image, let’s take a closer look at our subject. She has a greenish color cast on her face that we want to remove.
STEP ONE: OPEN AN IMAGE
First, open any image in Photoshop that has unwanted colors. Whether it’s a green color cast on the skin or a man wearing a highly saturated and distracting red hat, you can easily manipulate the colors to your liking using this technique. If you wish to follow along with the image used here, you may download the JPEG preview for free, or license the full-resolution version from Adobe Stock by clicking here. To download the preview image, log in with your Adobe ID, and click the Save Preview to My Library button.
If you’re using one of your own images, go to File>Open, locate your image, and then click Open. Or, while Photoshop is open in Application Frame, go to Finder (PC: Explorer), locate your image, and drag-and-drop it into Photoshop.
Note: If you downloaded the preview image from Adobe Stock, you can double-click the image in the Libraries panel (Windows>Libraries) to open it.
STEP TWO: TARGET THE UNWANTED GREENS
Click the Create New Adjustment Layer icon (the half-black/half-white circle) at the bottom of the Layers panel and choose Hue/Saturation. In the Hue/Saturation Properties panel (Window>Properties), click on the hand icon, which is the Targeted Adjustment tool (TAT).
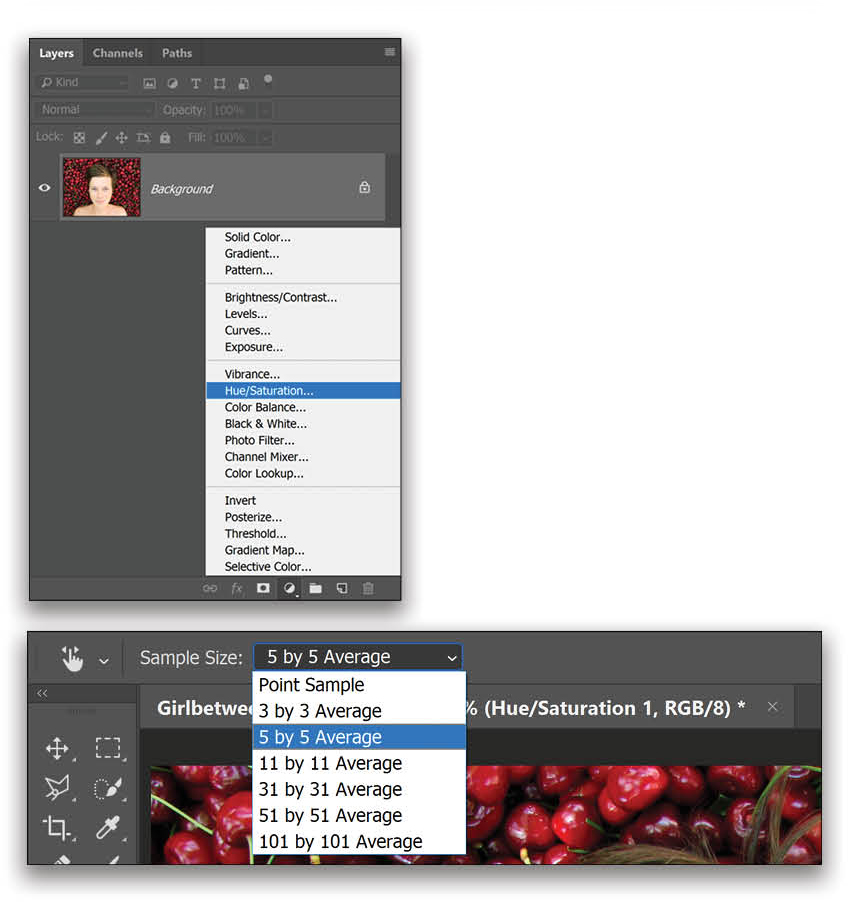
In the Options Bar at the top, make sure the Sample Size drop-down menu is set to 3 by 3 Average or 5 by 5 Average.
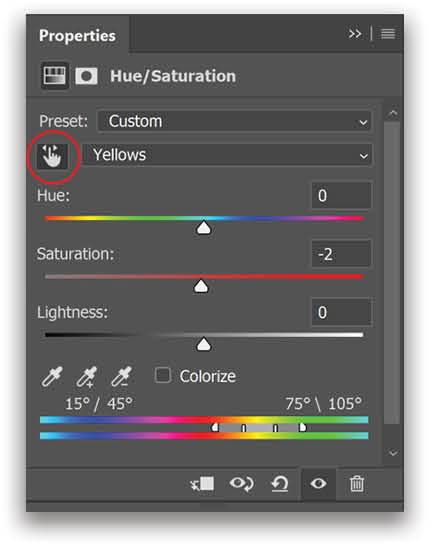
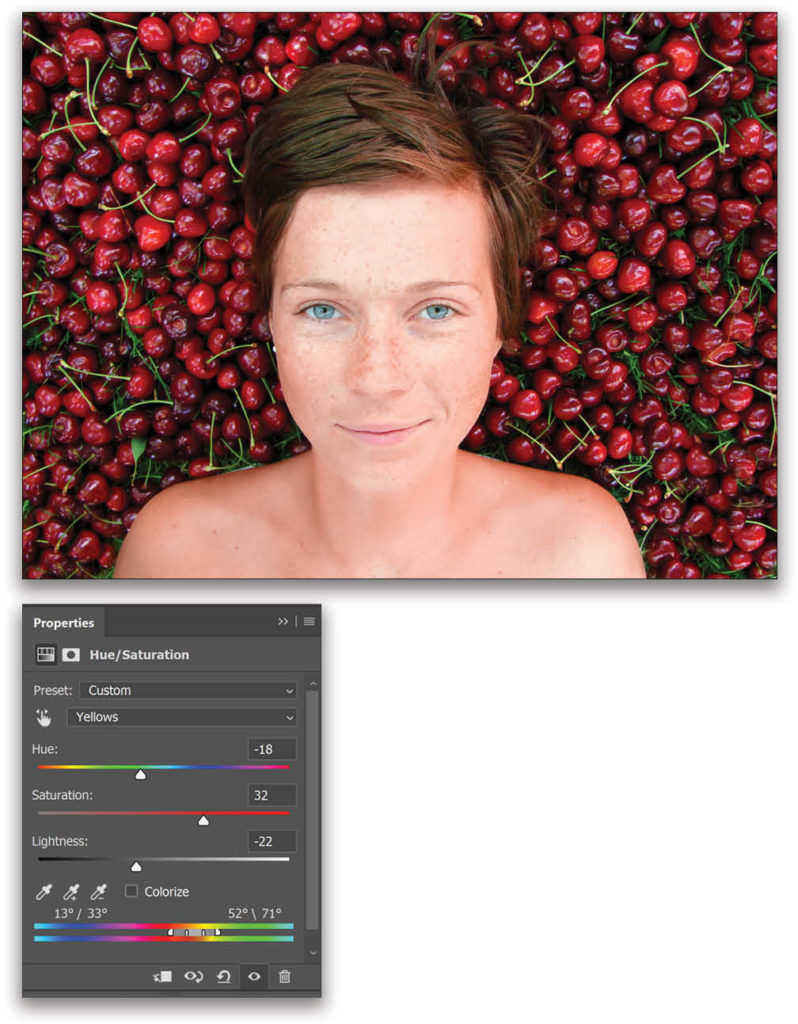
Click on the green area of the skin that you want to modify. As soon as you click, you’ll notice that in the Hue/Saturation Properties, the drop-down menu next to the TAT changes to either Yellows or Reds. In my case, it’s Yellows, but it doesn’t matter, as we’ll modify it later.
STEP THREE: REFINE THE COLOR RANGE
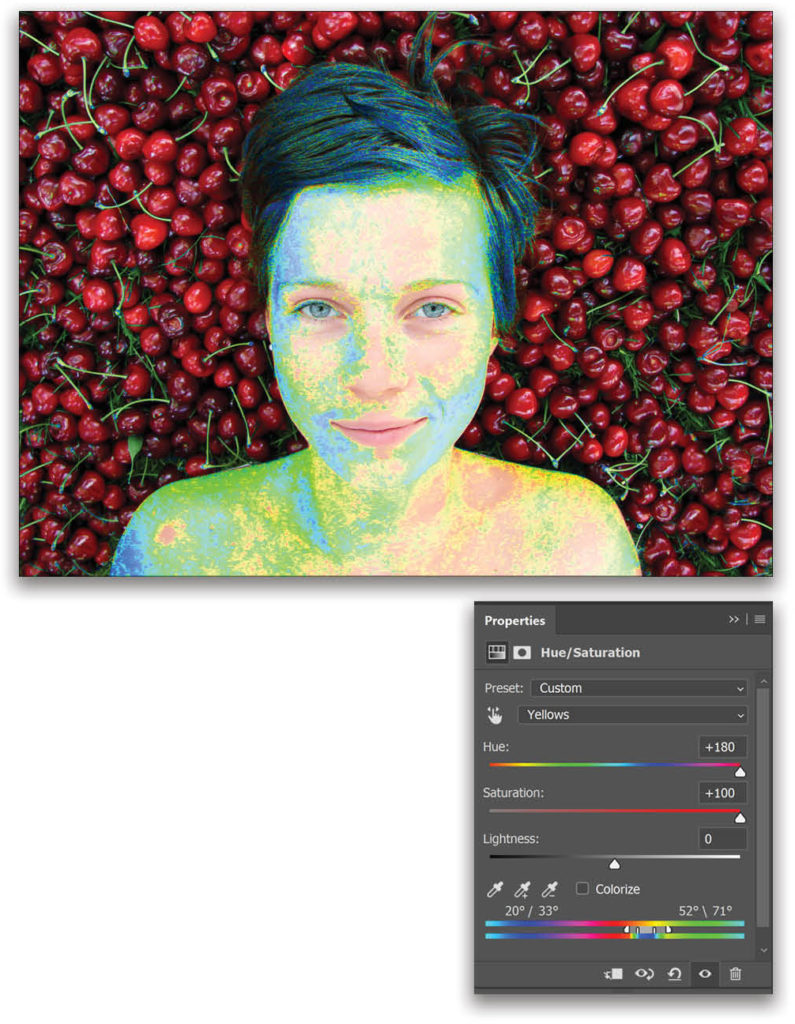
In the Hue/Saturation Properties, take the Hue and the Saturation sliders all the way to the right. This allows us see which areas are being affected, and thus helps us to refine the targeted area.
In the two color ramps at the bottom of the Properties panel, you can narrow the target range by moving the two range sliders on the left and the two range sliders on the right closer together.
Start dragging the sliders in the middle, and stop at the point where the exact green areas are targeted. Expand the range of the targeted color by dragging the outside sliders as shown.
STEP FOUR: ADJUSTING THE COLOR
Bring the Hue and the Saturation sliders down to zero. Play with the Hue, Saturation, and Lightness to tweak the color of the targeted area. For this example, we chose Hue: –18, Saturation: 32, and Lightness: –22.
STEP FIVE: MASKING
Notice that along with the skin, the Hue/Saturation adjustment layer is also adding some unwanted red to the hair. To remove it, we need to mask it out. Click on the mask thumbnail of the Hue/Saturation adjustment layer in the Layers panel to make it active.
Press Command-I (PC: Ctrl-I) to invert the mask. The mask will turn black, hiding the entire effect. With the mask still selected, switch to the Brush tool (B), set it to a soft, round brush, press D to set the Foreground Color to white, and simply paint on the skin to reveal the Hue/Saturation effect.
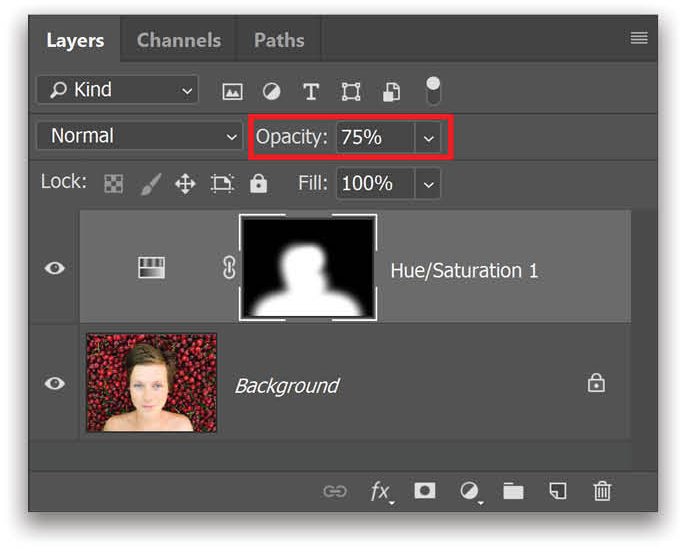
If you feel the effect of Hue/Saturation adjustment is too much, decrease the adjustment layer’s Opacity to around 60%–75%.
So that’s how easy it is to select an area based on its color and modify it in any way you want by using the Hue, Saturation, and Lightness sliders. Keep in mind that if you want to revisit these sliders later, you might have to select the corresponding color from the drop-down menu in the Hue/Saturation properties. In this example, it was Yellows. Apart from its applications when fixing colors, you can also artistically use this technique to creatively manipulate colors.
This article originally published in the June/July 2019 issue of Photoshop User magazine.


