Getting a good exposure, like a good card trick, is easy—easy if you know the trick or technique. In a good magic trick, the steps for success include diversion, performance, and of course, skill in handling the cards. In photography, the steps for success begin with what’s called the exposure triangle: the aperture, shutter speed, and ISO settings.
In this article, I’ll start by exploring the exposure triangle with some of my favorite pictures from Iceland. I’ll share the exposure information for each image, so you get an idea of how the exposure triangle works and how it can help you make good pictures. All the images were taken with my full-frame image sensor cameras, either the Canon EOS 5D Mark III or Canon EOS 5D Mark IV.
From there, we’ll move on to explore situations in which paying extra attention to the exposure triangle is important. For that, I’ll be using several photographs from an expedition to Antarctica, the Falkland Islands, and South Georgia, as well as some of my butterfly and moth photographs.
Each Camera Setting Controls Desired Effects
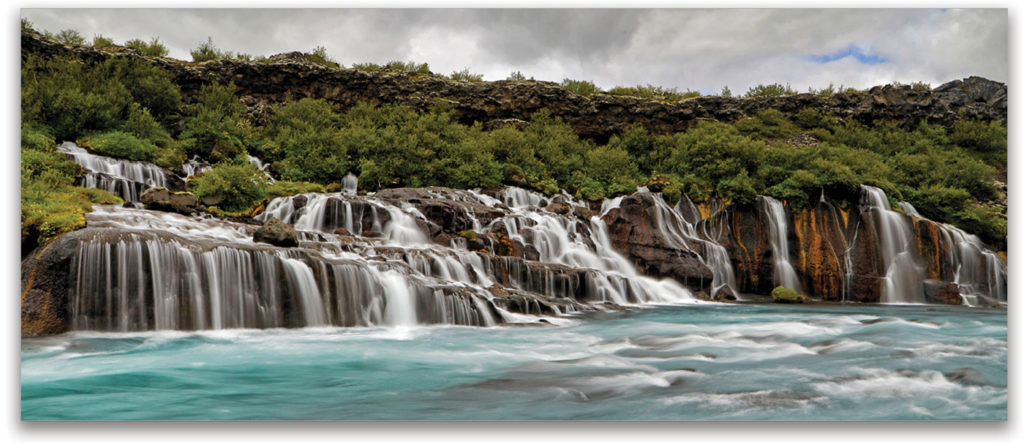
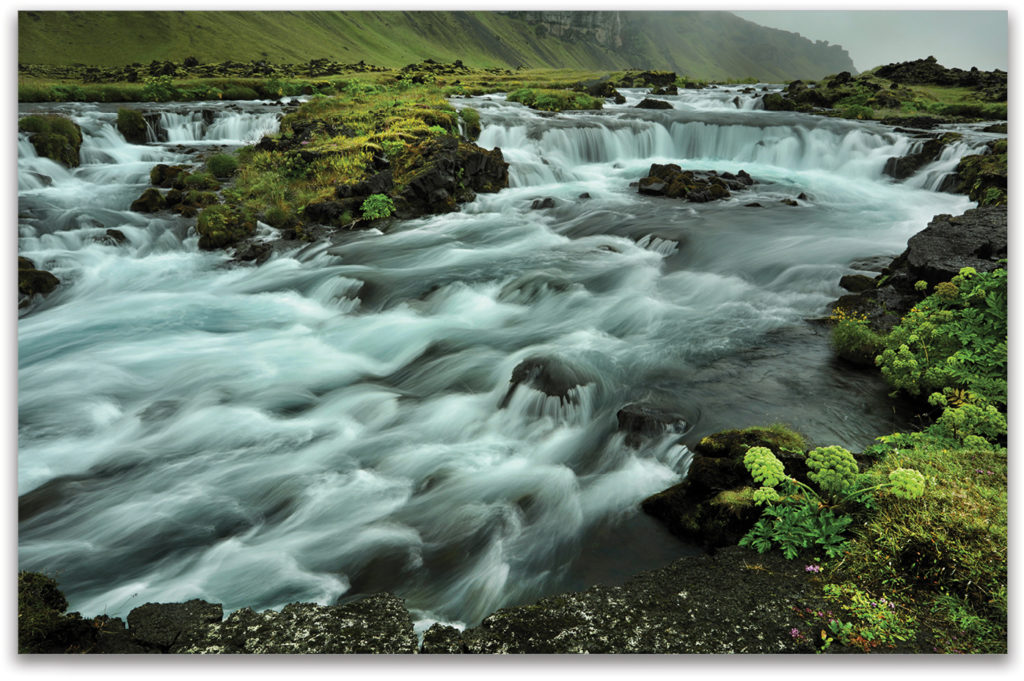
Here’s the exposure information for the image below, which I took at Hraunfossar in Iceland using a Canon 24–105mm IS lens set at 100mm: ISO 100, f/22, at 1 second.
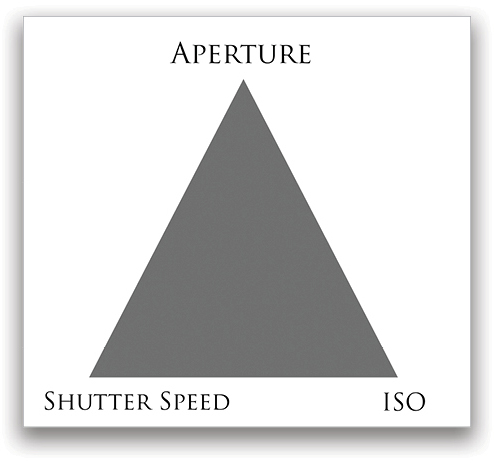
This graphic illustrates the exposure triangle. Just because aperture is at the top of the graphic doesn’t mean that the aperture is most important. In fact, the most important setting depends on the desired effect. Deep or shallow depth of field is controlled by the aperture; stopping or blurring motion is controlled by the shutter speed; and finally, the light level of the scene affects the ISO setting.
In the Hraunfossar image, I wanted to blur the water for what’s called the “silky water” effect. I chose to shoot at a slow shutter speed made possible by letting as little light as possible into the camera. Using f/22 (smallest aperture), ISO 100 (lowest ISO setting), and a Breakthrough Photography 6-stop ND (neutral density) filter I further reduced the light entering the camera. (Note: Talking about aperture settings can be a little tricky, because the higher the aperture number, the smaller the lens opening. So, for this article, I’ll use the term “wide aperture” to mean a big lens opening, which is a smaller aperture number such as f/1.8; and I’ll use the term “narrow aperture” to mean a small lens opening, which is a larger aperture number such as f/11.)
How Camera Settings Affect One Another
Let’s take a quick look at how camera settings relate to each other and when they become important. First, we need to agree that there isn’t only one good exposure for a scene by accepting that your idea of a good exposure may be different from a friend’s or mine, which is perfectly okay.
Second, we need to know that a good exposure, technically speaking, is about the amount of light entering your camera, and that one setting of the exposure triangle (aperture, shutter speed, or ISO) affects another. For example, say you’re photographing in the aperture priority mode. When you change the aperture, the camera changes the shutter speed to give you a good exposure of light. When you’re in the shutter priority mode, and you change the shutter speed, the camera changes the aperture, again, to give you a good exposure of light. In manual mode, you can get the same effect or override the effect for a darker or lighter image. In the automatic modes, you can also use +/– exposure compensation to fine-tune a picture.
What about ISO? Well, when in the aperture priority mode, as you boost the ISO you can shoot at smaller apertures in low light. When you’re shooting in the shutter priority
mode, boosting the ISO will let you shoot at faster shutter speeds with a side effect of adding noise to your image, most noticeable at high ISO settings when photographing in low-light conditions.
Okay, let’s take a look at some examples of when each element in the exposure triangle is the most important consideration.
Aperture
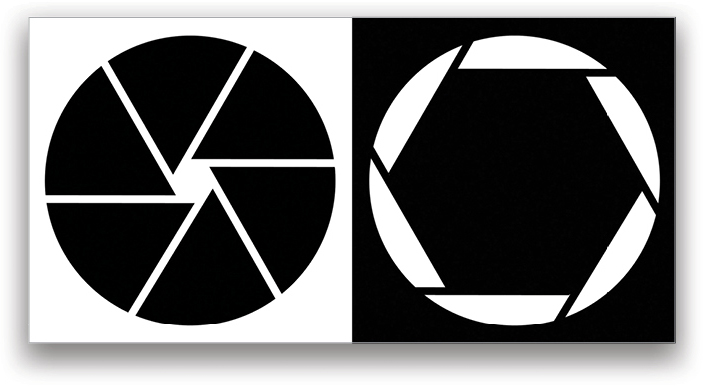
The aperture affects the depth of field, i.e., what’s in focus in front of and behind your focus point. At narrow apertures (small lens openings or high aperture numbers), as illustrated by the graphic on the left of this illustration, we have more in focus than at wide apertures (large lens openings or small aperture numbers), as shown on the right. Two other factors impact depth of field: the lens and the camera-to-subject distance. The longer the lens and the closer you are to the subject, the shorter the depth of field.
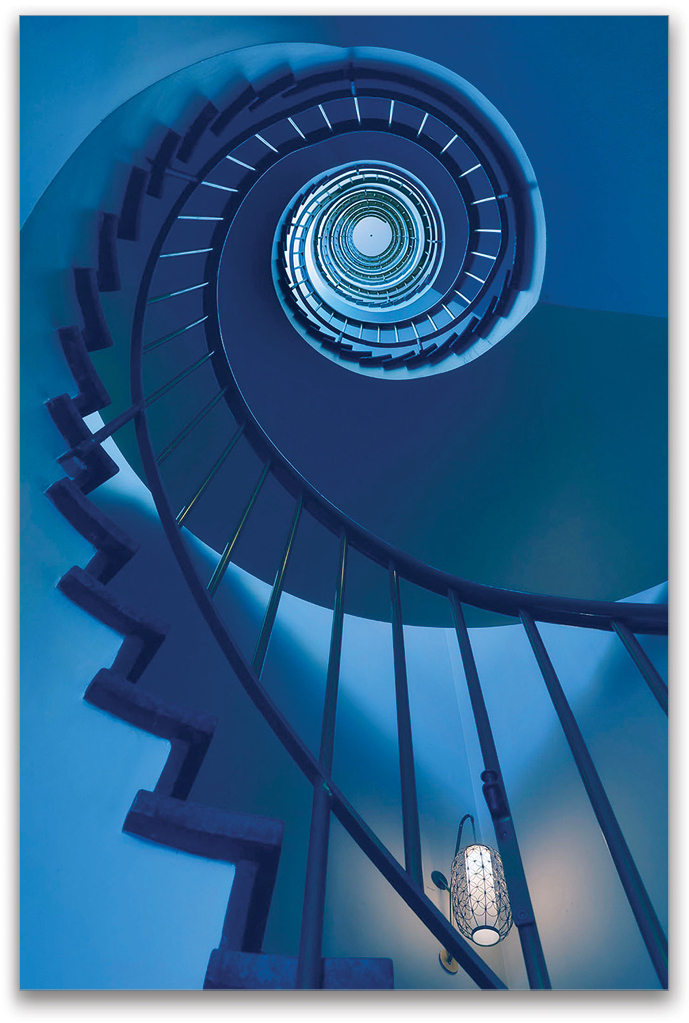
My goal in this image was to get the entire spiral staircase in focus at my Iceland hotel. A quick focusing tip: for maximum depth of field, use a wide-angle lens, narrow aperture, and set your focus 1/3 into the scene.
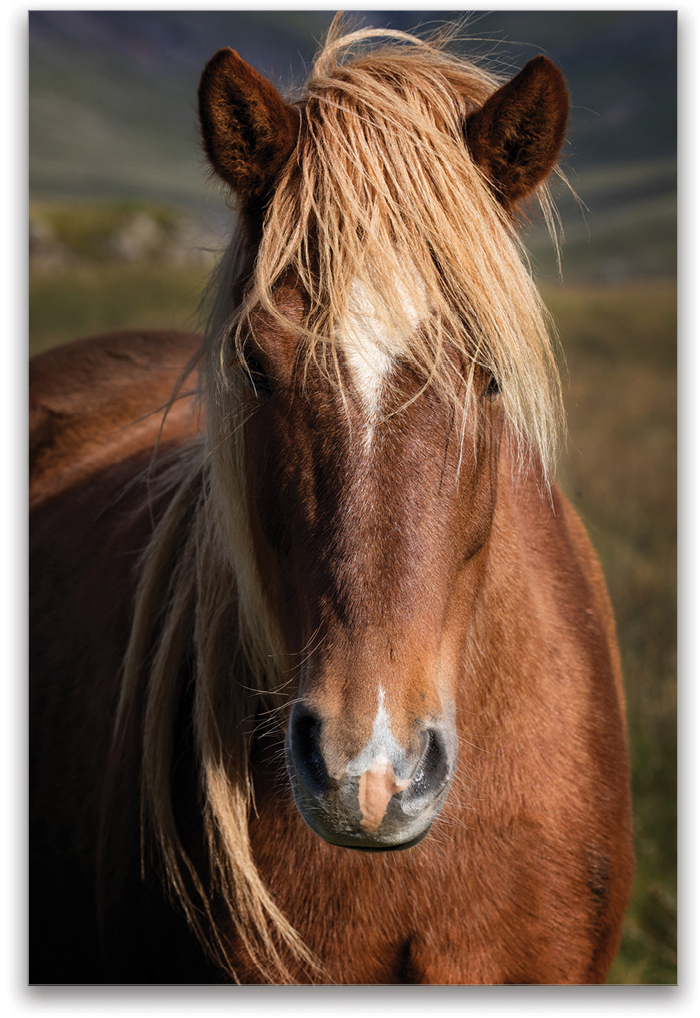
This Icelandic horse was standing about 3′ away when I made this portrait (below right). To get the horse’s head and mane in focus, and to blur his body and the distracting background, I experimented with different apertures. Experimenting with various apertures and shutter speeds on location is a good idea because sometimes you can get so caught up with the moment that you don’t really know what’s the best exposure for you.
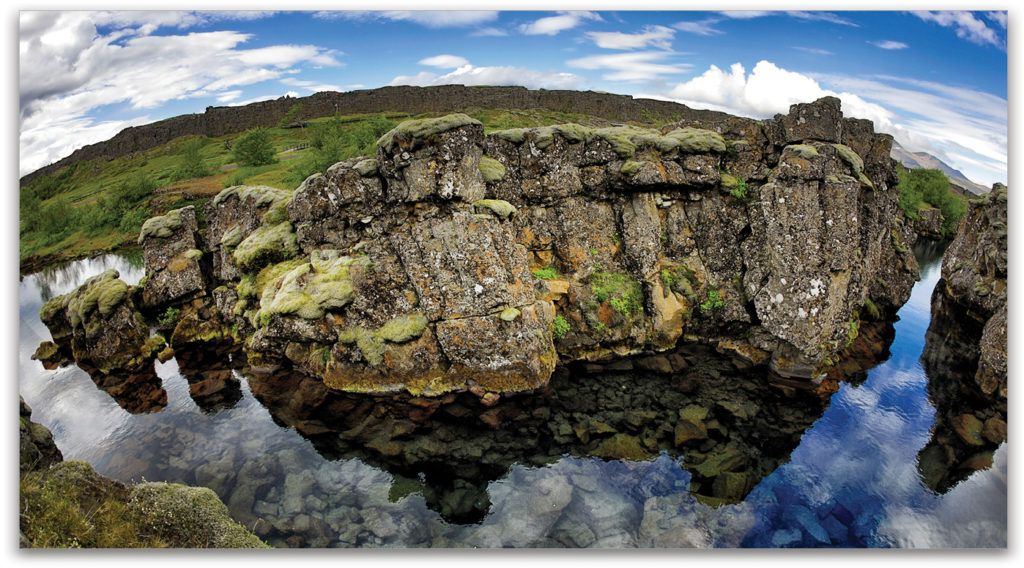
As I mentioned, wide-angle lenses offer more depth of field than telephoto lenses, and the wider the lens, the greater the depth of field. My goal in this next photograph (above) was to show the rocks, stream, foreground, and background all in sharp focus in this area of Iceland’s Thingvellir National Park. Standing on a ledge just a few feet from the rock formation in the foreground, I tried photographing with several different wide-angle lenses. The only lens that let me capture the entire scene was my Canon 15mm lens.
Shutter Speed
Shutter speed is about time—the time during which the shutter is open to record an image on an image sensor. Shutter speeds on DSLRs and mirrorless cameras can range from 1/8000 of a second or so to as long as you want to leave the shutter open. You want fast shutter speeds to stop action when you or the subject is moving.
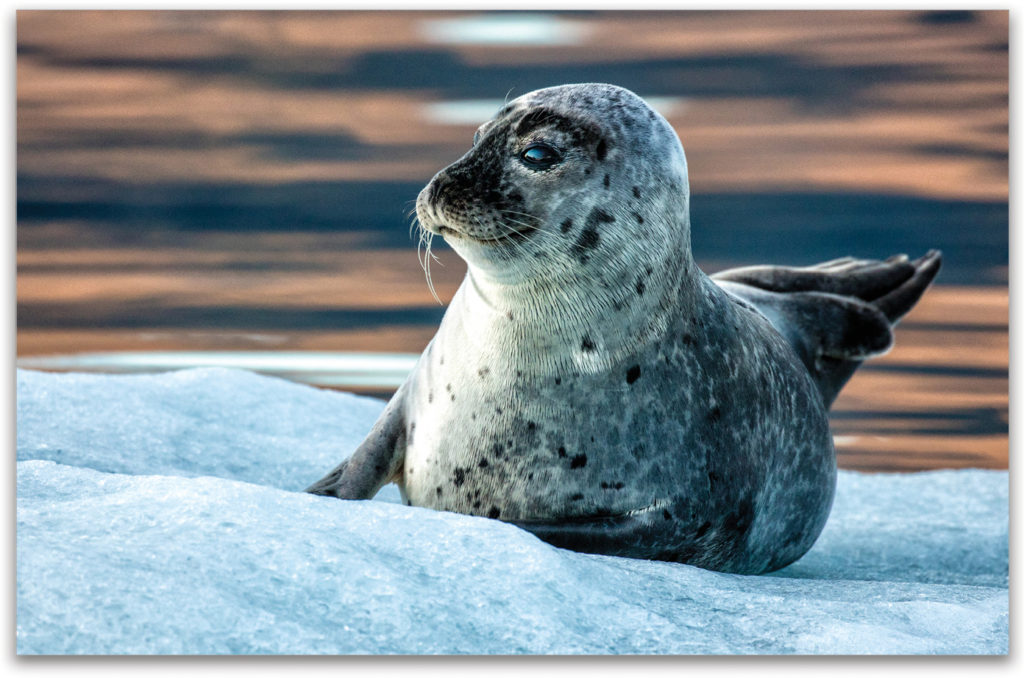
I photographed this seal in Iceland’s Jökulsárlón Glacier Lagoon while we were exploring by Zodiac. To prevent a blurry photograph caused by the movement of the boat and the telephoto lens factor (which exaggerates camera shake), I needed to set my ISO at 800 to get a shutter speed of 1/320 of a second, which is fast enough for a hand-held shot with my Canon 100–400mm IS lens set at 400mm. I also needed that fast shutter speed because the cute little seal was jumping on and off the ice, and I wanted to “freeze” subject movement.
Here’s an image of the famous waterfall in Thingvellir National Park. As in the image at the beginning of this article, I wanted to create a “silky water” type photograph. At this waterfall, the water was flowing faster than at Hraunfossar, and I was much closer. Those two factors required a slower shutter speed to create the effect.
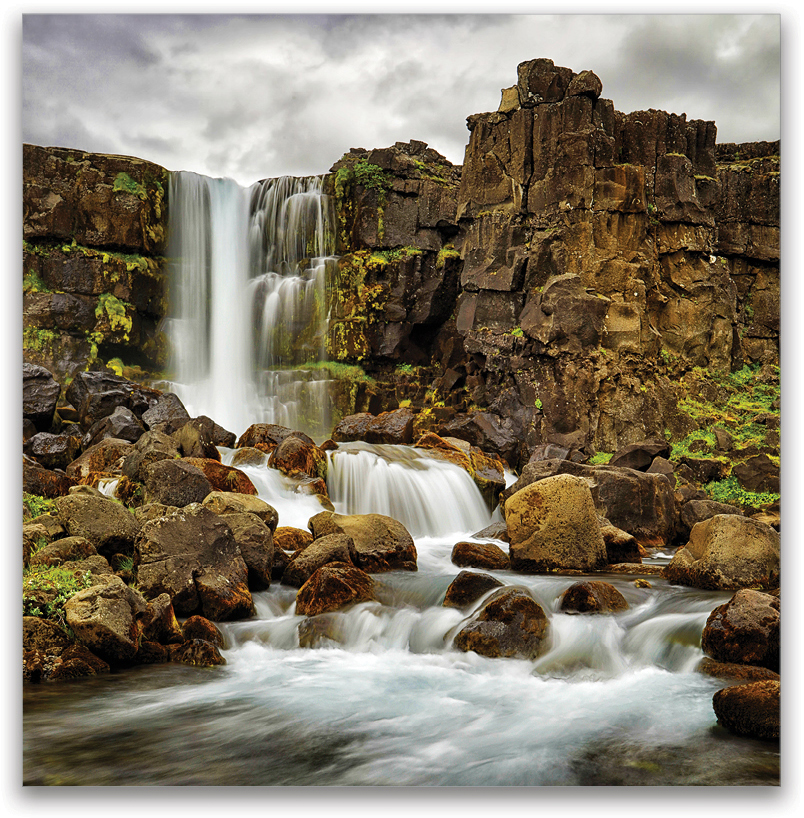
Exposure information: Canon 24–105mm IS lens at 105mm, ISO 100, f/22, at 1 second. Here, too, I used a Breakthrough Photography 6-stop ND filter.
ISO
The ISO setting determines the light sensitivity of the camera’s image sensor. Traditionally, you’d use a low ISO setting, such as ISO 100 or 200, in bright light, and high ISO settings in low-light situations. The lower the light, the higher the ISO you’d need to get a hand-held photograph. When you’re using a tripod or flash, ISO becomes much less of an issue.
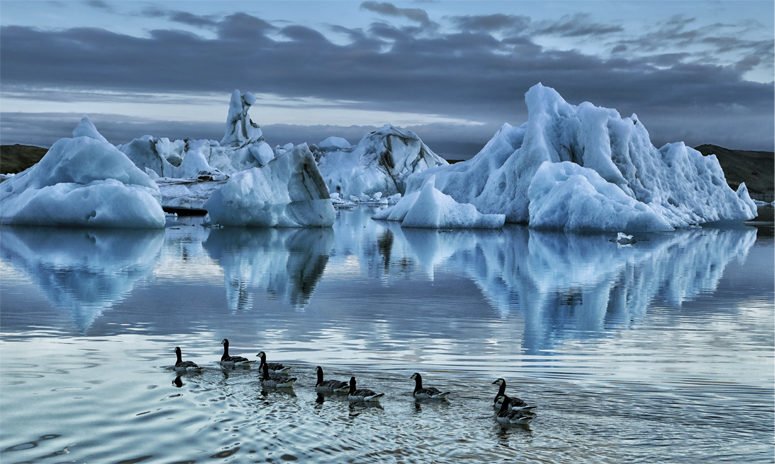
I took this hand-held image at the Jökulsárlón Glacier Lagoon after sunset. One of my goals was to stop the movement of the geese in the foreground, so I knew I had to boost my ISO to get a fast enough shutter speed to stop the action and maintain good depth of field so the entire scene was in focus.
Exposure information: Canon 24–105mm IS lens at 60mm, ISO 800, f/8, 1/250 of a second
This small waterfall is near the Jökulsárlón Lagoon. The sky was overcast and the light level was low, but still too bright to get the “silky-water” effect with the lowest ISO set on my camera, 100, and the narrowest aperture set, f/22. Here, too, I used my ND filter. For the wide view, I used my Canon 17–40mm lens. My shutter speed was 1/5 of a second.
When Aperture, Shutter Speed, and ISO Become Especially Important
There are several situations in which paying extra attention to your aperture, shutter speed, and ISO are important. For now, let’s take a look at just a few.
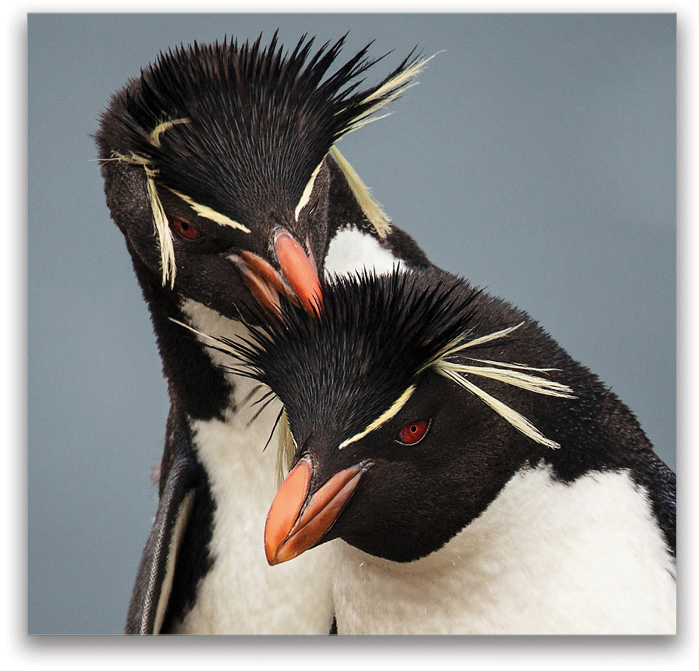
When photographing with telephoto lenses and depth of field is important: As the focal length of the lens increases, depth of field at any given aperture decreases. In this first rockhopper penguin photograph, taken in the Falkland Islands, I wanted to get the animals’ bodies, especially the eyes, in sharp focus, while blurring the background.Because I was using my Canon 100–400mm IS lens set at 400mm, and because the animals were only a few yards away, I selected a narrow aperture, f/14. My ISO was 400 and my shutter speed was 1/400 of a second.
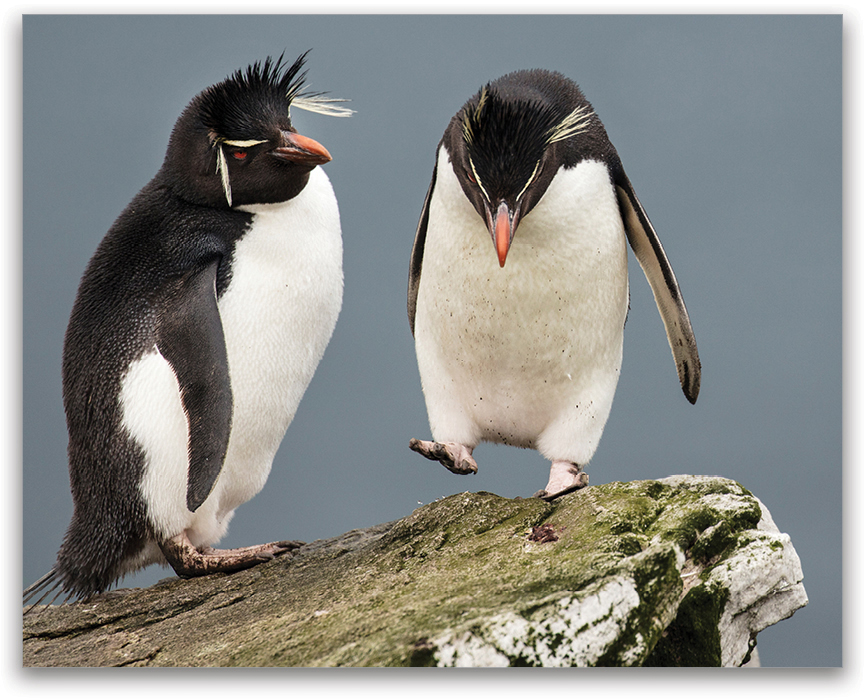
When photographing with telephoto lenses and shutter speed is important:
As the camera-to-subject distance decreases, apparent subject movement is exaggerated. That means you need to use a faster shutter speed when photographing close-up action than you do when photographing action that’s farther away when using the same focal length. To capture the action—in this case, rock hopping—of the penguin on the right, I chose a shutter speed of 1/800 of a second. My ISO was 200 and aperture f/5.6.
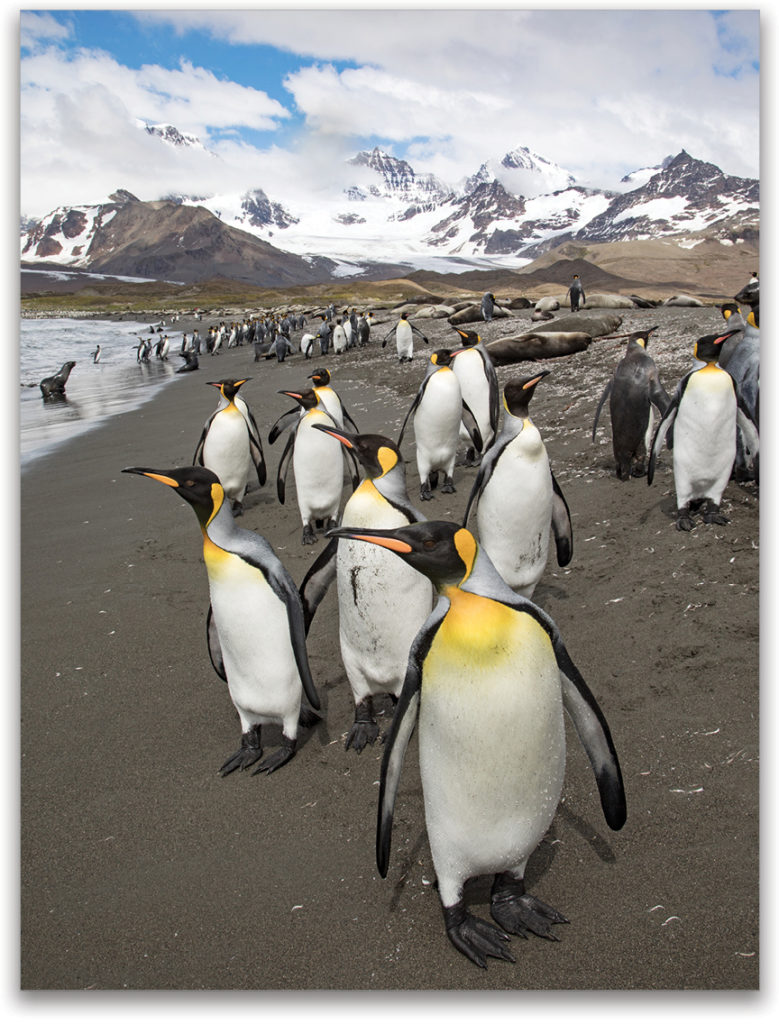
When photographing with wide-angle lenses and depth of field is important: Notice how everything in this South Georgia scene is in focus. That’s because I used the 24mm setting on my Canon 24–105mm IS lens. I also chose a narrow aperture, f/11, and focused 1/3 into the scene. Because I was standing only a few feet from the king penguin in the foreground, I knew I needed that aperture/focus combination to get everything in focus. My ISO was set at 200 and my shutter speed was 1/200 of a second.
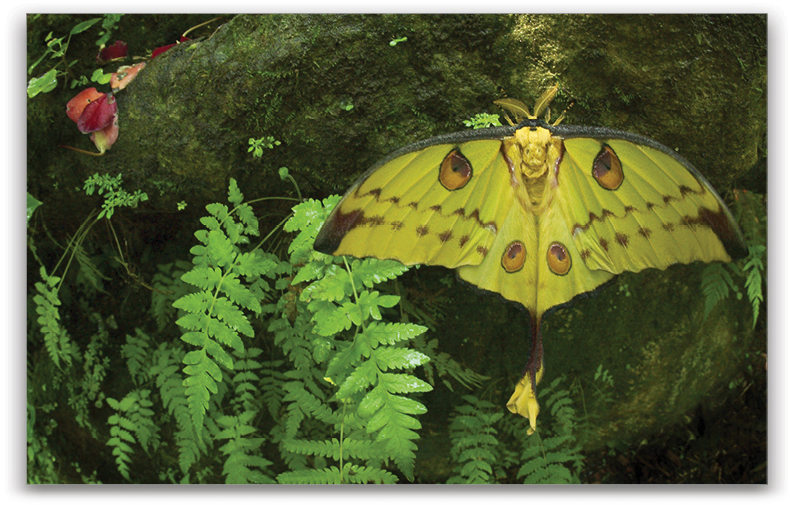
When photographing with wide-angle lenses and taking close-up photographs: Again, as you get closer to a subject, depth of field decreases. However, the wider the lens, the better chance you have of getting greater depth of field. I took this hand-held, natural-light photograph of a Madagascan Moon moth at Butterfly World in Coconut Creek, Florida. I was only inches away while photographing with my 15mm lens. To get the entire scene in focus, I set my aperture to f/11. Due to the low light level, I set my ISO to 800 so I could get a shutter speed of 1/30 of a second, fast enough for a steady, hand-held shot.
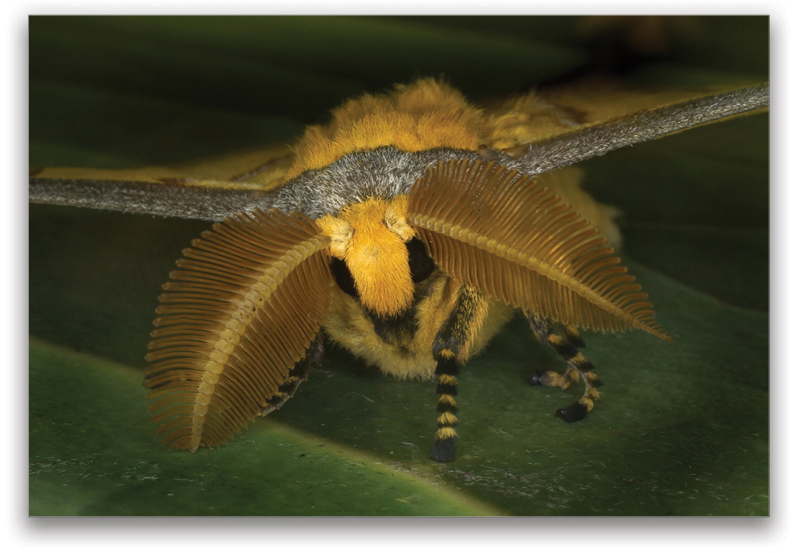
When photographing with true macro lenses and depth of field is important: Here’s a macro photograph, taken with my Canon 50mm macro lens, of the same animal. Notice the very shallow depth of field. I wanted to draw attention to the moth’s antenna. Because I was only inches way, I set my aperture to f/22. Yes, even at f/22, the depth of field was that shallow, again because I was so close and using a macro lens. This is a tripod-mounted photograph. My ISO was 200 and shutter speed 1/4 of a second.
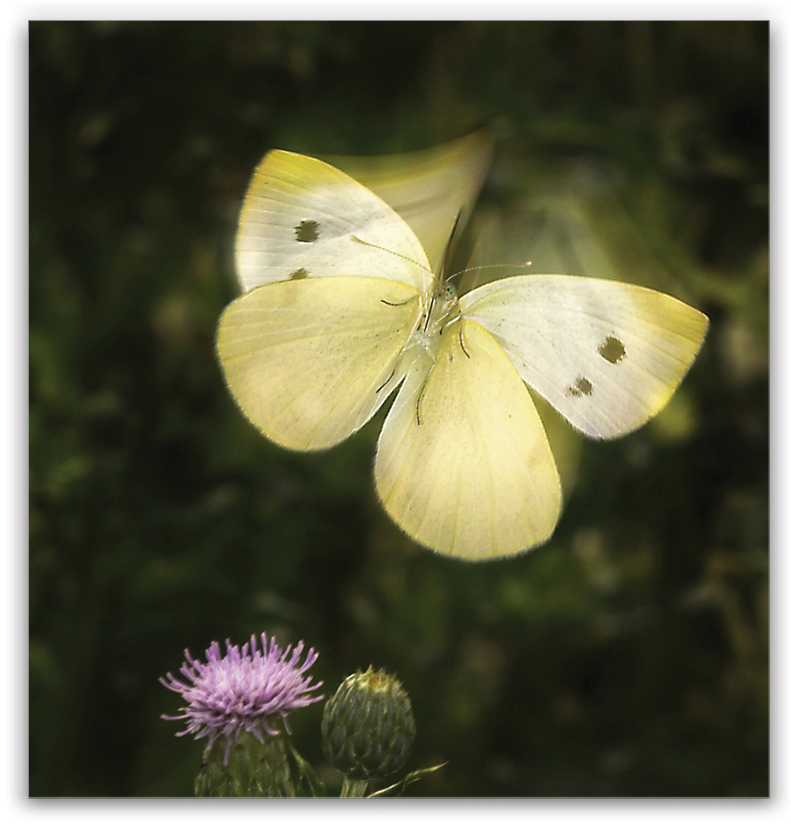
When photographing with true macro lenses and shutter speed is important: When photographing with true macro lenses, as I did here of this cabbage white butterfly in my backyard with my Canon 100mm macro lens, you need to pay super-extra attention to your shutter speed/aperture, especially when the subject is moving fast. For good depth of field, I set my aperture to f/18. For a clean image with no noticeable noise, I set my ISO to 100. At ISO 100 and with a narrow aperture, it wasn’t possible to get a fast enough shutter speed to stop the action of the butterfly in flight. To accomplish that goal, I used my Canon ring light, a flash that fits around the lens and can produce shadowless lighting.
Well my friends, that’s a look at the fundamentals of “The Exposure Triangle.” As you can see, paying attention to these settings can help you make great photographs—rather than simply taking pictures. n


Hi, I really like your article! Very interesting.
Does the type and type of camera affect exposure, shutter speed and others?