With today’s advanced technology, we often take for granted how much easier it is to edit our photos. Younger photographers will never know how difficult it was to remove something as simple as a power line or any other unwanted object back in the film days. In most cases, it meant a reshoot, which could get really expensive, or you had to hire a highly trained and expensive retoucher to fix it, which back then was known as airbrushing. That’s why photographers took every precaution and paid close attention to every detail during a shoot.
As the technology of shooting digital photos became more accessible to the masses by way of less expensive digital cameras and smartphones, the technology for editing photos became just as accessible and easy to use. Today, it’s so commonplace to “fix” photos after the fact that most of us don’t even worry about unwanted elements in our images. How many times have you said, “I’ll just Photoshop it out later?”
But even if you try to get it right in camera, however, there will be times when you’re going to have unwanted elements in your shots that you just can’t avoid. Maybe you’re shooting an old building for a period piece, but there are modern elements all around, such as signs, power lines, planes in the air, or tourists on the streets. Unless you have a massive budget or own the property, you have to work around this. Perhaps you’re a professional retoucher and are given a photo to fix when a reshoot is impossible. Or it could just be that your annoying cousin photo-bombed you on that family trip to the mountains.
So you have the shot. Where do you start? Well, it depends on what you’re trying to achieve. The reason there are so many different tools in Photoshop for removing elements is that not every scenario is the same. Let’s explore some of these tools so you’re better equipped to determine which tool is the right one for a given situation.
One rule of thumb I’ve always tried to stick to is: Don’t overdo it! The only time you should go completely overboard is when you’re learning a new technique. Then you can go nuts: Try something outrageous, and you may be surprised or just plain disappointed. The point is that you’re learning how the tools work. Pushing them to their limits helps you know what those limits are.
So let’s not only take a closer look at some of the most-used tools and methods for removing unwanted elements, but also learn how to assess a shot so you know which tool to use in a particular situation. While some of these tools seem similar in the way they function, you should be aware of their subtle differences, as well as how they can work together.
The Legend of the Clone Stamp Tool
Now I have to reflect for a moment, because when I first started using Photoshop, back in version 2, all there was for removing distracting elements from an image was the Clone Stamp tool. That’s it! This tool was a nightmare to master, and all it did was copy-and-paste a sampled area of a photo by way of a brush. It didn’t do any auto-blending or Content-Aware wizardry, so you really had to practice to get good results, especially since there were no layers in version 2 (they didn’t show up until version 3). This was an impressive tool at the time, and it still exists in Photoshop today, and can be very handy in a lot of situations.
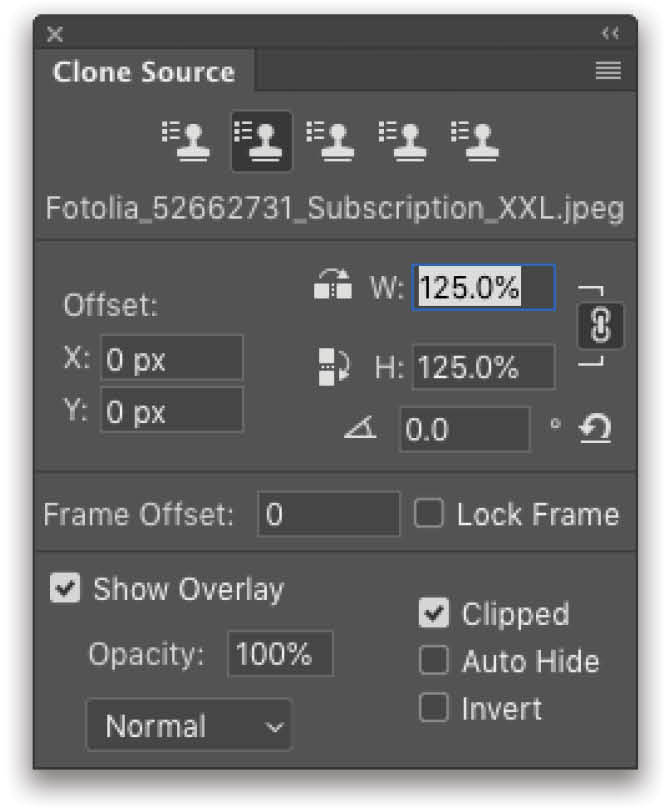
Since then, this tool has had its fair share of updates. You can sample up to five different parts of an image (or even another image), and manipulate other properties of the brush, such as scale, offset, and orientation in the Clone Source panel (Window>Clone Source). This has expanded the tool’s capabilities, but its core function remains the same. There’s still, however, no form of auto-blending or Content-Aware.
Here’s how it works: To remove something, position your cursor near that object in an area that you’d like to use as the clone source. Hold down the Option (PC: Alt) key and click to set that area as the sample point. Then, position the cursor over the unwanted object and start painting. You’ll see a crosshair appear as you paint, which indicates from where the Clone Stamp tool is copying. So whatever is currently below that crosshair will appear where you paint. By default, the cursor also has an overlay preview of the area that’s being sampled.
The only problem is that unless your background is a solid color, you’ll see color variations as you paint, and you have to constantly resample as you go, depending on the area. This should help you appreciate how far we’ve come with the following tools.
The Greatness That is Content-Aware
Some years ago, we were introduced to Content-Aware technology in Photoshop, and it was a game changer. Essentially, it’s smart cloning that automatically uses the information in the image to fill in the area you designate. Content-Aware technology is now found in several Photoshop commands and tools, including Content-Aware Fill, Content-Aware Scale, and the Healing tools.
Think of it this way: With the traditional Clone Stamp tool, you had to do 100% of the work to get the cloned area to match the surrounding areas in the image. Content-Aware will get you 90% of the way there, and you’ll only need to do a few minor tweaks to clean it up. Just like every other tool, however, Content-Aware has its limits but, as I said earlier, you can learn those limits by pushing the tools to their max.
If want to master retouching and restoration in Photoshop, you’re going to need to know how to use Content-Aware. So let’s dig in to see how these tools work, and what hurdles you’ll need to deal with along the way. The good news is that these tools can be combined for better results. Let’s start with the Content-Aware Fill command.
Content-Aware Fill
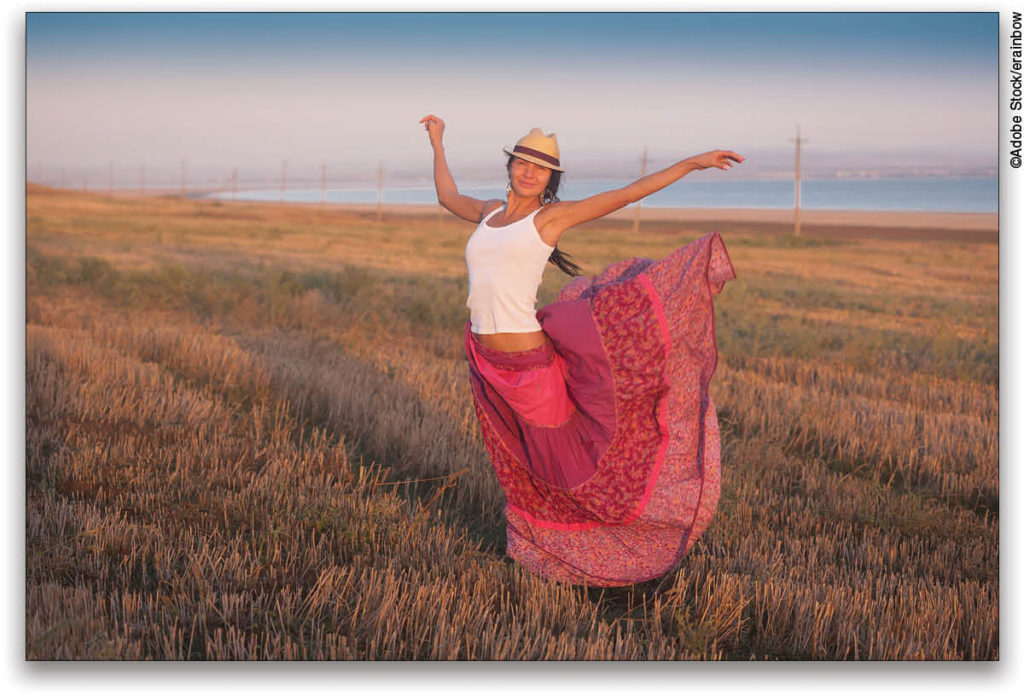
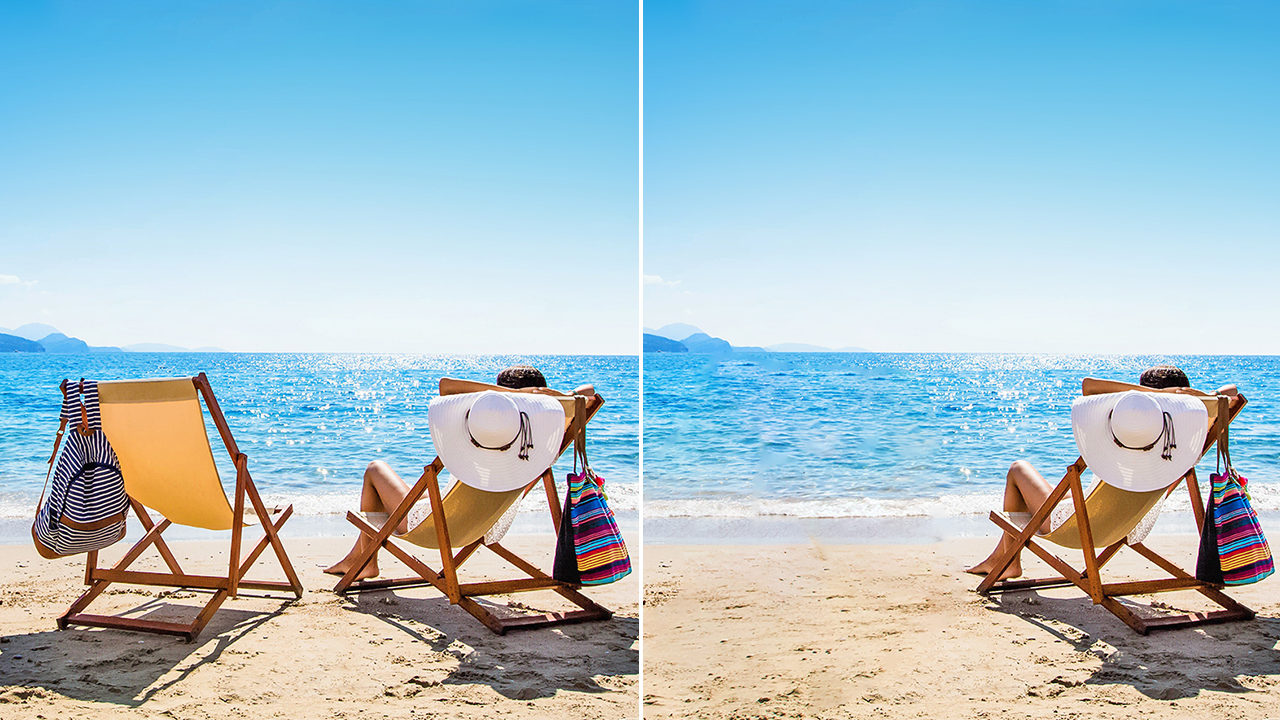
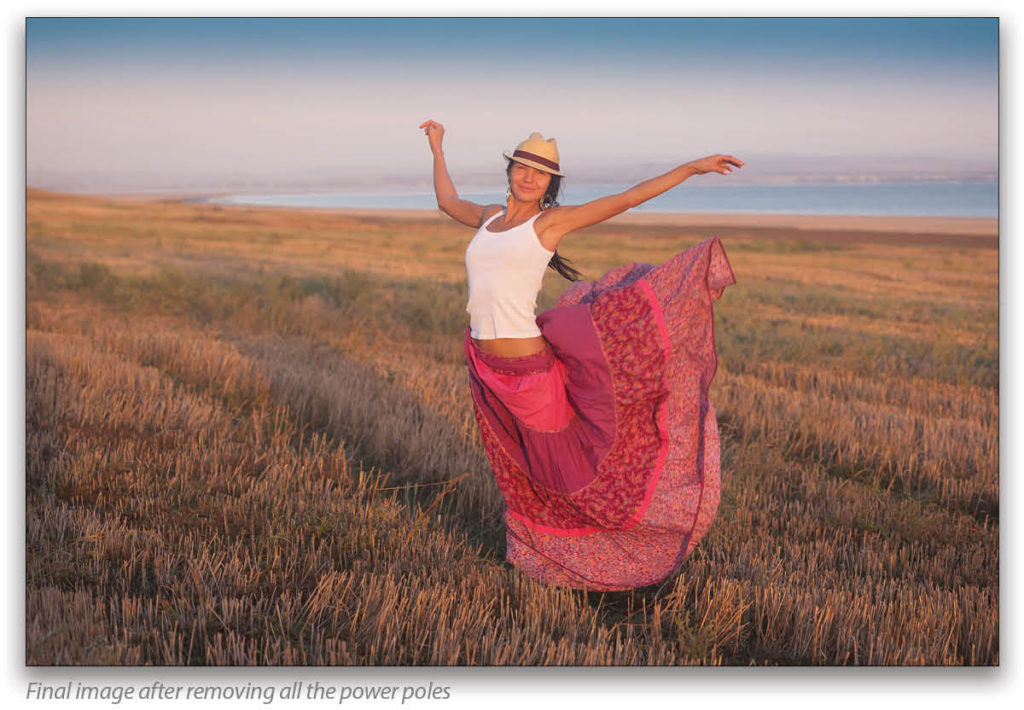
The idea behind Content-Aware is rather simple: It uses the information around a selection to fill in the selected area and create as seamless a blend as possible. In this example, I have an Adobe Stock photo of a subject standing in an open field with nice warm lighting and water in the background, but I’m not fond of those power poles behind her.
Step One: Start by choosing the Lasso tool (L) in the Toolbar and drawing a loose selection around the item you want to remove. You only want to leave a tad bit of space between the selection and the edge of the subject, because if you select an area that’s larger than necessary, it can result in muddied blends.
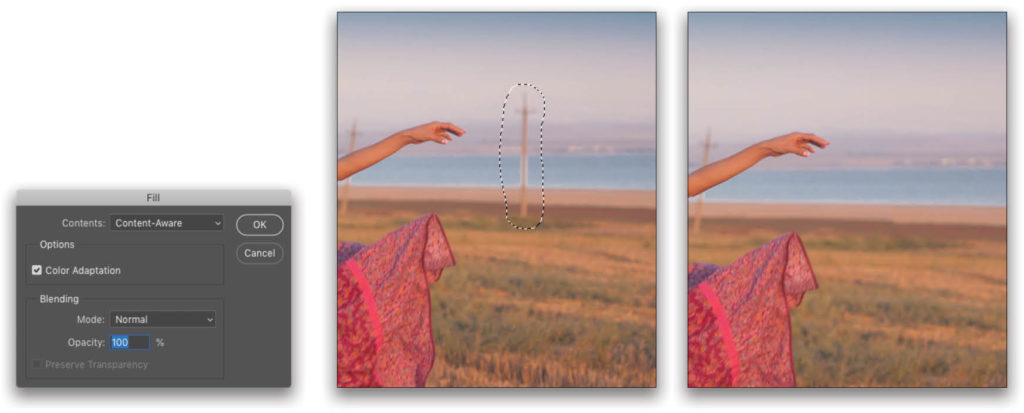
Step Two: Once you’ve selected the object to be removed, press Shift-Delete (PC: Shift-Backspace) to open the Fill dialog. Choose Content-Aware in the Contents drop-down menu. I usually leave Color Adaptation checked because it creates smoother transitions between colors and textures (I’ve rarely turned it off, and in some cases, there’s little noticeable difference). Click OK.
The pole is magically erased and replaced with the surrounding background. That’s all there is to it. Well, at least for simple things like that.
Content-Aware Fill Workspace
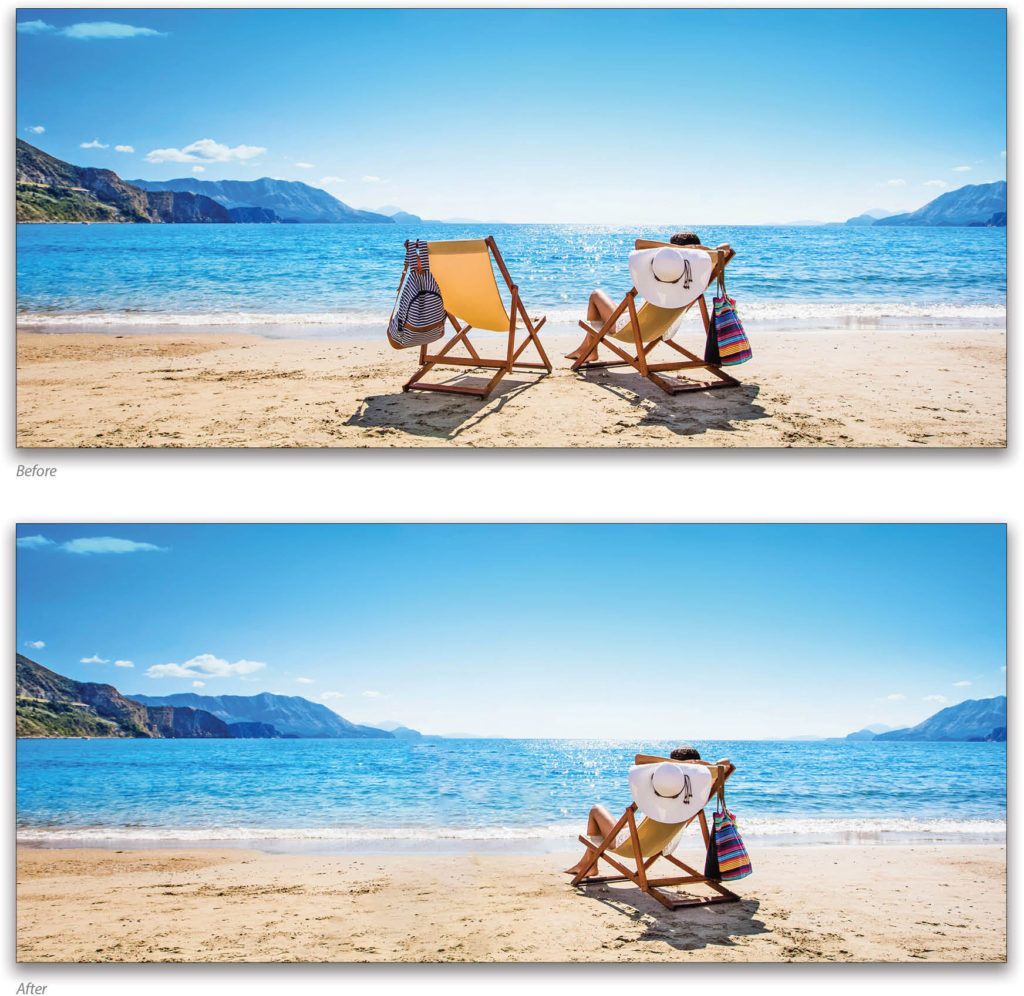
There’s another approach that offers more options when it comes to Content-Aware Fill. Once you have your selection in place, instead of opening the Fill dialog, go under the Edit menu and choose Content-Aware Fill. This will open the Content-Aware Fill workspace. You’ll see a green color overlay on your image indicating the sample area. There’s also a simple Preview panel showing the results of the fill, plus a Content-Aware Fill panel with various options. You can drag out the left side of the Preview panel if you’d like a larger preview, or use the slider at the bottom of the panel to zoom in up to 3,200%.
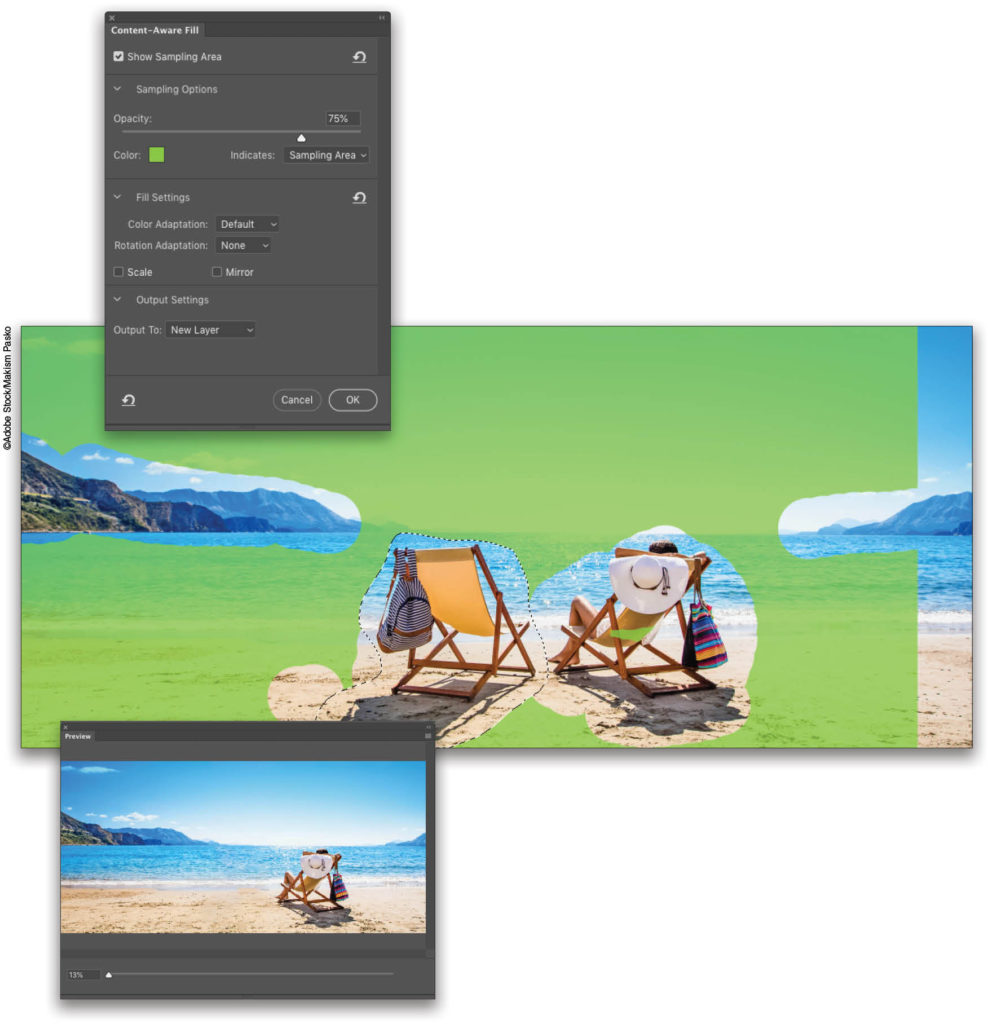
The advantage here is that you can determine which areas of the image are sampled to create the fill. In the Content-Aware Fill panel, the Indicates drop-down menu for the color overlay is set to Sampling Area, but you can switch it to Excluded Area (we’re leaving it set to Sampling Area). You can also change the color of the overlay (if it’s hard to see on your image), change its Opacity, or turn it off altogether.
If the fill looks too chaotic in the Preview panel, then select the Sampling Brush tool (B) in the Toolbar on the left, and up in the Options Bar, make sure the minus icon is selected so the brush will subtract from the overlay area. Simply paint away any of the sampling area that you don’t want to be used to create the fill. The fill Preview will update after every stroke, which will help you to narrow the scope of the sampling to areas that are relevant to your selected area, as shown here.
You can also modify the fill area with the Lasso tool (L). In the Options Bar, you’ll see a series of square icons for New Selection, Add to Selection, Subtract from Selection, and Intersect with Selection. This helps you to widen or narrow the area to be filled.
Before you click OK, go back to the Content-Aware Fill panel to the Fill Settings section. Here you can add more blending through Color Adaptation. Since every image is different, it’s worth going through each option to see which looks best. In this case, I discovered that the Default setting was the best.
The Rotation Adaptation is handy when sampling images with patterns, defined lines, or curves. It’s just a matter of trying each setting to see the result. Finally, you can set the Output To drop-down menu to New Layer, Current Layer, or Duplicate Layer. In an effort to stay nondestructive, let’s leave it set to New Layer, and click OK.
Selection Tips
Keep in mind that the larger your selection, the less effective Content-Aware will be. You’ll start to see repeated elements and even some blurring, because Photoshop is sampling too much data. So don’t select half the image and expect it to come out looking beautiful. In some cases, however, the area you need to address will be rather large. There are ways to deal with that (which we’ll get to later), but for now, I just want you to be aware of this when you’re making your selections.
Also, be careful about selecting more than one area at a time. This tends to trip up Content-Aware, as it’s sampling a larger area based on multiple selections. Just select one item at a time for best results. Click here for a short video on using Content-Aware Fill.
In a lot of situations, Content-Aware Fill will do a great job on its own, but sometimes it can create blurred or even misplaced areas. You can adjust for that by using the Patch tool.
The Patch Tool
The Patch tool is one of my favorite tools when it comes to removing elements. I also use it along with Content-Aware Fill when removing large areas within a photo. It’s a selection-based healing brush that can use Content-Aware. You can find it nested under the Spot Healing Brush tool (J) in the Toolbar. The Patch tool allows you to not only define the area to be filled, but it also lets you target the source of the patch, whereas with Content-Aware Fill, the information is sourced from whatever is in proximity to the selection.
Step One: Here I have a beautiful shot that would make a great background image, but I want to remove the subject in the foreground.
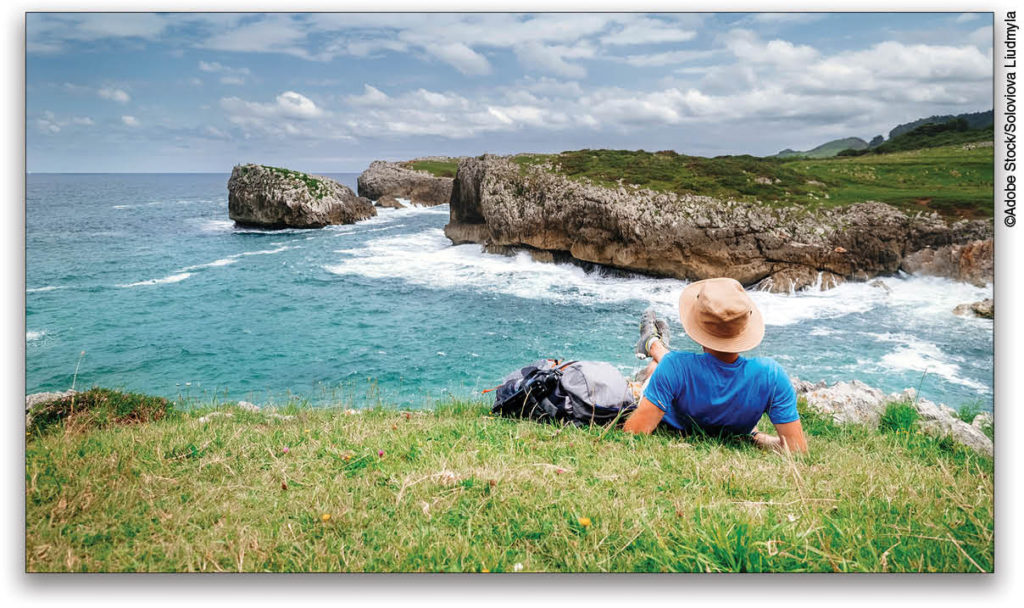
Step Two: Start by selecting the area you want to remove. You can use any selection tool or the Patch tool itself. If you use a different selection tool, just switch to the Patch tool after your selection is in place.
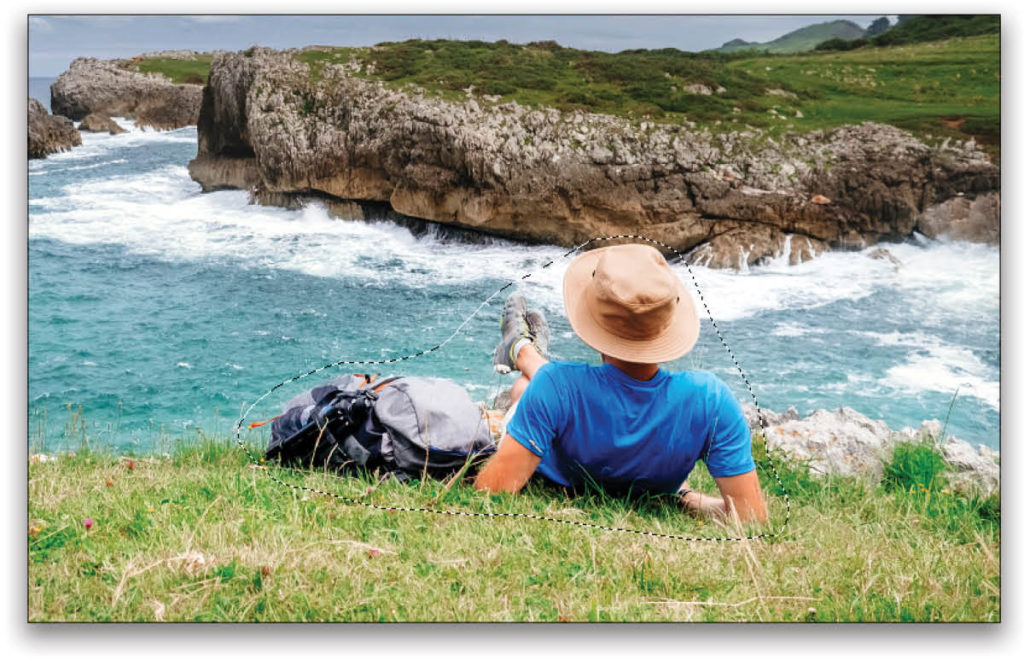
Step Three: Go up to the Options Bar and set the Patch drop-down menu to Content-Aware. The Structure setting determines how much the source area blends with the selected area. Lower settings blend it more, while higher settings blend it less. I usually keep this setting between 3 and 5. As for the Color setting, higher numbers create smoother color blends, while lower numbers retain more of the source color. I tend to keep this one around 5 or 6, but this can vary depending on the image. The nice thing about these settings is you can adjust them after you’ve made the patch but before you deselect, so you can experiment with different settings to see how it affects the result.

Create a new layer in the Layers panel, and then turn on Sample All
Layers in the Options Bar. Your patch will appear on this layer, leaving the original unharmed.
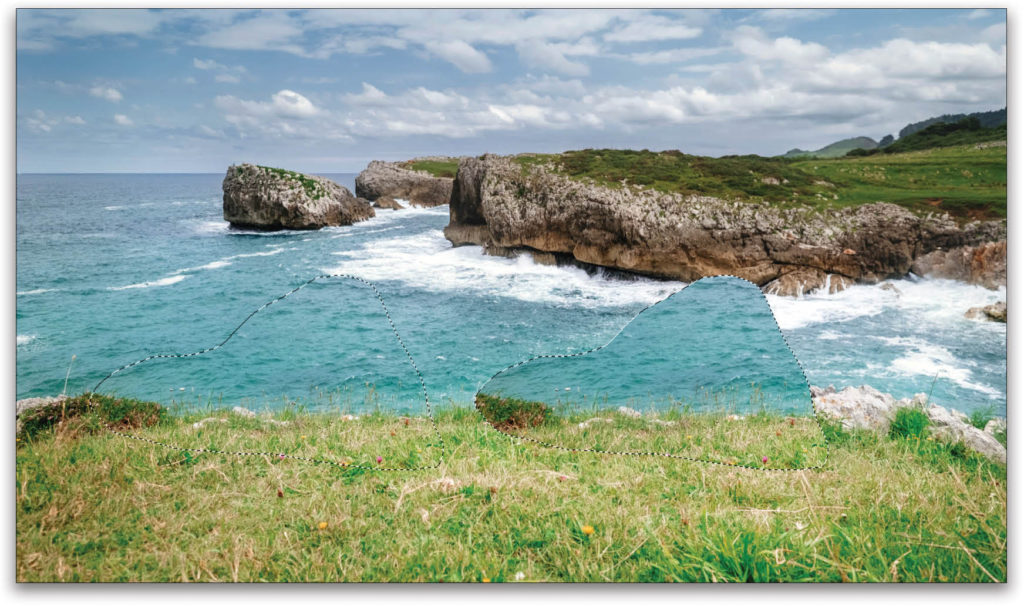
Step Four: Once your selection is active, click inside the selection and drag it to an area of the image you want to sample and blend into the area you want removed. You’ll see a preview of the area over which your cursor is hovering inside the original selected area. This helps you to line up the sample area with the patch area when you’re removing things along a horizon or part of a pattern. Once you release the mouse button, Content-Aware will automatically do its thing. Again, as with Content-Aware Fill, you need to be cautious of how large an area you do at one time. In this example, it did a decent job, but there are still some areas that didn’t blend very well, especially in the water. Remember what I said about Content-Aware getting you 90% of the way there?
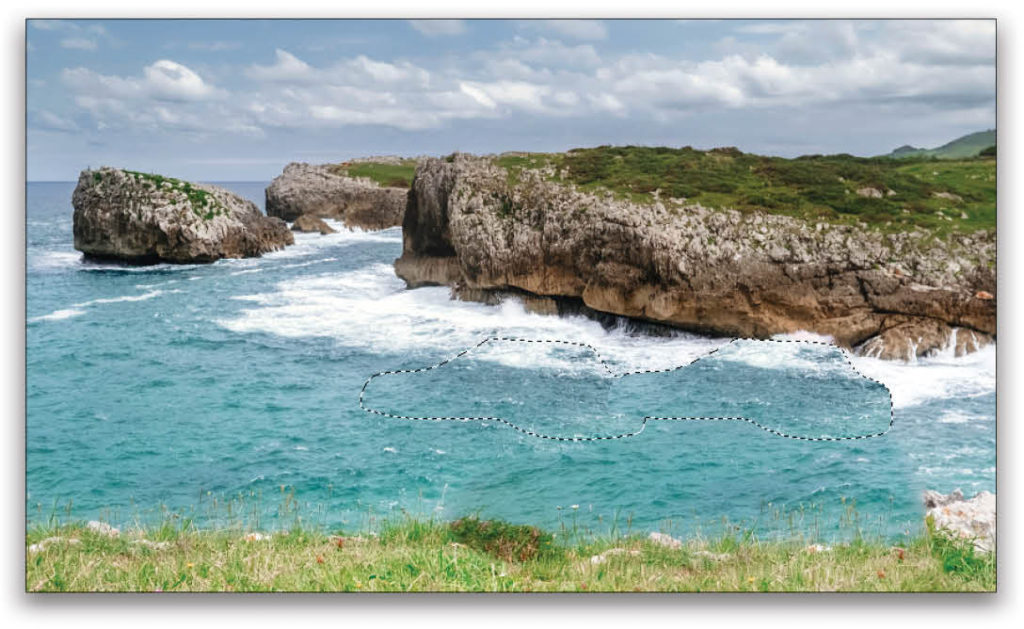
Step Five: The trick here now is to work smaller. We’re going to do exactly the same thing we did in the previous steps, but we’re going to isolate smaller areas of the water and land to refine the blend. There’s definitely an art to this. Here’s a quick video on how to use the Patch tool.
Working with Larger Areas
Earlier I mentioned that making large selections when using Content-Aware Fill can lead to less-than-desired results, but sometimes this can’t be avoided when you have large areas that need to be edited. For example, I use Content-Aware all the time to modify backgrounds in photos or create tiling patterns and textures for 3D, etc. I’ll start by creating the initial selection, pressing Shift-Delete (PC: Shift-Backspace) to open the Fill dialog, and running Content-Aware Fill as we did earlier. Now, depending on the photo, you might get a pretty good result on the first try. If not, redo the selection and try again. This often works, because you’re redefining the fill area with a new selection.
You can also combine the tools. If you have some elements that appear a bit blurry or have obvious replications of other parts of the image after using Content-Aware Fill, then you can take the Patch tool and do targeted patch work, as we did earlier. Keep in mind the extent to which you need to fix the detail. Those blurred or repeated areas may be covered by new elements that you add to the image. This kind of planning can save you time because you don’t need to fix those areas. At any rate, this is a handy trick for starting big and working your way down to the finer details.
It’s Not Always What You Take Out, But What You Add
There will be times when, instead of removing something, you may need to add something, such as extending the background to accommodate a different dimension from the original photo. This is where Content-Aware Scale comes in handy. It’s commonly used to extend skies, textures, and photographic backdrops. Like all other Content-Aware tools, though, it’s limited by how much is selected.
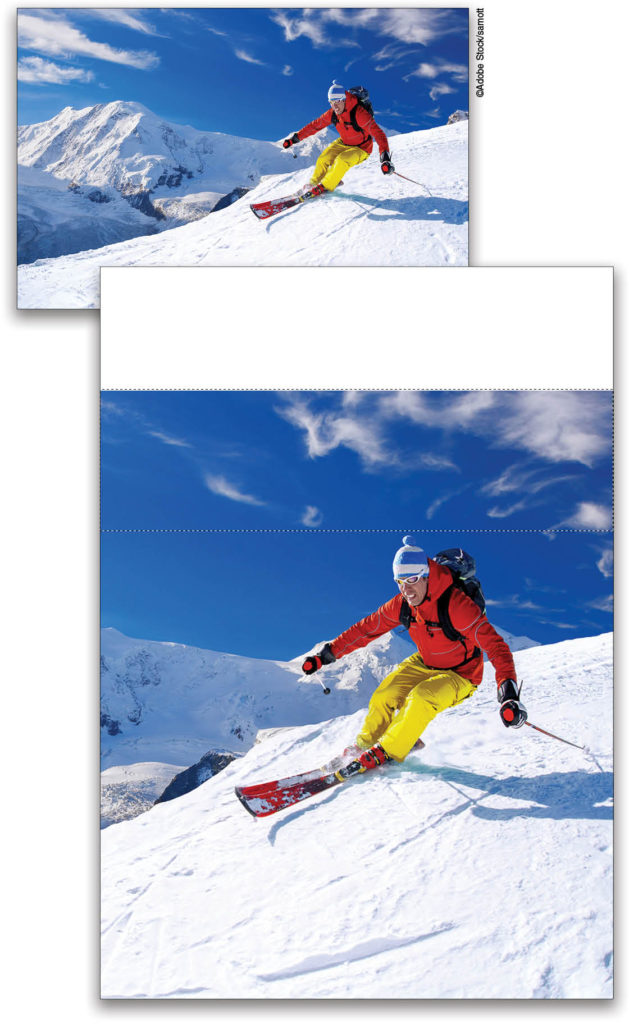
In this example, I have a horizontal shot that I want to fit into a vertical poster format. Normally, you’d crop the image to fit the space, but then you’d most likely lose critical parts of the shot.
Step One: First, create a new document (File>New) at the desired size and aspect ratio. Use the Move tool (V) to drag the image into the new canvas.
Step Two: Press Command-T (PC: Ctrl-T) for Free Transform, and resize the image in the new canvas as desired. Press Enter to commit the transformation. As you can see here, once I have the subject resized and in position, I have some blank area at the top. So use the Rectangular Marquee tool (M) to draw a selection around the sky area at the top of the image.
Step Three: Then, go under the Edit menu and select Content-Aware Scale. When the transform box appears, hold down the Shift key (if using Photoshop CC 2019) and drag the top middle control handle up to the top edge of the document. You’ll actually see the Content-Aware Scale happening as you expand the box. Some stretching of the pixels is inevitable so don’t go too far.
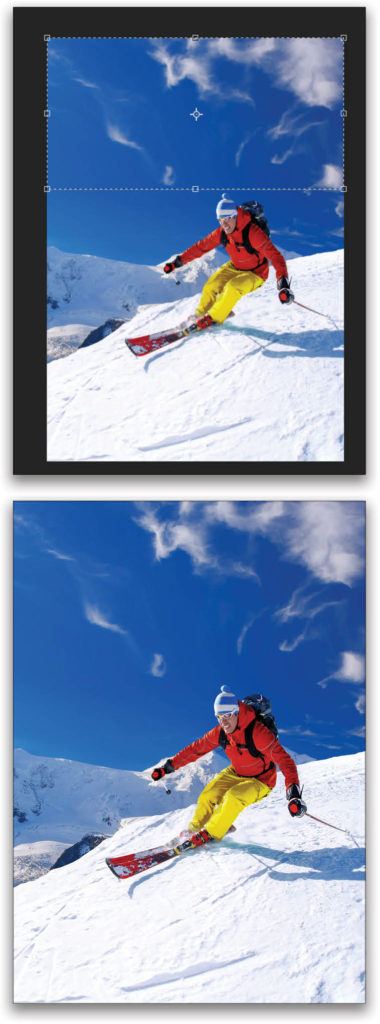
Step Four: Once done, press Enter. If needed, you can make some tweaks with the Patch tool. Bear in mind that if Content-Aware Scale isn’t giving you the results you want, you may find using Content-Aware Fill works better. Again, it depends on the image and your objective.
The Power to Heal and Beyond
Another one of my favorite tools is the Spot Healing Brush (J).
This is my go-to for quick fixes and removing unwanted artifacts. It’s a brush-based tool that also uses Content-Aware technology, so the results are amazing.
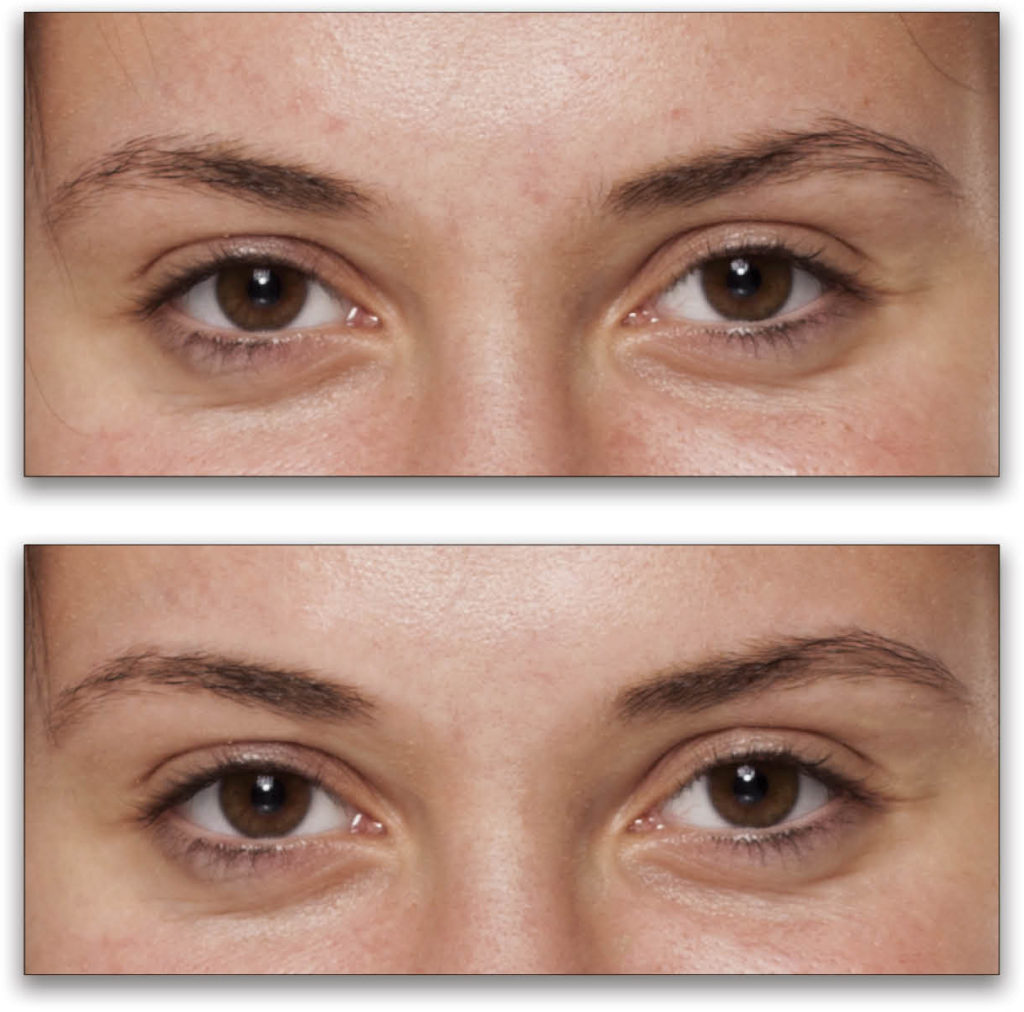
The Spot Healing Brush is underrated in my opinion because it’s incredibly powerful in a number of ways. The first and most obvious use for this tool is portrait retouching. It’s really quick and effective at removing small blemishes, stray hairs, or perhaps cleaning up a black eye in a family photo (it could happen). So here are a few tips to keep in mind when getting ready to use Spot Healing.
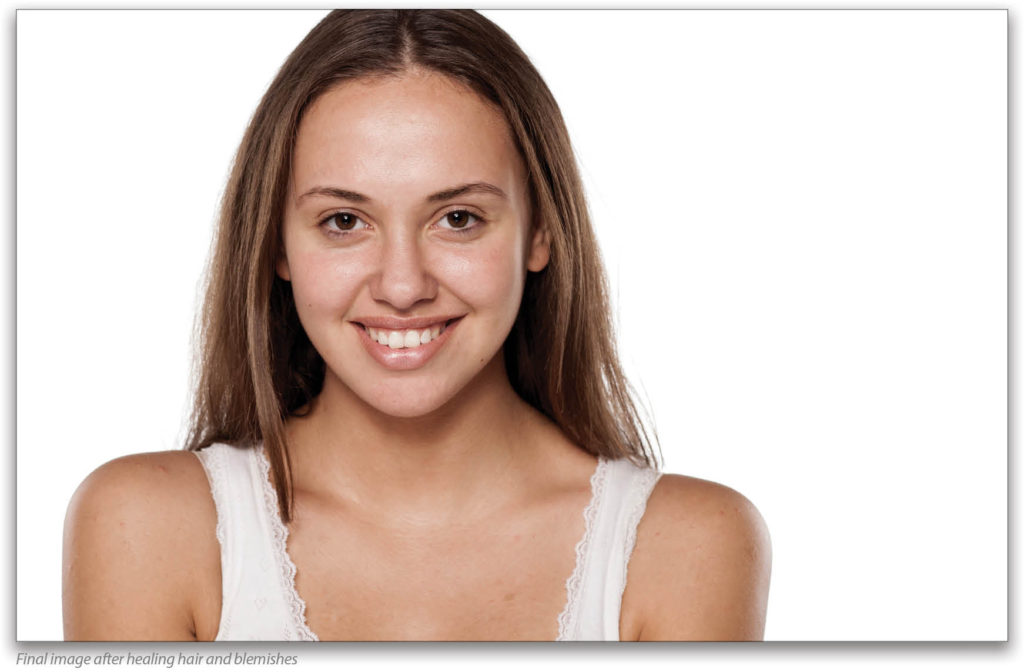
Here we have a young woman with no makeup (no, we’re not going to add makeup—I rather like that she isn’t wearing any). There’s some subtle acne, however, that could go, and there are a few hairs around her eyes that can be removed too.
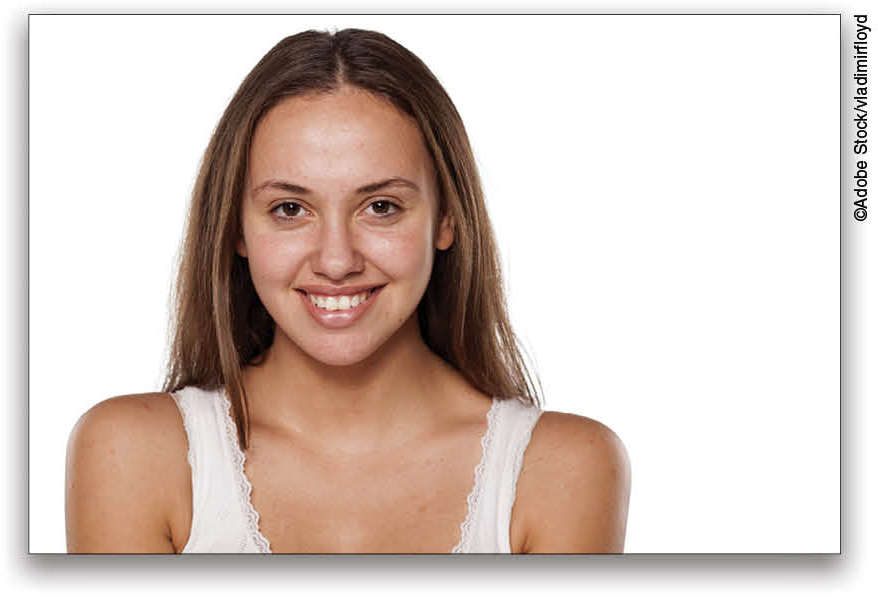
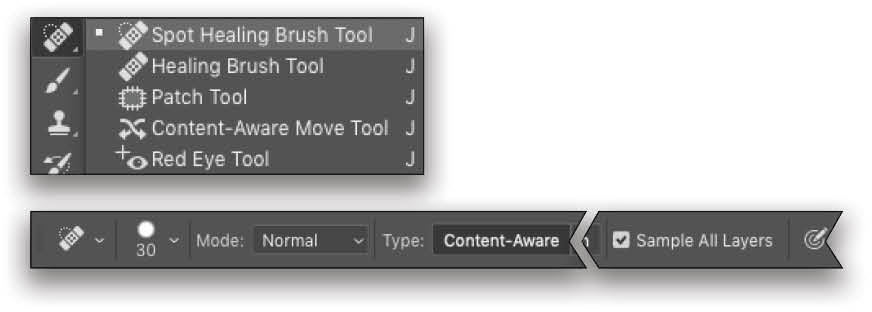
Step One: Go ahead and select the Spot Healing Brush tool in the Toolbar. In the Options Bar, you’ll see three different options for Type: Content-Aware, Create Texture, and Proximity Match. For our purpose, we’ll stick with Content-Aware. Create a new layer in the Layers panel, and turn on Sample All Layers in the Options Bar to keep your edits nondestructive.
Step Two: I’m going to start with the stray hair on the right side of her forehead. Zoom in to the spot where you want to work, and then use the Bracket keys on your keyboard to make the brush just a little larger than the area you want to heal. One thing you don’t want to do is brush a single stroke the full length of the stray hair (in this example). It’ll do a decent job, but will be inconsistent, and you’ll see some variation where the hair was. It can almost look like a scar. Instead, just dab the brush or use smaller strokes as you work your way down the hair—much better, but it still left some color variation.
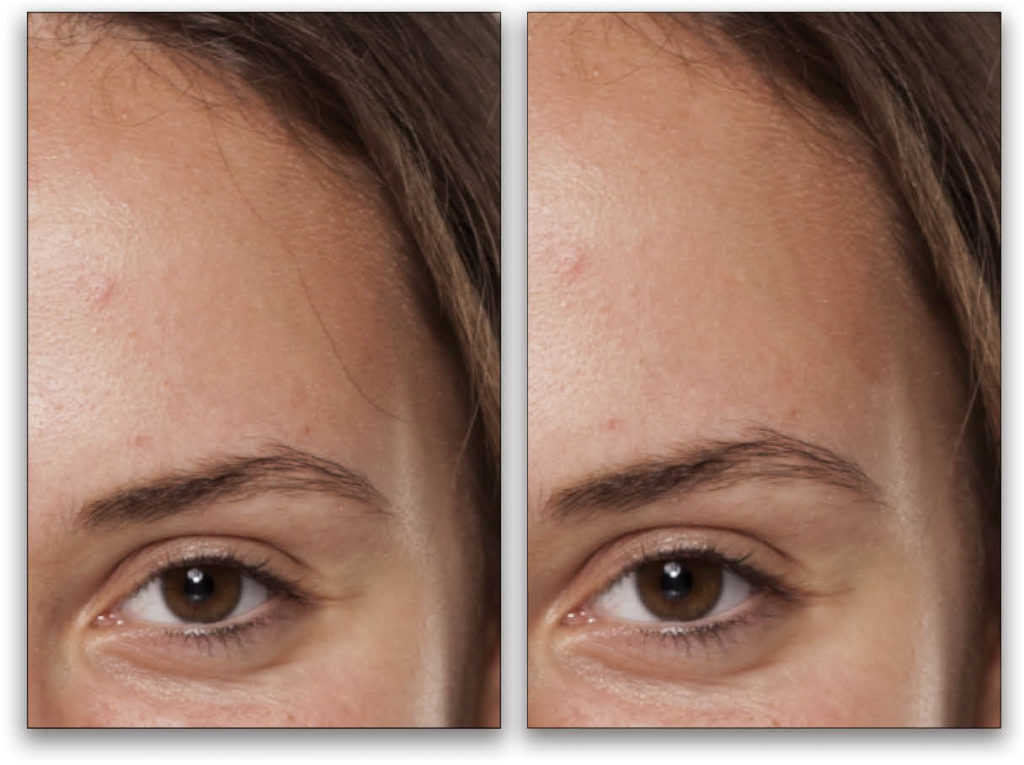
Step Three: Here’s a cool trick: When you’re removing something dark on a light background, such as dark hair on light skin, set the Mode up in the Options Bar to Lighten. Now when you dab and paint the hair, the Spot Healing Brush concentrates on blending the dark elements. This helps maintain the texture and color variation. Notice also when you apply it to darker blemishes, the texture and specular highlights remain unaffected. To remove lighter elements that are on darker backgrounds, you’d simply change the tool Mode to Darken.
Step Four: One last thing regarding facial retouching. This tool is also handy for things like shaping up the eyebrows on a subject. Just a little Spot Healing cleanup around the edges is all it takes. Remember, just dabbing and small strokes are more effective.
Now I don’t want you to think that the Spot Healing Brush is only good for cleaning up faces. It can take care of lots of simple edits really quickly, such as removing dust spots, background elements, etc. In fact, I usually start with Spot Healing, and if that doesn’t work, I try the other tools. You can never predict exactly how these features will affect an image, but always take the simple path first, because it could save some time. Here’s another video showing the Spot Healing Brush tool in action.
One Last Thing
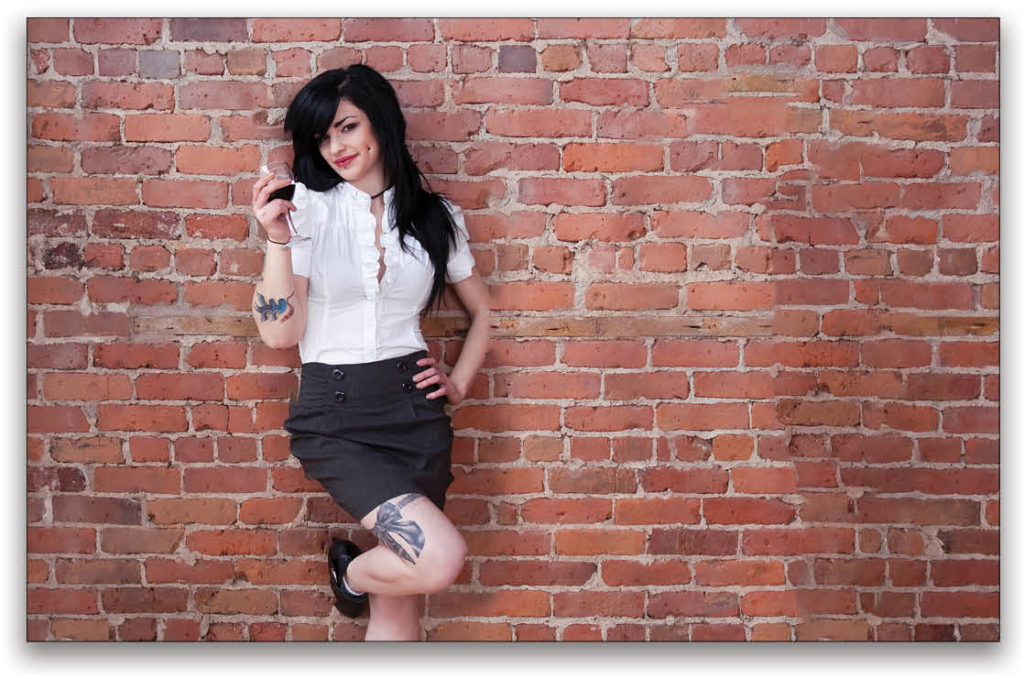
Well, I wasn’t sure if I was going to throw this in, but here it is. There’s another Content-Aware tool that works pretty well: the Content-Aware Move tool. The only problem is that it doesn’t work for every image, but it’s still worth knowing about. Again, you can never have too many tools in your arsenal. Here’s how it works:
Step One: The Content-Aware Move tool is grouped with the Spot Healing Brush, just under the Patch tool in the Toolbar.
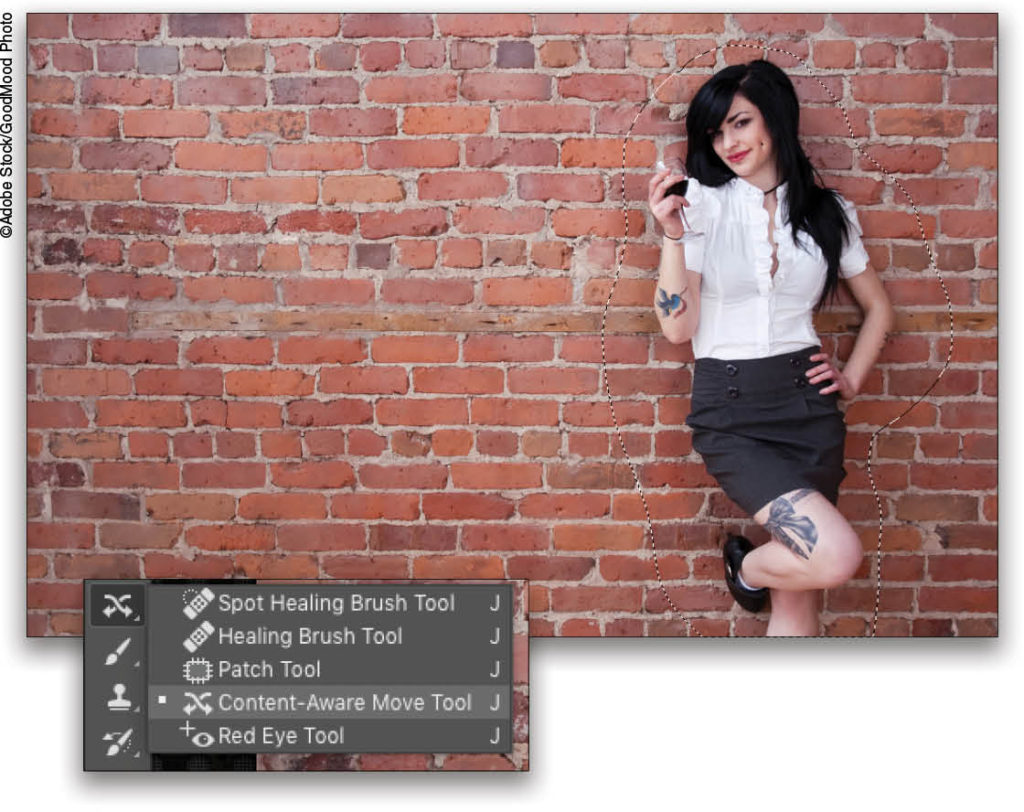
Step Two: Up in the Options Bar, you’ll see the Structure and Color settings we used before. Adjust those as needed, and then draw a selection around the part of the image you want to move. Again, create a new layer, and turn on Sample All Layers in the Options Bar.
Step Three: Click inside the selection and drag it to where you want to place it. When you press Enter, Photoshop will auto-blend the selected area in the new position and simultaneously Content-Aware Fill the area where the object was originally located. This tool works better with simple backgrounds. Try it on a chaotic or textured background and you’ll see what I mean.

Throughout this article, I hope that you’ve not only gained a better understanding of what these tools can do but also when to use them. If you’re somewhat new to editing photos, then I encourage you to just play with the tools in various scenarios. Remember that subtlety is key when removing or moving objects; don’t overdo it to the point where it’s obvious the image has been altered. Also, these tools aren’t always going to give you the result you want—they’re powerful but they can’t work miracles!
This article originally published in the April, 2019 issue of Photoshop User magazine.


